
Magnum XL 180 RFS engine
Joe Wagner | [email protected]
Overview
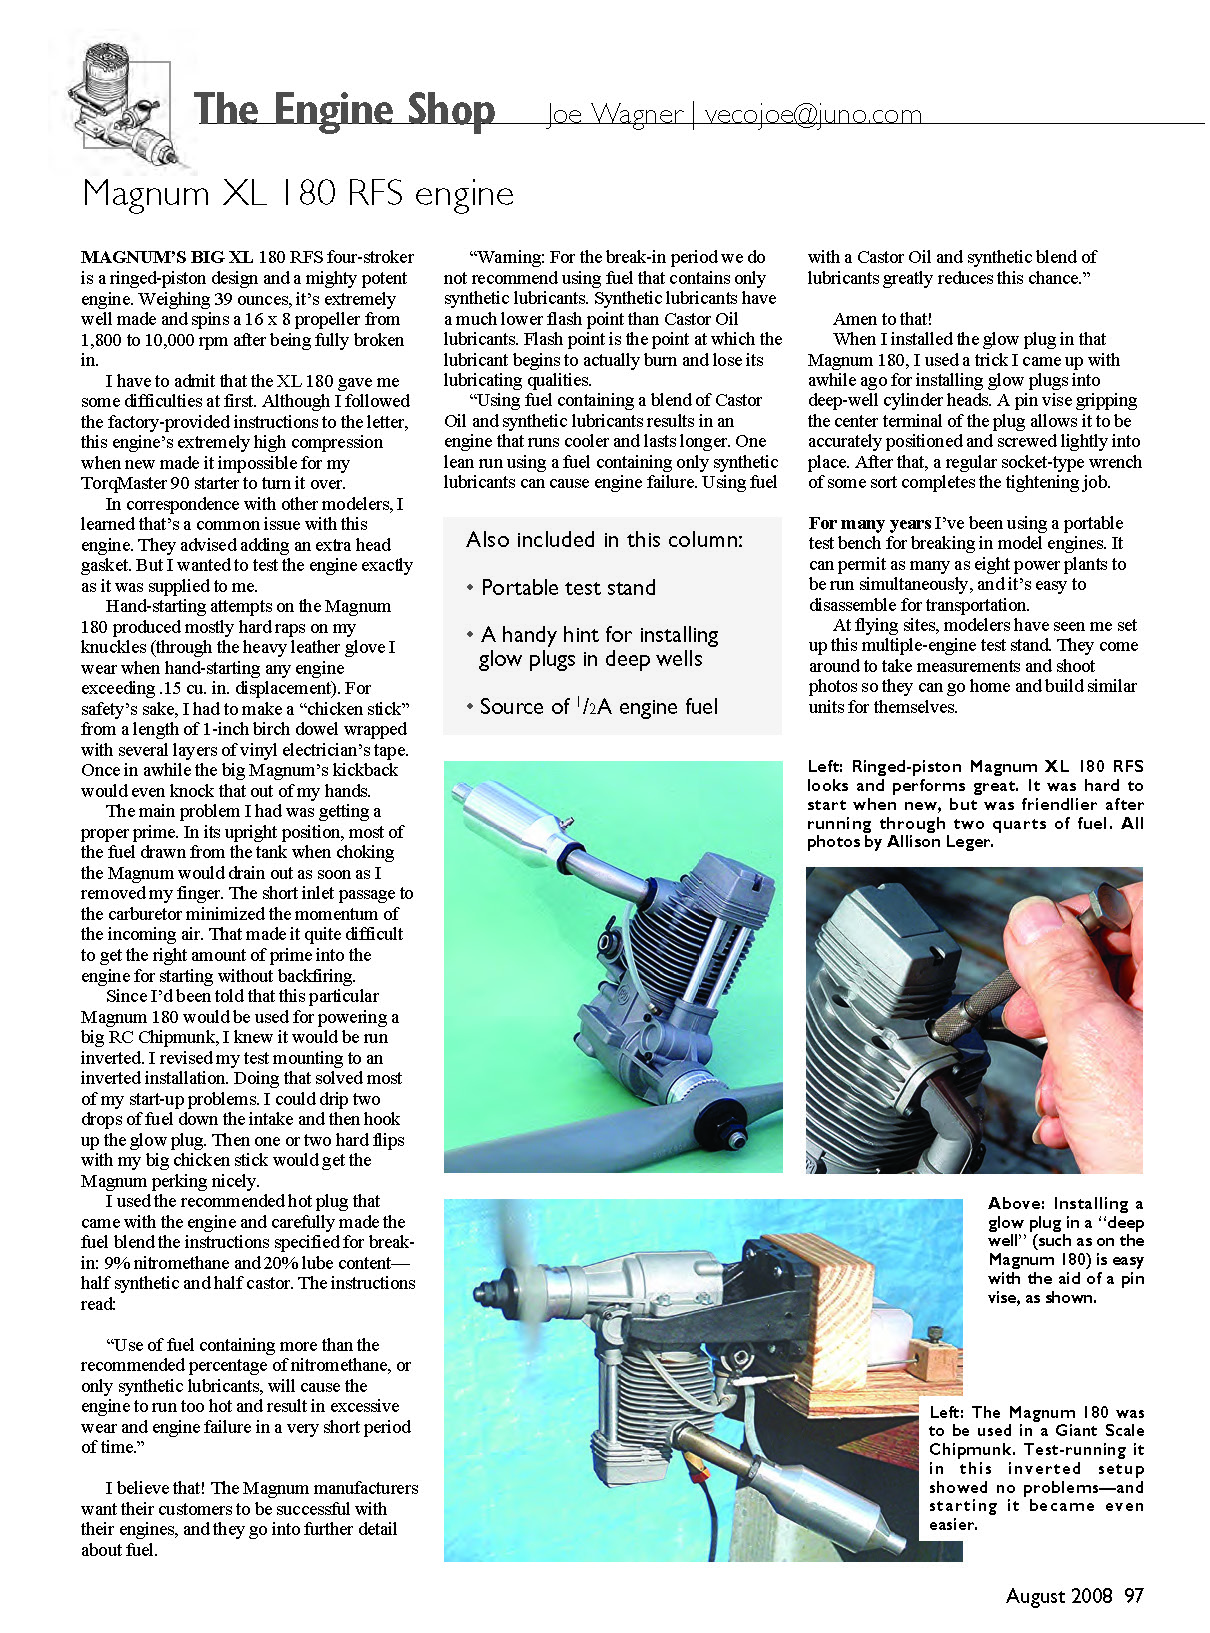
MAGNUM'S big XL 180 RFS four-stroker is a ringed-piston design and a mighty potent engine. Weighing 39 ounces, it's extremely well made and, once fully broken in, will spin a 16 x 8 propeller from about 1,800 to 10,000 rpm.
Starting issues
I have to admit the XL 180 gave me some difficulties at first. Although I followed the factory instructions to the letter, this engine's extremely high compression when new made it impossible for my TorqMaster 90 starter to turn over.
In correspondence with other modelers I learned that's a common issue with this engine. They advised adding an extra head gasket, but I wanted to test the engine exactly as it was supplied to me.
Hand-starting attempts produced mostly hard raps on my knuckles (through the heavy leather glove I wear when hand-starting any engine exceeding .15 cu. in. displacement). For safety's sake I made a "chicken stick" from a length of 1-inch birch dowel wrapped with several layers of vinyl electrician's tape. Once in a while the big Magnum's kickback would even knock that out of my hands.
The main problem was getting a proper prime. In its upright position, most of the fuel drawn from the tank when choking the Magnum would drain out as soon as I removed my finger. The short inlet passage to the carburetor minimized the momentum of the incoming air, making it difficult to get the right amount of prime into the engine for starting without backfiring.
Since I'd been told this Magnum 180 would be used to power a big RC Chipmunk (an inverted installation), I revised my test mounting to an inverted installation. That solved most of my start-up problems. I could drip two drops of fuel down the intake, hook up the glow plug, and then one or two hard flips with my big chicken stick would get the Magnum perking nicely.
Break-in procedure and glow plug
I used the recommended hot plug that came with the engine and carefully made the fuel blend the instructions specified for break-in: 9% nitromethane and 20% lube content—half synthetic and half castor. The instructions read:
"Warning: For the break-in period we do not recommend using fuel that contains only synthetic lubricants. Synthetic lubricants have a much lower flash point than castor oil lubricants. Flash point is the point at which the lubricant begins to actually burn and lose its lubricating qualities.
"Using fuel containing a blend of castor oil and synthetic lubricants results in an engine that runs cooler and lasts longer. One lean run using a fuel containing only synthetic lubricants can cause engine failure. Using fuel with a castor oil and synthetic blend of lubricants greatly reduces this chance."
When I installed the glow plug in that Magnum 180, I used a trick I came up with a while ago for installing glow plugs into deep-well cylinder heads: a pin vise gripping the center terminal of the plug allows it to be accurately positioned and screwed lightly into place. After that, a regular socket-type wrench completes the tightening job.
Portable test bench for break-in
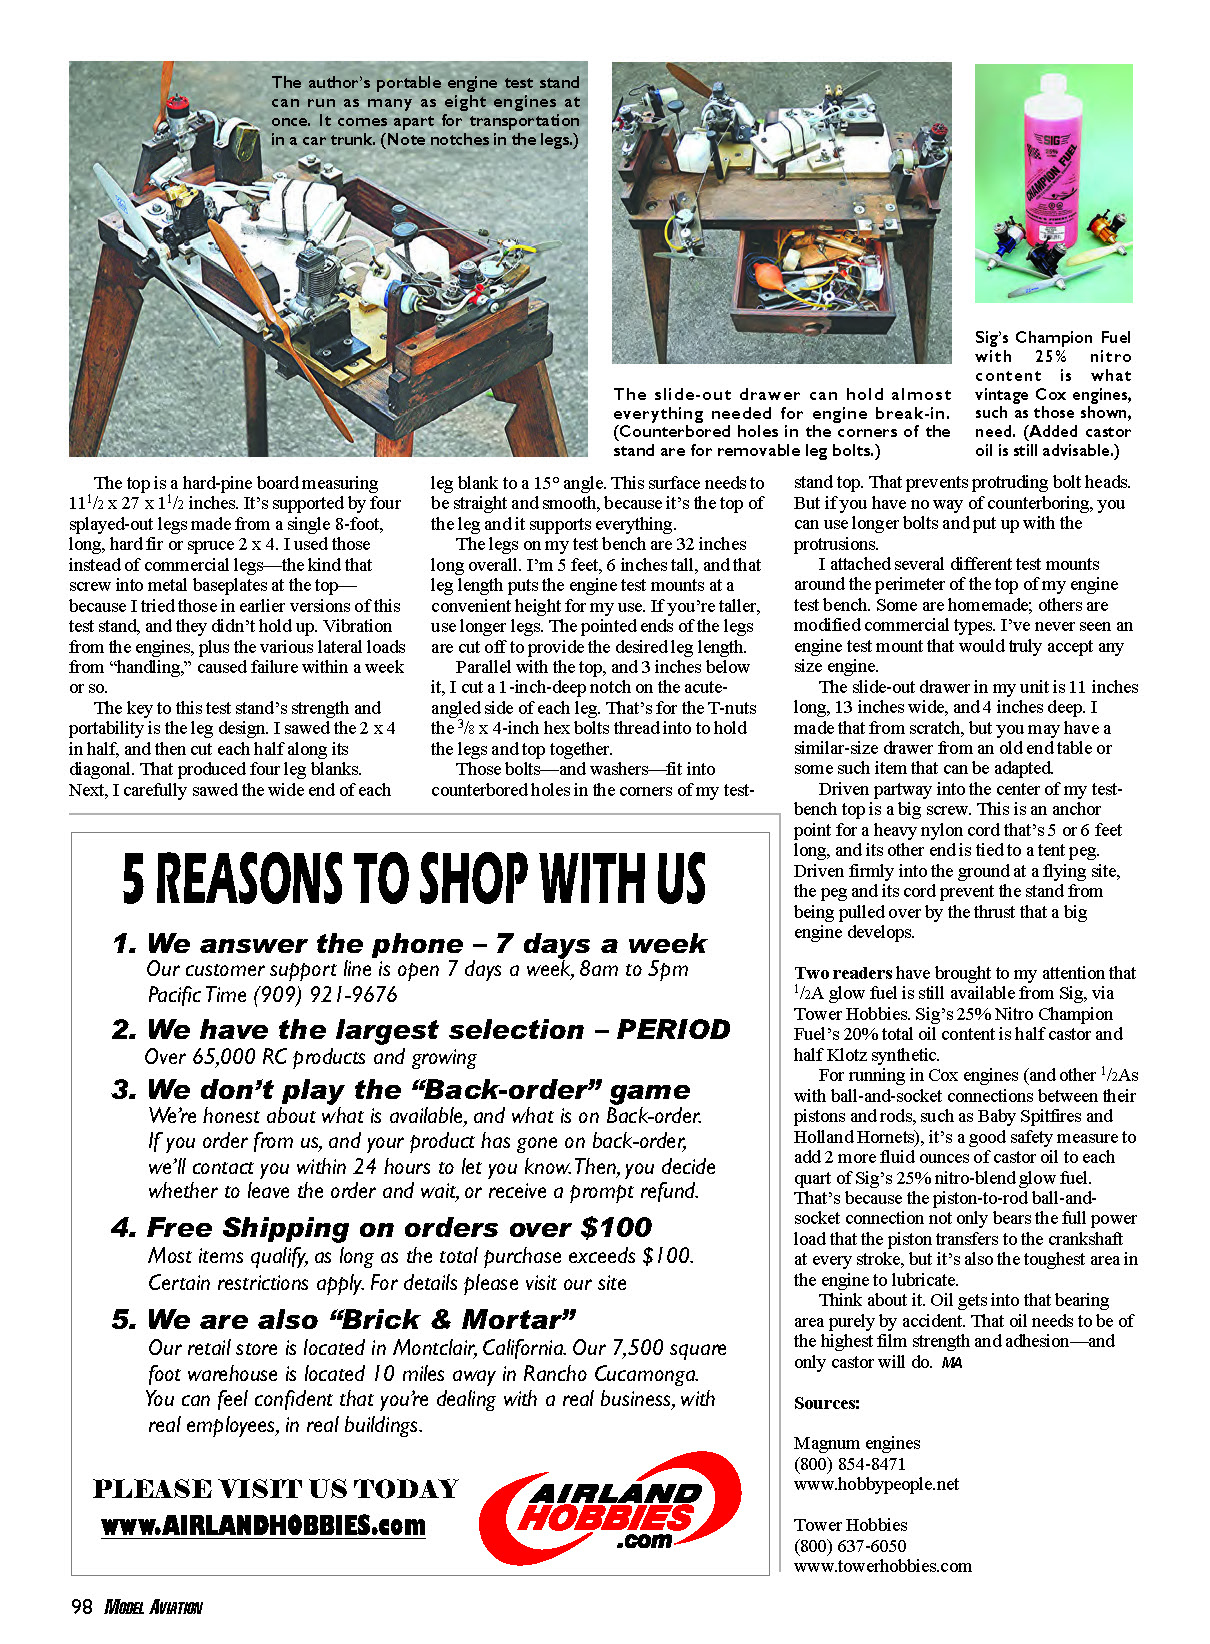
For many years I've used a portable test bench for breaking in model engines. It can permit as many as eight power plants to be run simultaneously and is easy to disassemble for transportation. At flying sites, modelers often come around to take measurements and shoot photos so they can make similar units themselves.
Construction details and features:
- Top: hard-pine board measuring 11-1/2 x 27 x 1-1/2 inches.
- Legs: made from a single 8-foot long hard fir or spruce 2 x 4. I sawed the 2 x 4 in half, then cut each half along its diagonal to produce four leg blanks.
- Top of legs: saw the wide end of each leg blank to a 15° angle; this surface is the top of the leg and must be straight and smooth.
- Leg length: legs are 32 inches long overall (adjust length if you're taller).
- Pointed ends: cut off to provide the desired leg length.
- Notch: parallel with the top, and 3 inches below it, cut a 1-inch-deep notch on the acute-angled side of each leg for the T-nuts that the 3/8 x 4-inch hex bolts thread into to hold the legs and top together.
- Bolts and washers: fit into counterbored holes in the corners of the test-stand top to prevent protruding bolt heads. If you cannot counterbore, use longer bolts and accept the protrusions.
- Mounts: attach several different test mounts around the perimeter of the top—some homemade and some modified commercial types.
- Drawer: slide-out drawer is 11 inches long, 13 inches wide, and 4 inches deep (can be built from scratch or adapted from an old piece of furniture).
- Anchor: driven partway into the center of the test-bench top is a big screw that anchors a heavy nylon cord (5–6 feet long); the other end ties to a tent peg driven into the ground at a flying site to prevent the stand from being pulled over by the engine's thrust.
The key to the stand's strength and portability is the leg design. I used those homemade legs instead of commercial legs that screw into metal baseplates at the top because vibration and lateral loads caused the commercial-style legs to fail in earlier versions.
Fuel availability and recommendations
Two readers pointed out that 1/2A glow fuel is still available from Sig via Tower Hobbies. Sig's 25% Nitro Champion Fuel has a 20% total oil content that is half castor and half Klotz synthetic.
For running in Cox engines (and other 1/2As with ball-and-socket connections between their pistons and rods, such as Baby Spitfires and Holland Hornets), it's a good safety measure to add 2 more fluid ounces of castor oil to each quart of Sig's 25% nitro-blend glow fuel. The piston-to-rod ball-and-socket connection not only bears the full power load transferred to the crankshaft at every stroke, but it's also the toughest area in the engine to lubricate. Oil reaches that bearing area largely by accident; the oil there needs the highest film strength and adhesion—and only castor will do.
MA
Sources
- Magnum Engines
(800) 854-8471 www.hobbypeople.net
- Tower Hobbies
(800) 637-6050 www.towerhobbies.com
Transcribed from original scans by AI. Minor OCR errors may remain.

