
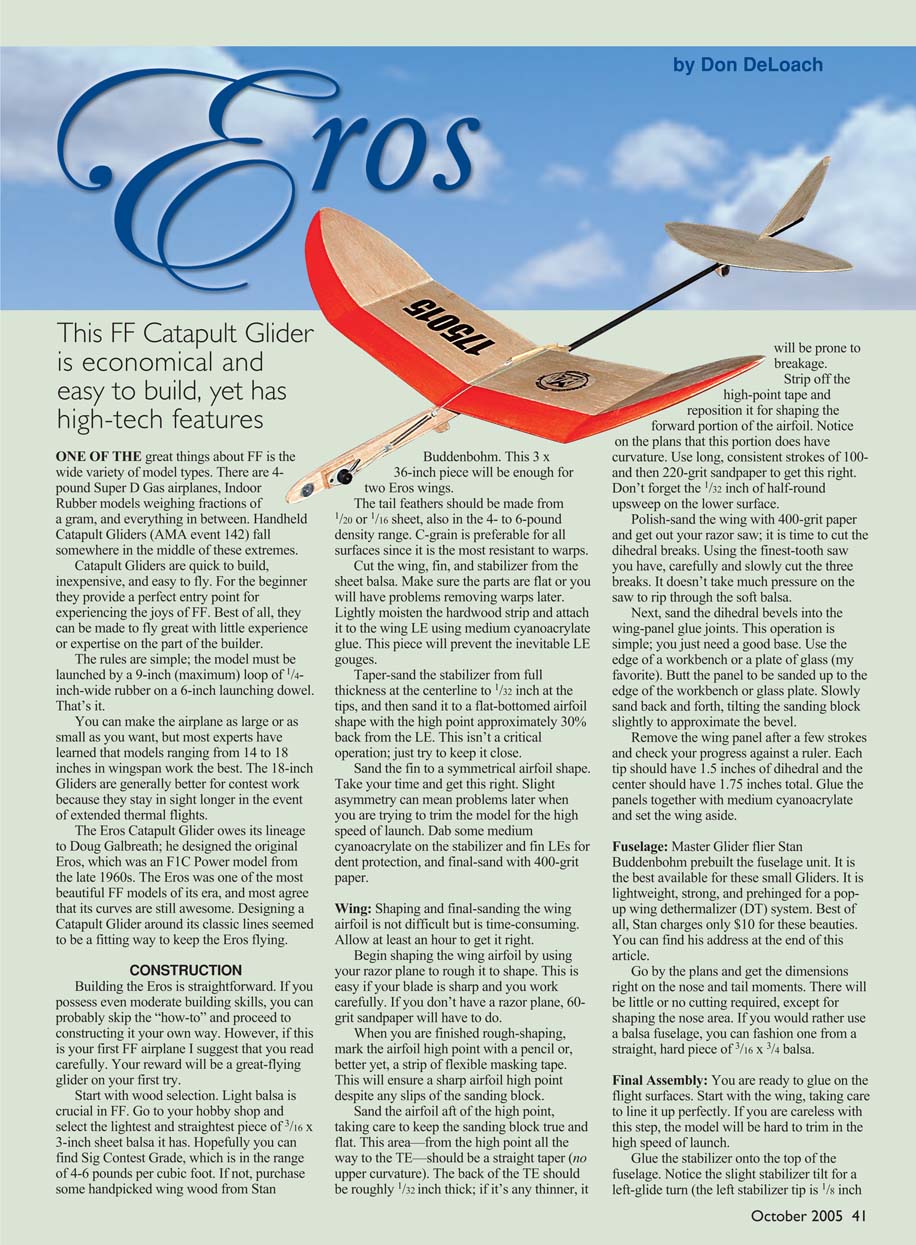
Eros
by Don DeLoach
This FF Catapult Glider is economical and easy to build, yet has high-tech features
ONE OF THE great things about FF is the wide variety of model types. There are 4-pound Super D Gas airplanes, Indoor Rubber models weighing fractions of a gram, and everything in between. Handheld Catapult Gliders (AMA event 142) fall somewhere in the middle of these extremes.
Catapult Gliders are quick to build, inexpensive, and easy to fly. For the beginner they provide a perfect entry point for experiencing the joys of FF. Best of all, they can be made to fly great with little experience or expertise on the part of the builder.
The rules are simple; the model must be launched by a 9-inch (maximum) loop of 1/4-inch-wide rubber on a 6-inch launching dowel. That's it.
You can make the airplane as large or as small as you want, but most experts have learned that models ranging from 14 to 18 inches in wingspan work the best. The 18-inch Gliders are generally better for contest work because they stay in sight longer in the event of extended thermal flights.
The Eros Catapult Glider owes its lineage to Doug Galbreath; he designed the original Eros, which was an F1C Power model from the late 1960s. The Eros was one of the most beautiful FF models of its era, and most agree that its curves are still awesome. Designing a Catapult Glider around its classic lines seemed to be a fitting way to keep the Eros flying.
CONSTRUCTION
Building the Eros is straightforward. If you possess even moderate building skills, you can probably skip the "how-to" and proceed to constructing it your own way. However, if this is your first FF airplane I suggest that you read carefully. Your reward will be a great-flying glider on your first try.
Start with wood selection. Light balsa is crucial in FF. Go to your hobby shop and select the lightest and straightest piece of 3/16 x 3-inch sheet balsa it has. Hopefully you can find Sig Contest Grade, which is in the range of 4-6 pounds per cubic foot. If not, purchase some handpicked wing wood from Stan Buddenbohm. This 3 x 36-inch piece will be enough for two Eros wings.
The tail feathers should be made from 1/20 or 1/16 sheet, also in the 4- to 6-pound density range. C-grain is preferable for all surfaces since it is the most resistant to warps.
Cut the wing, fin, and stabilizer from the sheet balsa. Make sure the parts are flat or you will have problems removing warps later. Lightly moisten the hardwood strip and attach it to the wing LE using medium cyanoacrylate glue. This piece will prevent the inevitable LE gouges.
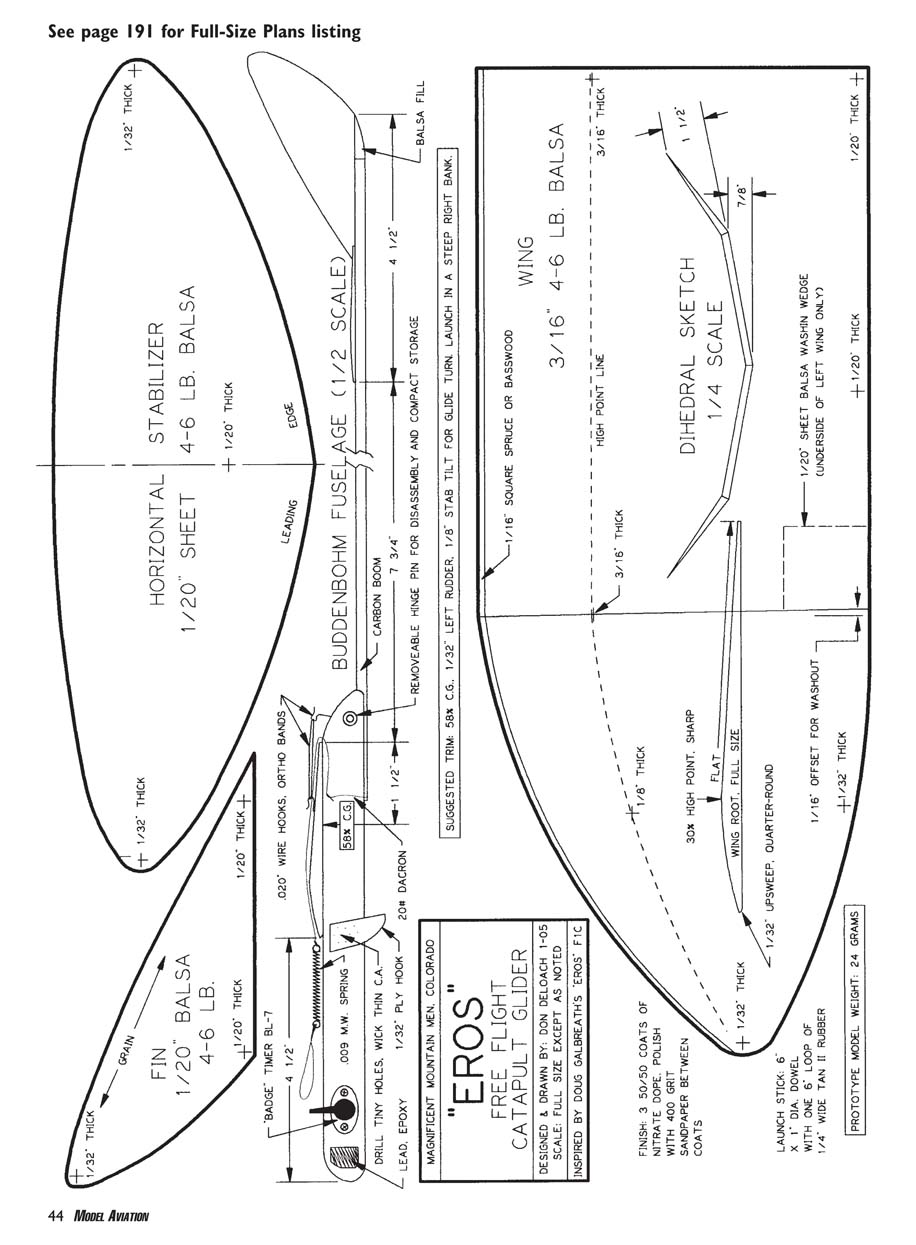
Taper-sand the stabilizer from full thickness at the centerline to 1/32 inch at the tips, and then sand it to a flat-bottomed airfoil shape with the high point approximately 30% back from the LE. This isn't a critical operation; just try to keep it close.
Sand the fin to a symmetrical airfoil shape. Take your time and get this right. Slight asymmetry can mean problems later when you are trying to trim the model for the high speed of launch. Dab some medium cyanoacrylate on the stabilizer and fin LEs for dent protection, and final-sand with 400-grit paper.
Wing
Shaping and final-sanding the wing airfoil is not difficult but is time-consuming. Allow at least an hour to get it right.
Begin shaping the wing airfoil by using your razor plane to rough it to shape. This is easy if your blade is sharp and you work carefully. If you don't have a razor plane, 60-grit sandpaper will have to do.
When you are finished rough-shaping, mark the airfoil high point with a pencil or, better yet, a strip of flexible masking tape. This will ensure a sharp airfoil high point despite any slips of the sanding block.
Sand the airfoil aft of the high point, taking care to keep the sanding block true and flat. This area — from the high point all the way to the TE — should be a straight taper (no upper curvature). The back of the TE should be roughly 1/32 inch thick; if it's any thinner, it will be prone to breakage.
Strip off the high-point tape and reposition it for shaping the forward portion of the airfoil. Notice on the plans that this portion does have curvature. Use long, consistent strokes of 100- and then 220-grit sandpaper to get this right. Don't forget the 1/32 inch of half-round upsweep on the lower surface.
Polish-sand the wing with 400-grit paper and get out your razor saw; it is time to cut the dihedral breaks. Using the finest-tooth saw you have, carefully and slowly cut the three breaks. It doesn't take much pressure or a saw to rip through the soft balsa.
Next, sand the dihedral bevels into the wing-panel glue joints. This operation is simple; you just need a good base. Use the edge of a workbench or glass plate (my favorite). Butt the panels to be sanded up to the edge of the workbench or glass plate. Slowly sand back and forth, tilting the sanding block slightly to approximate the bevel.
Remove the wing panel after a few strokes and check your progress against a ruler. Each tip should have .5 inches of dihedral and the center should have 1.75 inches total. Glue the panels together with medium cyanoacrylate and set the wing aside.
Fuselage
Master Glider flier Stan Buddenbohm prebuilt the fuselage unit. It is the best available for these small Gliders. It is lightweight, strong, and prehinged for a pop-up wing dethermalizer (DT) system. Best of all, Stan charges only $10 for these beauties. You can find his address at the end of this article.
Go by the plans and get the dimensions right on the nose and tail moments. There will be little or no cutting required, except for shaping the nose area. If you would rather use a balsa fuselage, you can fashion one from a straight, hard piece of 3/16 x 3/4 balsa.
Final Assembly
You are ready to glue on the flight surfaces. Start with the wing, taking care to line it up correctly with the fuselage. If you are careless with this step, the model will be hard to trim in the high speed of launch.
Glue the stabilizer onto the top of the fuselage. Notice the slight stabilizer tilt for a left-glide (the left stabilizer tip is 1/8 inch higher than the right when viewed from the rear); this is important. Too little stabilizer tilt is better than too much. Glue on the rudder with medium cyanoacrylate, making sure it is aligned.
It is time to apply a finish to the flight surfaces. I normally use two or three coats of 50/50 thinned nitrate modeling dope on all the balsa, sanding lightly with 400-grit sandpaper between coats. Others like to mix a bit of talcum powder with the dope for a sanding sealer effect. Still others use a light coat of clear polyurethane smeared off with a nasal tissue.
Use your favorite finishing method, but don't forget to cover the model with some bright-red or orange paint for visibility. I really like Design Master spray paint from the Michael's chain of craft stores. It is extremely bright and weighs next to nothing. Holiday Red is my color of choice.
There are a few more details to attend to, and then we'll be ready to test-fly.
Securely attach the 1/32 plywood launching hook and 1/8 balsa finger grip with thin cyanoacrylate and a small amount of epoxy for safety. Adding some 100-grit sandpaper on each side of the finger grip is a good idea.
Attach a 1/32 plywood doubler to one side of the nose. This will give the nose area extra durability and strength. Locate the badge or button timer roughly 3/4 inch back from the tip of the nose. This is to allow room for the lead nose weight. Rig your wing hinge with just enough rubber-band power to pop it up every time.
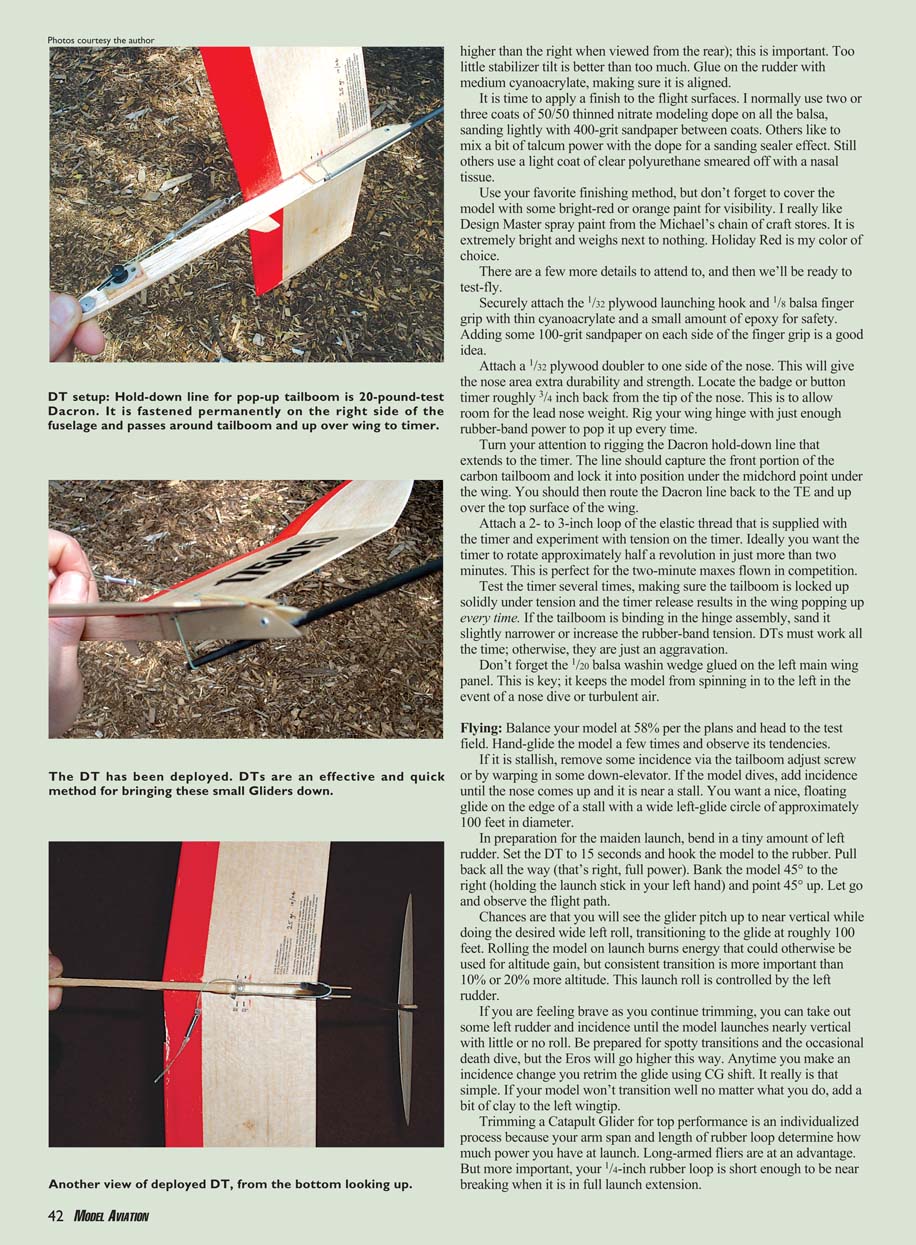
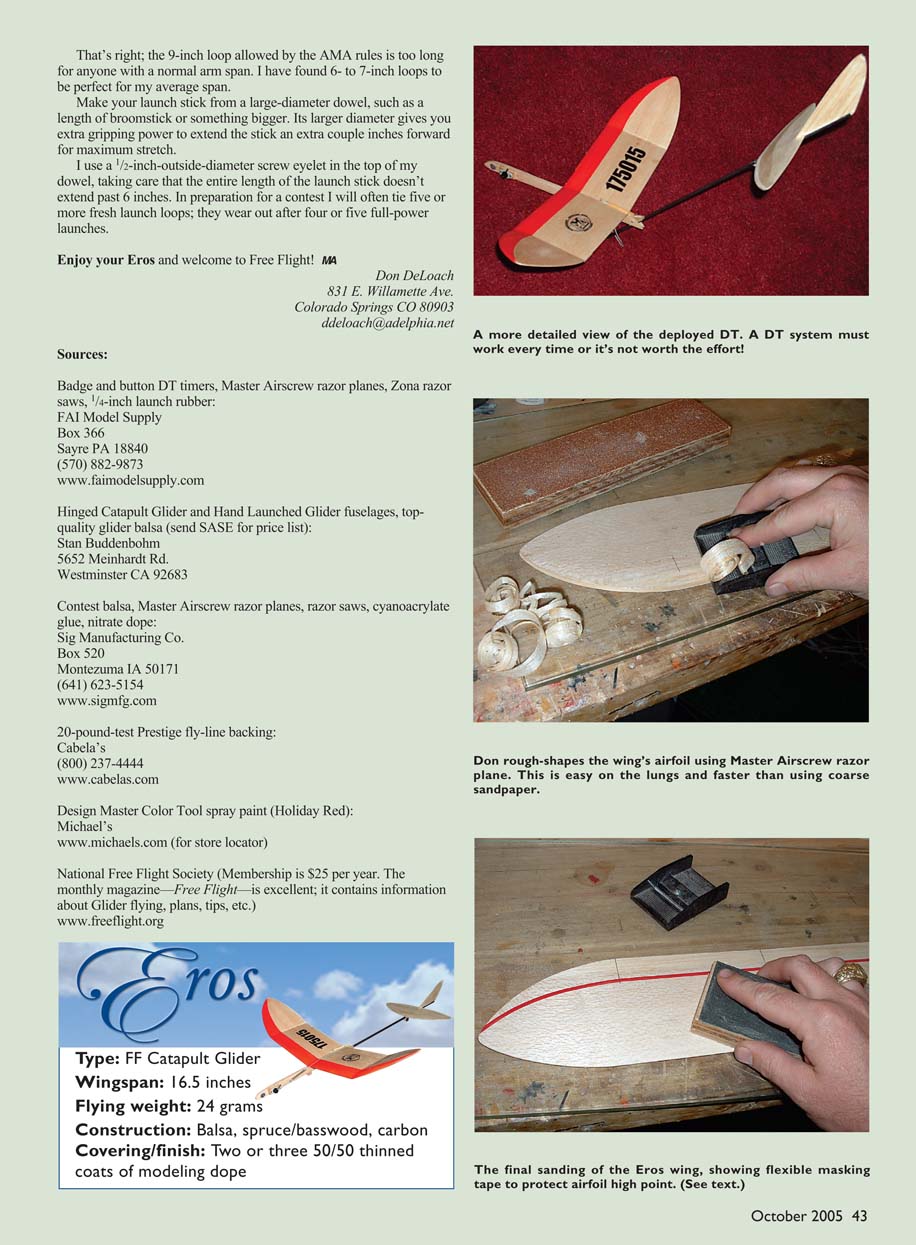
Turn your attention to rigging the Dacron hold-down line that extends to the timer. The line should capture the front portion of the carbon tailboom and lock it into position under the midchord point under the wing. You should then route the Dacron line back to the TE and up over the top surface of the wing.
Attach a 2- to 3-inch loop of the elastic thread that is supplied with the timer and experiment with tension on the timer. Ideally you want the timer to rotate approximately half a revolution in just more than two minutes. This is perfect for the two-minute maxes flown in competition.
Test the timer several times, making sure the tailboom is locked up solidly under tension and the timer release results in the wing popping up every time. If the tailboom is binding in the hinge assembly, sand it slightly narrower or increase the rubber-band tension. DTs must work all the time; otherwise, they are just an aggravation.
Don't forget the 1/20 balsa washin wedge glued on the left main wing panel. This is key; it keeps the model from spinning in to the left in the event of a nose dive or turbulent air.
Flying
Balance your model at 58% per the plans and head to the test field. Hand-glide the model a few times and observe its tendencies.
If it is stallish, remove some incidence via the tailboom adjust screw or by warping in some down-elevator. If the model dives, add incidence until the nose comes up and it is near a stall. You want a nice, floating glide on the edge of a stall with a wide left-glide circle of approximately 100 feet in diameter.
In preparation for the maiden launch, bend in a tiny amount of left rudder. Set the DT to 15 seconds and hook the model to the rubber. Pull back all the way (that's right, full power). Bank the model 45° to the right (holding the launch stick in your left hand) and point 45° up. Let go and observe the flight path.
Chances are that you will see the glider pitch up to near vertical while doing the desired wide left roll, transitioning to the glide at roughly 100 feet. Rolling the model on launch burns energy that could otherwise be used for altitude gain, but consistent transition is more important than 10% or 20% more altitude. This launch roll is controlled by the left rudder.
If you are feeling brave as you continue trimming, you can take out some left rudder and incidence until the model launches nearly vertical with little or no roll. Be prepared for spotty transitions and the occasional death dive, but the Eros will go higher this way. Anytime you make an incidence change you retrim the glide using CG shift. It really is that simple. If your model won't transition well no matter what you do, add a bit of clay to the left wingtip.
Trimming a Catapult Glider for top performance is an individualized process because your arm span and length of rubber loop determine how much power you have at launch. Long-armed fliers are at an advantage. But more important, your 1/4-inch rubber loop is short enough to be near breaking when it is in full launch extension. That's right; the 9-inch loop allowed by the AMA rules is too long for anyone with a normal arm span. I have found 6- to 7-inch loops to be perfect for my average span.
Make your launch stick from a large-diameter dowel, such as a length of broomstick or something bigger. Its larger diameter gives you extra gripping power to extend the stick an extra couple inches forward for maximum stretch.
I use a 1/2-inch-outside-diameter screw eyelet in the top of my dowel, taking care that the entire length of the launch stick doesn't extend past 6 inches. In preparation for a contest I will often tie five or more fresh launch loops; they wear out after four or five full-power launches.
Enjoy your Eros and welcome to Free Flight! MA
Don DeLoach 831 E. Willamette Ave. Colorado Springs CO 80903 [email protected]
Sources:
Badge and button DT timers, Master Airscrew razor planes, Zona razor saws, 1/4-inch launch rubber: FAI Model Supply Box 366 Sayre PA 18840 (570) 882-9873 www.faimodelsupply.com
Hinged Catapult Glider and Hand Launched Glider fuselages, top-quality glider balsa (send SASE for price list): Stan Buddenbohm 5652 Meinhardt Rd. Westminster CA 92683
Contest balsa, Master Airscrew razor planes, razor saws, cyanoacrylate glue, nitrate dope: Sig Manufacturing Co. Box 520 Montezuma IA 50171 (641) 623-5154 www.sigmfg.com
20-pound-test Prestige fly-line backing: Cabela's (800) 237-4444 www.cabelas.com
Design Master Color Tool spray paint (Holiday Red): Michael's www.michaels.com (for store locator)
National Free Flight Society (Membership is $25 per year. The monthly magazine—Free Flight—is excellent; it contains information about Glider flying, plans, tips, etc.) www.freeflight.org
Eros
Type: FF Catapult Glider Wingspan: 16.5 inches Flying weight: 24 grams Construction: Balsa, spruce/basswood, carbon Covering/finish: Two or three 50/50 thinned coats of modeling dope
Transcribed from original scans by AI. Minor OCR errors may remain.

