
Exploring the joy of building - 201209
I began flying RC model airplanes when I was a boy, and at that time there were few RTF aircraft on the market. The only viable option was to build my own. I spent many hours building and repairing my airplanes while learning how to fly. I soon found that I enjoyed building models as much as I enjoyed flying them, and that the experience could be relaxing and rewarding.
Today, with all of the wonderful RTF airplanes on the market, most people choose not to build their own models. I think a great way to get into the hobby is by purchasing an RTF airplane, but people should try building at some point to see the benefits of constructing their own model. You can even salvage the RC gear from a crashed or worn-out RTF model and use it in the airplane you want to build.
One of the fun aspects of building is learning new techniques. I just finished building a kit of Gordon Johnson’s wonderful Cartoon Scale Pitts that required a few techniques that I hadn’t tried before.
Building the Cartoon Scale Pitts
Kit background and contents
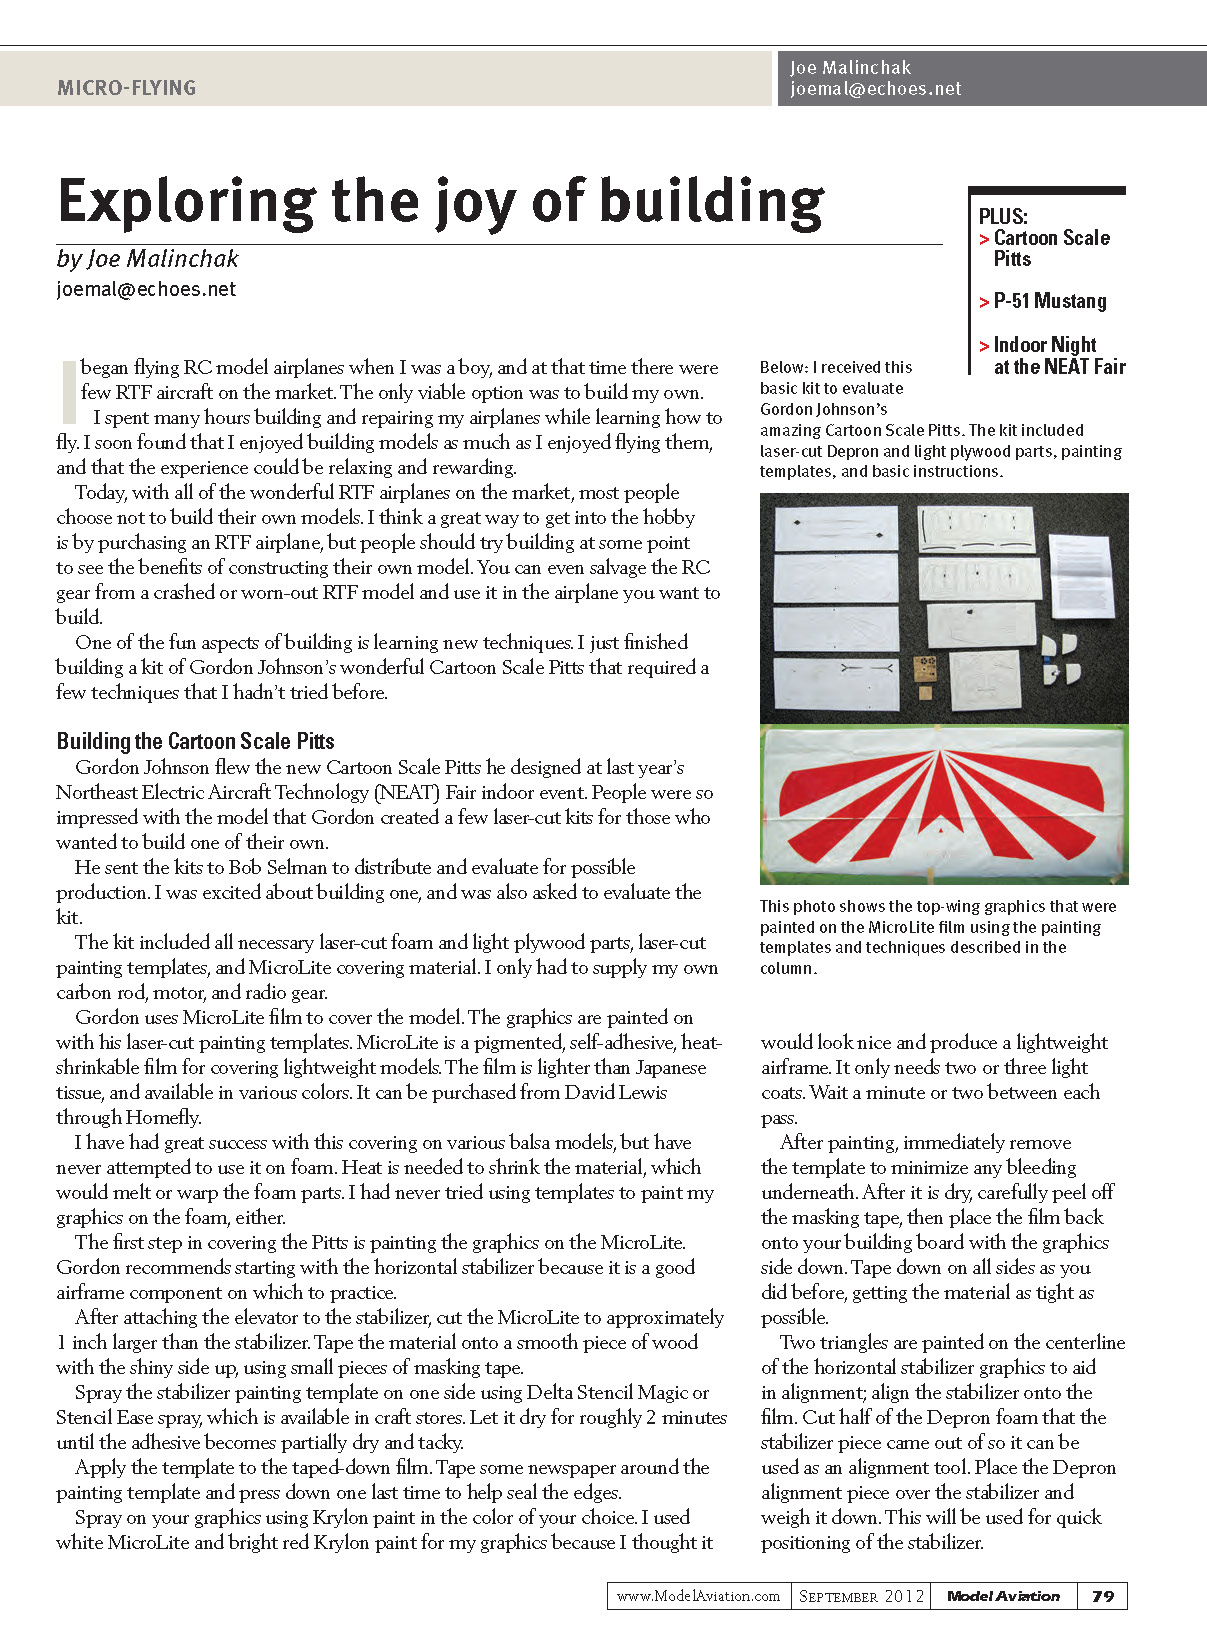
Gordon Johnson flew the new Cartoon Scale Pitts he designed at last year’s Northeast Electric Aircraft Technology (NEAT) Fair indoor event. People were so impressed with the model that Gordon created a few laser-cut kits for those who wanted to build one of their own. He sent the kits to Bob Selman to distribute and evaluate for possible production. I was excited about building one, and was also asked to evaluate the kit.
The kit included:
- Laser-cut foam and light plywood parts
- Laser-cut painting templates
- MicroLite covering material
I only had to supply my own carbon rod, motor, and radio gear.
Gordon uses MicroLite film to cover the model. The graphics are painted on with his laser-cut painting templates. MicroLite is a pigmented, self-adhesive, heat-shrinkable film for covering lightweight models. The film is lighter than Japanese tissue and is available in various colors. It can be purchased from David Lewis through Homefly.
I have had great success with this covering on various balsa models but had never attempted to use it on foam. Heat is needed to shrink the material, which would melt or warp the foam parts. I had also never tried using templates to paint my graphics on foam.
Painting and covering the stabilizer (step-by-step)
Gordon recommends starting with the horizontal stabilizer because it is a good airframe component on which to practice. The basic steps I followed:
- Attach the elevator to the stabilizer.
- Cut the MicroLite to approximately 1 inch larger than the stabilizer.
- Tape the MicroLite onto a smooth piece of wood with the shiny side up using small pieces of masking tape.
- Spray the stabilizer painting template on one side using Delta Stencil Magic or Stencil Ease spray (available in craft stores). Let it dry roughly 2 minutes until the adhesive becomes partially dry and tacky.
- Apply the template to the taped-down film. Tape some newspaper around the painting template and press down to help seal the edges.
- Spray the graphics using Krylon paint in the color of your choice. I used white MicroLite and bright red Krylon paint for lightweight, vivid graphics. Apply two or three light coats, waiting a minute or two between passes.
- Immediately remove the template after painting to minimize bleeding.
- After the paint is dry, carefully peel off the masking tape, then place the film back onto your building board with the graphics side down. Tape down on all sides, getting the material as tight as possible.
Two triangles are painted on the centerline of the horizontal stabilizer graphics to aid in alignment. Align the stabilizer onto the film. Cut half of the Depron foam that the stabilizer piece came out of so it can be used as an alignment tool. Place the Depron alignment piece over the stabilizer and weigh it down; this will be used for quick positioning of the stabilizer.
Dust the stabilizer skeleton with 3M Super 77 Multipurpose spray adhesive, making two light passes from approximately 12 inches high. Quickly place the adhesive-coated stabilizer skeleton back down onto the film using the Depron alignment piece as a guide. Place a smooth, flat board on the stabilizer and firmly press down. Trim the covering around the perimeter of the stabilizer using a sharp hobby knife (I used a #11 blade).
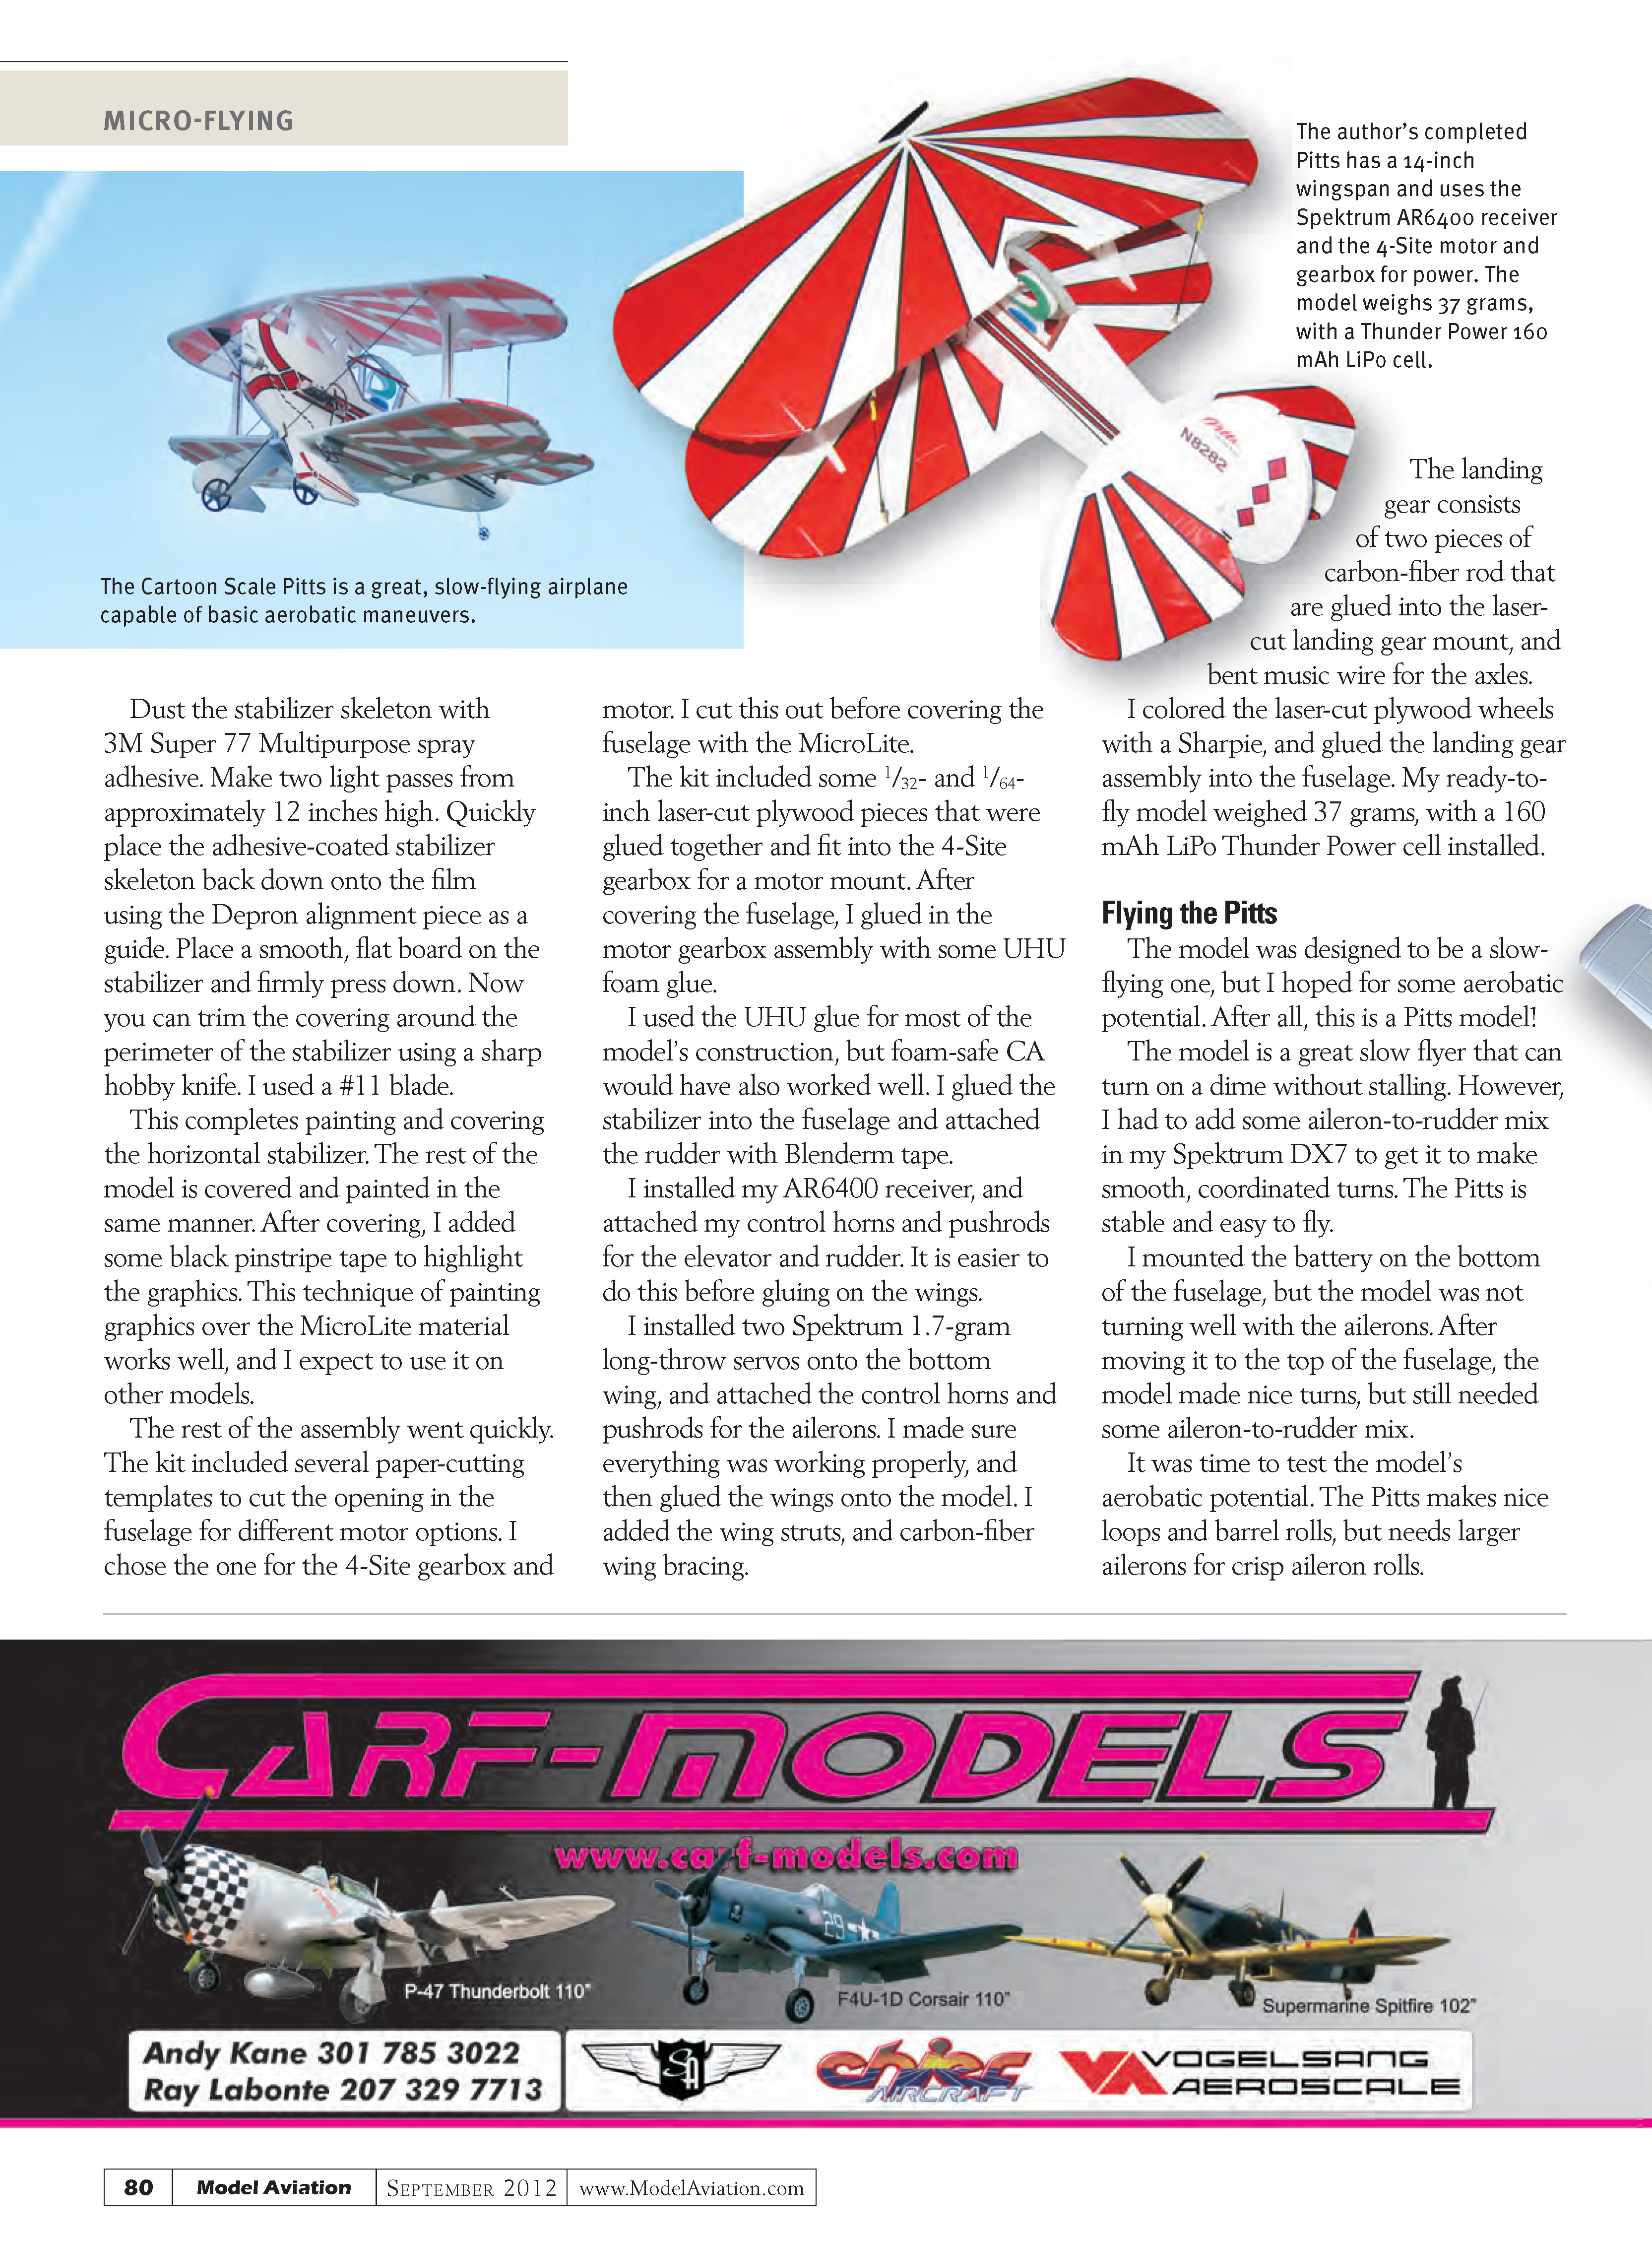
This completes painting and covering the horizontal stabilizer. The rest of the model is covered and painted in the same manner. After covering, I added some black pinstripe tape to highlight the graphics. This technique of painting graphics over the MicroLite material works well, and I expect to use it on other models.
Assembly
The rest of the assembly went quickly. The kit included several paper-cutting templates to cut the opening in the fuselage for different motor options. I chose the one for the 4-Site gearbox and motor, and cut this out before covering the fuselage with MicroLite.
The kit included some 1/32- and 1/64-inch laser-cut plywood pieces that were glued together and fit into the 4-Site gearbox for a motor mount. After covering the fuselage, I glued in the motor gearbox assembly with UHU foam glue.
I used UHU glue for most of the model’s construction, but foam-safe CA would have also worked well. I glued the stabilizer into the fuselage and attached the rudder with Blenderm tape.
Before gluing on the wings I installed the AR6400 receiver and attached control horns and pushrods for the elevator and rudder. It is easier to do this beforehand.
I installed two Spektrum 1.7-gram long-throw servos onto the bottom wing and attached control horns and pushrods for the ailerons. After confirming everything worked properly, I glued the wings onto the model, added the wing struts, and installed carbon-fiber wing bracing.
The landing gear consists of two pieces of carbon-fiber rod glued into the laser-cut landing gear mount, with bent music wire for the axles. I colored the laser-cut plywood wheels with a Sharpie and glued the landing gear assembly into the fuselage. My ready-to-fly model weighed 37 grams with a 160 mAh LiPo Thunder Power cell installed.
Flying the Pitts
The model was designed to be a slow flyer, but I hoped for some aerobatic potential—after all, this is a Pitts model!
Flight characteristics and setup:
- The model is a great slow flyer and can turn on a dime without stalling.
- I had to add some aileron-to-rudder mix in my Spektrum DX7 to get smooth, coordinated turns.
- The Pitts is stable and easy to fly.
- I originally mounted the battery on the bottom of the fuselage; the model did not turn well. Moving the battery to the top of the fuselage improved turning, though aileron-to-rudder mix was still helpful.
Aerobatic performance:
- The Pitts makes nice loops and barrel rolls.
- It needs larger ailerons for crisp aileron rolls; I may modify and increase the aileron size in the future.
Gordon has a winner with his Cartoon Scale Pitts design. The airplane puts a smile on your face when you see it fly!
If you are interested in building the aircraft, please contact Bob Selman at Bob Selman Designs for the kit. You can also build one from Gordon’s plans, which should be posted on his build thread on www.RCGroups.com by the time you read this. You can access it from the link listed in “Sources,” or search the indoor and micro models section under Cartoon Scale Pitts.
GeminiRC P-51 Mustang
First impressions
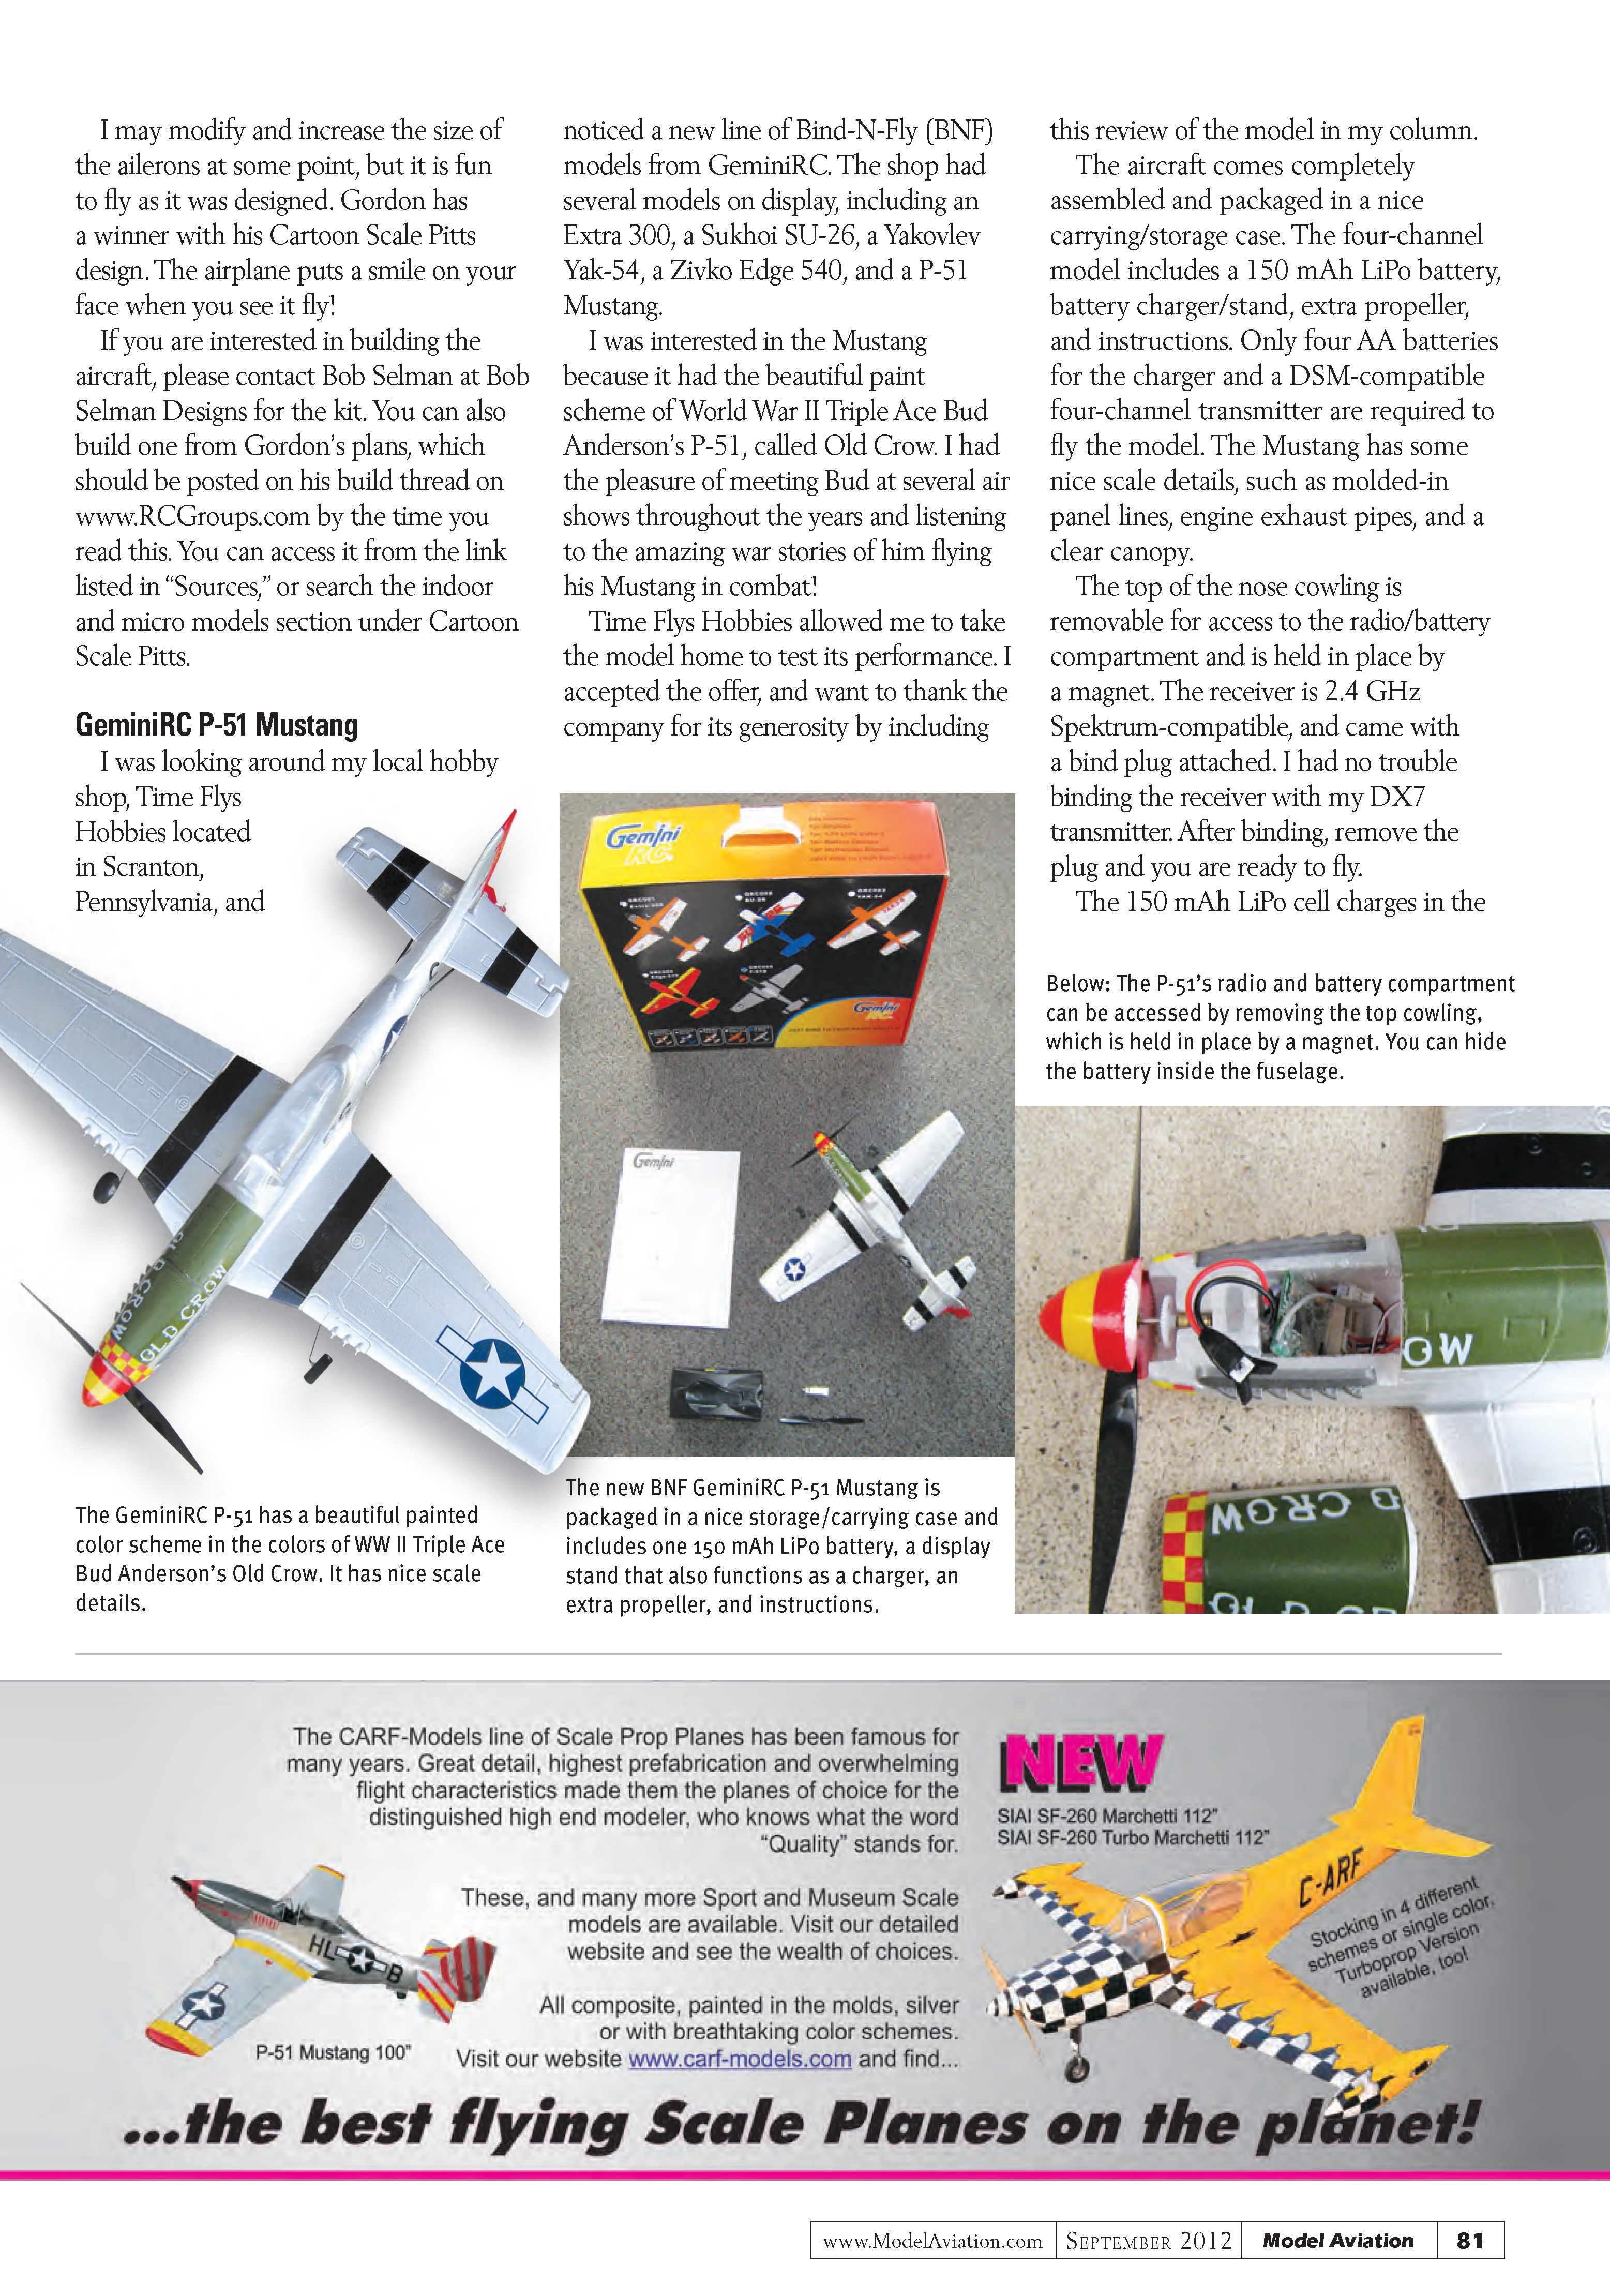
I was looking around my local hobby shop, Time Flys Hobbies in Scranton, Pennsylvania, and noticed a new line of Bind-N-Fly (BNF) models from GeminiRC. The shop had several models on display, including an Extra 300, a Sukhoi SU-26, a Yakovlev Yak-54, a Zivko Edge 540, and a P-51 Mustang.
I was interested in the Mustang because it sported the beautiful paint scheme of World War II Triple Ace Bud Anderson’s P-51, called Old Crow. I had the pleasure of meeting Bud at several air shows and hearing his amazing stories of flying his Mustang in combat.
Time Flys Hobbies allowed me to take the model home to test its performance. I accepted the offer and want to thank the company for its generosity by including this review of the model in my column.
What's included and setup
The aircraft comes completely assembled and packaged in a nice carrying/storage case. The four-channel model includes:
- 150 mAh LiPo battery
- Battery charger/stand
- Extra propeller
- Instructions
Only four AA batteries for the charger and a DSM-compatible four-channel transmitter are required to fly the model. The Mustang has some nice scale details, such as molded-in panel lines, engine exhaust pipes, and a clear canopy.
The top of the nose cowling is removable for access to the radio/battery compartment and is held in place by a magnet. The receiver is 2.4 GHz Spektrum-compatible and came with a bind plug attached. I had no trouble binding the receiver with my DX7 transmitter. After binding, remove the plug and you are ready to fly.
The 150 mAh LiPo cell charges in the included charger; the charger requires four AA batteries to operate.
Transcribed from original scans by AI. Minor OCR errors may remain.

