
FREE FLIGHT DURATION
Louis Joyner, 183 Civitas St., Mt. Pleasant SC 29464
Starting out Right: Something struck me while I was reviewing Alan Abriss's 2000 Nationals (Nats) video: I have never seen so many bad launches!
Perhaps Alan edited out all the good ones, leaving only the bad launches. Or perhaps it was the curse of the camera, as self-conscious modelers forgot everything they knew in a plague of mass hysteria brought on by the media. (This does happen out in the real world, where peaceful demonstrations turn violent as soon as the cameras start rolling.)
Maybe some of these elements were present, but more than likely it was a number of small factors that contributed to so many botched launches. It certainly wasn't lack of experience; the combined years in modeling of the people making these bad launches surely totaled more than 500 years.
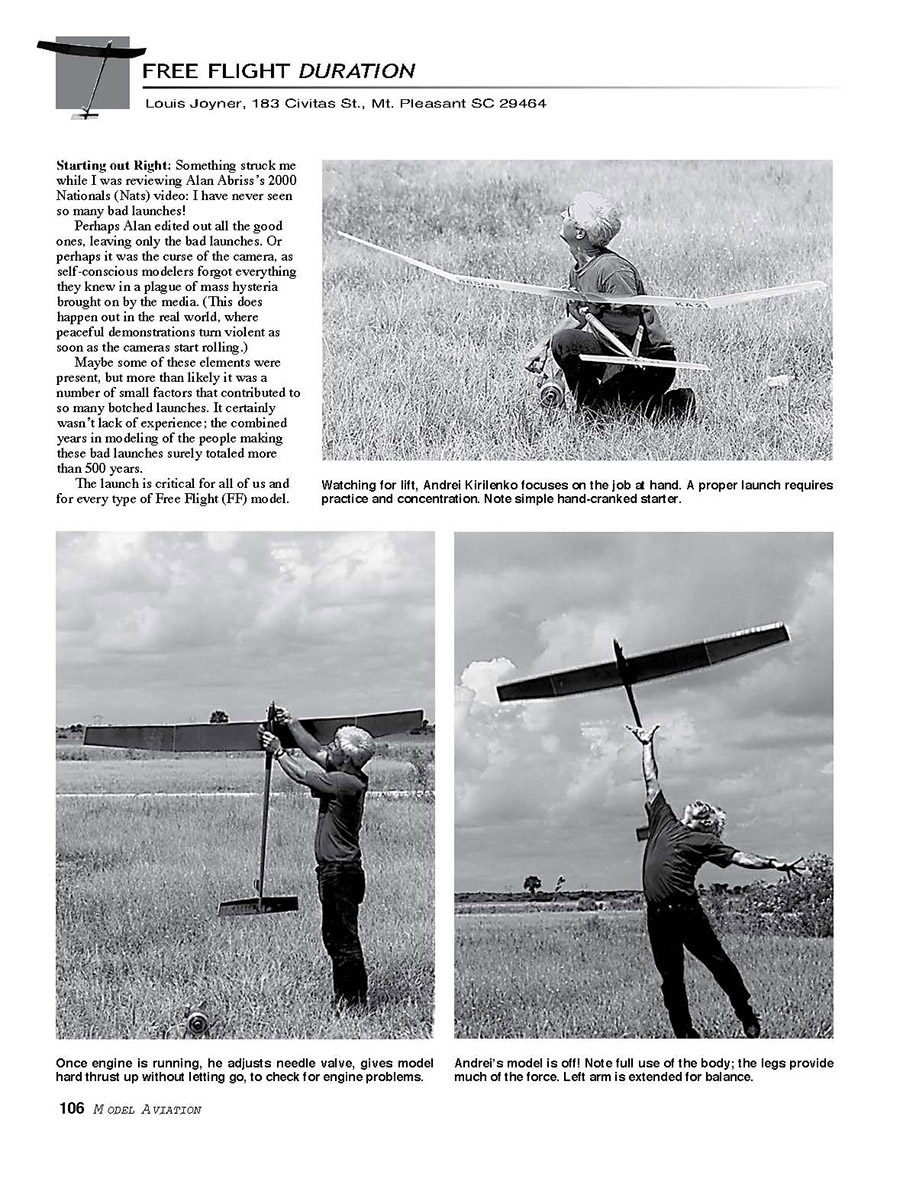
The launch is critical for all of us and for every type of Free Flight (FF) model. It can mean the difference between a max and a miss as the model goes off-pattern and loses height in the climb.
More importantly, a bad launch will result in a crash as often as not. So let’s take a look at potential problems and their cures.
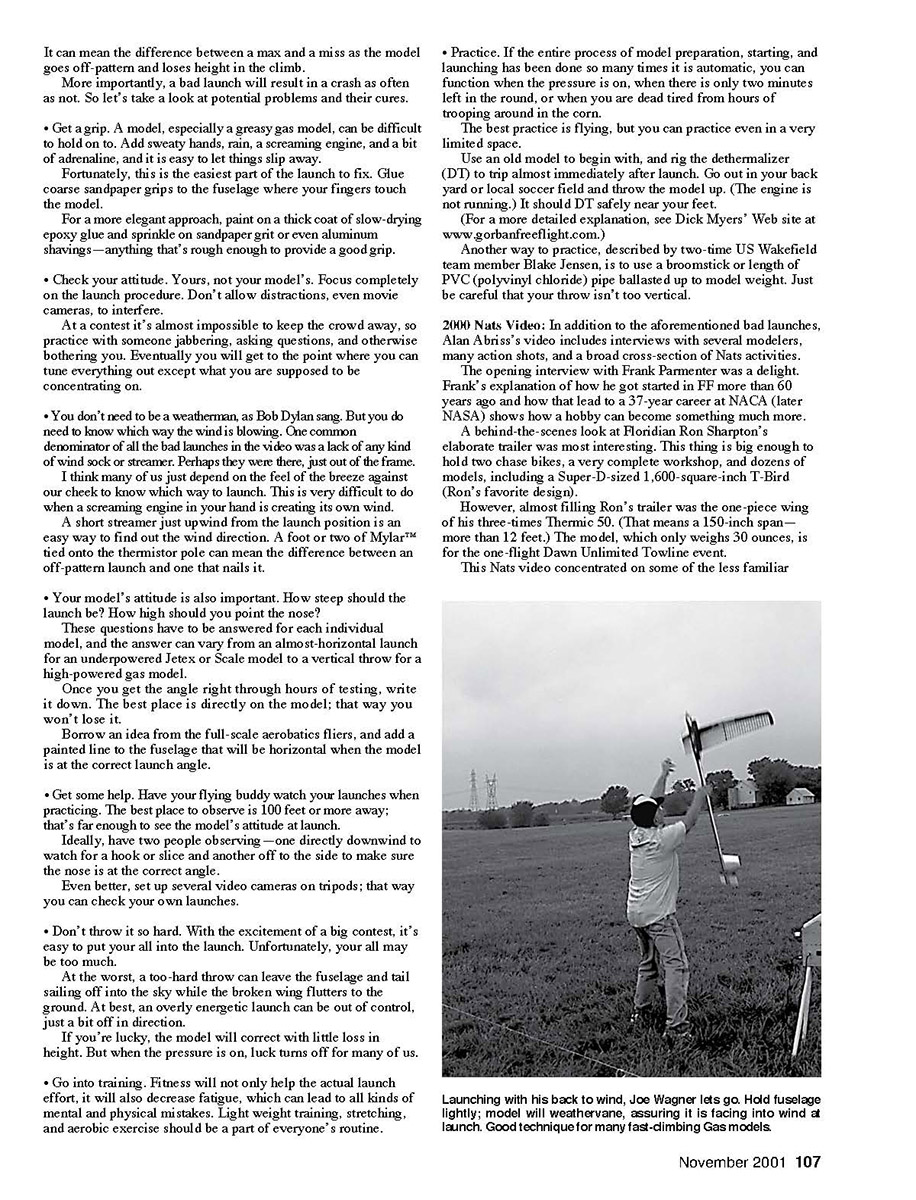
- Get a grip. A model, especially a greasy gas model, can be difficult to hold on to. Add sweaty hands, rain, a screaming engine, and a bit of adrenalin, and it is easy to let things slip away.
Fortunately, this is the easiest part of the launch to fix. Glue coarse sandpaper grips to the fuselage where your fingers touch the model.
For a more elegant approach, paint on a thick coat of slow-drying epoxy glue and sprinkle on sandpaper grit or even aluminum shavings—anything that’s rough enough to provide a good grip.
- Check your attitude. Yours, not your model’s. Focus completely on the launch procedure. Don’t allow distractions, even movie cameras, to interfere.
At a contest it’s almost impossible to keep the crowd away, so practice with someone jabbering, asking questions, and otherwise bothering you. Eventually you will get to the point where you can tune everything out except what you are supposed to be concentrating on.
- You don’t need to be a weatherman, as Bob Dylan sang. But you do need to know which way the wind is blowing. One common denominator of all the bad launches in the video was a lack of any kind of wind sock or streamer. Perhaps they were there, just out of the frame.
I think many of us just depend on the feel of the breeze against our cheek to know which way to launch. This is very difficult to do when a screaming engine in your hand is creating its own wind.
A short streamer just upwind from the launch position is an easy way to find out the wind direction. A foot or two of Mylar tied onto the thermistor pole can mean the difference between an off-pattern launch and one that nails it.
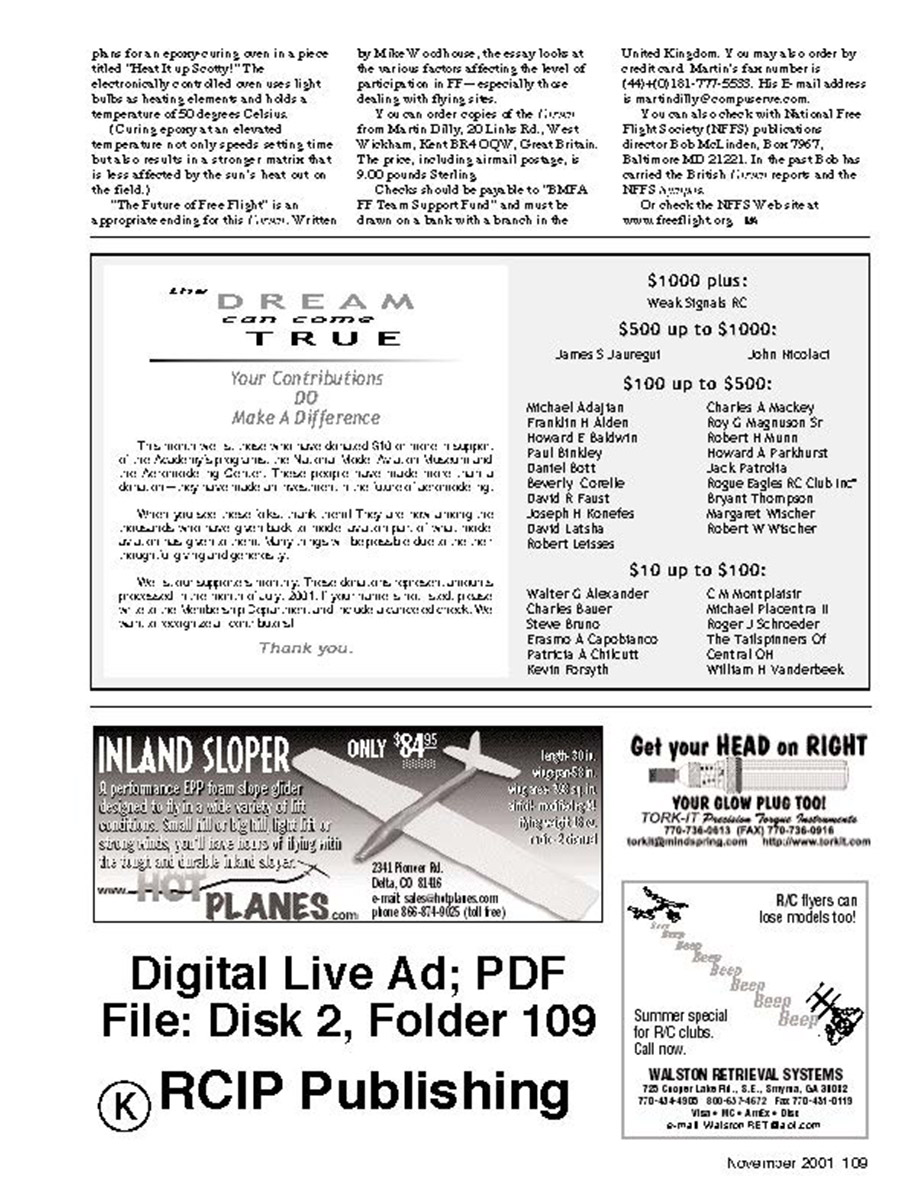
- Your model’s attitude is also important. How steep should the launch be? How high should you point the nose?
These questions have to be answered for each individual model, and the answer can vary from an almost-horizontal launch for an underpowered Jetex or Scale model to a vertical throw for a high-powered gas model.
Once you get the angle right through hours of testing, write it down. The best place is directly on the model; that way you won’t lose it.
Borrow an idea from the full-scale aerobatics fliers, and add a painted line to the fuselage that will be horizontal when the model is at the correct launch angle.
- Get some help. Have your flying buddy watch your launches when practicing. The best place to observe is 100 feet or more away; that’s far enough to see the model’s attitude at launch.
Ideally, have two people observing—one directly downwind to watch for a hook or slice and another off to the side to make sure the nose is at the correct angle.
Even better, set up several video cameras on tripods; that way you can check your own launches.
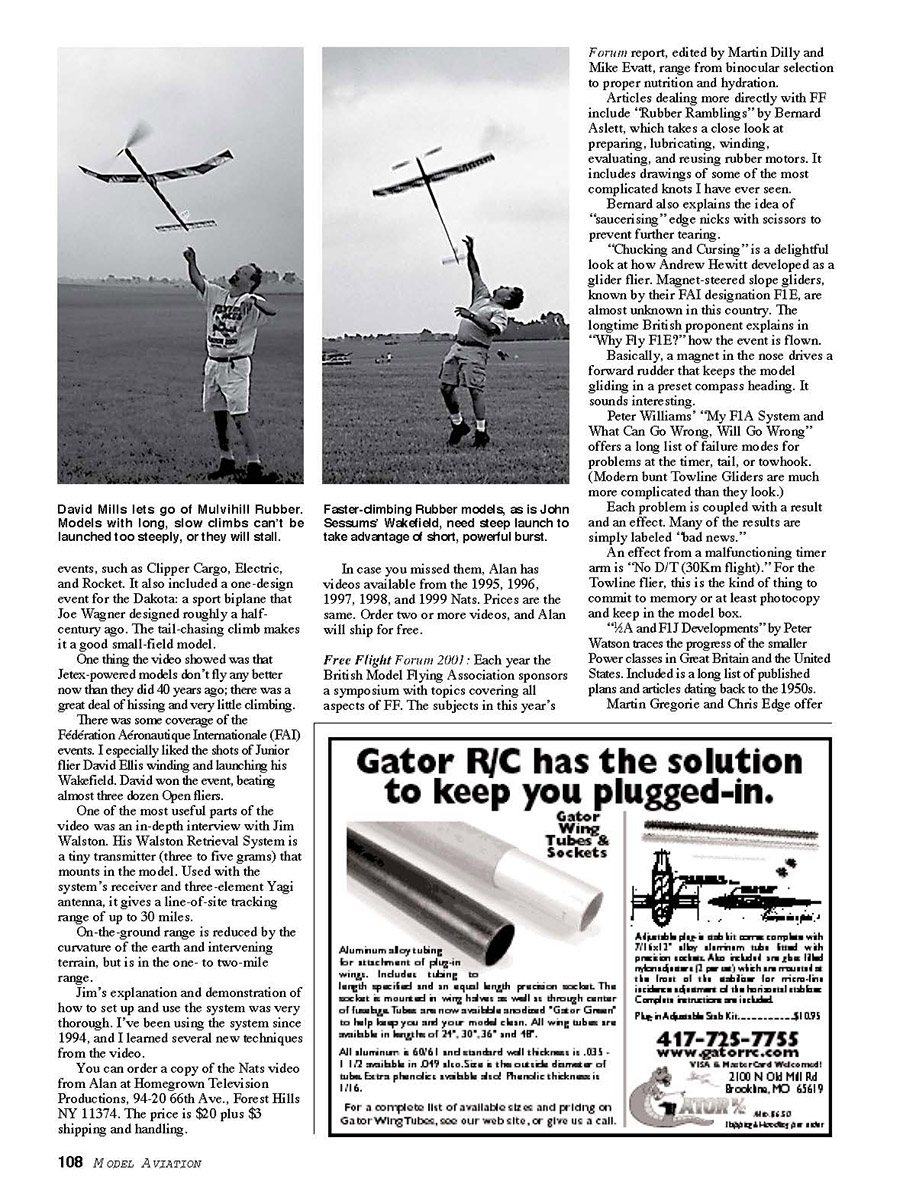
- Don’t throw it so hard. With the excitement of a big contest, it’s easy to put your all into the launch. Unfortunately, your all may be too much.
At the worst, a too-hard throw can leave the fuselage and tail sailing off into the sky while the broken wing flutters to the ground. At best, an overly energetic launch can be out of control, just a bit off in direction.
If you’re lucky, the model will correct with little loss in height. But when the pressure is on, luck turns off for many of us.
- Go into training. Fitness will not only help the actual launch effort, it will also decrease fatigue, which can lead to all kinds of mental and physical mistakes. Light weight training, stretching, and aerobic exercise should be a part of everyone’s routine.
- Practice. If the entire process of model preparation, starting, and launching has been done so many times it is automatic, you can function when the pressure is on, when there is only two minutes left in the round, or when you are dead tired from hours of trooping around in the corn.
The best practice is flying, but you can practice even in a very limited space.
Use an old model to begin with, and rig the dethermalizer (DT) to trip almost immediately after launch. Go out in your backyard or local soccer field and throw the model up. (The engine is not running.) It should DT safely near your feet.
(For a more detailed explanation, see Dicky Myers’ Web site at www.gorbanfreeflight.com.)
Another way to practice, described by two-time US Wakefield team member Blake Jensen, is to use a broomstick or length of PVC (polyvinyl chloride) pipe ballasted up to model weight. Just be careful that your throw isn’t too vertical.
2000 Nats Video: In addition to the aforementioned bad launches, Alan Abriss’s video includes interviews with several modelers, many action shots, and a broad cross-section of Nats activities.
The opening interview with Frank Parmenter was a delight. Frank’s explanation of how he got started in FF more than 60 years ago and how that led to a 37-year career at NACA (later NASA) shows how a hobby can become something much more.
A behind-the-scenes look at Floridan Ron Sharpton’s elaborate trailer was most interesting. This thing is big enough to hold two chase bikes, a very complete workshop, and dozens of models, including a Super-D-sized 1,600-square-inch T-Bird (Ron’s favorite design).
However, almost filling Ron’s trailer was the one-piece wing of his three-times Thermic 50. (That means a 150-inch span—more than 12 feet.) The model, which only weighs 30 ounces, is for the one-flight Dawn Unlimited Towline event.
This Nats video concentrated on some of the less familiar. In case you missed them, Alan has videos available from the 1995, 1996, 1997, 1998, and 1999 Nats. Prices are the same. Order two or more videos, and Alan will ship for free.
Free Flight Forum 2001: Each year the British Model Flying Association sponsors a symposium with topics covering all aspects of FF. The subjects in this year’s Forum report, edited by Martin Dilly and Mike Evatt, range from binocular selection to proper nutrition and hydration.
Articles dealing more directly with FF include “Rubber Ramblings” by Bernard Aslett, which takes a close look at preparing, lubricating, winding, evaluating, and reusing rubber motors. It includes drawings of some of the most complicated knots I have ever seen.
Bernard also explains the idea of “saucerising” edge nicks with scissors to prevent further tearing.
“Chucking and Cursing” is a delightful look at how Andrew Hewitt developed as a glider flier. Magnet-steered slope gliders, known by their FAI designation F1E, are almost unknown in this country. The longtime British proponent explains in “Why Fly F1E?” how the event is flown.
Basically, a magnet in the nose drives a forward rudder that keeps the model gliding in a preset compass heading. It sounds interesting.
Peter Williams’ “My F1A System and What Can Go Wrong, Will Go Wrong” offers a long list of failure modes for problems at the timer, tail, or towhook. (Modern bunt Towline Gliders are much more complicated than they look.)
Each problem is coupled with a result and an effect. Many of the results are simply labeled “bad news.”
An effect from a malfunctioning timer arm is “No D/T (30km flight).” For the Towline flier, this is the kind of thing to commit to memory or at least photocopy and keep in the model box.
“V&A and F1J Developments” by Peter Watson traces the progress of the smaller Power classes in Great Britain and the United States. Included is a long list of published plans and articles dating back to the 1950s.
Martin Gregorie and Chris Edge offer
FF Duration
by Mike Woodhouse, the essay looks at the various factors affecting the level of participation in FF—especially those dealing with flying sites.
You can order copies of the flyer from Martin Dilly, 20 Link Rd., West Wickham, Kent BR4 0QW, Great Britain. The price, including airmail postage, is 9.00 pounds Sterling.
Cheques should be payable to "BMFA FF Team Support Fund" and must be drawn on a bank with a branch in the United Kingdom. You may also order by credit card. Martin's fax number is +44(0)181-777-5555. His E-mail address is [email protected].
You can also check with National Free Flight Society (NFFS) publications director Bob McLinden, Box 7967, Baltimore MD 21221. In the past Bob has carried the British flyer reports and the NFFS reprints.
Or check the NFFS Website at www.freeflight.org
Transcribed from original scans by AI. Minor OCR errors may remain.

