
FF Indoor
Electric Records
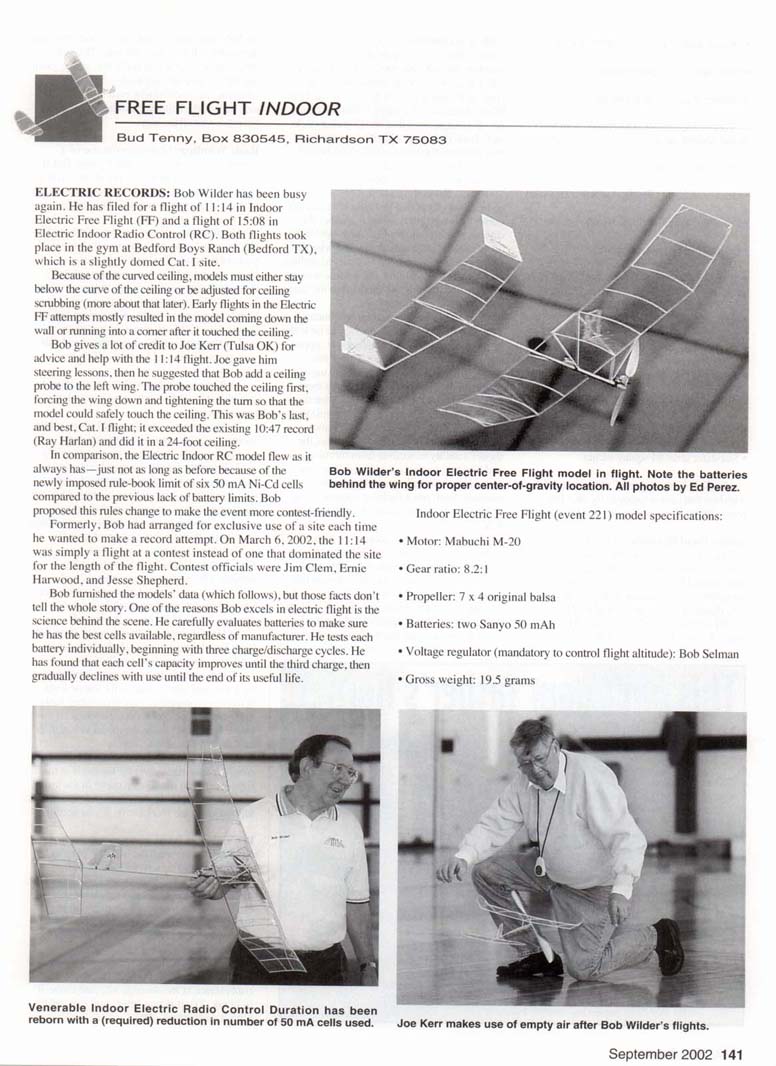
Bob Wilder has been busy again. He filed for a flight of 11:14 in Indoor Electric Free Flight (FF) and a flight of 15:08 in Electric Indoor Radio Control (RC). Both flights took place in the gym at Bedford Boys Ranch (Bedford, TX), which is a slightly domed Cat. I site.
Because of the curved ceiling, models must either stay below the curve of the ceiling or be adjusted for ceiling scrubbing (more about that later). Early flights in the Electric FF attempts mostly resulted in the model coming down the wall or running into a corner after it touched the ceiling. Bob gives a lot of credit to Joe Kerr (Tulsa, OK) for advice and help with the 11:14 flight. Joe gave him steering lessons, then suggested that Bob add a ceiling probe to the left wing. The probe touched the ceiling first, forcing the wing down and tightening the turn so that the model could safely touch the ceiling.
This was Bob's last, and best, Cat. I flight; it exceeded the existing 10:47 record (Ray Harlan) and did it in a 24-foot ceiling.
In comparison, the Electric Indoor RC model flew as it always has—just not as long as before because of the newly imposed rule-book limit of six 50 mA Ni-Cd cells compared to the previous lack of battery limits. Bob proposed this rules change to make the event more contest-friendly. Formerly, Bob had arranged for exclusive use of a site each time he wanted to make a record attempt. On March 6, 2002, the 11:14 was simply a flight at a contest instead of one that dominated the site for the length of the flight. Contest officials were Jim Clem, Ernie Harwood, and Jesse Shepherd.
Bob furnished the models' data (which follows), but those facts don't tell the whole story. One of the reasons Bob excels in electric flight is the science behind the scene. He carefully evaluates batteries to make sure he has the best cells available, regardless of manufacturer. He tests each battery individually, beginning with three charge/discharge cycles. He has found that each cell's capacity improves until the third charge, then gradually declines with use until the end of its useful life.
Indoor Electric Free Flight (event 221) — Model specifications
- Motor: Mabuchi M-20
- Gear ratio: 8.2:1
- Propeller: 7 x 4 original balsa
- Batteries: two Sanyo 50 mAh
- Voltage regulator (mandatory to control flight altitude): Bob Selman
- Gross weight: 19.5 grams
- Official flight time: 11 minutes, 14 seconds
- Wing area: 213 square inches
- Stabilizer area: 82 square inches
Indoor Electric RC Duration (event 627) — Model specifications
- Motor: Maxon RE 10-118392
- Gearbox: Maxon GP 10K-110309, 16:1 ratio
- Propeller: WES-Technik 10 x 5
- Batteries: six Sanyo 50 mAh
- Speed controller: WES-Technik JMP HF-9 ESC
- Radio: GWS
- Servo: WES-Technik
- Gross weight: 77 grams
- Official flight time: 15 minutes, eight seconds
- Wing area: 249 square inches
- Stabilizer area: 85 square inches
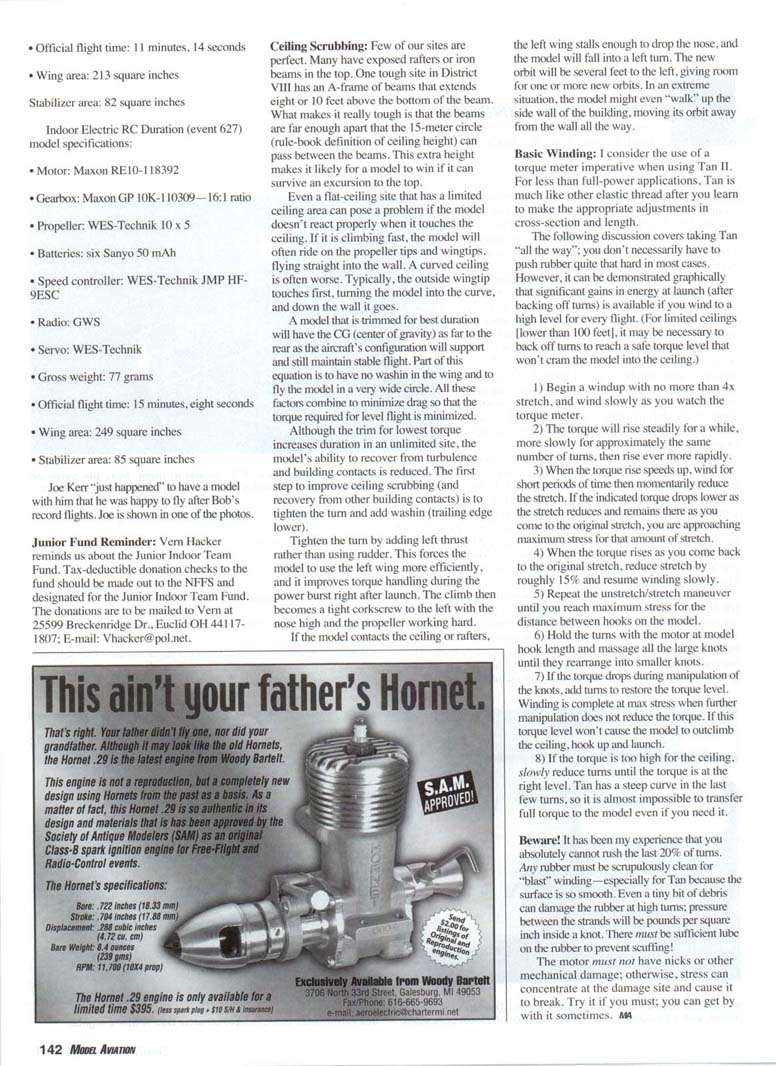
Joe Kerr "just happened" to have a model with him that he was happy to fly after Bob's record flights. Joe is shown in one of the photos.
Junior Fund Reminder
Vern Hacker reminds us about the Junior Indoor Team Fund. Tax-deductible donation checks to the fund should be made out to the NFFS and designated for the Junior Indoor Team Fund. The donations are to be mailed to Vern at 25599 Breckenridge Dr., Euclid, OH 44117-1807. E-mail: [email protected].
Ceiling Scrubbing
Few of our sites are perfect. Many have exposed rafters or iron beams in the top. One tough site in District VIII has an A-frame of beams that extends eight or ten feet above the bottom of the beam. What makes it really tough is that the beams are far enough apart that the 15-meter circle (rule-book definition of ceiling height) can pass between the beams. This extra height makes it likely for a model to win if it can survive an excursion to the top.
Even a flat-ceiling site that has a limited ceiling area can pose a problem if the model doesn't react properly when it touches the ceiling. If it is climbing fast, the model will often ride on the propeller tips and wingtips, flying straight into the wall. A curved ceiling is often worse. Typically, the outside wingtip touches first, turning the model into the curve, and down the wall it goes.
A model that is trimmed for best duration will have the CG (center of gravity) as far to the rear as the aircraft's configuration will support and still maintain stable flight. Part of this equation is to have no wash in the wing and to fly the model in a very wide circle. All these factors combine to minimize drag so that the torque required for level flight is minimized.
Although the trim for lowest torque increases duration in an unlimited site, the model's ability to recover from turbulence and building contacts is reduced. The first step to improve ceiling scrubbing (and recovery from other building contacts) is to tighten the turn and add more wash (trailing edge lower).
Tighten the turn by adding left thrust rather than using rudder. This forces the model to use the left wing more efficiently, and it improves torque handling during the power burst right after launch. The climb then becomes a tight corkscrew to the left with the nose high and the propeller working hard.
If the model contacts the ceiling or rafters, the left wing stalls enough to drop the nose, and the model will fall into a left turn. The new orbit will be several feet to the left, giving room for one or more new orbits. In an extreme situation, the model might even "walk" up the side wall of the building, moving its orbit away from the wall all the way.
Basic Winding
I consider the use of a torque meter imperative when using Tan II. For less than full-power applications, Tan is much like other elastic thread after you learn to make the appropriate adjustments in cross-section and length.
The following discussion covers taking Tan "all the way"; you don't necessarily have to push rubber quite that hard in most cases. However, it can be demonstrated graphically that significant gains in energy at launch (after backing off turns) are available if you wind to a high level for every flight. (For limited ceilings, lower than 100 feet, it may be necessary to back off turns to reach a safe torque level and not cram the model into the ceiling.)
- Begin a windup with no more than 4x stretch, and wind slowly as you watch the torque meter.
- The torque will rise steadily for a while, more slowly for approximately the same number of turns, then rise ever more rapidly.
- When the torque rises more rapidly, stop winding for short periods of time then momentarily reduce the stretch. If the indicated torque drops lower as the stretch reduces and remains there as you come to the original stretch, you are approaching maximum stress for that amount of stretch.
- When the torque rises as you come back to the original stretch, reduce stretch by roughly 15% and resume winding slowly.
- Repeat the stretch/restricted-stretch maneuver until you reach maximum stress for the distance between hooks on the model.
- Hold the turns with the motor at model hook length and massage all the large knots until they rearrange into smaller knots.
- If the torque drops during manipulation of the knots, add turns to restore the torque level. Winding is complete at max stress when further manipulations do not reduce the torque. If this torque level won't cause the model to outclimb the ceiling, hook up and launch.
- If the torque is too high for the ceiling, slowly reduce turns until the torque is at the right level. Tan has a steep curve in the last few turns, so it is almost impossible to transfer the full torque to the model even if you need it.
Beware!
It has been my experience that you absolutely cannot rush the last 20% of turns. Any rubber must be scrupulously clean for "blast" winding—especially for Tan because the surface is so smooth. Even a tiny bit of debris can damage the rubber during winding; pressure between the strands will be pounds per square inch inside a knot. There must be sufficient lube on the rubber to prevent scuffing!
The motor must not have nicks or other mechanical damage; otherwise, stress can concentrate at the damaged site and cause it to break. Try it if you must; you can get by with it sometimes.
Transcribed from original scans by AI. Minor OCR errors may remain.

