
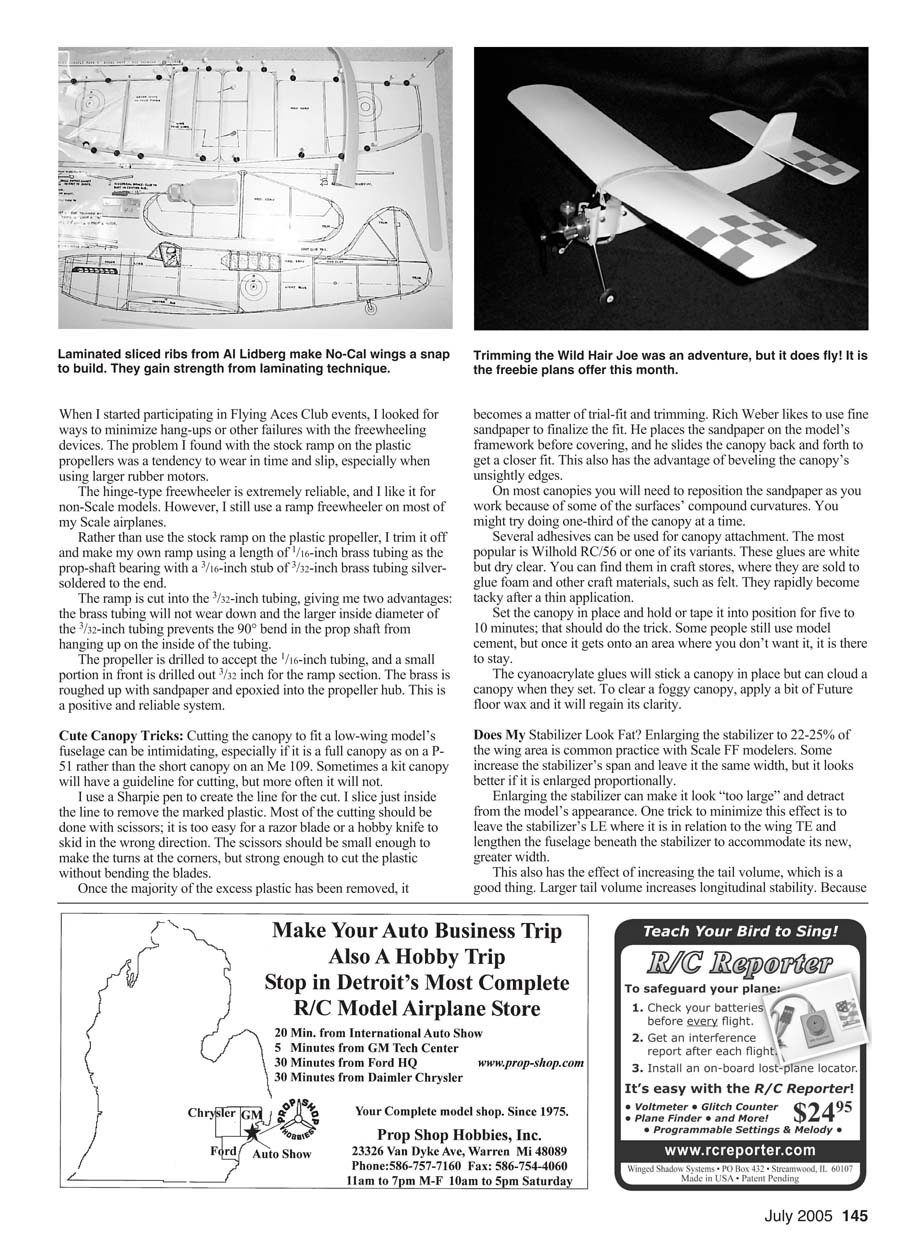
FF Sport
Gene Smith, 1401 N. Husband St., Stillwater OK 74075; E-mail: [email protected]
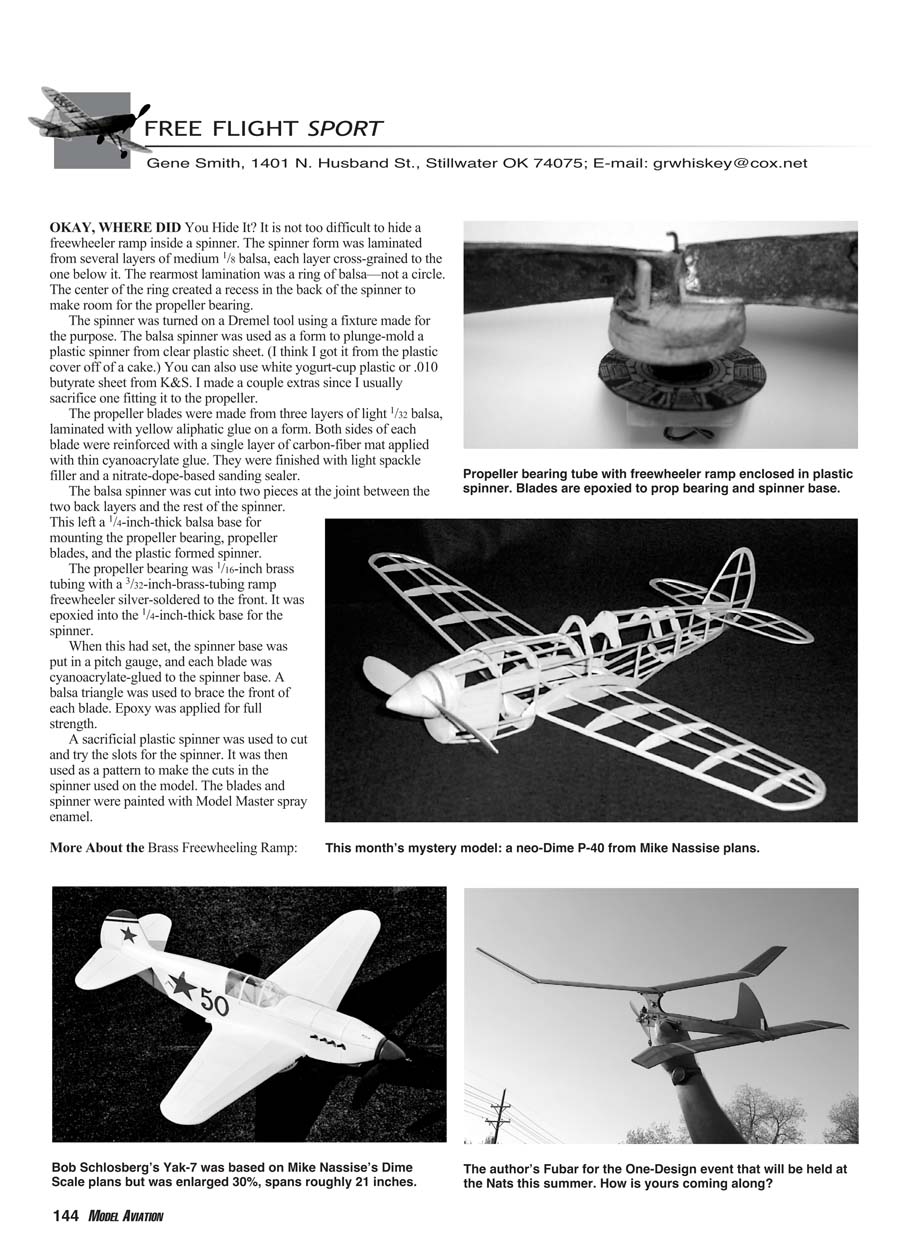
OKAY, WHERE DID YOU HIDE IT? It is not too difficult to hide a freewheeler ramp inside a spinner. The spinner form was laminated from several layers of medium 7/8 balsa, each layer cross-grained to the one below it. The rearmost lamination was a ring of balsa—not a circle. The center of the ring created a recess in the back of the spinner to make room for the propeller bearing.
The spinner was turned on a Dremel tool using a fixture made for the purpose. The balsa spinner was used as a form to plunge-mold a plastic spinner from clear plastic sheet. (I think I got it from the plastic cover off of a cake.) You can also use white yogurt-cup plastic or .010 butyrate sheet from K&S. I made a couple extras since I usually sacrifice one fitting it to the propeller.
The propeller blades were made from three layers of light 1/32 balsa, laminated with yellow aliphatic glue on a form. Both sides of each blade were reinforced with a single layer of carbon-fiber mat applied with thin cyanoacrylate glue. They were finished with light spackle filler and a nitrate-dope-based sanding sealer.
The balsa spinner was cut into two pieces at the joint between the two back layers and the rest of the spinner.
This left a 1/4-inch-thick balsa base for mounting the propeller bearing, propeller blades, and the plastic formed spinner.
The propeller bearing was 1/16-inch brass tubing with a 3/32-inch-brass-tubing ramp freewheeler silver-soldered to the front. It was epoxied into the 1/4-inch-thick base for the spinner.
When this had set, the spinner base was put in a pitch gauge, and each blade was cyanoacrylate-glued to the spinner base. A balsa triangle was used to brace the front of each blade. Epoxy was applied for full strength.
A sacrificial plastic spinner was used to cut and try the slots for the spinner. It was then used as a pattern to make the cuts in the spinner used on the model. The blades and spinner were painted with Model Master spray enamel.
More About the Brass Freewheeling Ramp:
When I started participating in Flying Aces Club events, I looked for ways to minimize hang-ups or other failures with the freewheeling devices. The problem I found with the stock ramp on the plastic propellers was a tendency to wear in time and slip, especially when using larger rubber motors.
The hinge-type freewheeler is extremely reliable, and I like it for non-Scale models. However, I still use a ramp freewheeler on most of my Scale airplanes.
Rather than use the stock ramp on the plastic propeller, I trim it off and make my own ramp using a length of 1/16-inch brass tubing as the prop-shaft bearing with a 3/16-inch stub of 3/32-inch brass tubing silver-soldered to the end.
The ramp is cut into the 3/32-inch tubing, giving me two advantages: the brass tubing will not wear down and the larger inside diameter of the 3/32-inch tubing prevents the 90° bend in the prop shaft from hanging up on the inside of the tubing.
The propeller is drilled to accept the 1/16-inch tubing, and a small portion in front is drilled out 3/32 inch for the ramp section. The brass is roughed up with sandpaper and epoxied into the propeller hub. This is a positive and reliable system.
Cute Canopy Tricks:
Cutting the canopy to fit a low-wing model’s fuselage can be intimidating, especially if it is a full canopy as on a P-51 rather than the short canopy on an Me 109. Sometimes a kit canopy will have a guideline for cutting, but more often it will not.
Use a Sharpie pen to create the line for the cut. I slice just inside the line to remove the marked plastic. Most of the cutting should be done with scissors; it is too easy for a razor blade or a hobby knife to skid in the wrong direction. The scissors should be small enough to make the turns at the corners, but strong enough to cut the plastic without bending the blades.
Once the majority of the excess plastic has been removed, it becomes a matter of trial-fit and trimming. Rich Weber likes to use fine sandpaper to finalize the fit. He places the sandpaper on the model’s framework before covering, and he slides the canopy back and forth to get a closer fit. This also has the advantage of beveling the canopy’s unsightly edges.
On most canopies you will need to reposition the sandpaper as you work because of some of the surfaces’ compound curvatures. You might try doing one-third of the canopy at a time.
Several adhesives can be used for canopy attachment. The most popular is Wilhold RC/56 or one of its variants. These glues are white but dry clear. You can find them in craft stores, where they are sold to glue foam and other craft materials, such as felt. They rapidly become tacky after an application.
Set the canopy in place and hold or tape it into position for five to 10 minutes; that should do the trick. Some people still use model cement, but once it gets onto an area where you don’t want it, it is there to stay.
The cyanoacrylate glues will stick a canopy in place but can cloud a canopy when they set. To clear a foggy canopy, apply a bit of Future floor wax and it will regain its clarity.
Does My Stabilizer Look Fat?
Enlarging the stabilizer to 22-25% of the wing area is common practice with Scale F/F models. This will increase the stabilizer’s span and leave it the same width, but it looks better if it is enlarged proportionally.
Enlarging the stabilizer can make it look “too large” and detract from the model’s appearance. One trick to minimize this effect is to leave the stabilizer’s LE where it is in relation to the wing TE and lengthen the fuselage beneath the stabilizer to accommodate its new, greater width.
This also has the effect of increasing the tail volume, which is a good thing. Larger tail volume increases longitudinal stability. Because
If you are interested in making Scale model airplanes fly, I highly recommend a booklet by the same name. It is sold directly by author William McCombs at 2106 Siesta, Dallas TX 75224. The booklet is $18.95 plus $2 shipping and handling.
I have had my copy of Making Scale Model Airplanes Fly for approximately 10 years and have found it to be extremely helpful. It addresses dihedral, stabilizer area, and fin area. It also covers other design parameters, CG, trimming, canards, pushers, biplanes, and more.
Best Thing Since Sliced Ribs:
Wing ribs for No-Cal models are usually made by slicing 1/16-inch-wide curved ribs from 1/16-inch sheet-balsa stock. A portion of each of the resulting ribs is fragile because the wood is cross-grain for most of each. One needs to hold the modeling knife precisely vertical or the ribs become nonuniform in shape.
Al Lidberg is selling sliced ribs that are machine-cut uniformly from two laminated layers of 1/32 sheet that have been formed to an airfoil contour. With this process, the wood grain follows the curve of the ribs, making them much stronger than those sliced in the conventional manner. There is no unsightly laser charring, and the edges are beautifully cut. No-Cal models will go together more quickly.
The sliced ribs can also be used on slightly larger models with a wing chord (width) of up to 5.5 inches. For that application, 1/16 square sticks are used as the rib bottom and one or two full-depth spars of 1/16 sheet, at say, 25% and 60% of the chord, are used to support the sliced ribs. The result is an extremely light structure with smooth contours; there are no spars on the surface of the top or the bottom.
Check out Al's Web site at www.aalmpgs.com or send $2 for a catalog to A. A. Lidberg, 1030 E. Baseline, Suite 105-1074, Tempe AZ 85283. Al also has a great selection of kits and plans for FF and small-field RC.
Modeling Tips:
Longtime model builder and Jordan Marsh Junior Aviation League veteran Bob Haley submitted a couple useful tips, one of which is to fill the small liquor bottles from the airlines with acetone. He says they work great as brush cleaners. They have small caps that minimize evaporation. Just be sure to clearly mark them as acetone bottles!
Fine fiberglass cloth can be hard to cut and handle. Bob tapes a 10-inch square of plastic, such as the backing from UltraCote, to a square of cardboard. He then tapes a 7-inch square of 5-ounce fiberglass cloth to the plastic. The fiberglass gets two thin coats of nitrate dope.
After it has dried overnight, the fiberglass is easy to cut into strips to reinforce the LEs of propellers and wings. It can also reinforce dihedral joints. The material attaches readily with Duco or similar cements.
You Know You Want It:
It's a freebie set of plans for the Wild Hare Joe! A Ken Willard design, this little pocket rocket is just the thing to break the tension when that contest model won't do what you want. Send me an SASE for the plans and have a ball.
Attention Nostalgia Gas (NosGas) Fliers:
Although he is well known among Society of Antique Modelers fliers as an excellent gasoline man, Don Blackburn may not be so well known by those who fly NosGas. If your NosGas engine gives you trouble or won't run, give Don a try. Blackburn Aero Engineering, Box 15143, Amarillo TX 79105; Tel.: (806) 622-1657; E-mail: [email protected]. MA
Transcribed from original scans by AI. Minor OCR errors may remain.

