
Free Flight Sport
Gene Smith [[email protected]]
Harbor Freight is selling an inexpensive electric-powered FF model
Also included in this column is information about:
- Darcy Whyte's easy-to-build Squirrel design
- Mike Stuart's fantastic Web site
- Finishing and trim-flying the P-40
- Prop-shaft bearings
- Scale-canopy framing how-to
- A lubricating tip from Fred Tellier
AS I LOOK out the window, I see trees bending in the 20 mph breeze, their movements accentuated by gusts to 30. We call this "building weather." In Oklahoma it occurs 335 days a year and is characterized by weather that is too hot, too cold, too windy, too humid, or too wet for FF flying. On the bright side, it makes those nice days that much sweeter.
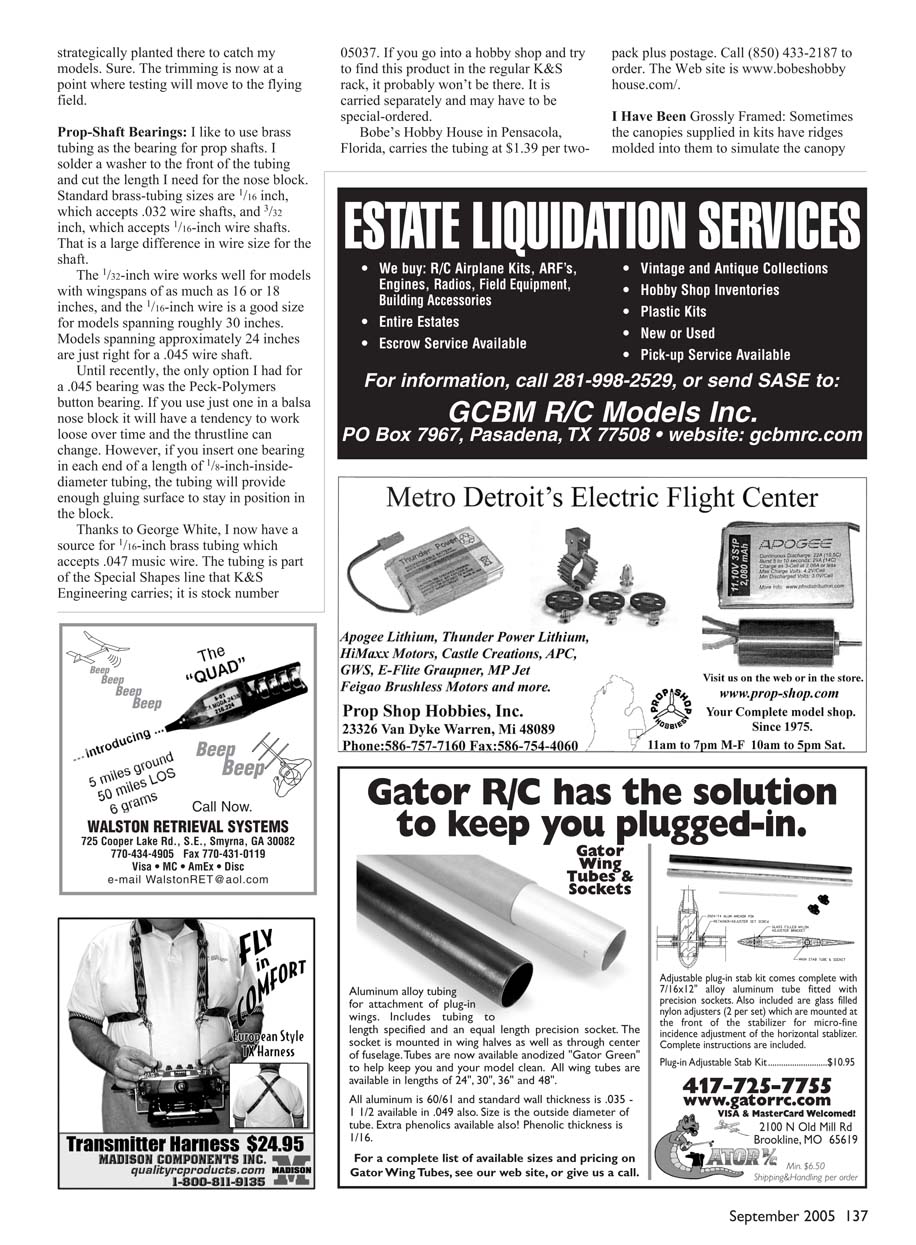
Ross Jahnke is touting the flying qualities of an RTF electric-powered FF model that Harbor Freight sells. His club in the Pensacola, Florida, area has found it to be a good flier. Find it at www.harborfreight.com. Type "43678" in the item-number search box or "airplane" in the description search box.
The model has twin rudders and a pusher propeller mounted at the wing TE. A simple charger consisting of a holder for two AA batteries and a connector is included. The model's wingspan is 23 inches. It lists for $14 but periodically goes on sale for $7. Ross says the company has other electric models but that they don't perform as well.
Be sure to attach the wings to the wing brace before attaching the assembly to the fuselage. The instructions direct users to charge the battery (single-cell NiMH) for 15-30 seconds. That's good advice because a three-minute charge will result in a motor run exceeding two minutes.
My model required a shim of 1/32 balsa under the last 1/4 inch of the stabilizer and a tweak of washout in the right wing. The short charge would give a flight of approximately 25 seconds. However, on one flight my model caught a thermal and was up for roughly two minutes.
Ross says that some clubs have held contests with these airplanes, controlling motor run with charge time. Several models have gone OOS (out of sight), even with these limited motor runs.
Len Sherman devised a motor-cutoff/DT arrangement that allows the microswitch motor cutoff and the pop-up stabilizer to operate from a single-button DT timer. For details, check out www.geocities.com/the_great_sam8/HF_Challenge/hfdt.html. If you don't have a computer, go to your local library; people there will be glad to help you surf the Web!
Something Squirrely Going On:
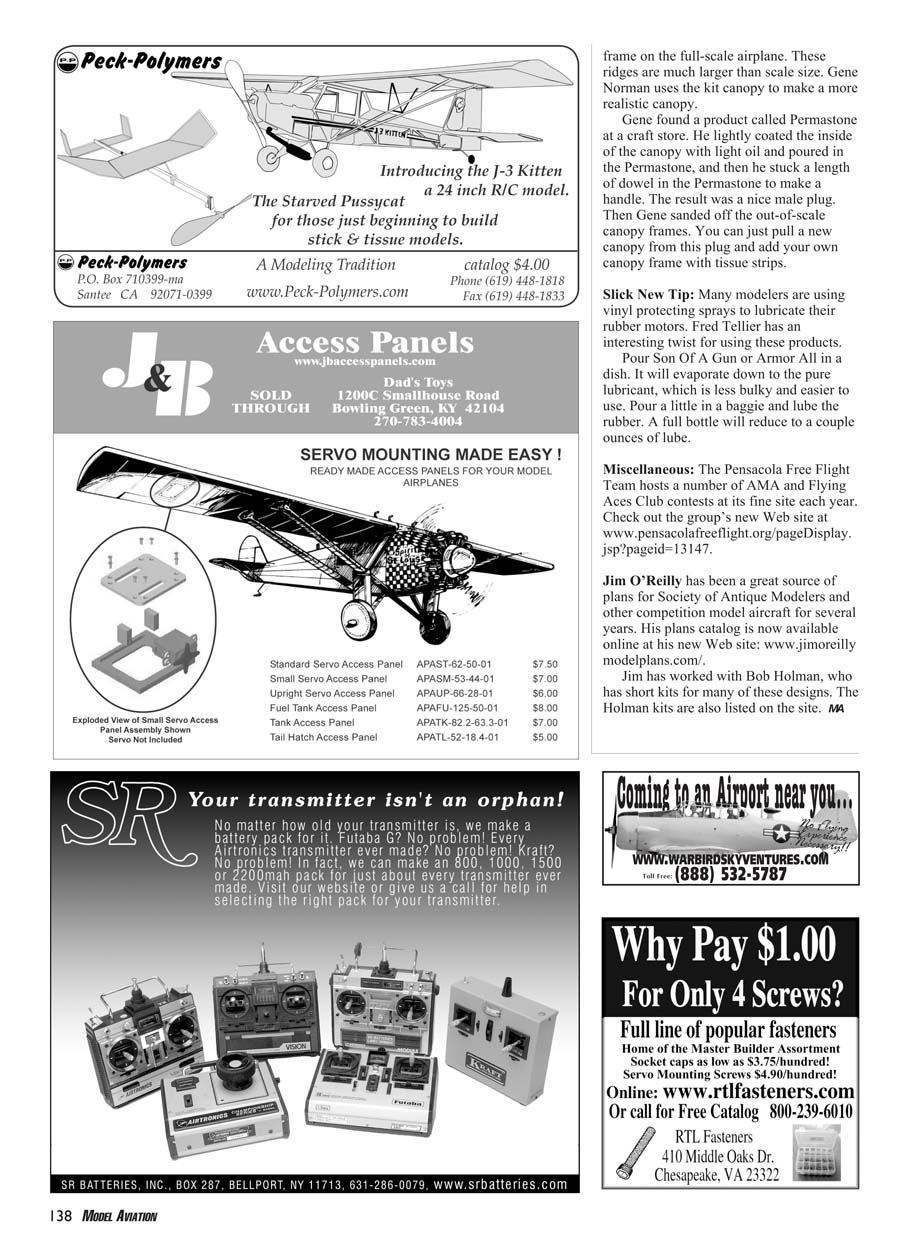
Darcy Whyte has created a new airplane design for model-building workshops. The Squirrel features greatly simplified construction. It is made from Japanese or domestic tissue paper, balsa, and white glue. Darcy says that beginners can construct it faster and more easily than any other airplane in its class.
Check out his Web site at www.rubber-power.com/. Click on "Squirrel," and it will take you to a page with two ways to download the plans/instruction sheet. The plans include a timeline showing how long it takes to do each step. Using precut parts, the model can be completed in 25 minutes!
I helped my granddaughter assemble one, and it is an impressive flier indoors or in calm conditions. If you don't have a computer and want the one-page "plans," send me an SASE with a note at 1401 N Husband St., Stillwater OK 74075, and I will send you one for free.
Mike Stuart's Web site—
www.ffscale.co.uk/—is a fantastic resource for the Scale and sport FF modeler. Scroll down to the "Techniques" section and click on "Build your first flying scale model." Mike has Comper Swift plans for easy download.
He takes you step by step through the construction, complete with pictures. It reminds me of the excellent booklet-style building instructions seen in kits back when RC fliers built their own models. Mike even has several finish schemes from which you can choose.
The Best-Laid Plans:
Okay, so I have this impossibly long "to-do list" of models and related projects. There, in order of priority, are the models I "always wanted to build" and the ones I "need to build for the next contest." Then something happens that throws a monkey wrench into the whole deal.
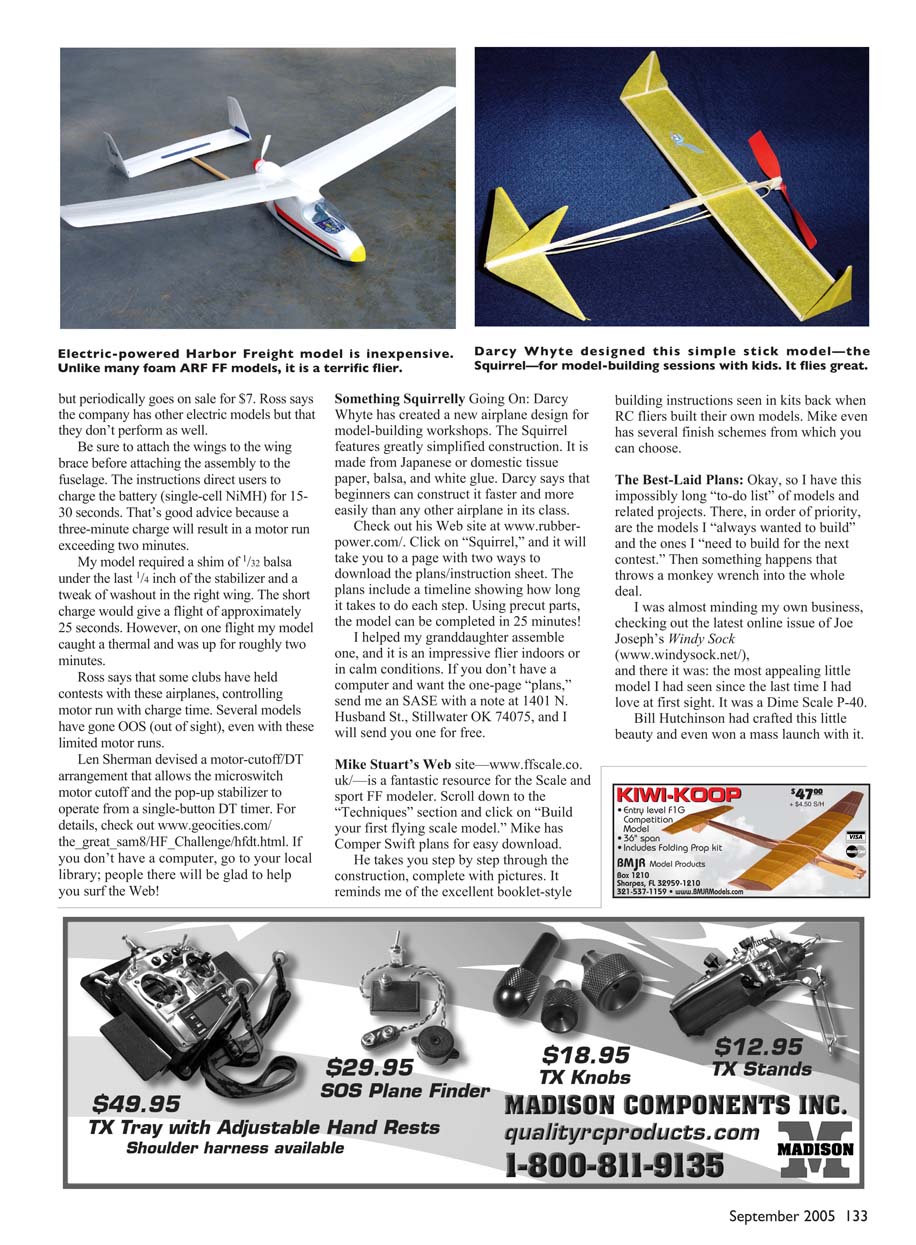
I was almost minding my own business, checking out the latest online issue of Joe Joseph's Windy Sock (www.windysock.net) and there it was: the most appealing little model I had seen since the last time I had a love at first sight. It was a Dime Scale P-40.
Bill Hutchinson had crafted this little beauty and even won a mass launch with it.
Prop-Shaft Bearings:
I like to use brass tubing as the bearing for prop shafts. I solder a washer to the front of the tubing and cut the length I need for the nose block. Standard brass-tubing sizes are 1/16 inch, which accepts .032 wire shafts, and 3/32 inch, which accepts 1/16-inch wire shafts. That is a large difference in wire size for the shaft.
The 1/32-inch wire works well for models with wingspans of as much as 16 or 18 inches, and the 1/16-inch wire is a good size for models spanning roughly 30 inches. Models spanning approximately 24 inches are just right for a .045 wire shaft.
Until recently, the only option I had for a .045 bearing was the Peck-Polymers button bearing. If you use just one in a balsa nose block it will have a tendency to work loose over time and the thrustline can change. However, if you insert one bearing in each end of a length of 1/8-inch-inside-diameter tubing, the tubing will provide enough gluing surface to stay in position in the block.
Thanks to George White, I now have a source for 1/16-inch brass tubing which accepts .047 music wire. The tubing is part of the Special Shapes line that K&S Engineering carries; it is stock number 05037. If you go into a hobby shop and try to find this product in the regular K&S rack, it probably won't be there. It is carried separately and may have to be special-ordered.
Bobe's Hobby House in Pensacola, Florida, carries the tubing at $1.39 per two-pack plus postage. Call (850) 433-2187 to order. The Web site is www.bobeshobbyhouse.com/.
I Have Been Grossly Framed:
Sometimes the canopies supplied in kits have ridges molded into them to simulate the canopy framing. The usual method is to press thin masking tape into the ridges, fill the low spots with epoxy or CA, then sand and paint. A better method is to fill the low spots with a light-bodied automotive filler such as Bondo's glazing-and-spot putty. It sands easily and won't shrink like epoxy.
FF Sport
By Gene Smith
frame on the full-scale airplane. These ridges are much larger than scale size. Gene Norman uses the kit canopy to make a more realistic canopy.
Gene found a product called Permastone at a craft store. He lightly coated the inside of the canopy with light oil and poured in the Permastone, and then he stuck a length of dowel in the Permastone to make a handle. The result was a nice male plug. Then Gene sanded off the out-of-scale canopy frames. You can just pull a new canopy from this plug and add your own canopy frame with tissue strips.
Slick New Tip:
Many modelers are using vinyl protecting sprays to lubricate their rubber motors. Fred Tellier has an interesting twist for using these products.
Pour Son Of A Gun or Armor All in a dish. It will evaporate down to the pure lubricant, which is less bulky and easier to use. Pour a little in a baggie and lube the rubber. A full bottle will reduce to a couple ounces of lube.
Miscellaneous:
The Pensacola Free Flight Team hosts a number of AMA and Flying Aces Club contests at its fine site each year. Check out the group's new Web site at www.pensacolafreeflight.org/pageDisplay.jsp?pageid=13147.
Jim O'Reilly has been a great source of plans for Society of Antique Modelers and other competition model aircraft for several years. His plans catalog is now available online at his new Web site: www.jimoreillymodelplans.com/.
Jim has worked with Bob Holman, who has short kits for many of these designs. The Holman kits are also listed on the site. MA
Transcribed from original scans by AI. Minor OCR errors may remain.

