

FF SPORT - 2014/09
Using a stable nose block
by Gene Smith [email protected]
Beginners often overlook the importance of a stable nose block on their rubber-powered models. An unstable nose block was a problem I encountered when getting back into this hobby a few decades ago.
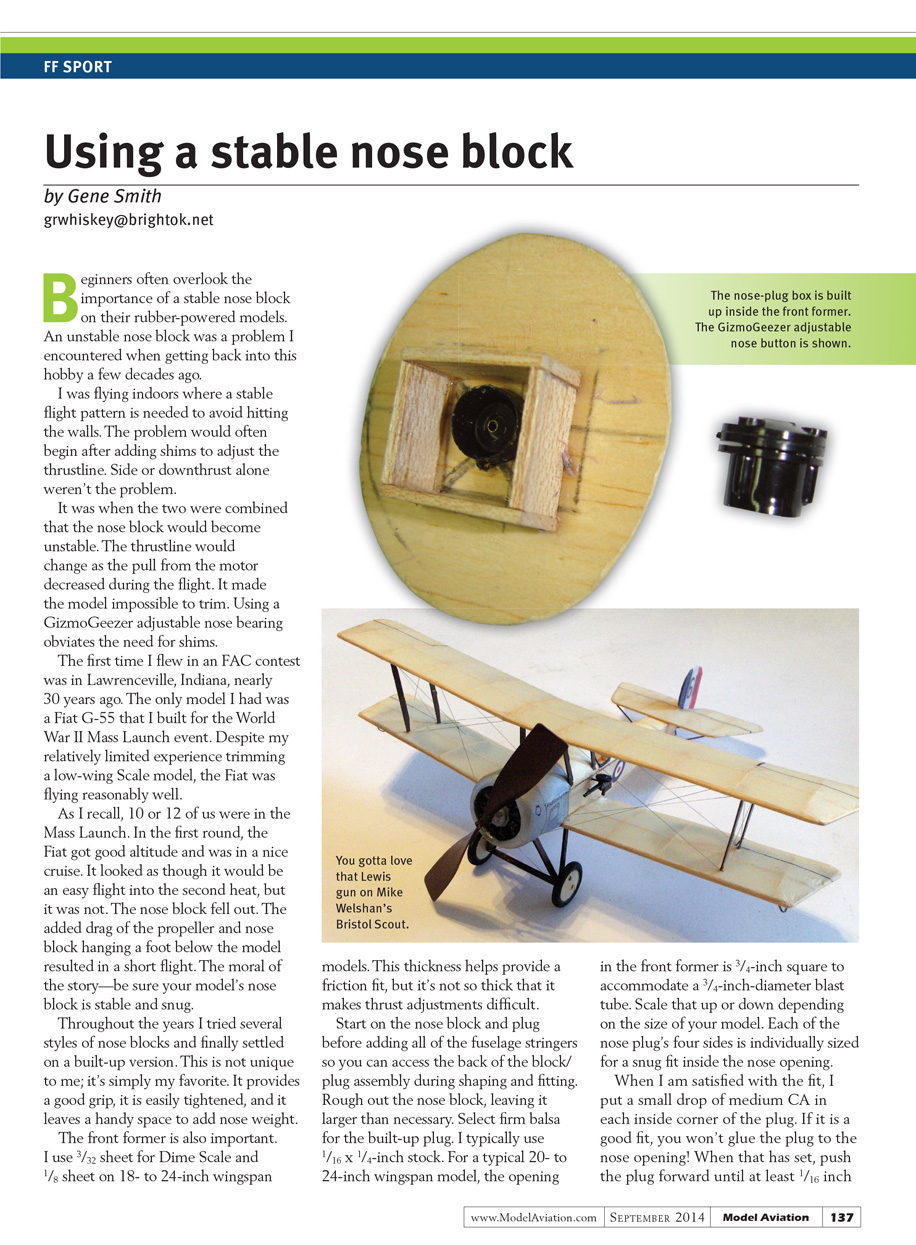
I was flying indoors where a stable flight pattern is needed to avoid hitting the walls. The problem would often begin after adding shims to adjust the thrustline. Side or downthrust alone weren't the problem. It was when the two were combined that the nose block would become unstable. The thrustline would change as the pull from the motor decreased during the flight, making the model impossible to trim. Using a GizmoGeezer adjustable nose bearing obviates the need for shims.
The first time I flew in an FAC contest was in Lawrenceville, Indiana, nearly 30 years ago. The only model I had was a Fiat G-55 that I built for the World War II Mass Launch event. Despite my relatively limited experience trimming a low-wing scale model, the Fiat was flying reasonably well.
As I recall, 10 or 12 of us were in the mass launch. In the first round, the Fiat got good altitude and was in a nice cruise. It looked as though it would be an easy flight into the second heat, but it was not. The nose block fell out. The added drag of the propeller and nose block hanging a foot below the model resulted in a short flight. The moral of the story — be sure your model's nose block is stable and snug.
Throughout the years I tried several different styles of nose blocks and finally settled on a built-up version. This is not unique to me; it's simply my favorite. It provides a good grip, is easily tightened, and leaves a handy space to add nose weight.
The front former is also important. I use 3/32-inch sheet for Dime Scale and 1/8-inch sheet on 18- to 24-inch wingspan models. This thickness helps provide a friction fit, but it's not so thick that it makes thrust adjustments difficult.
Start on the nose block and plug before adding all of the fuselage stringers so you can access the back of the block/plug assembly during shaping and fitting. Rough out the nose block, leaving it larger than necessary. Select firm balsa for the built-up plug — I typically use 1/16 x 1/4-inch stock. For a typical 20- to 24-inch wingspan model, the opening in the front former is 3/4-inch square to accommodate a 3/4-inch-diameter blast tube; scale that up or down depending on the size of your model.
Each of the nose plug's four sides is individually sized for a snug fit inside the nose opening. When I am satisfied with the fit, I put a small drop of medium CA in each inside corner of the plug. If you have a good fit, it won't glue the plug to the nose opening. When that has set, push the plug forward until at least 1/16 inch of the plug is in front of the front former. Apply a small amount of medium CA to the front of the plug. Use a finger behind the nose plug to be sure you don't push the plug back. Center the nose block on the nose plug. When it has set, pull the nose block/plug assembly out and add CA to the inside of the plug, securing it to the nose block.
This is a good time to drill a hole for your propeller-shaft bearing. Put the nose block back on the model, trace the front former shape onto the back of the nose block, and rough out the shape. The nose block can be placed back on the model for final shaping. Leaving the side stringers off allows a good hold for shaping with less chance of breaking stringers in the process.
Bristol Scout Peanut
Mike Welshans built a Bristol Scout Peanut from an old Lee kit. The nose section was modified, replacing the solid nose with a cowl. A dummy engine was made from Williams Cylinders cut in half lengthwise. The model still needed a bit of nose weight even with the plastic cylinders.
The wings had to be rebuilt because the originals warped after the tissue was applied. Mike found that bamboo was a great substitute for the wire called for in the kit. The Bristol weighs in at 18 grams before adding the rubber motor.
Copic Pens
Tom Hallman's Seafire was finished with Americana Gloss Enamels. These inexpensive paints are available at craft stores. Tom says the paint goes on beautifully.
Tom has found that Copic pens make the application of panel lines smooth and easy. The Copic pens are a step up from the Sharpie pens many of us use.
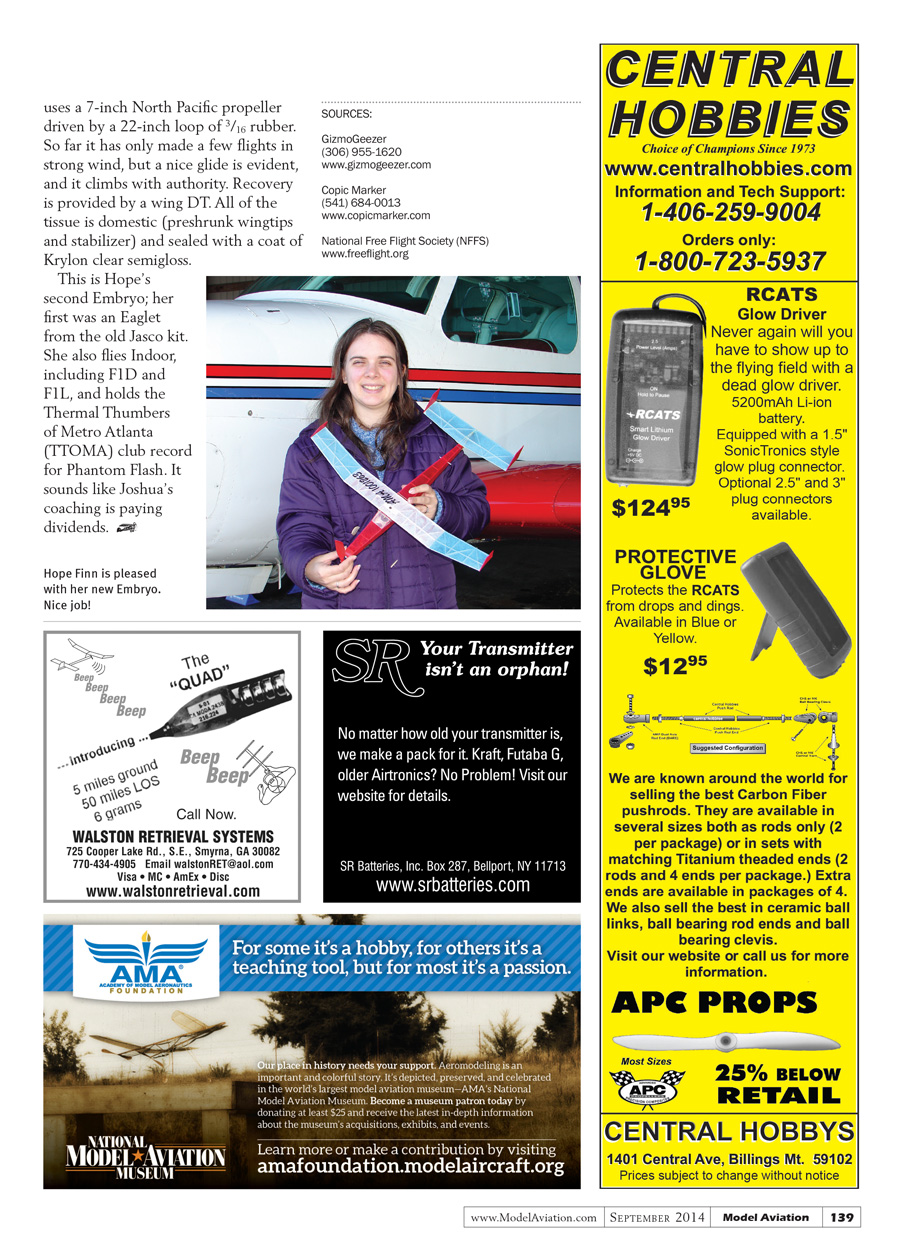
Hope Finn's Embryo
Hope Finn did a great job on her new Maxout IX Embryo, which was designed by her husband, Joshua. The aircraft behind her in one of the pictures is Joshua's father's 1950 B35 Bonanza N8724A.
Hope's model weighs 16 grams and uses a 7-inch North Pacific propeller driven by a 22-inch loop of 3/16 rubber. So far it has only made a few flights in strong wind, but a nice glide is evident, and it climbs with authority. Recovery is provided by a wing DT. All of the tissue is domestic (preshrunk wingtips and stabilizer) and sealed with a coat of Krylon clear semigloss.
This is Hope's second Embryo; her first was an Eaglet from the old Jasco kit. She also flies indoor events, including F1D and F1L, and holds the Thermal Thumbers of Metro Atlanta (TTOMA) club record for Phantom Flash. It sounds like Joshua's coaching is paying dividends.
SOURCES:
- GizmoGeezer
(306) 955-1620 www.gizmogeezer.com
- Copic Marker
(541) 684-0013 www.copicmarker.com
- National Free Flight Society (NFFS)
Transcribed from original scans by AI. Minor OCR errors may remain.

