
FIBERGLASSING THE WING CENTER-SECTION
Bob Noll [email protected]
Introduction
One-piece wings must have their center-sections reinforced with fiberglass cloth to provide enough strength to survive the stresses of aerobatic maneuvers. This step-by-step procedure shows how to reinforce the wing to obtain that strength while providing a smooth surface necessary for film coverings. I have used this technique on my 2-meter RC Aerobatics (Pattern) models.
After you have gone through the process with one wing, repeat all the steps for the other side of the wing. Careful attention to each step of this technique will provide you with a tough center-section and an even, light surface.
Materials and tools
- Fiberglass cloth (choose weight depending on model size; I use 2-ounce-per-square-foot material for my 2-meter Pattern models)
- Finishing resin/epoxy (finishing resin is easier to sand)
- Saran Wrap
- Spatula for mixing
- Paste brush
- Mixing cup
- Plastic credit card or similar stiff card
- Sanding tool
- Rubber gloves
Note: LE = leading edge; TE = trailing edge.
Procedure
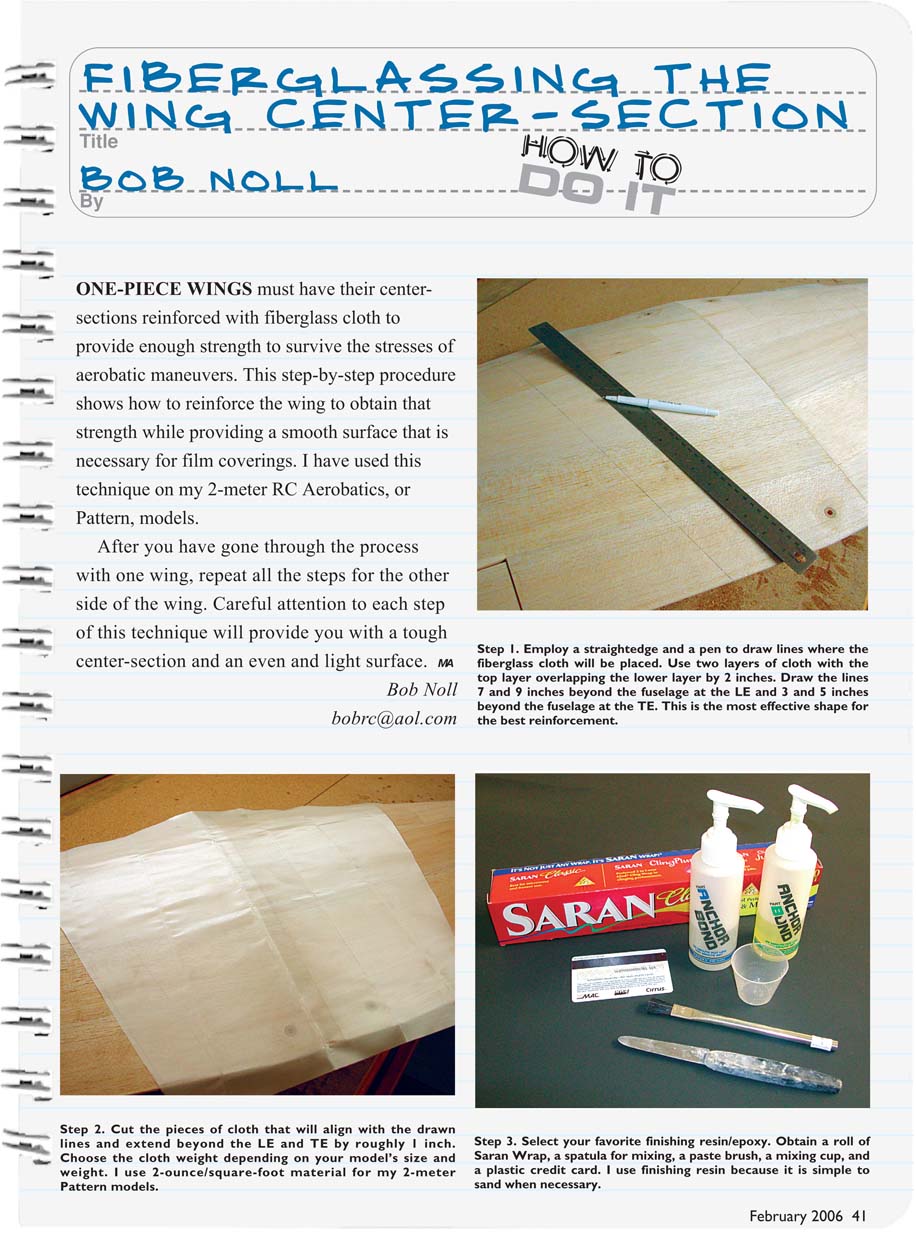
- Using a straightedge and a pen, draw lines where the fiberglass cloth will be placed. Plan for two layers of cloth with the top layer overlapping the lower layer by 2 inches. Draw the lines 7 and 9 inches beyond the fuselage at the leading edge (LE) and 3 and 5 inches beyond the fuselage at the trailing edge (TE). This shape provides effective reinforcement.
- Cut the pieces of cloth to align with the drawn lines and extend beyond the LE and TE by roughly 1 inch.
- Select your finishing resin/epoxy. Gather Saran Wrap, a spatula for mixing, a paste brush, a mixing cup, and a plastic credit card. I prefer finishing resin because it is simple to sand when necessary.
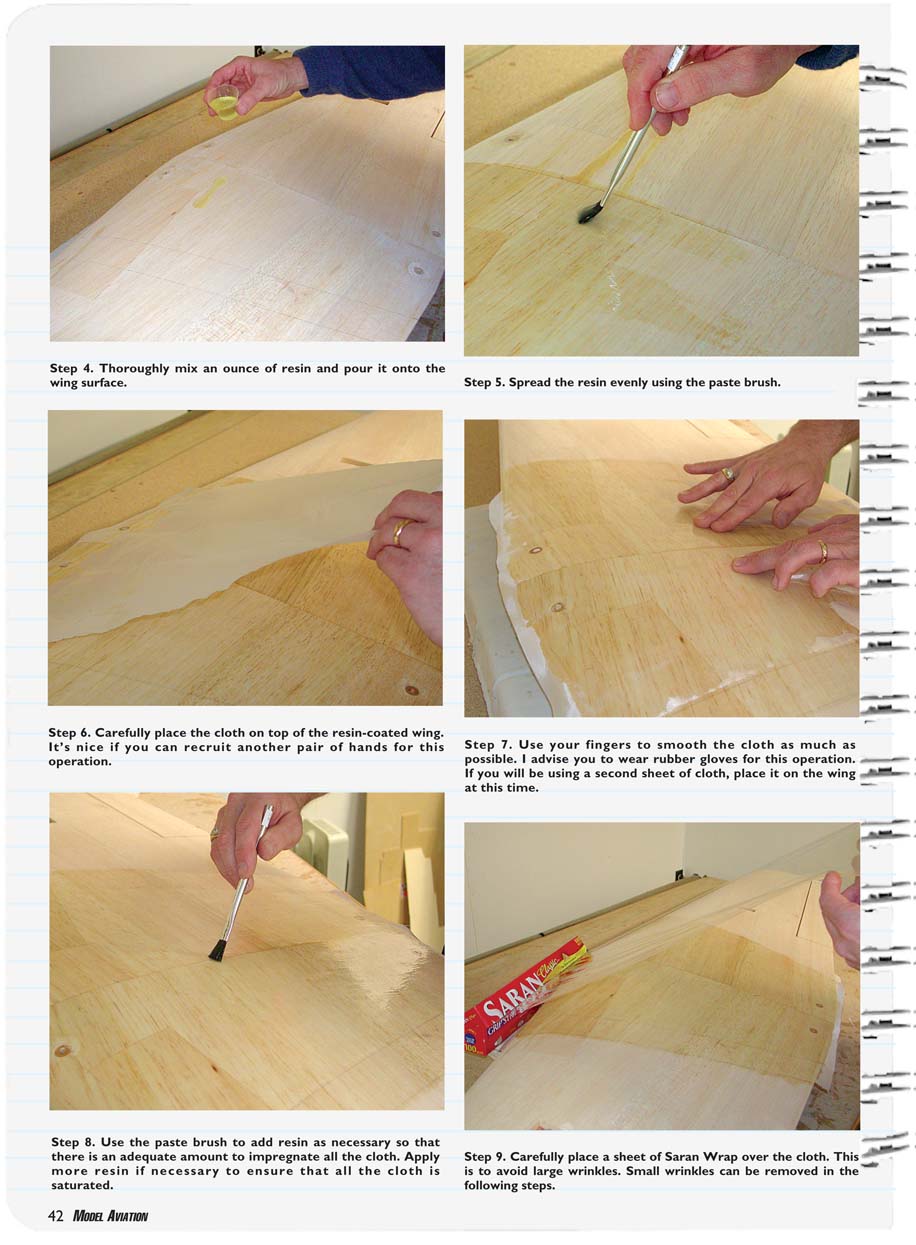
- Thoroughly mix an ounce of resin (or the appropriate amount for your area) and pour it onto the wing surface.
- Spread the resin evenly over the area using the paste brush.
- Carefully place the cloth on top of the resin-coated wing. If possible, recruit an extra pair of hands for this operation.
- Use your fingers to smooth the cloth as much as possible (wear rubber gloves). If using a second sheet of cloth, place it on the wing at this time.
- Use the paste brush to add resin as necessary so that there is an adequate amount to impregnate all the cloth. Ensure all cloth is fully saturated.
- Carefully place a sheet of Saran Wrap over the cloth to avoid large wrinkles. Small wrinkles can be removed in the following steps.
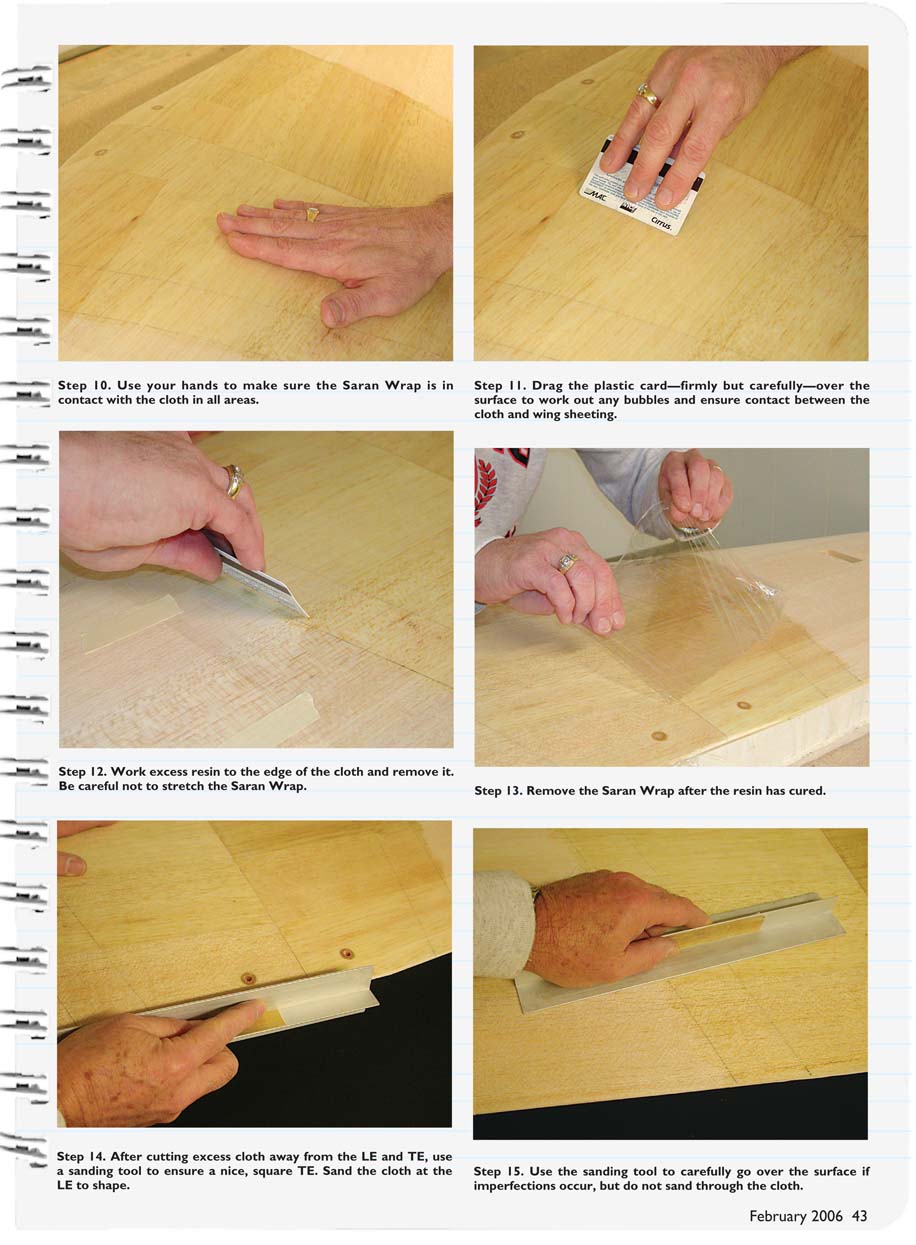
- Use your hands to make sure the Saran Wrap is in contact with the cloth in all areas.
- Drag the plastic card—firmly but carefully—over the surface to work out any bubbles and ensure contact between the cloth and wing sheeting.
- Work excess resin to the edge of the cloth and remove it. Be careful not to stretch the Saran Wrap.
- Remove the Saran Wrap after the resin has cured.
- After cutting excess cloth away from the LE and TE, use a sanding tool to ensure a nice, square TE. Sand the cloth at the LE to shape it.
- Use the sanding tool to carefully go over the surface if imperfections occur, but do not sand through the cloth.
Transcribed from original scans by AI. Minor OCR errors may remain.

