
An RC club’s flying site shelter suits a common lend/lease condition
by William E. Locke
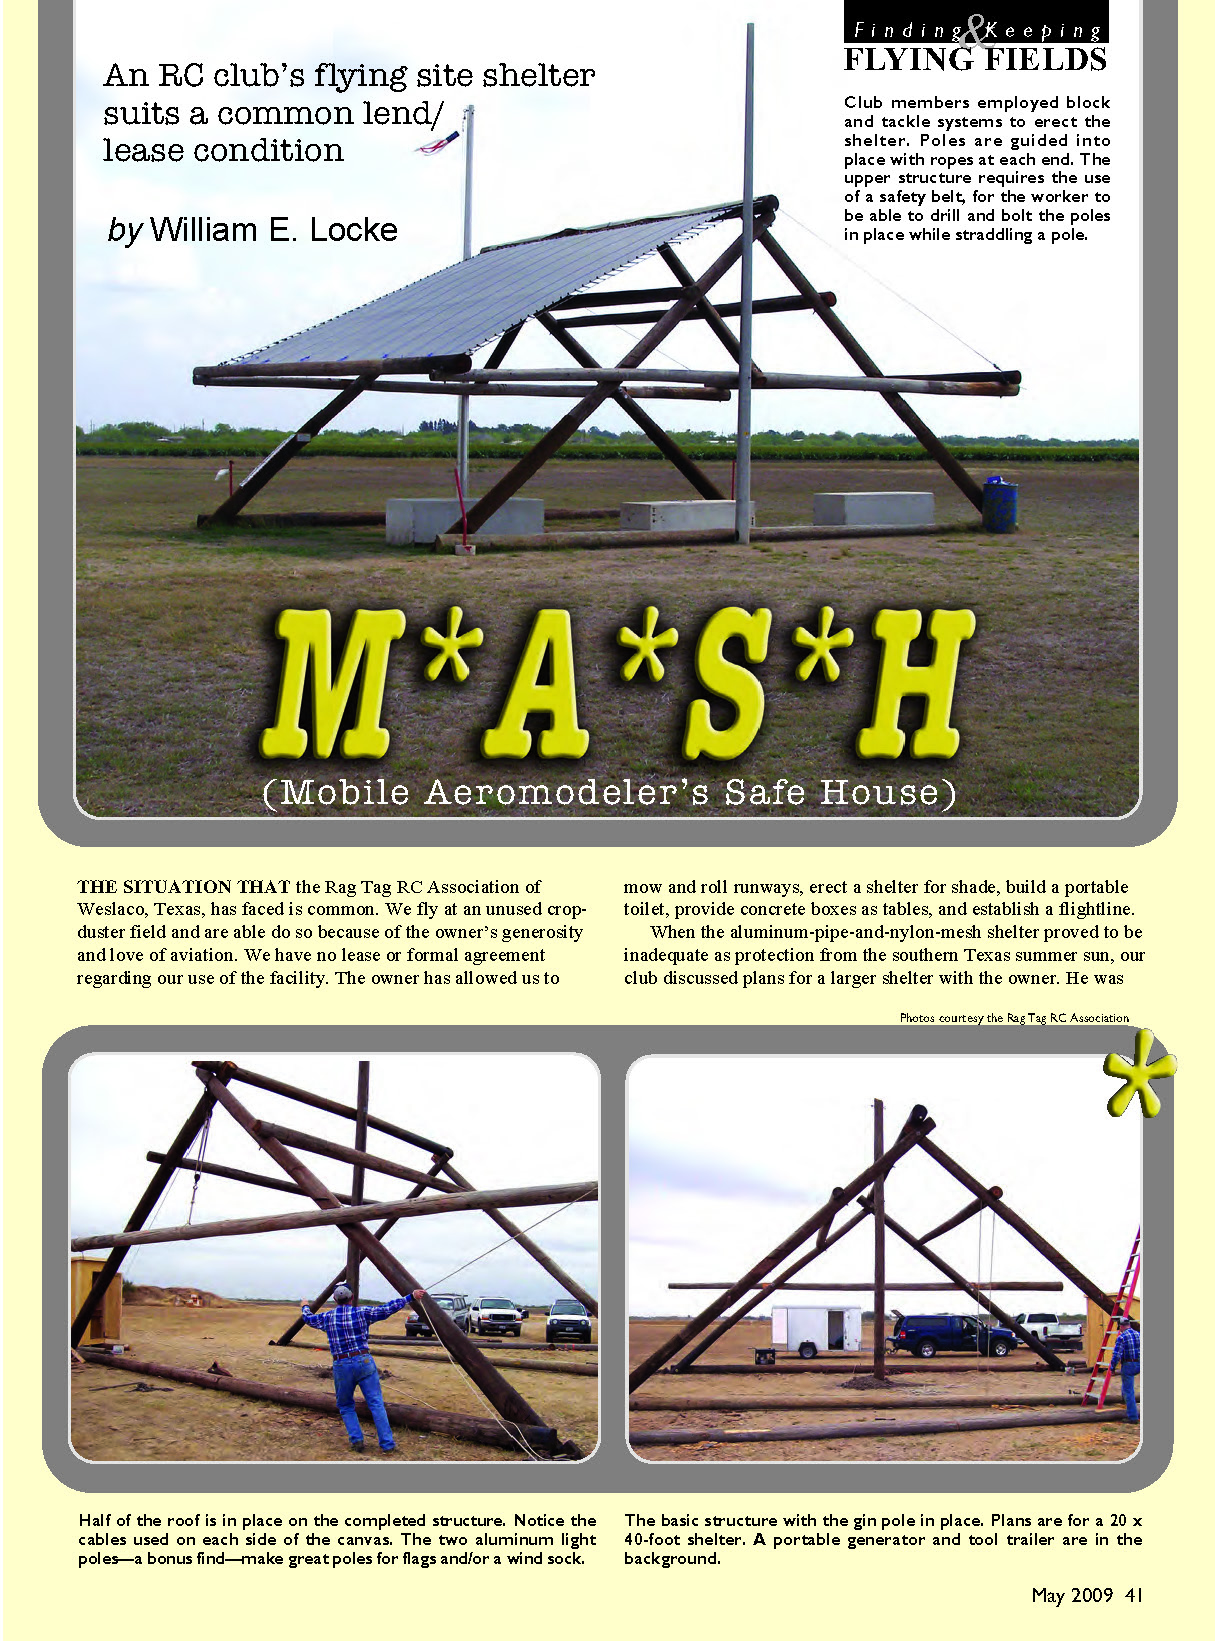
M*A*S*H (Mobile Aeromodeler’s Safe House)
The Rag Tag RC Association of Weslaco, Texas, faced a common situation. We fly at an unused crop-duster field and are able to do so because of the owner’s generosity and love of aviation. We have no lease or formal agreement regarding our use of the facility. The owner has allowed us to mow and roll runways, erect a shelter for shade, build a portable toilet, provide concrete boxes as tables, and establish a flightline.
When the aluminum-pipe-and-nylon-mesh shelter proved inadequate protection from the South Texas summer sun, our club discussed plans for a larger shelter with the owner. He was not as concerned about the size of the proposed shelter as he was about the requirement that it be temporary, so any structures placed on his land could be moved or removed if ownership changed.
A new member of our club became the architect, construction engineer, and foreman of the building project. He works for a power company and had experience using old utility poles as basic structural material for erecting a large shelter for another model aircraft club. As a model airplane builder, he made a scale representation of an A-frame–style structure. He planned to use old poles bolted together to produce a 20 x 40-foot building that would sit on the ground rather than be anchored—so it could be moved or disassembled. The concept, which the model made clear, was endorsed by the owner and the project went forward, albeit with some members’ skepticism.
Building the rig
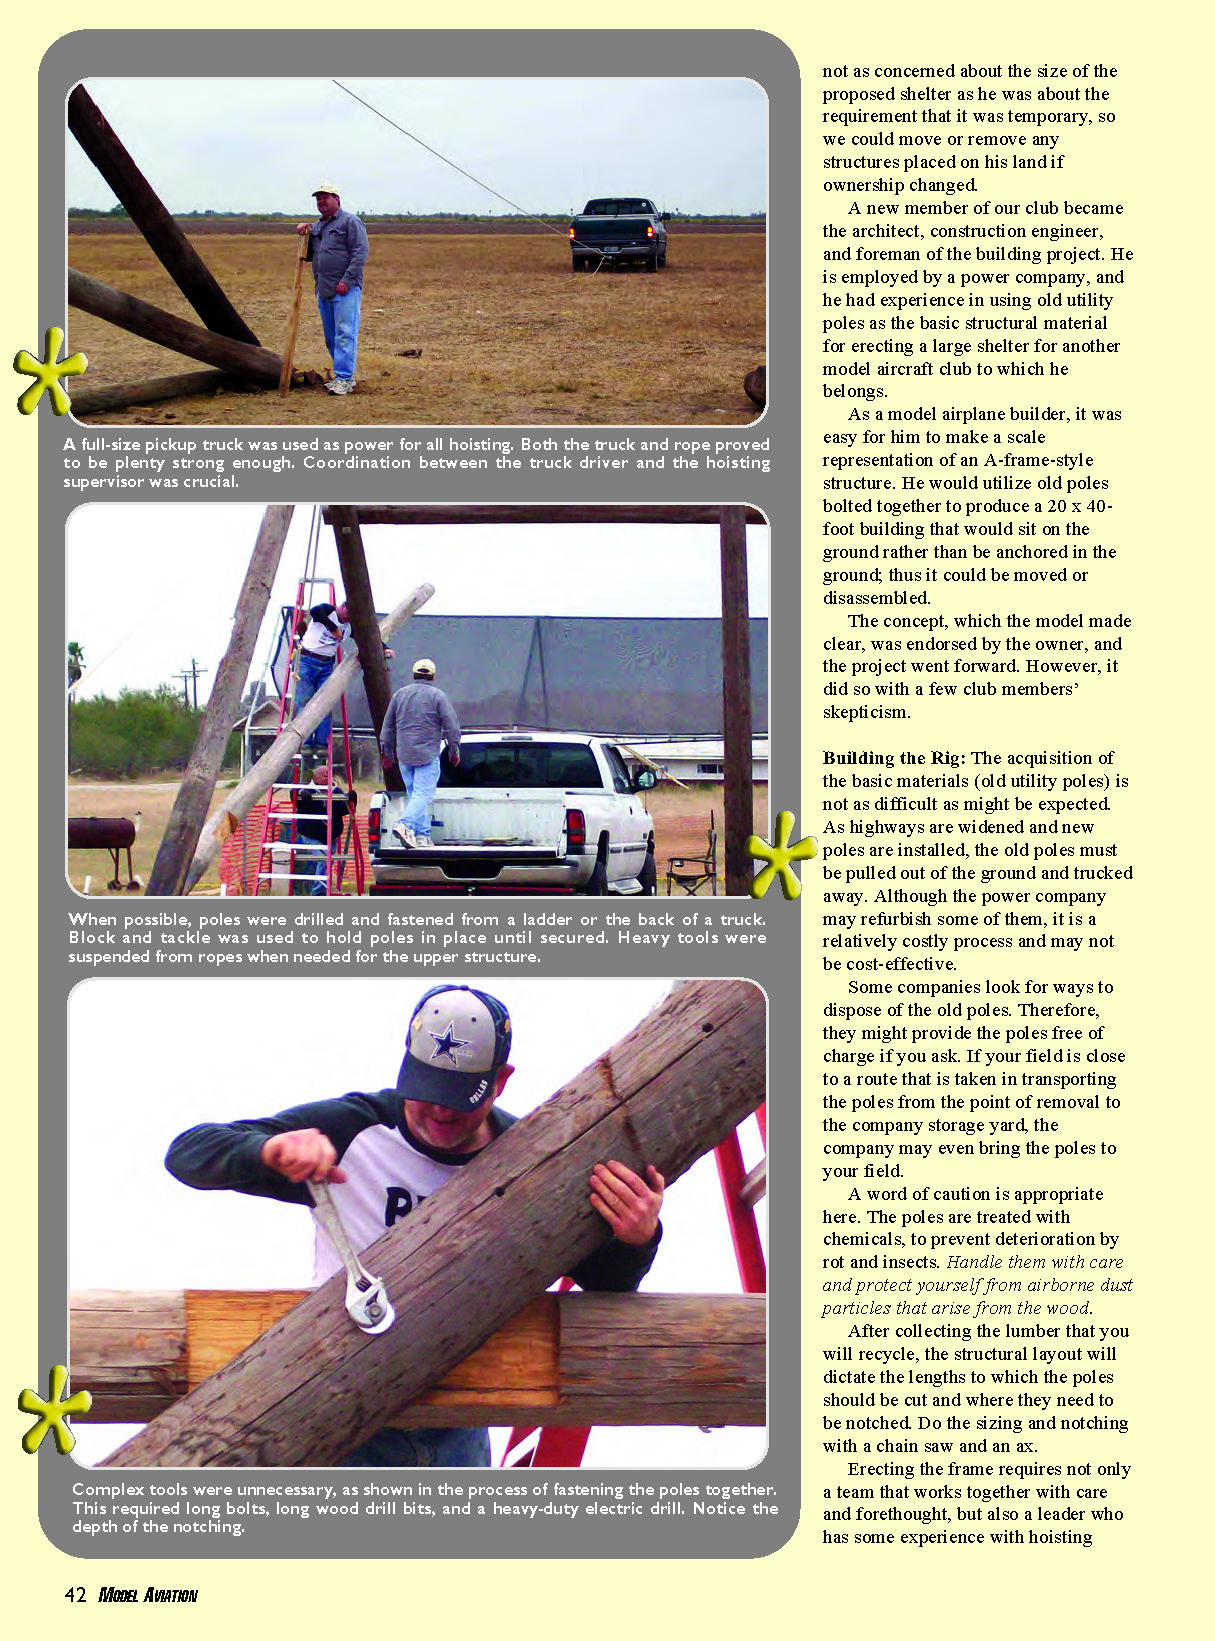
Acquiring the basic materials (old utility poles) is not as difficult as might be expected. As highways are widened and new poles are installed, the old poles are pulled and trucked away. Although power companies may refurbish some, refurbishment can be costly. Some companies look for ways to dispose of old poles and may provide them free of charge if you ask. If your field is close to a route used for transporting poles to a company storage yard, the company may even bring the poles to your field.
A word of caution: poles are treated with chemicals to prevent deterioration by rot and insects. Handle them carefully and protect yourself from airborne dust particles produced when cutting or sanding the wood.
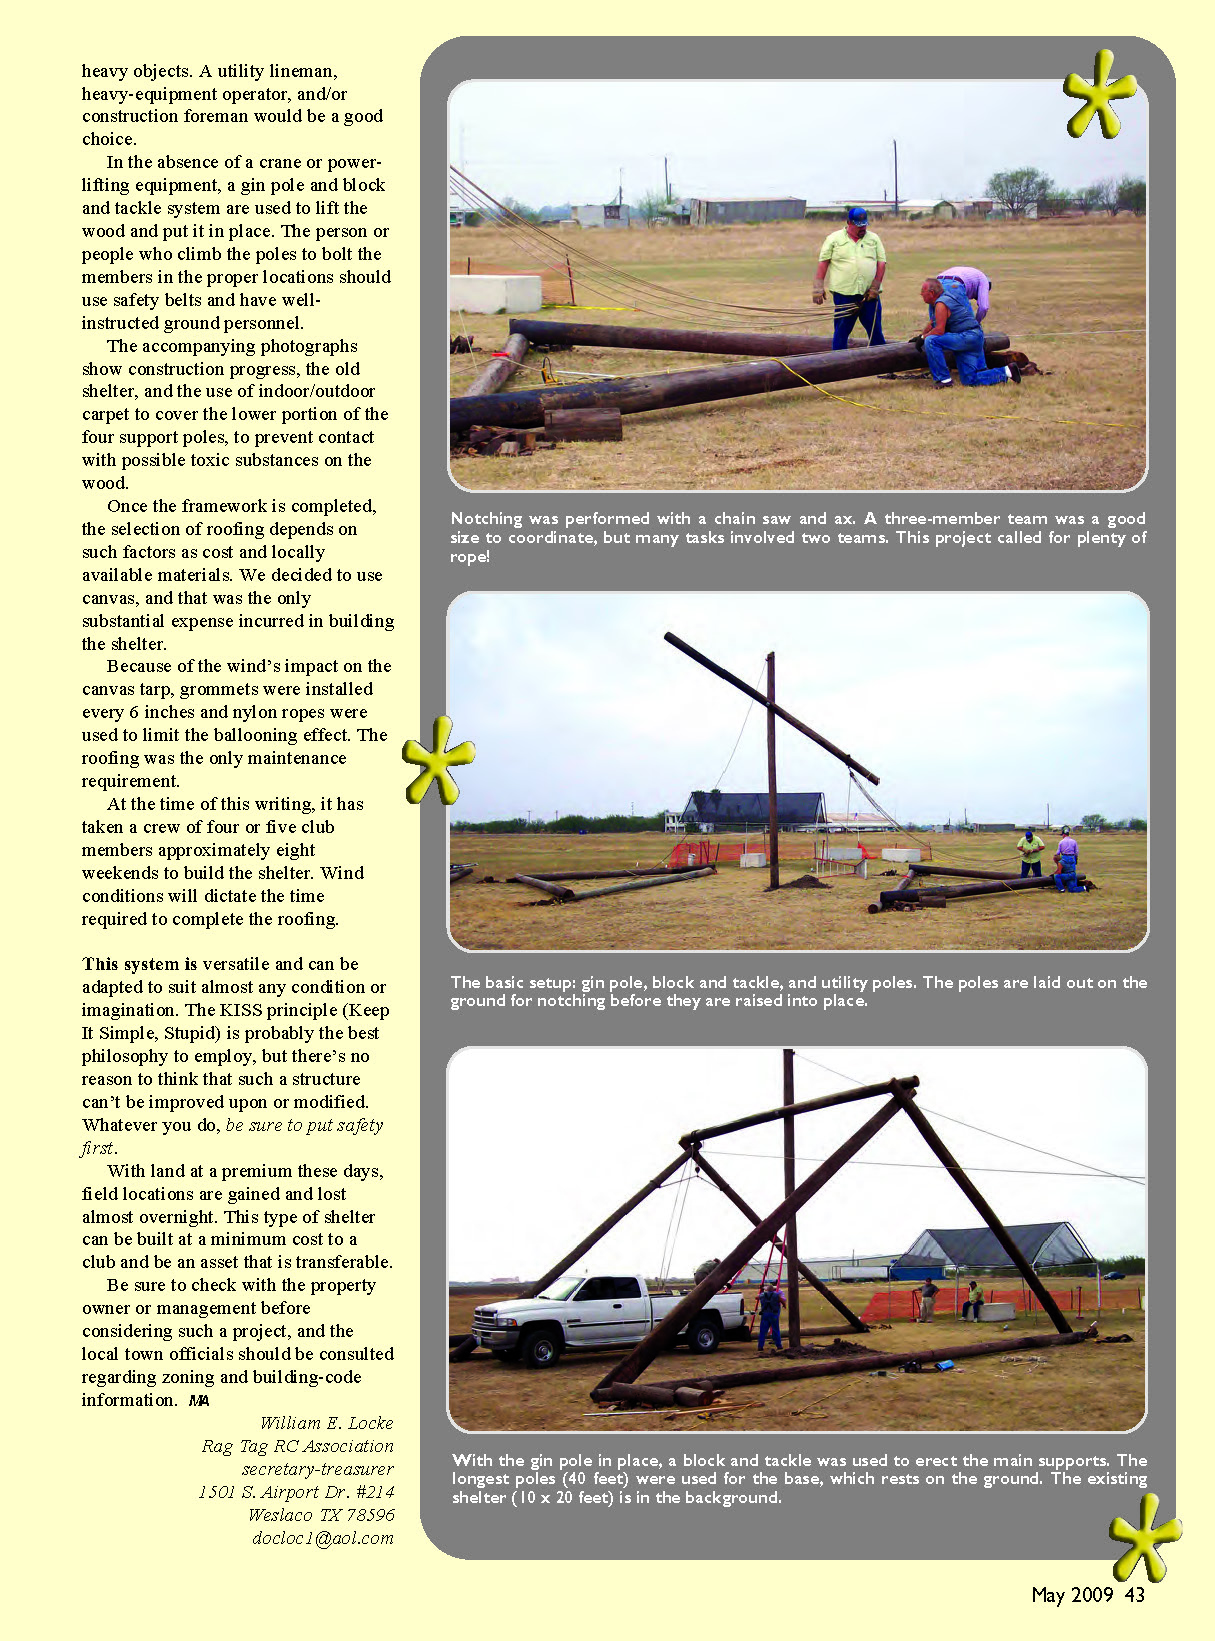
After collecting the lumber you will recycle, the structural layout dictates the lengths to which the poles should be cut and where they need to be notched. Do the sizing and notching with a chainsaw and an ax.
Erecting the frame requires a team that works together with care and forethought, and a leader who has some experience with hoisting and rigging. When possible, poles should be drilled and fastened from a ladder or the back of a truck. Block and tackle can be used to hold poles in place until secured. Heavy tools can be suspended from ropes when needed for the upper structure.
Complex tools are unnecessary. Fastening the poles together requires:
- long bolts
- long wood drill bits
- a heavy-duty electric drill
Notice the depth of the notching when fitting members together.
If you lack a crane or power-lifting equipment, use a gin pole and a block-and-tackle system to lift the wood into place. The people who climb the poles to bolt the members should use safety belts and have well-instructed ground personnel. A utility lineman, heavy-equipment operator, or construction foreman is a good choice to lead or advise the crew.
The lower portions of the four support poles were covered with indoor/outdoor carpet to prevent contact with possible toxic substances on the wood.
Roofing and finishing
Once the framework is completed, roofing selection depends on cost and locally available materials. We decided to use canvas; that was the only substantial expense incurred in building the shelter. Because of wind’s impact on the canvas tarp, grommets were installed every 6 inches and nylon ropes were used to limit ballooning. The roofing proved to be the only ongoing maintenance requirement.
At the time of this writing, a crew of four or five club members took approximately eight weekends to build the shelter. Wind conditions will dictate the time required to complete the roofing.
Practical notes and recommendations
This system is versatile and can be adapted to suit almost any condition or imagination. The KISS principle (Keep It Simple, Stupid) is probably the best philosophy to employ, but there is no reason such a structure can’t be improved or modified. Whatever you do, put safety first.
With land at a premium these days, field locations are gained and lost almost overnight. This type of shelter can be built at minimal cost to a club and be an asset that is transferable.
Be sure to check with the property owner or management before considering such a project, and consult local town officials regarding zoning and building-code information.
William E. Locke Rag Tag RC Association Secretary-Treasurer 1501 S. Airport Dr. #214 Weslaco, TX 78596 [email protected]
Transcribed from original scans by AI. Minor OCR errors may remain.

