
Flying for Fun
D.B. Mathews 909 N. Maize Rd., Townhouse 734, Wichita, KS 67212
ANOTHER TWILIGHT Zone Story:
This column has become somewhat of a "lightning rod" for "paranormal" stories about model airplanes. I've passed on some incredible experiences in this column throughout the years, but this one might rank at the top.
Warren Plohr of Ann Arbor, MI relates the following:
"I grew up in The Bronx, NYC. In the late 1930s, flying rubber-powered models in the streets, vacant lots, and small local parks was the norm. When gas engines first appeared, a larger park was needed. Van Cortland Park was the only real choice in the borough. I saw my first gas model fly from The Meadows Field in V.C.P., bounded by Broadway on one side and trees on the other.
"Those early 'gas' models were large and underpowered. It was always a guess as to whether the model would clear the ground on its first downwind turn. These heavy models were perceived as potentially dangerous to the public and were banned from flying in the park. Modelers were persistent though, and found that flying time was available after the park police went off duty at the end of the day.
"I was flying one of the newer smaller models, an Ohlsson .23-powered Megow Cadet, there in late 1939 or 1940. After many flights, I had it well-trimmed to fly left-left from its takeoff. Just one more flight—even though the only light was from Broadway in the distance. I remember a group of observers watching the takeoff, an occasional glimpse of the Cadet against the glow of the lights, the silence after the engine quit, and the surprise of a smooth landing near the starting box. I also remember the Cadet getting a round of applause.
"Now let's shift the scene forward to September, 1944. It's nighttime in a cold English Quonset hut at Halesworth. A group of B-24 combat officers of the 489th Bomb Group, who had not known each other before the war, are sitting around passing the evening together.
"Many of my war buddies were modelers. We would sit around and swap stories at night, around an old potbellied stove. One night, a story was told by one of the guys about seeing a night flight of a Megow Cadet. The storyteller was quite surprised when I announced the story was about my Cadet. The world was made a little smaller that night—thanks to model airplanes.
"I don't remember anything about the storyteller, or even his name, but we were modeler kin. I wonder if he was as lucky as I to be able to be flying models these many decades later."
Isn't this incredible? Consider the odds of two strangers sharing an experience in the huge city of New York, becoming flying officers in the Army Air Corps, being assigned to the same B-24 bomb group, and finally ending up in the same Quonset hut on one of the many airfields in England five years later.
Xerographed Model Graphics:
The modeling press has included several excellent articles in the last few years detailing how to create graphics for model airplanes using a scanner, a personal computer with a graphics card and program, and an inkjet color printer. Similar custom setup services are available from some of the larger graphics operations (at a cost) for those who lack the proper equipment, but there is also a simpler way.
We have a tendency to refer to any markings applied to models as "decals," and that isn't correct. True decals are soaked off the backing material in water, then slid on an object's surface. They are retained on that surface by molecular attraction; therefore, they do not stick well to slick surfaces.
Decals are quite thin and fragile. Sticky-backed markings, as found in almost all modern kits and available from various graphics firms, are not decals by definition.
Bill Schmidt has developed an effective and inexpensive technique for creating adhesive-backed thin Mylar™ graphics using a simple office copier. For pennies at a copy store, one can develop scale markings or other decorations with no computer equipment.
The key to this method is the fact that a copier can transfer an image, by xerography, onto clear tape. If the copied image is protected with another layer of tape, it can be adhered to the surface of a model to create a first-class graphic.
The trick is to position the tape over a test image so that the copy will line up on the tape and be removed from the underlying paper.
The steps to this method are as follows.
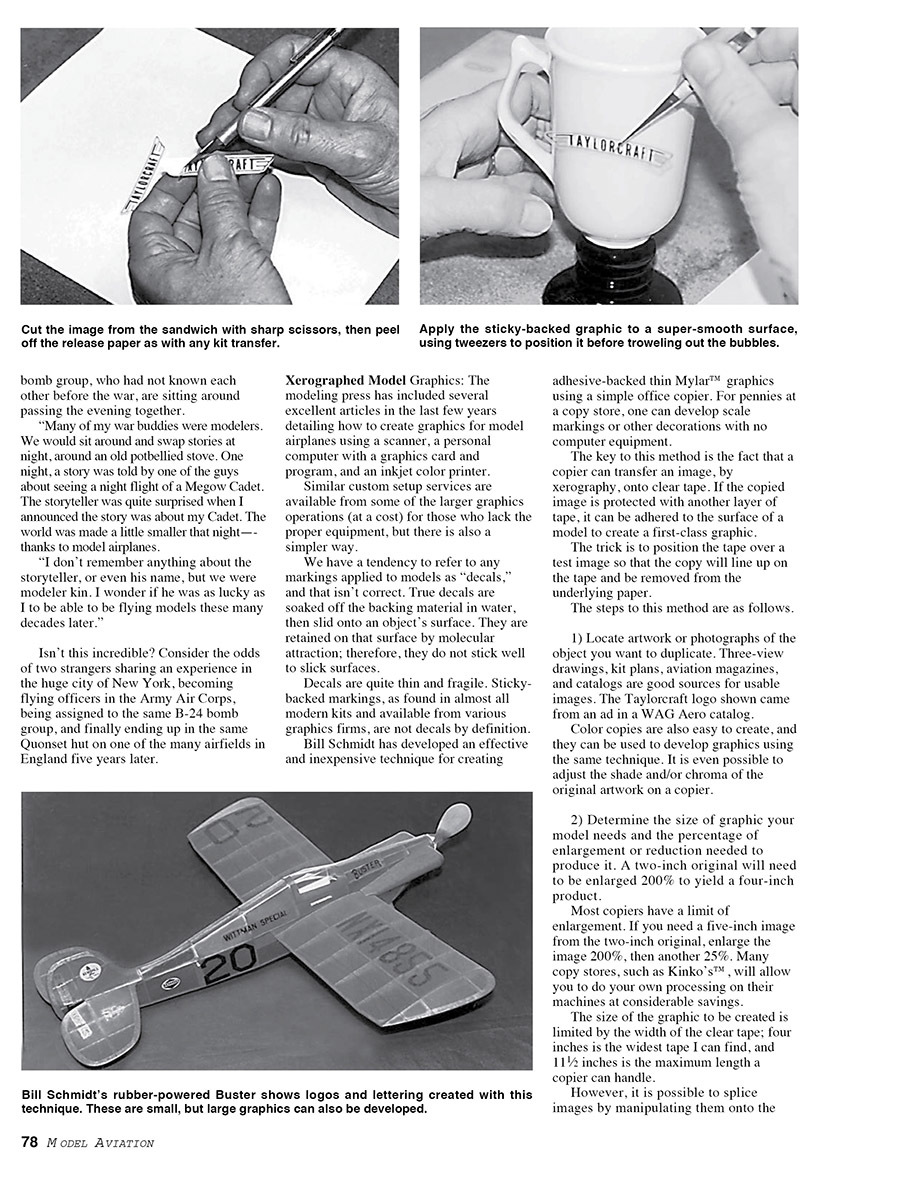
- Locate artwork or photographs of the object you want to duplicate. Three-view drawings, kit plans, aviation magazines, and catalogs are good sources for usable images. The Taylorcraft logo shown came from an ad in a WAG Aero catalog.
Color copies are also easy to create, and they can be used to develop graphics using the same technique. It is even possible to adjust the shade and/or chroma of the original artwork on a copier.
- Determine the size of graphic your model needs and the percentage of enlargement or reduction needed to produce it. A two-inch original will need to be enlarged 200% to yield a four-inch product.
Most copiers have a limit of enlargement. If you need a five-inch image from the two-inch original, enlarge the image 200%, then another 25%. Many copy stores, such as Kinko's, will allow you to do your own processing on their machines at considerable savings. The size of the graphic being created is limited by the width of the clear tape; four inches is the widest tape I can find, and 11½ inches is the maximum length a copier can handle.
However, it is possible to splice images by manipulating them onto the model or applying the second tape layer at right angles to the first.
- Place the final artwork facedown on the copier's glass plenum, and run a test copy. Centering the piece works best, since the copier's heat rollers can peel far outside edges. Do not disturb the artwork's position on the glass once you are satisfied.
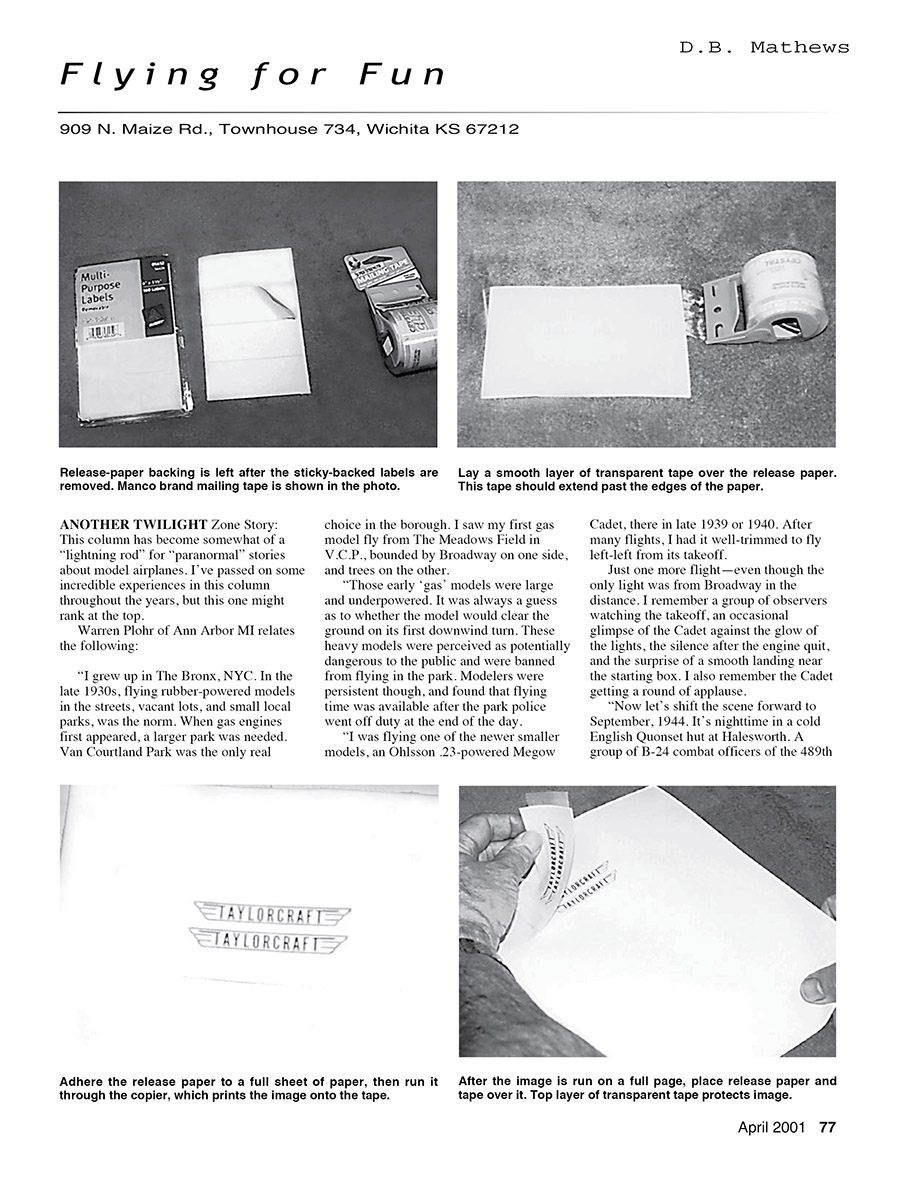
- Obtain a section of release paper, such as the backing from computer or mailing labels or Avery® multipurpose labels available at office suppliers. This release paper allows you to lift the finished image cleanly off the paper.
Waxed paper and food wrap will not work, since the xerography system uses heat to make the copies.
- Use the final test copy to position and align the release paper and tape; this relates the master artwork to the copy being made. Place a strip of clear plastic mailing tape over the release paper. Manco brand tape from Wal-Mart, etc., is fine. This tape should extend over the edges of the release paper to hold things onto the large paper sheet.
- Place the sandwiched sheet into the paper feed tray of the copier (usually upside down) and push the "copy" button. The image printed (actually xerographed) will come out onto the tape.
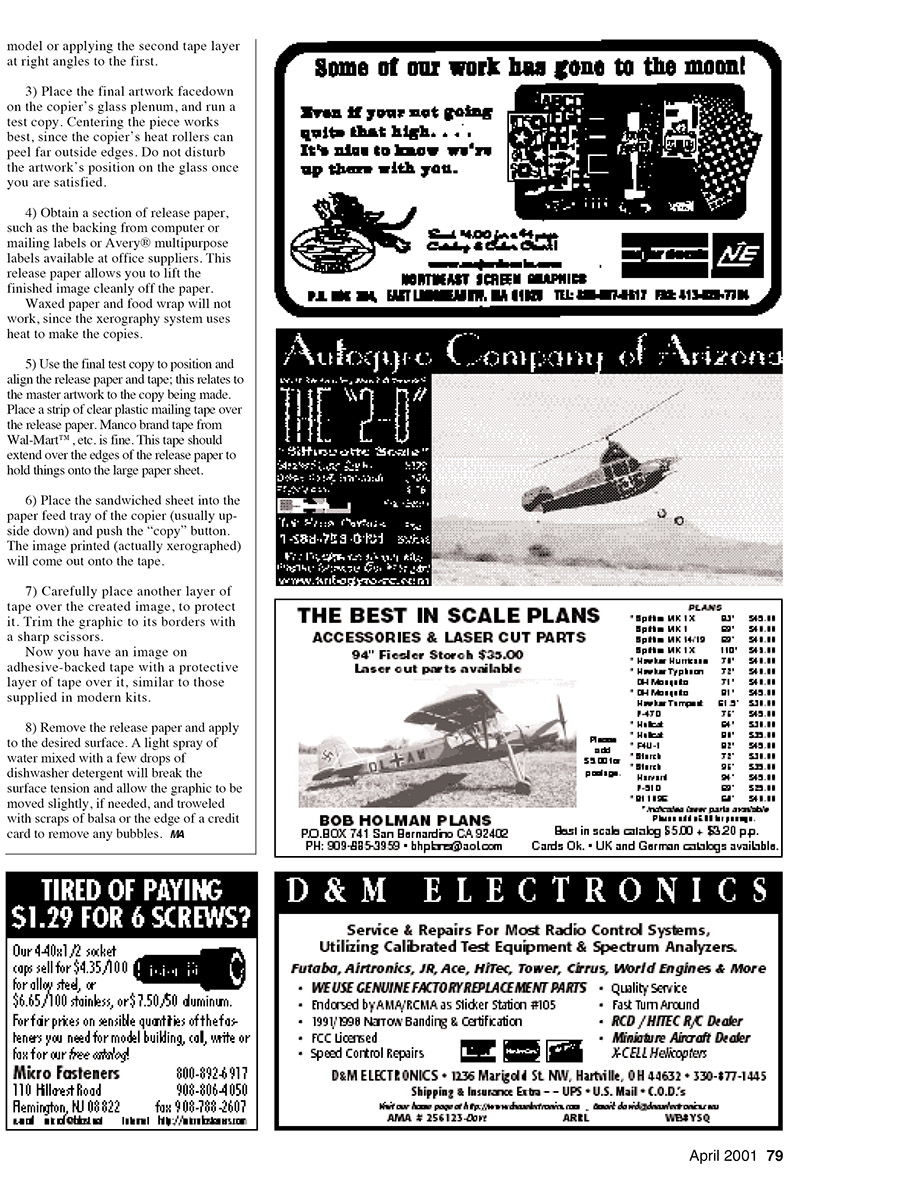
- Carefully place another layer of tape over the created image to protect it. Trim the graphic to its borders with sharp scissors.
Now you have an image on adhesive-backed tape with a protective layer of tape over it, similar to those supplied in modern kits.
- Remove the release paper and apply to the desired surface. A light spray of water mixed with a few drops of dishwasher detergent will break the surface tension and allow the graphic to be moved slightly, if needed, and troweled with scraps of balsa or the edge of a credit card to remove any bubbles.
Bill Schmidt's rubber-powered Buster shows logos and lettering created with this technique. These are small, but large graphics can also be developed.
Transcribed from original scans by AI. Minor OCR errors may remain.

