
Flying for Fun
D.B. Mathews
909 N. Maize Rd., Townhouse 734, Wichita KS 67212
An Ounce (or Less) of Prevention
I've been test-flying Jerry Nelson's Throttle Fail Safe for a while, and it works flawlessly.
I started to write a detailed description of this device's design features and applications, then I decided to get directly to the point: if anything interrupts the radio-signal connection between the transmitter and the receiver, this gadget stops the engine.
One of my most embarrassing modeling moments occurred when I landed a big model a bit long at an International Miniature Aircraft Association fly-in. I thought I'd shut the engine down and let my spotter retrieve the airplane while I turned my back, turned off the transmitter, and headed to the impound tent.
You've probably guessed the rest of the story. I won't soon forget the sight of my spotter running wildly in pursuit of the model as it merrily chugged its way to the end of the field.
Fortunately the model was not headed toward the pits, others on the flightline, or spectators. If it had been, this would not be a funny story, but a tragic one.
If I had installed a Nelson Throttle Fail Safe, the engine would have died safely when I turned off the transmitter. It would have been particularly invaluable if the model had been one of the great, large things powered by a monster engine.
That safety feature would be indispensable in a situation where someone turned on the same frequency or the radio system failed when the pilot was taxiing or landing.
Basically, the little black prewired box installs between the receiver throttle plug and the servo. It has a double-ended endpoint adjustment to set a complete shut-down in the proper direction if the signal is interrupted.
In flight, this fail-safe would slow the velocity of the crash, but obviously would not prevent it.
One gets this valuable prevention for a total weight of 0.632 ounces — worth far more than a pound of cure when compared to the hazards of an out-of-control model with an interrupted signal when it's near or on the ground.
Contact Nelson Hobby Specialties, (503) 259-8899, or your local dealer for further information.
Cardboard Models
Last month I featured Armin Lindow's cardboard PT-19.
The cardboard I am referring to is the corrugated variety used for boxes. The technique doesn't apply to the plastic-type corrugated material. The technique uses flats of the material you can purchase at one of those businesses that specializes in shipping items for the public.
This cardboard comes in grades and thicknesses; try to find 1/8-inch "C" fluted. It comes in several sizes, such as 2 x 4 feet, and is certainly less expensive than equivalent balsa or plywood.
The raw cost of materials for these models is ridiculously low; not including the hardware, the model shown has less than $15 in material.
It is impossible to use previously bent cardboard to build these models.
During a period of 22 years, Dennis Reichenberger has evolved a technique that several others in my flying group have used to create cardboard models.
Dennis has learned that carpenters' glue, such as Elmer's®, is ideal, although it has to be applied carefully; if put on too heavily, it will soak through into the outer layer and cause rippling.
Wings
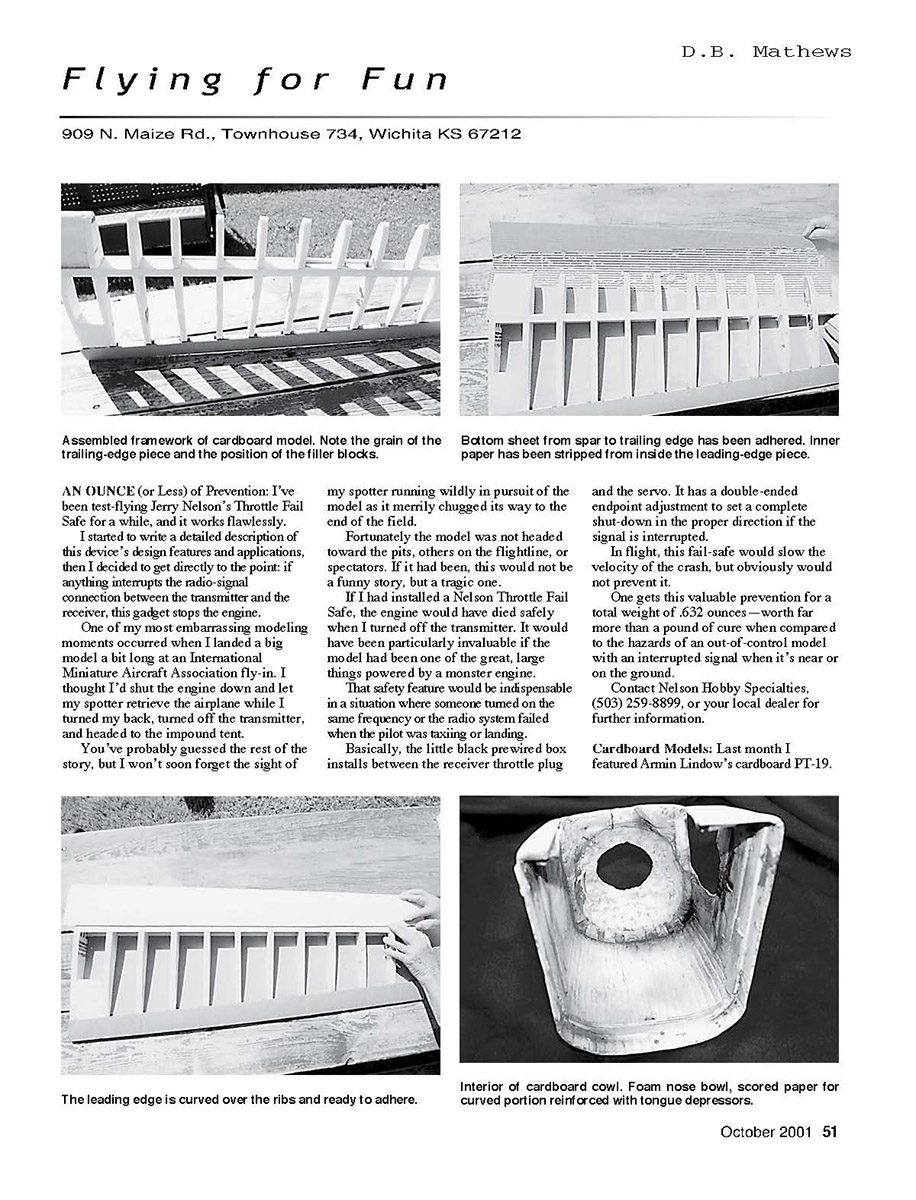
- The wings use 1/2-inch hot-wire-cut blue foam (from Wal-Mart®) ribs cut from a stack.
- Ribs for double-tapered wings are sliced from a foam stack that is taper-cut using a Formica® root rib pattern on each end of the blank. That produces ribs that are correct fore and aft and have the horizontal taper toward the tips built in so the spar notches also follow the taper.
- Dennis assembles the ribs on basswood main spars ripped from stock found at a building supply.
- Cardboard shear webs are used between the main spars and between the folded trailing edge. The corrugations are chordwise on this piece.
- Some scrap foam is inset at the center-section leading edge to support the wing dowels, and at the trailing edge for the wing bolts.
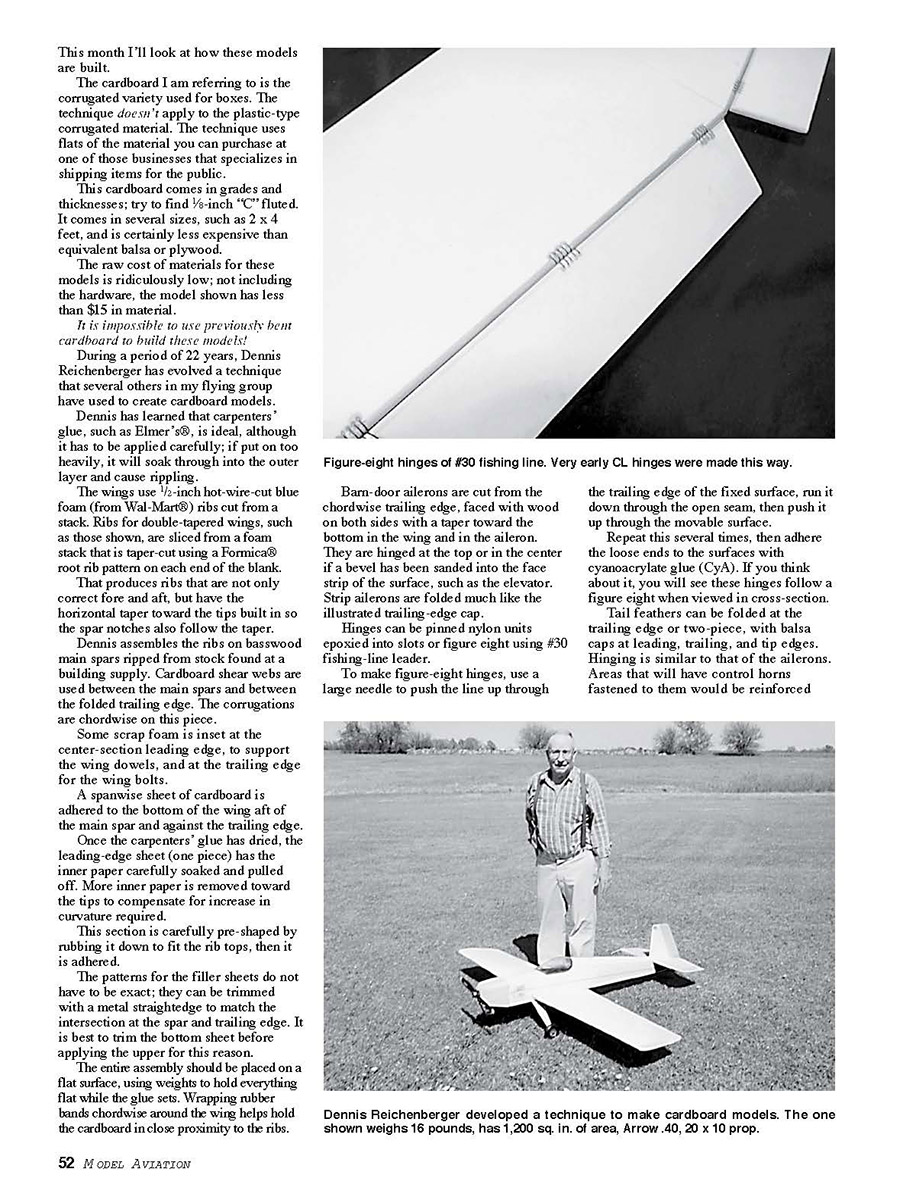
- A spanwise sheet of cardboard is adhered to the bottom of the wing aft of the main spar and against the trailing edge.
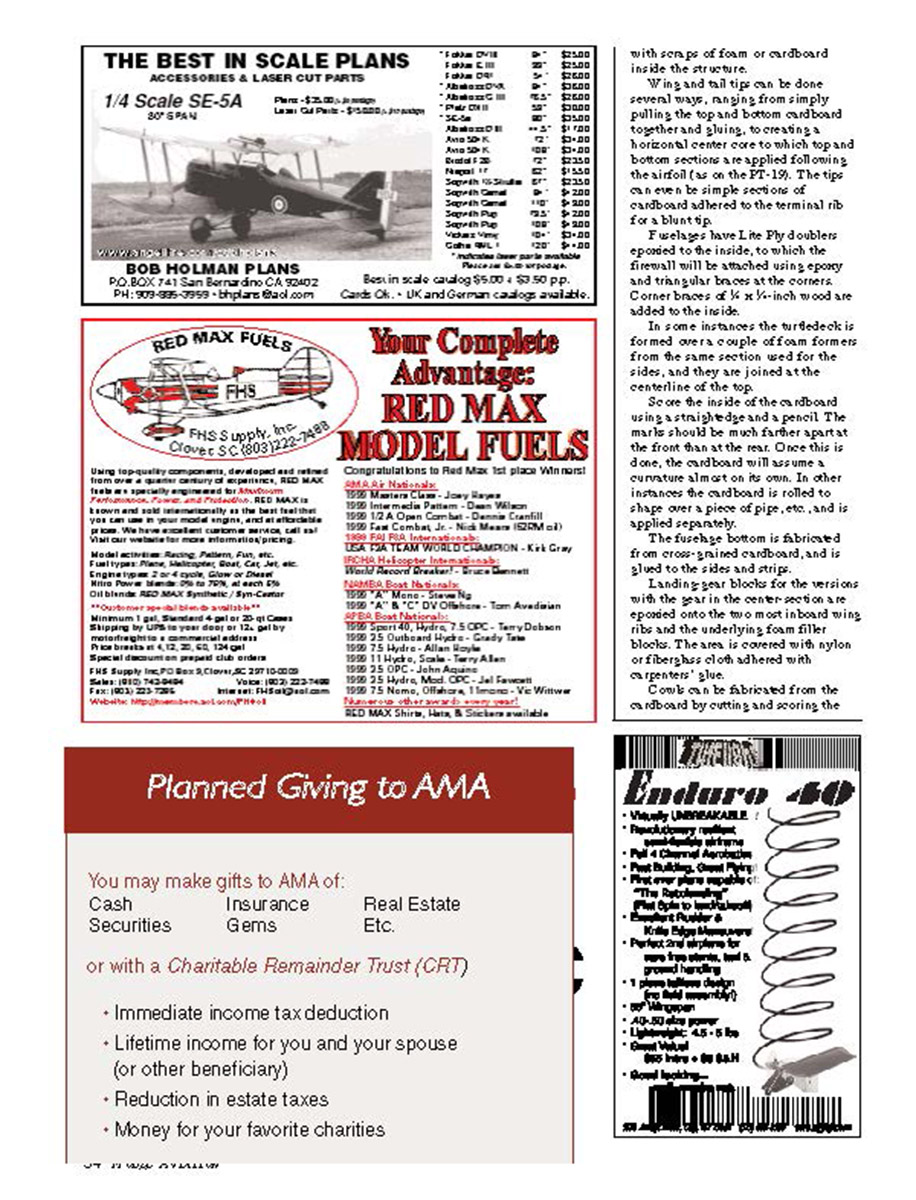
Once the carpenters' glue has dried, the leading-edge sheet (one piece) has the inner paper carefully soaked and pulled off. More inner paper is removed toward the tips to compensate for the increase in curvature required.
This section is carefully pre-shaped by rubbing it down to fit the rib tops, then it is adhered.
The patterns for the filler sheets do not have to be exact; they can be trimmed with a metal straightedge to match the intersection at the spar and trailing edge. It is best to trim the bottom sheet before applying the upper for this reason.
The entire assembly should be placed on a flat surface, using weights to hold everything flat while the glue sets. Wrapping rubber bands chordwise around the wing helps hold the cardboard in close proximity to the ribs.
Ailerons and Hinges
- Barn-door ailerons are cut from the chordwise trailing edge, faced with wood on both sides with a taper toward the bottom in the wing and in the aileron. They are hinged at the top or in the center if a bevel has been sanded into the face strip of the surface, such as the elevator.
- Strip ailerons are folded much like the trailing-edge cap.
- Hinges can be pinned nylon units epoxied into slots or figure-eight using #30 fishing-line leader.
To make figure-eight hinges:
- Use a large needle to push the line up through the trailing edge of the fixed surface.
- Run it down through the open seam, then push it up through the movable surface.
- Repeat this several times, then adhere the loose ends to the surfaces with cyanoacrylate glue (CyA).
If you think about it, you will see these hinges follow a figure eight when viewed in cross-section.
Tail Surfaces
- Tail feathers can be folded at the trailing edge or made two-piece, with balsa caps at leading, trailing, and tip edges.
- Hinging is similar to that of the ailerons.
- Areas that will have control horns fastened to them should be reinforced.
Dennis Reichenberger developed a technique to make cardboard models. The one shown weighs 16 pounds, has 1,200 sq. in. of area, Arrow .40, 20 x 10 prop, with scraps of foam or cardboard inside the structure.
Wings and tail tips can be done several ways, ranging from simply pulling the top and bottom cardboard together and gluing, to creating a horizontal center core to which top and bottom sections are applied following the airfoil (as on the PT-19). The tips can even be a simple section of cardboard adhered to the terminal rib for a blunt tip.
Fuselage
- Fuselages have Lite Ply doublers epoxied to the inside, to which the firewall will be attached using epoxy and triangular braces at the corners.
- Corner braces of 1/8 x 1/8-inch wood are added to the inside.
- In some instances the turtledeck is formed over a couple of foam formers from the same section used for the sides, and they are joined at the centerline at the top.
Score the inside of the cardboard using a straightedge and a pencil. The mark should be much farther apart at the front than at the rear. Once this is done, the cardboard will assume a curvature almost on its own. In other instances the cardboard is rolled to shape over a piece of pipe, etc., and applied separately.
The fuselage box is fabricated from cross-grained cardboard and is glued to the sides and strip.
Landing gear blocks for versions with the gear in the center section are epoxied onto the two most inboard wing ribs and the underlying foam filler blocks. The area is covered with nylon or fiberglass cloth adhered with carpenters' glue.
Cowl and Nose
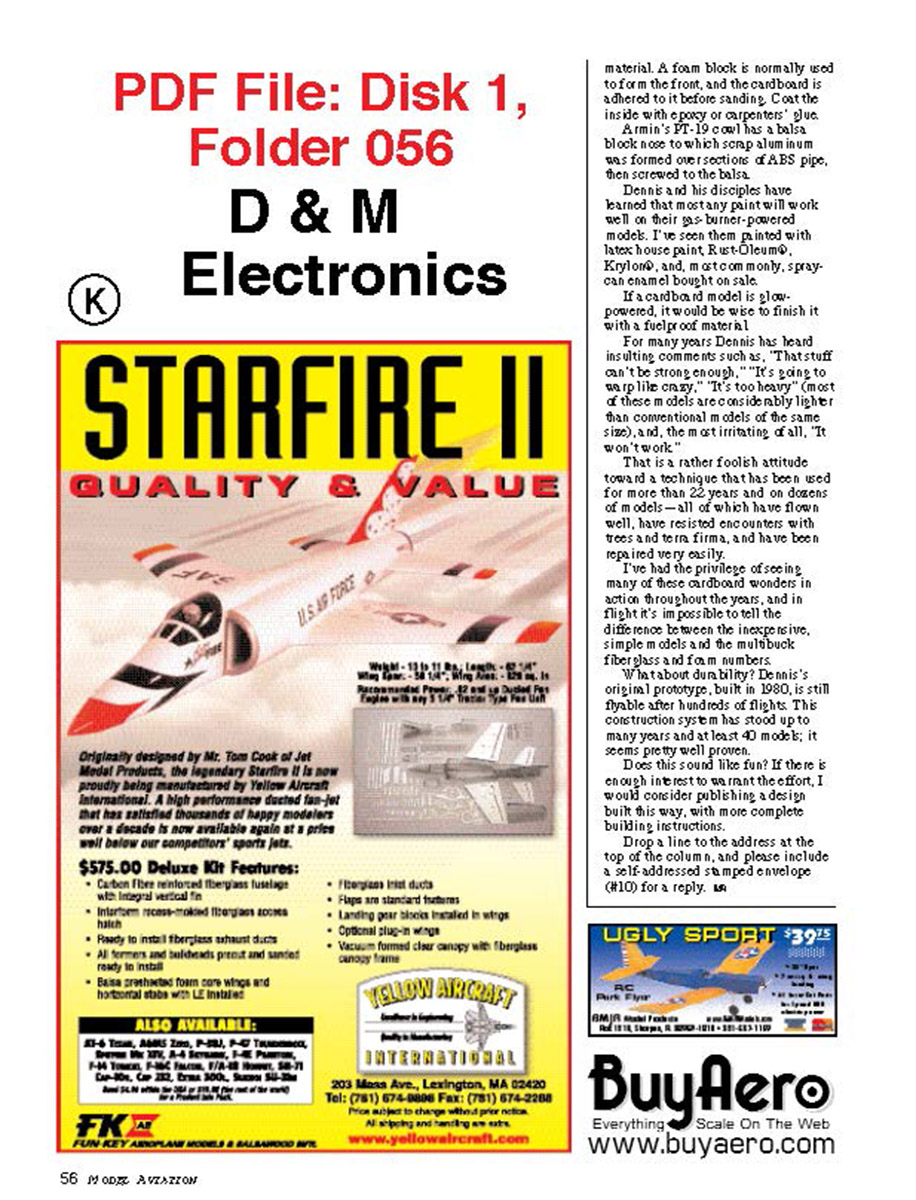
- The cowl can be fabricated from the cardboard by cutting and scoring the material. A foam block is normally used to form the front, and the cardboard is adhered to it before sanding. Coat the inside with epoxy or carpenters' glue.
- Armin's PT-19 cowl has a balsa block nose to which scrap aluminum was formed over sections of ABS pipe, then screwed to the balsa.
Finishes and Durability
Dennis and his disciples have learned that most any paint will work well on their gas-burner-powered models. I've seen them painted with latex house paint, Rust-Oleum®, Krylon®, and, most commonly, spray-can enamel bought on sale.
If a cardboard model is glow-powered, it would be wise to finish it with a fuelproof material.
For many years Dennis has heard insulting comments such as:
- "That stuff can't be strong enough."
- "It's going to warp like crazy."
- "It's too heavy" (most of these models are considerably lighter than conventional models of the same size).
- "It won't work."
That is a rather foolish attitude toward a technique that has been used for more than 22 years and on dozens of models — all of which have flown well, have resisted encounters with trees and terra firma, and have been repaired very easily.
I've had the privilege of seeing many of these cardboard wonders in action throughout the years, and in flight it's impossible to tell the difference between the inexpensive, simple models and the multibuck fiberglass and foam numbers.
What about durability? Dennis's original prototype, built in 1980, is still flyable after hundreds of flights. This construction system has stood up to many years and at least 40 models; it seems pretty well proven.
Does this sound like fun? If there is enough interest to warrant the effort, I would consider publishing a design built this way, with more complete building instructions.
Drop a line to the address at the top of the column, and please include a self-addressed stamped envelope ($1.00) for a reply. LS
Transcribed from original scans by AI. Minor OCR errors may remain.

