
FLYZONE HADRON
Google the word "Hadron" without adding the filtering name "Flyzone" and the search query will return page after page of scientific information about subatomic particles, a large linear accelerator, and similar data. When my favorite delivery person dropped a Hadron on my front porch, the box was anything but subatomic in size!
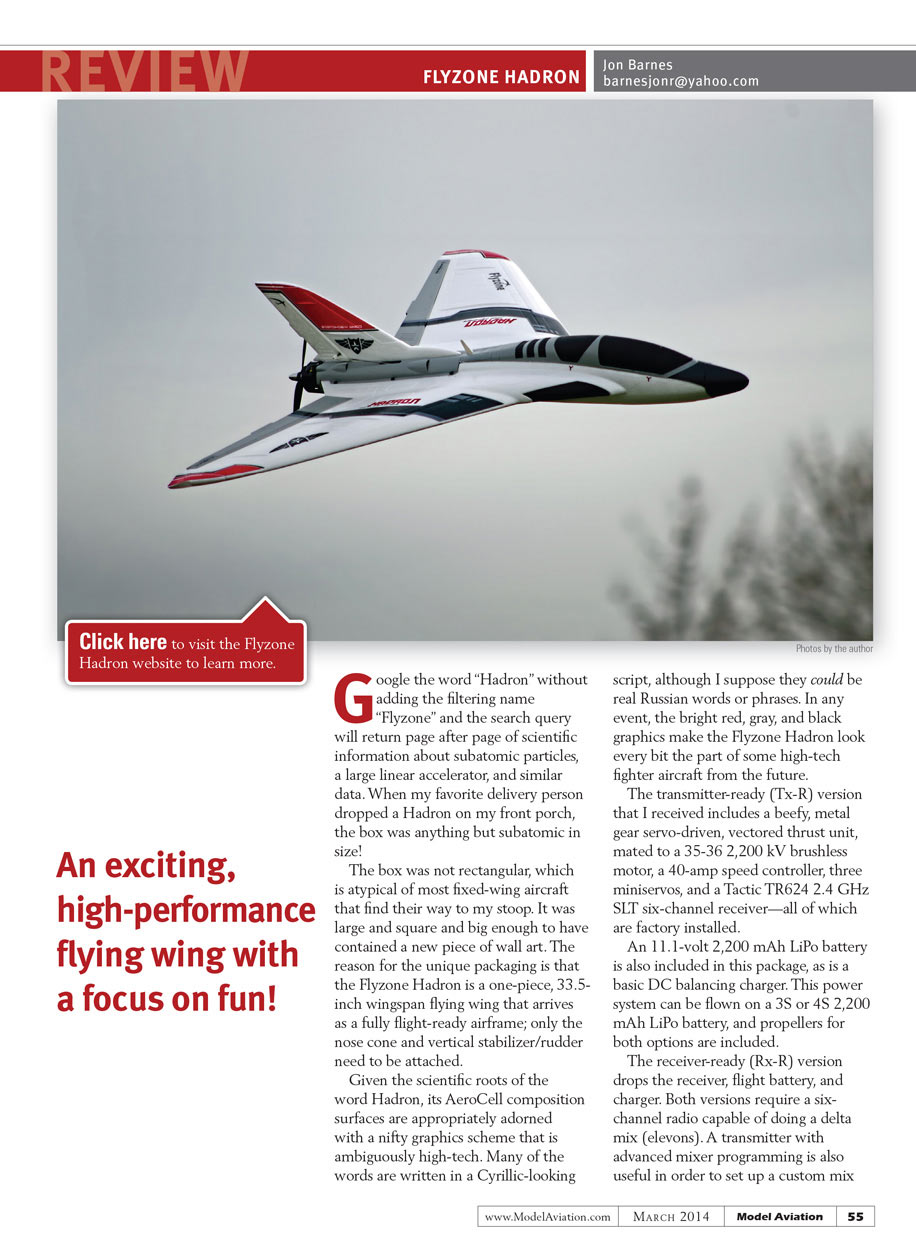
The box was not rectangular, which is atypical of most fixed-wing aircraft that find their way to my stoop. It was large and square and big enough to have contained a new piece of wall art. The reason for the unique packaging is that the Flyzone Hadron is a one-piece, 33.5-inch-wingspan flying wing that arrives as a fully flight-ready airframe; only the nose cone and vertical stabilizer/rudder need to be attached.
Given the scientific roots of the word Hadron, its AeroCell-composition surfaces are appropriately adorned with a nifty graphics scheme that is ambiguously high-tech. Many of the words are written in a Cyrillic-looking script, although I suppose they could be real Russian words or phrases. In any event, the bright red, gray, and black graphics make the Flyzone Hadron look every bit the part of some high-tech fighter aircraft from the future.
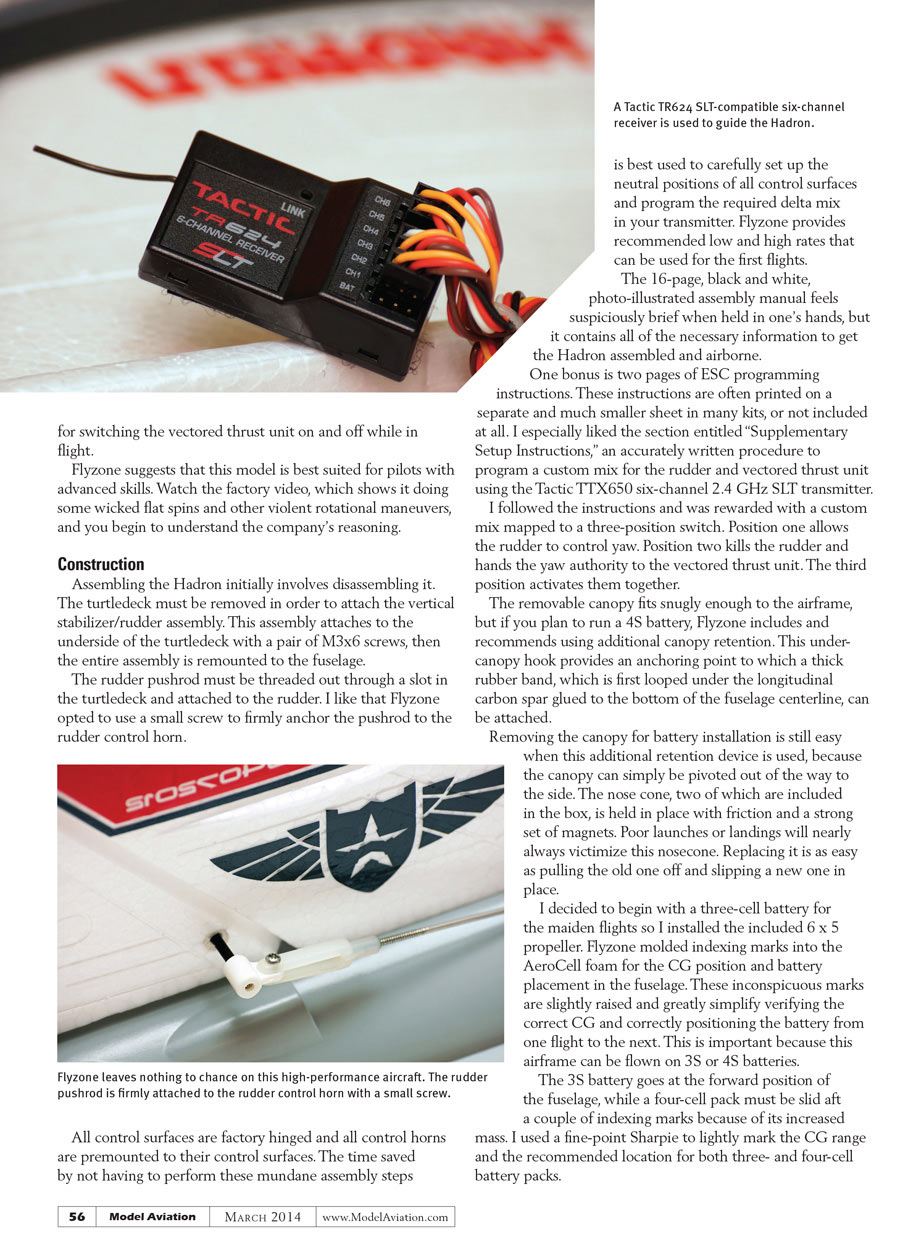
The transmitter-ready (Tx-R) version that I received includes a beefy metal-gear servo-driven vectored-thrust unit mated to a 35-36 2,200 kV brushless motor, a 40-amp speed controller, three mini servos, and a Tactic TR624 2.4 GHz SLT six-channel receiver—all of which are factory installed.
An 11.1-volt 2,200 mAh LiPo battery is also included in this package, as is a basic DC balancing charger. This power system can conveniently be flown on either a 3S or 4S 2,200 mAh LiPo battery, and propellers for both options are included.
The receiver-ready (Rx-R) version drops the receiver, flight battery, and charger. Both versions require a six-channel radio capable of doing a delta mix (elevons). A transmitter with advanced mixer programming is also useful in order to set up a custom mix for switching the vectored-thrust unit on and off while in flight. Flyzone suggests that this model is best suited for pilots with advanced skills. Watch the factory video, which shows it doing some wicked flat spins and other violent rotational maneuvers, and you begin to understand the company’s reasoning.
Construction
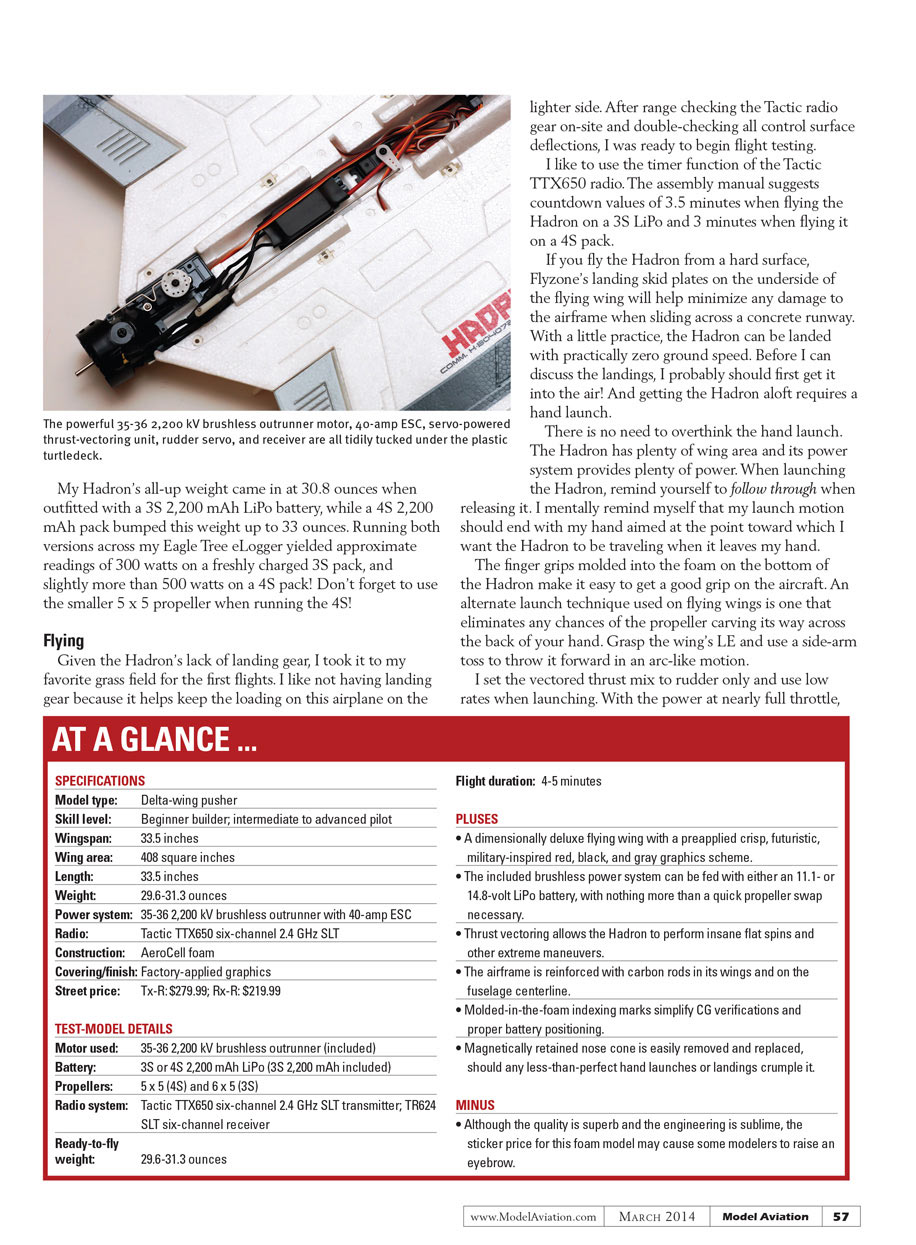
Assembling the Hadron initially involves disassembling the Hadron. The turtledeck must be removed in order to attach the vertical stabilizer/rudder assembly. This assembly attaches to the underside of the turtledeck with a pair of M3x6 screws; then the entire assembly is remounted to the fuselage. The rudder pushrod must be threaded out through a slot in the turtledeck and attached to the rudder. I like that Flyzone opted to use a small screw to firmly anchor the pushrod to the rudder control horn.
All control surfaces are factory-hinged and all control horns are premounted to their control surfaces. The time saved by not having to perform these mundane assembly steps is best used to carefully set up the neutral positions of all control surfaces and program the required delta mix in your transmitter. Flyzone provides recommended low and high rates that can be used for the first flights.
The 16-page, black-and-white, photo-illustrated assembly manual feels suspiciously brief when held in one’s hands, but it contains all of the necessary information to get the Hadron assembled and airborne. One bonus is two pages’ worth of ESC programming instructions. These instructions are often printed on a separate and much smaller sheet in many kits, or not included at all.
I especially liked the section entitled "Supplementary Setup Instructions," an accurately written procedure to program a custom mix for the rudder and vectored-thrust unit using the Tactic TTX650 six-channel 2.4 GHz SLT transmitter. I followed the instructions and was rewarded with a custom mix mapped to a three-position switch. Position one allows the rudder to control yaw. Position two kills the rudder and hands yaw authority to the vectored-thrust unit. The third position activates them together.
The removable canopy fits snugly enough to the airframe, but if you plan to run a 4S battery, Flyzone includes and recommends using additional canopy retention. This under-canopy hook provides an anchoring point to which a thick rubber band—first looped under the longitudinal carbon spar glued to the bottom of the fuselage centerline—can be attached.
Removing the canopy for battery installation is still easy when this additional retention device is used because the canopy can simply be pivoted out of the way to the side. The nose cone, two of which are included in the box, is held in place with friction and a strong set of magnets. Poor launches or landings will nearly always victimize this nose cone. Replacing it is as easy as pulling the old one off and slipping a new one in place.
I decided to begin with a three-cell battery for the maiden flights, so I installed the included 6 x 5 propeller. Flyzone molded indexing marks into the AeroCell foam for the CG position and battery placement in the fuselage. These inconspicuous marks are slightly raised and greatly simplify verifying the correct CG and correctly positioning the battery from one flight to the next. This is important because this airframe can be flown on 3S or 4S batteries.
The 3S battery goes at the forward position of the fuselage, while a four-cell pack must be slid aft a couple of indexing marks because of its increased mass. I used a fine-point Sharpie to lightly mark the CG range and the recommended location for both three- and four-cell battery packs.
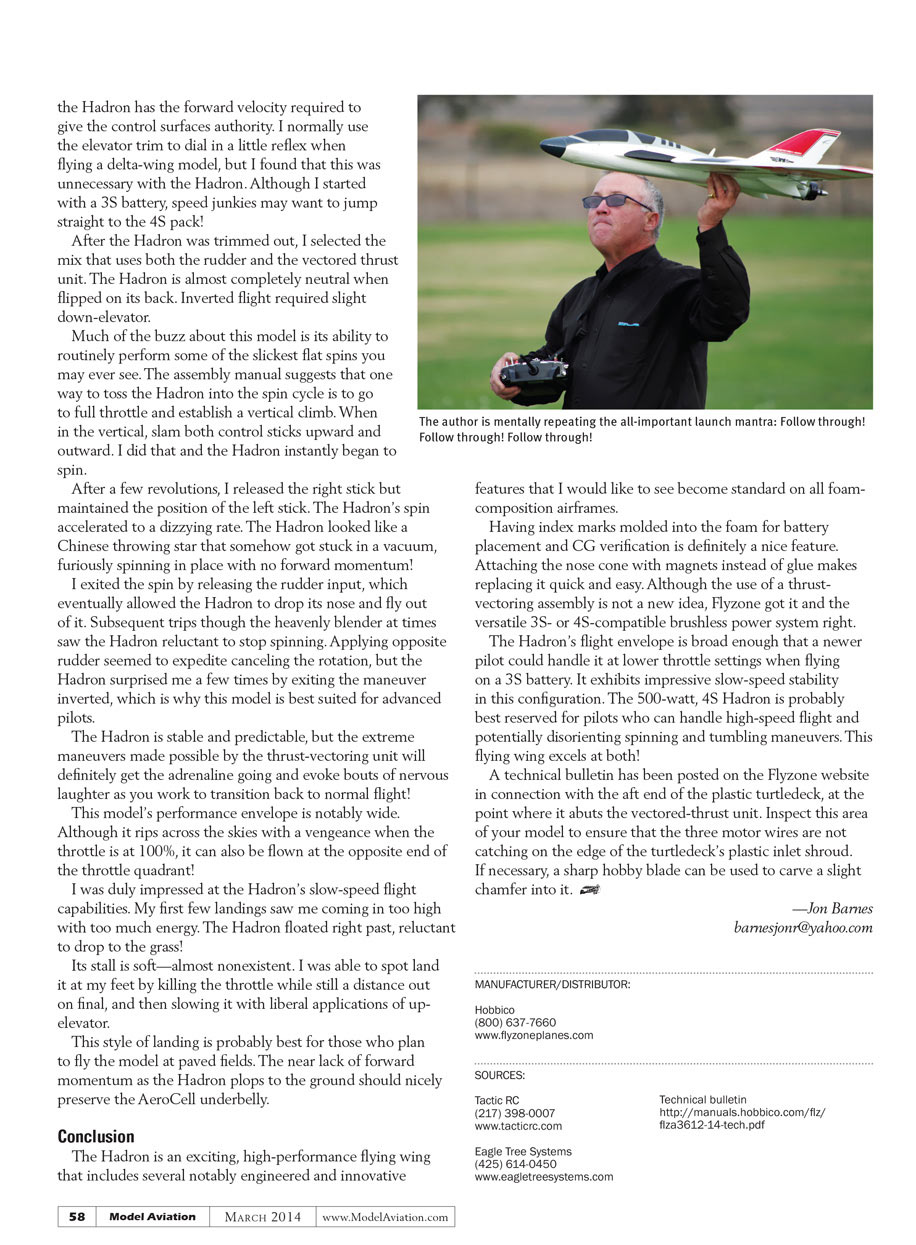
My Hadron's all-up weight came in at 30.8 ounces when outfitted with a 3S 2,200 mAh LiPo battery, while a 4S 2,200 mAh pack bumped this weight up to 33 ounces. Running both versions across my Eagle Tree eLogger yielded approximate readings of 300 watts on a freshly charged 3S pack, and slightly more than 500 watts on a 4S pack. Don't forget to use the smaller 5 x 5 propeller when running the 4S!
Flying
Given the Hadron's lack of landing gear, I took it to my favorite grass field for the first flights. I like not having landing gear because it helps keep the loading on this airplane on the lighter side. After range-checking the Tactic radio gear on-site and double-checking all control surface deflections, I was ready to begin flight testing.
I like to use the timer function of the Tactic TTX650 radio. The assembly manual suggests countdown values of 3.5 minutes when flying the Hadron on a 3S LiPo and 3 minutes when flying it on a 4S pack.
If you fly the Hadron from a hard surface, Flyzone's landing skid plates on the underside of the flying wing will help minimize any damage to the airframe when sliding across a concrete runway. With a little practice, the Hadron can be landed with practically zero ground speed. Before I can discuss the landings, I probably should first get it into the air! And getting the Hadron aloft requires a hand launch.
There is no need to overthink the hand launch. The Hadron has plenty of wing area and its power system provides plenty of thrust. When launching the Hadron, remind yourself to follow through when releasing it. I mentally remind myself that my launch motion should end with my hand aimed at the point toward which I want the Hadron to be traveling when it leaves my hand.
The finger grips molded into the foam on the bottom of the Hadron make it easy to get a good grip on the aircraft. An alternate launch technique used on flying wings eliminates any chances of the propeller carving its way across the back of your hand: grasp the wing's leading edge and use a side-arm toss to throw it forward in an arc-like motion.
I set the vectored-thrust mix to rudder-only and use low rates when launching. With the power at nearly full throttle, the Hadron has the forward velocity required to give the control surfaces authority. I normally use the elevator trim to dial in a little reflex when flying a delta-wing model, but I found that this was unnecessary with the Hadron. Although I started with a 3S battery, speed junkies may want to jump straight to the 4S pack.
After the Hadron was trimmed out, I selected the mix that uses both the rudder and the vectored-thrust unit. The Hadron is almost completely neutral when flipped on its back. Inverted flight required slight down-elevator.
Much of the buzz about this model is its ability to routinely perform some of the slickest flat spins you may ever see. The assembly manual suggests that one way to toss the Hadron into the spin cycle is to go to full throttle and establish a vertical climb. When in the vertical, slam both control sticks upward and outward. I did that and the Hadron instantly began to spin.
After a few revolutions, I released the right stick but maintained the position of the left stick. The Hadron's spin accelerated to a dizzying rate. The Hadron looked like a Chinese throwing star that somehow got stuck in a vacuum, furiously spinning in place with no forward momentum!
I exited the spin by releasing the rudder input, which eventually allowed the Hadron to drop its nose and fly out of it. Subsequent trips through the heavenly blender at times saw the Hadron reluctant to stop spinning. Applying opposite rudder seemed to expedite canceling the rotation, but the Hadron surprised me a few times by exiting the maneuver inverted, which is why this model is best suited for advanced pilots.
The Hadron is stable and predictable, but the extreme maneuvers made possible by the thrust-vectoring unit will definitely get the adrenaline going and evoke bouts of nervous laughter as you work to transition back to normal flight!
This model's performance envelope is notably wide. Although it rips across the skies with a vengeance when the throttle is at 100%, it can also be flown at the opposite end of the throttle quadrant.
I was duly impressed at the Hadron's slow-speed flight capabilities. My first few landings saw me coming in too high with too much energy. The Hadron floated right past, reluctant to drop to the grass!
Its stall is soft—almost nonexistent. I was able to spot land it at my feet by killing the throttle while still a distance out on final, and then slowing it with liberal applications of up-elevator.
This style of landing is probably best for those who plan to fly the model at paved fields. The near lack of forward momentum as the Hadron plops to the ground should nicely preserve the AeroCell underbelly.
AT A GLANCE ...
SPECIFICATIONS
- Model type: Delta-wing pusher
- Skill level: Beginner builder; intermediate to advanced pilot
- Wingspan: 33.5 inches
- Wing area: 408 square inches
- Length: 33.5 inches
- Weight: 29.6–31.3 ounces
- Power system: 35-36 2,200 kV brushless outrunner with 40-amp ESC
- Radio: Tactic TTX650 six-channel 2.4 GHz SLT
- Construction: AeroCell foam
- Covering/finish: Factory-applied graphics
- Street price: Tx-R: $279.99; Rx-R: $219.99
TEST-MODEL DETAILS
- Motor used: 35-36 2,200 kV brushless outrunner (included)
- Battery: 3S or 4S 2,200 mAh LiPo (3S 2,200 mAh included)
- Propellers: 5 x 5 (4S) and 6 x 5 (3S)
- Radio system: Tactic TTX650 six-channel 2.4 GHz SLT transmitter; TR624 SLT six-channel receiver
- Ready-to-fly weight: 29.6–31.3 ounces
- Flight duration: 4–5 minutes
PLUSES
- A dimensionally deluxe flying wing with a preapplied crisp, futuristic, military-inspired red, black, and gray graphics scheme.
- The included brushless power system can be fed with either an 11.1- or 14.8-volt LiPo battery, with nothing more than a quick propeller swap necessary.
- Thrust vectoring allows the Hadron to perform insane flat spins and other extreme maneuvers.
- The airframe is reinforced with carbon rods in its wings and on the fuselage centerline.
- Molded-in-the-foam indexing marks simplify CG verifications and proper battery positioning.
- Magnetically retained nose cone is easily removed and replaced should any less-than-perfect hand launches or landings crumple it.
MINUS
- Although the quality is superb and the engineering is sublime, the sticker price for this foam model may cause some modelers to raise an eyebrow.
Conclusion
The Hadron is an exciting, high-performance flying wing that includes several notably engineered and innovative features that I would like to see become standard on all foam-composition airframes.
Having index marks molded into the foam for battery placement and CG verification is definitely a nice feature. Attaching the nose cone with magnets instead of glue makes replacing it quick and easy. Although the use of a thrust-vectoring assembly is not a new idea, Flyzone got it and the versatile 3S- or 4S-compatible brushless power system right.
The Hadron's flight envelope is broad enough that a newer pilot could handle it at lower throttle settings when flying on a 3S battery. It exhibits impressive slow-speed stability in this configuration. The 500-watt, 4S Hadron is probably best reserved for pilots who can handle high-speed flight and potentially disorienting spinning and tumbling maneuvers. This flying wing excels at both!
A technical bulletin has been posted on the Flyzone website in connection with the aft end of the plastic turtledeck, at the point where it abuts the vectored-thrust unit. Inspect this area of your model to ensure that the three motor wires are not catching on the edge of the turtledeck's plastic inlet shroud. If necessary, a sharp hobby blade can be used to carve a slight chamfer into it.
— Jon Barnes [email protected]
MANUFACTURER/DISTRIBUTOR
- Hobbico
- (800) 637-7660
- www.flyzoneplanes.com
SOURCES
- Tactic RC — (217) 398-0007 — www.tacticrc.com
- Technical bulletin — http://manuals.hobbico.com/flz/flza3612-14-tech.pdf
- Eagle Tree Systems — (425) 614-0450 — www.eagletreesystems.com
Transcribed from original scans by AI. Minor OCR errors may remain.

