
Focus on Education
Jack Frost AMA Education Coordinator Tel.: (765) 287-1256 Ext. 274 [email protected]
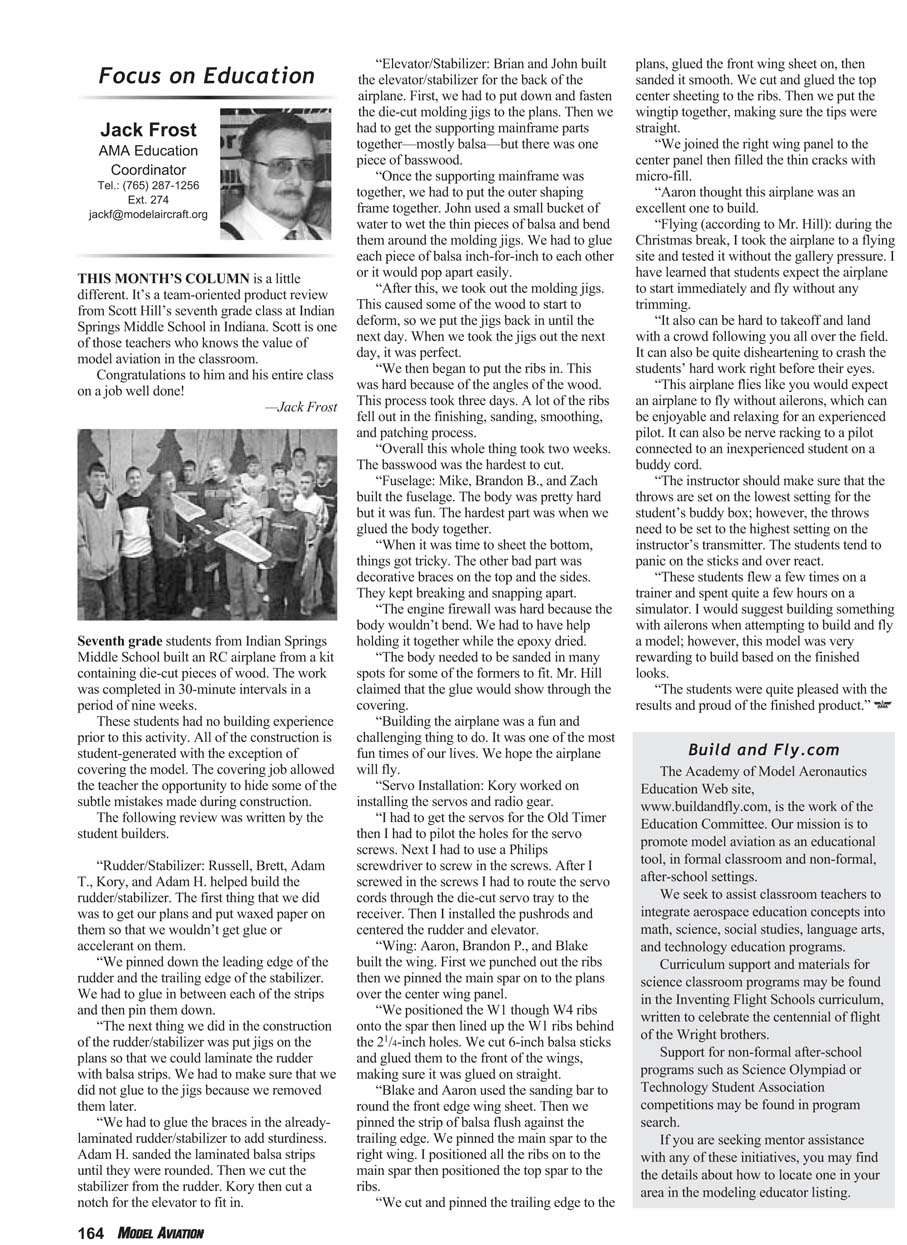
This month's column is a little different. It's a team-oriented product review from Scott Hill's seventh-grade class at Indian Springs Middle School in Indiana. Scott is one of those teachers who knows the value of model aviation in the classroom. Congratulations to him and his entire class on a job well done! —Jack Frost
These students had no building experience prior to this activity. All of the construction is student-generated with the exception of covering the model. The covering job allowed the teacher the opportunity to hide some of the subtle mistakes made during construction.
Rudder and Stabilizer
Builders: Russell, Brett, Adam T., Kory, and Adam H.
- First we got our plans and put waxed paper on them so we wouldn't get glue or accelerator on them.
- We pinned down the leading edge of the rudder and the trailing edge of the stabilizer.
- We glued in between each of the strips and pinned them down.
- Next we put jigs on the plans so we could laminate the rudder with balsa strips. We had to be careful not to glue to the jigs because we removed them later.
- We glued the braces into the already-laminated rudder and stabilizer to add sturdiness.
- Adam H. sanded the laminated balsa strips until they were rounded.
- Then we cut the stabilizer from the rudder. Kory cut a notch for the elevator to fit in.
Elevator and Stabilizer
Builders: Brian and John
- We fastened the die-cut molding jigs to the plans.
- We assembled the supporting mainframe parts—mostly balsa, with one piece of basswood.
- We assembled the outer shaping frame. John used a small bucket of water to wet the thin pieces of balsa and bend them around the molding jigs.
- We glued each piece of balsa inch for inch to each other so the laminate would hold.
- We removed the molding jigs, but some wood started to deform, so we put the jigs back in until the next day. When we removed them the next day, the part was perfect.
- We then began to install the ribs. This was difficult because of the angles of the wood, and the process took three days. Many ribs fell out during finishing, sanding, smoothing, and patching.
- Overall this whole section took two weeks. The basswood was the hardest to cut.
Fuselage
Builders: Mike, Brandon B., and Zach
- Building the body was pretty hard but fun. The hardest part was gluing the body together.
- When it was time to sheet the bottom, things got tricky.
- Decorative braces on the top and the sides kept breaking and snapping apart.
- The engine firewall was difficult because the body wouldn't bend; we needed help holding it together while the epoxy dried.
- The body needed sanding in many spots for some of the formers to fit. Mr. Hill warned that glue would show through the covering.
- Building the airplane was fun and challenging. It was one of the most enjoyable times of our lives. We hope the airplane will fly.
Servo Installation
Builder: Kory
- I got the servos for the Old-Timer and drilled the pilot holes for the servo screws.
- I used a Phillips screwdriver to install the screws.
- I routed the servo cords through the die-cut servo tray to the receiver.
- Then I installed the pushrods and centered the rudder and elevator.
Wing
Builders: Aaron, Brandon P., and Blake
- First we punched out the ribs, pinned the plans, glued the front wing sheeting on, then sanded it smooth.
- We cut and glued the top center sheeting to the ribs.
- We assembled the wingtip, making sure the tips were straight.
- We joined the right wing panel to the center panel and filled thin cracks with micro-fill.
- Aaron thought this airplane was an excellent one to build.
Flying (according to Mr. Hill)
- During the Christmas break, I took the airplane to a flying site and test-flew it without the pressure of an audience. I have learned that students expect the airplane to start immediately and fly without any trimming.
- It can be hard to take off and land with a crowd following you all over the field. It can also be disheartening to crash the students' hard work right before their eyes.
- This airplane flies like you would expect an airplane to fly without ailerons, which can be enjoyable and relaxing for an experienced pilot. It can also be nerve-racking to a pilot connected to an inexperienced student on the buddy cord.
- The instructor should make sure the throws are set on the lowest setting for the student's buddy box; however, the throws need to be set to the highest setting on the instructor's transmitter. Students tend to panic on the sticks and overreact.
- These students flew a few times on a trainer and spent quite a few hours on a simulator. I would suggest building something with ailerons when attempting to build and fly a model; however, this model was very rewarding to build based on the finished looks.
- The students were quite pleased with the results and proud of the finished product.
Transcribed from original scans by AI. Minor OCR errors may remain.

