
FPG-9
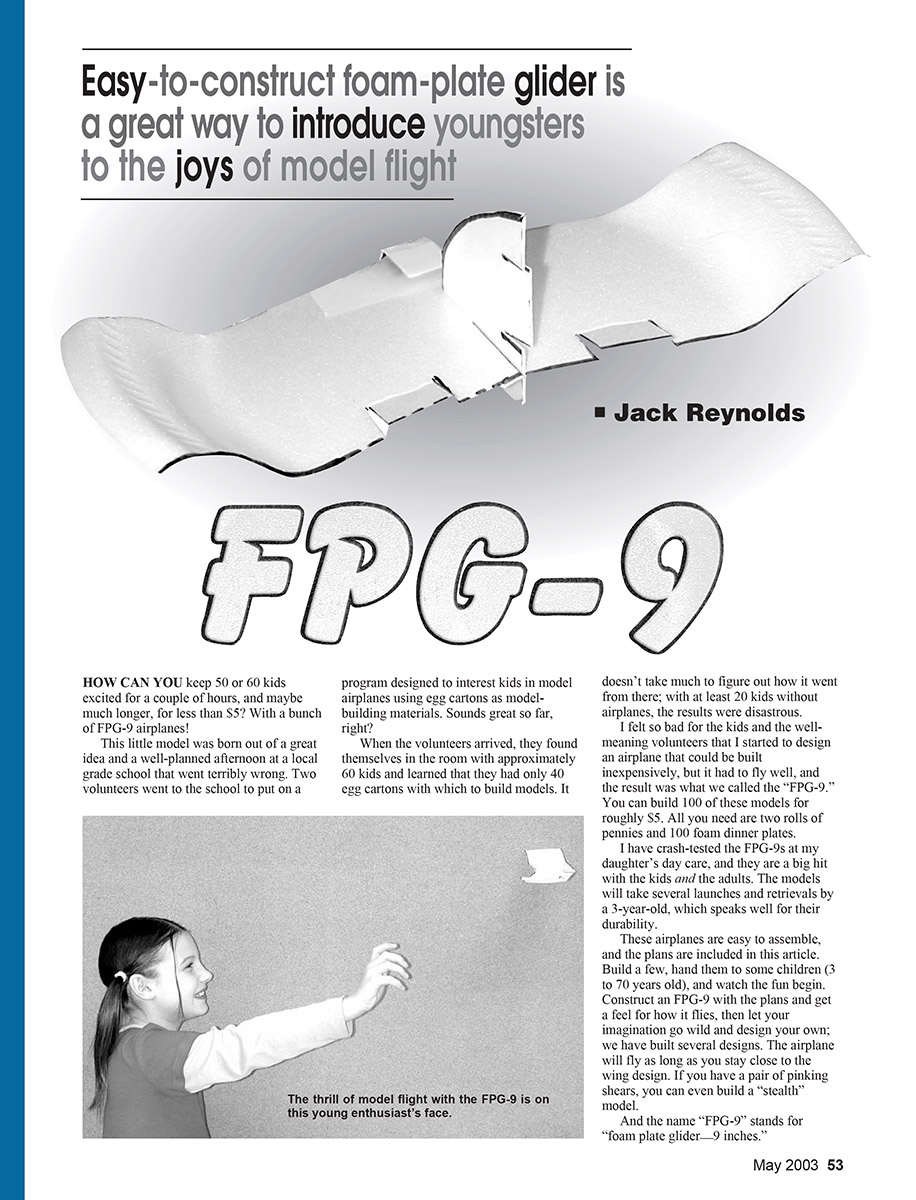
Easy-to-construct foam-plate glider is a great way to introduce youngsters to the joys of model flight
Jack Reynolds
How can you keep 50 or 60 kids excited for a couple of hours, and maybe much longer, for less than $5? With a bunch of FPG-9 airplanes!
This little model was born out of a great idea and a well-planned afternoon at a local grade school that went terribly wrong. Two volunteers went to the school to put on a program designed to interest kids in model airplanes using egg cartons as model-building materials. When the volunteers arrived, they found themselves in the room with approximately 60 kids and learned that they had only 40 egg cartons with which to build models. With at least 20 kids without airplanes, the results were disastrous.
I felt so bad for the kids and the well-meaning volunteers that I started to design an airplane that could be built inexpensively, but it had to fly well. The result was what we called the "FPG-9." You can build 100 of these models for roughly $5. All you need are two rolls of pennies and 100 foam dinner plates.
I have crash-tested the FPG-9s at my daughter's day care, and they are a big hit with the kids and the adults. The models will take several launches and retrievals by a 3-year-old, which speaks well for their durability.
These airplanes are easy to assemble. Build a few, hand them to some children (3 to 70 years old), and watch the fun begin. Construct an FPG-9 with the plans and get a feel for how it flies, then let your imagination go wild and design your own; the airplane will fly as long as you stay close to the wing design. If you have a pair of pinking shears, you can even build a "stealth" model.
The name "FPG-9" stands for "foam plate glider—9 inches."
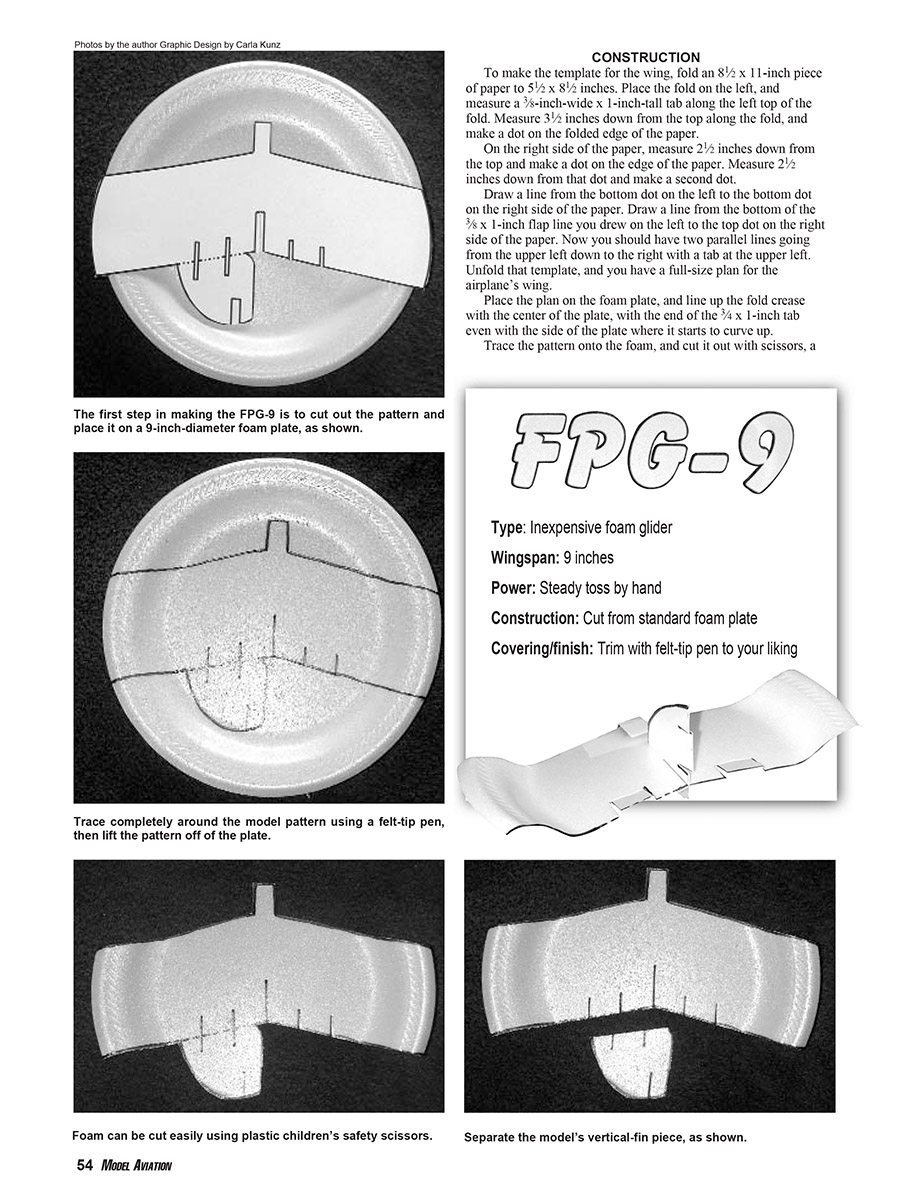
Specifications
- Type: Inexpensive foam glider
- Wingspan: 9 inches
- Power: Steady toss by hand
- Construction: Cut from standard foam plate
- Covering/finish: Trim with felt-tip pen to your liking
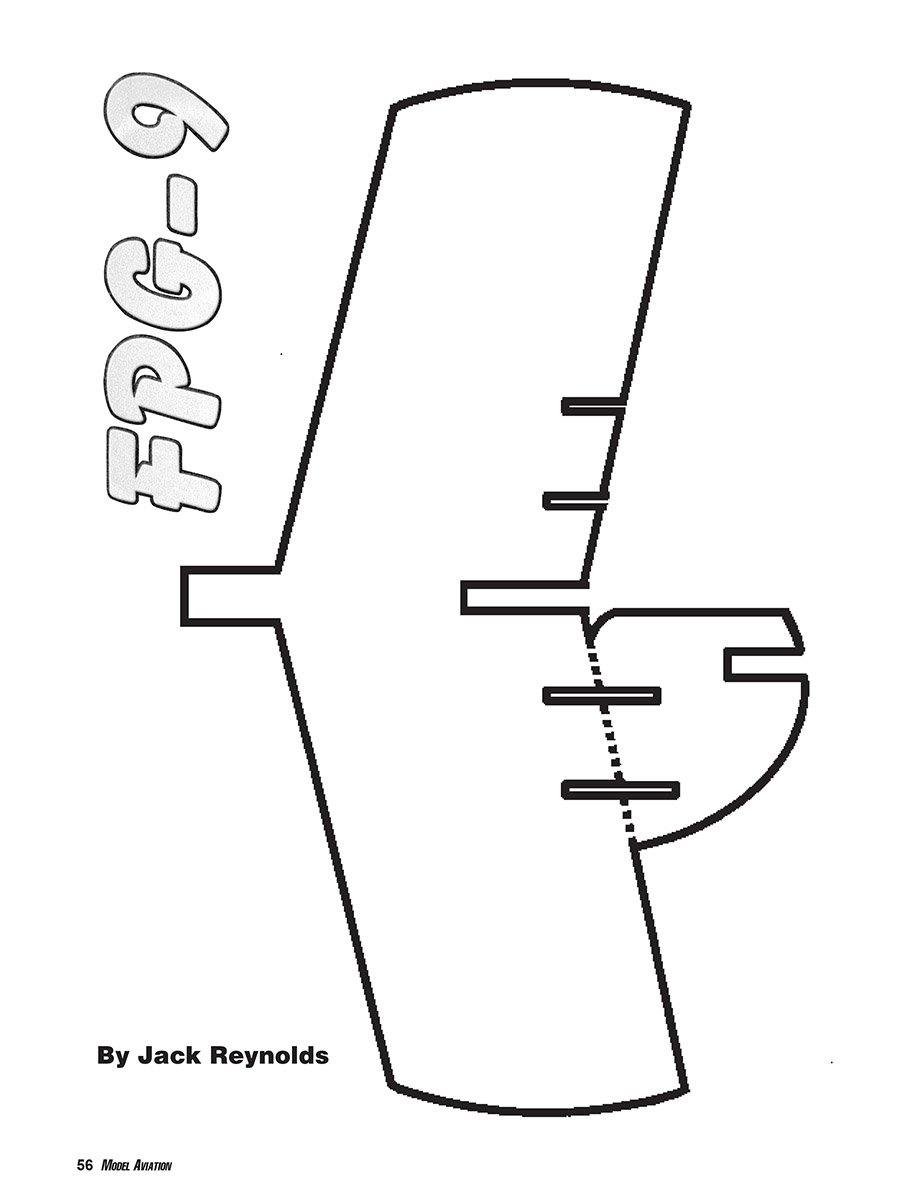
Construction
- Make the wing template
- Fold an 8½ x 11-inch piece of paper to 5½ x 8½ inches. Place the fold on the left.
- Along the left top of the fold, measure and mark a 3/8-inch-wide by 1-inch-tall tab.
- Measure 3½ inches down from the top along the fold and make a dot on the folded edge.
- On the right side of the paper, measure 2½ inches down from the top and make a dot on the edge of the paper. Measure 2½ inches down from that dot and make a second dot.
- Draw a line from the bottom dot on the left to the bottom dot on the right side of the paper.
- Draw a line from the bottom of the 3/8 x 1-inch tab line on the left to the top dot on the right side of the paper.
- You should now have two parallel lines running from the upper left down to the right with a tab at the upper left. Unfold the template to get the full-size plan for the airplane's wing.
- Transfer the pattern to the foam plate
- Place the unfolded plan on the foam plate. Line up the fold crease with the center of the plate, with the end of the 3/8 x 1-inch tab even with the side of the plate where it starts to curve up.
- Trace the pattern onto the foam plate.
- Cut the wing
- Cut out the wing with scissors, a sharp knife, or plastic children's scissors; the foam cuts easily.
- Cut a slot in the center of the rear edge of the wing that is roughly the thickness of the foam plate.
- Cut the fin
- From the scrap left below the wing, cut a right triangle measuring 2¼ x 2¼ inches (join the ends of the lines to form the triangle).
- Cut a slot in the triangle so it will slide into the slot on the wing.
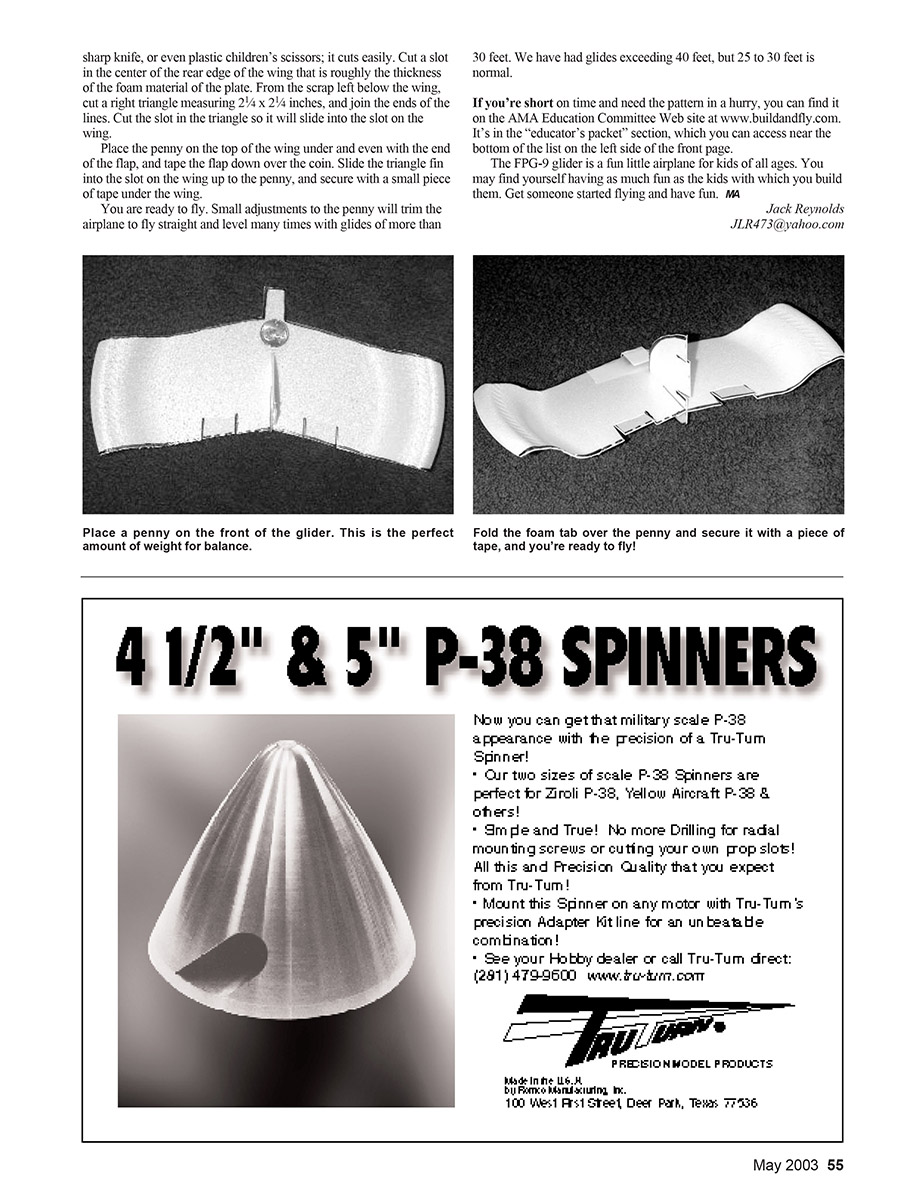
- Balance and assemble
- Place a penny on the top of the wing under and even with the end of the flap (the tab).
- Tape the flap down over the coin to hold it in place.
- Slide the triangle fin into the slot on the wing up to the penny, and secure it with a small piece of tape under the wing.
You are ready to fly. Small adjustments to the penny will trim the airplane to fly straight and level many times with glides of more than 30 feet. We have had glides exceeding 40 feet, but 25 to 30 feet is normal.
If you're short on time and need the pattern in a hurry, you can find it on the AMA Education Committee Web site at www.buildandfly.com. It's in the "educator's packet" section, which you can access near the bottom of the list on the left side of the front page.
The FPG-9 glider is a fun little airplane for kids of all ages. You may find yourself having as much fun as the kids with which you build them. Get someone started flying and have fun.
Jack Reynolds [email protected]
Transcribed from original scans by AI. Minor OCR errors may remain.

