
FREE FLIGHT DURATION
Louis Joyner, 183 Civitas St., Mt. Pleasant, SC 29464
ICAREX COVERING:
At the 1996 Nationals (Nats), Art Ellis showed me a sample of a kite fabric called Icarex. His son David was using it on his F1A towline glider wings.
The material looked like the ripstop nylon often seen on tents and other camping gear, but it was a good bit thinner. The sample they showed me was a bright, almost fluorescent yellow-green, but Art mentioned that a wide variety of other colors were available.
Since then I’ve seen more and more modelers using the ripstop covering on towline and larger power models. The consensus seems to be that Icarex is strong and easy to use. The range of available colors is a big plus compared to materials such as Polyspan and clear Micafilm®, in which white is the only option.
At the 2000 Nats I noticed that Frank Parmenter used red Icarex on the stabilizer of one of his Jay’s Bird B Nostalgia models. He said the Icarex only added roughly three grams compared to the same-size stab covered with Japanese tissue. (Frank double-covers the bottom surfaces when he uses tissue, to reduce puncture wounds from landing in rough areas.)
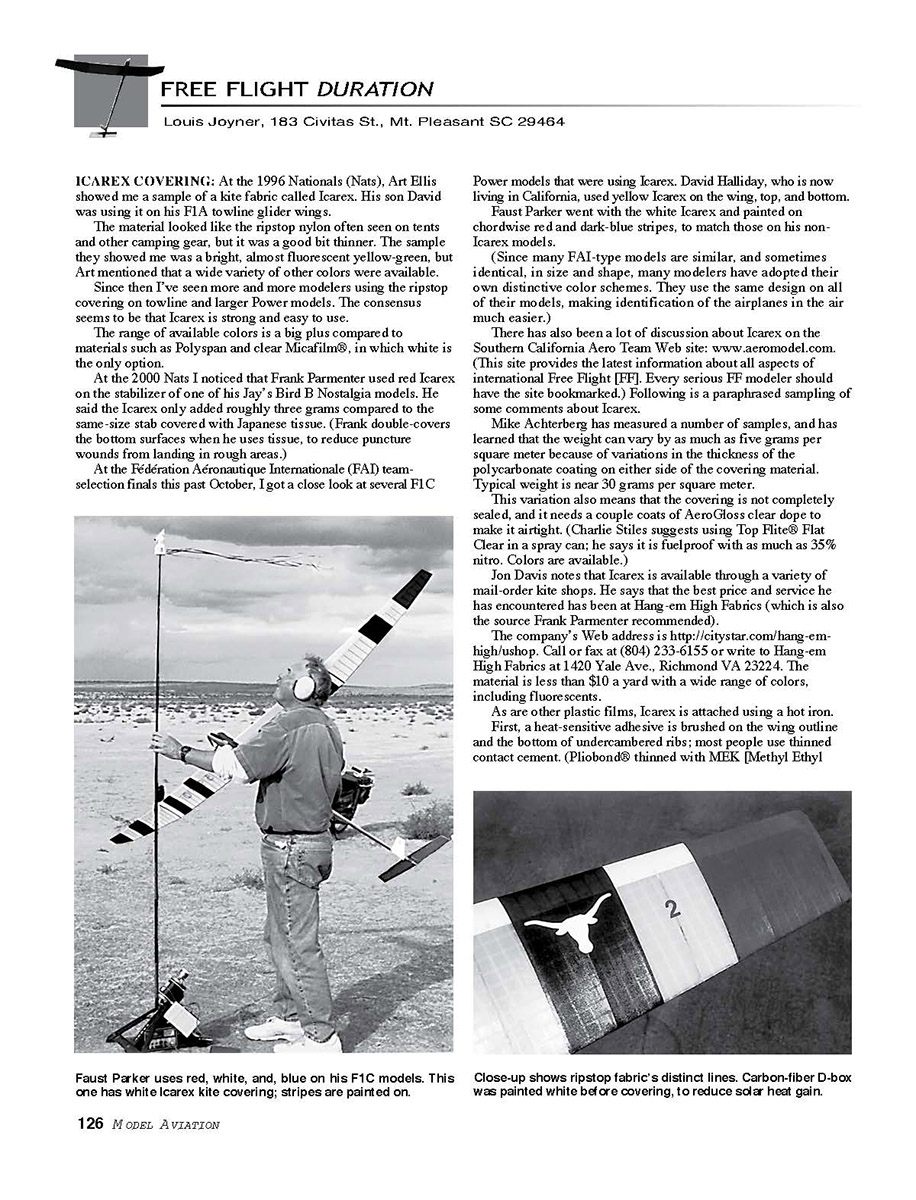
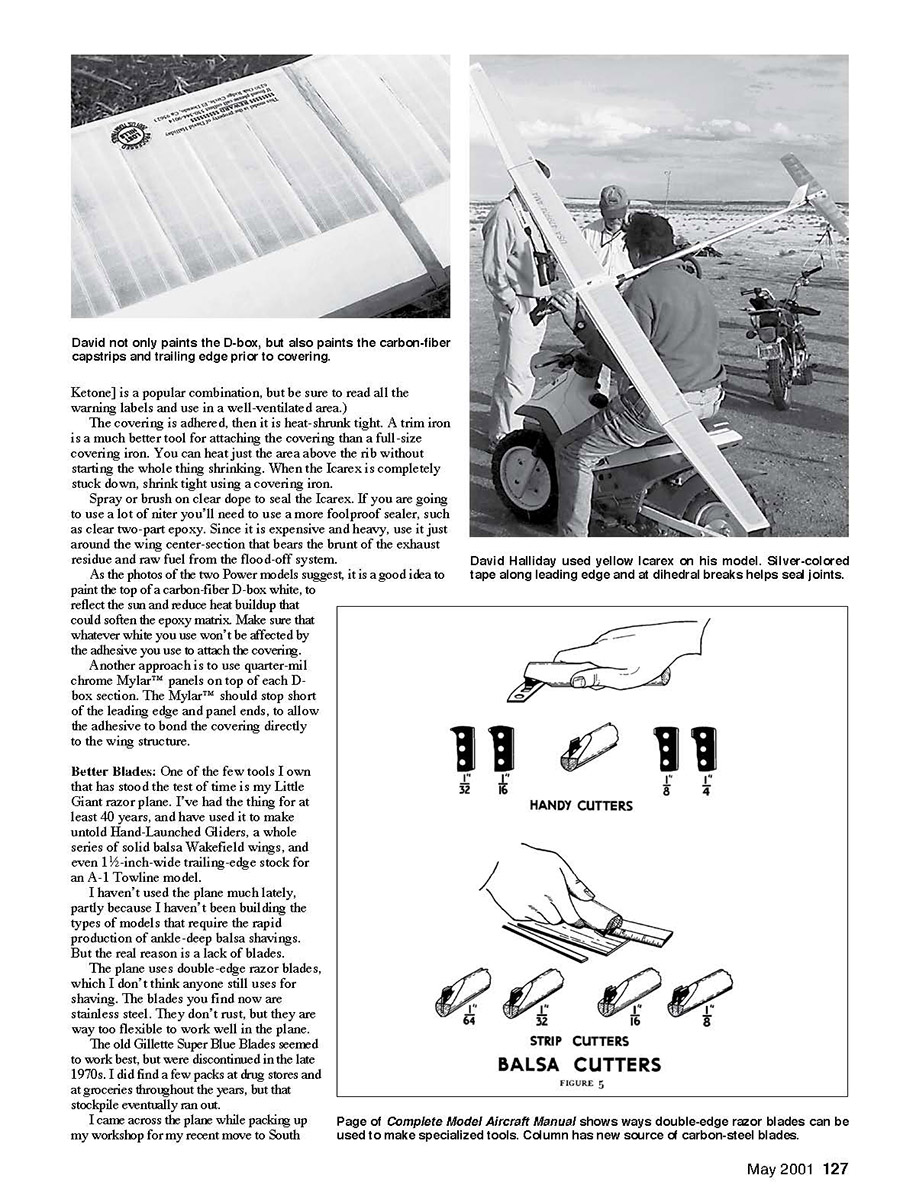
At the Fédération Aéronautique Internationale (FAI) team-selection finals this past October, I got a close look at several F1C power models that were using Icarex. David Halliday, who is now living in California, used yellow Icarex on the wing top and bottom. Faust Parker went with the white Icarex and painted on chordwise red and dark-blue stripes, to match those on his non-Icarex models. (Since many FAI-type models are similar, and sometimes identical, in size and shape, many modelers have adopted their own distinctive color schemes. They use the same design on all of their models, making identification of the airplanes in the air much easier.)
There has also been a lot of discussion about Icarex on the Southern California Aero Team web site: www.aeromodel.com. This site provides the latest information about all aspects of international free flight (FF). Every serious FF modeler should have the site bookmarked. Following is a paraphrased sampling of some comments about Icarex.
- Mike Achterberg has measured a number of samples and has learned that the weight can vary by as much as five grams per square meter because of variations in the thickness of the polycarbonate coating on either side of the covering material. Typical weight is near 30 grams per square meter.
- This variation also means that the covering is not completely sealed, and it needs a couple coats of AeroGloss clear dope to make it airtight. (Charlie Stiles suggests using Top Flite® Flat Clear in a spray can; he says it is fuelproof with as much as 35% nitro. Colors are available.)
- Jon Davis notes that Icarex is available through a variety of mail-order kite shops. He says that the best price and service he has encountered has been at Hang-em High Fabrics (which is also the source Frank Parmenter recommended).
Hang-em High Fabrics contact:
- Web: http://citystar.com/hang-em-high/ushop
- Phone/Fax: (804) 233-6155
- Mail: Hang-em High Fabrics, 1420 Yale Ave., Richmond, VA 23224
- The material is less than $10 a yard with a wide range of colors, including fluorescents.
As are other plastic films, Icarex is attached using a hot iron. Typical procedure:
- Brush a heat-sensitive adhesive on the wing outline and the bottom of undercambered ribs; most people use thinned contact cement. (Pliobond® thinned with MEK [Methyl Ethyl Ketone] is a popular combination—read all warning labels and use in a well-ventilated area.)
- Adhere the covering, then heat-shrink it tight.
- A trim iron is a much better tool for attaching the covering. You can heat just the area above the rib without starting the whole sheet shrinking. When the Icarex is completely stuck down, shrink it tight using a covering iron.
- Spray or brush on clear dope to seal the Icarex. If you are going to use a lot of niter you'll need a more foolproof sealer, such as clear two-part epoxy. Since epoxy is expensive and heavy, use it just around the wing center section that bears the brunt of exhaust residue and raw fuel from the flood-off system.
Suggestions from F1C model practice:
- Paint the top of a carbon-fiber D-box white to reflect the sun and reduce heat buildup that could soften the epoxy matrix. Make sure whatever white you use won't be affected by the adhesive used to attach the covering.
- Another approach is to use quarter-mil chrome Mylar panels on top of each D-box section. The Mylar should stop short of the leading edge and panel ends to allow the adhesive to bond the covering directly to the wing structure.
Better Blades
One of the few tools I own that has stood the test of time is my Little Giant razor plane. I've had it for at least 40 years and have used it to make untold hand-launched gliders, a whole series of solid-balsa Wakefield wings, and even 1½-inch-wide trailing-edge stock for an A-1 towline model.
I haven't used the plane much lately, partly because I haven't been building the types of models that require the rapid production of ankle-deep balsa shavings. But the real reason is a lack of blades.
The plane uses double-edge razor blades, which I don't think anyone still uses for shaving. The blades you find now are stainless steel. They don't rust, but they are way too flexible to work well in the plane.
The old Gillette Super Blue blades seemed to work best, but were discontinued in the late 1970s. I did find a few packs at drug stores and groceries throughout the years, but that stockpile eventually ran out.
I came across the plane while packing up my workshop for my recent move to South Carolina. I was tempted to throw it away, since I thought good double-edge blades were a thing of the past, but a letter from Tim Goldstein arrived just in time, with a sample of the German razor blades he's selling.
These blades are made from carbon steel and are approximately .004-inch thick, which is a good bit thinner than the old Blue Blades at .0045 inch. However, as with the Blue Blades, these will break easily to show points for custom-made tools. (The new stainless-steel blades bend instead of breaking.)
For those of you too young to remember, a broken piece of razor blade was the standard modeler's knife in the days before the X-Acto®. It's still the best way to cut or notch soft balsa.
- Use a pair of pliers to break the blade to the desired size and shape.
- Be sure to wear safety glasses, and carefully dispose of all the broken slivers.
A sharp razor blade is also great for trimming tissue or other covering. On polyester coverings such as Polyspan, a razor blade yields a much smoother edge than trimming with fine sandpaper.
If you'd like a sample of four blades, send a self-addressed stamped envelope and a dollar bill to:
- Tim Goldstein, 13096 W. Cross Dr., Littleton, CO 80127
Prices:
- $6 plus $1.25 shipping for 25 blades
- $20 plus $6.20 shipping for 100 blades
A hundred blades may seem like a several-lifetime supply, but believe me, it isn't. Payment must be in US funds; contact Tim for information about overseas orders. His e-mail address is [email protected] and his web site is www.IndoorDuration.com.
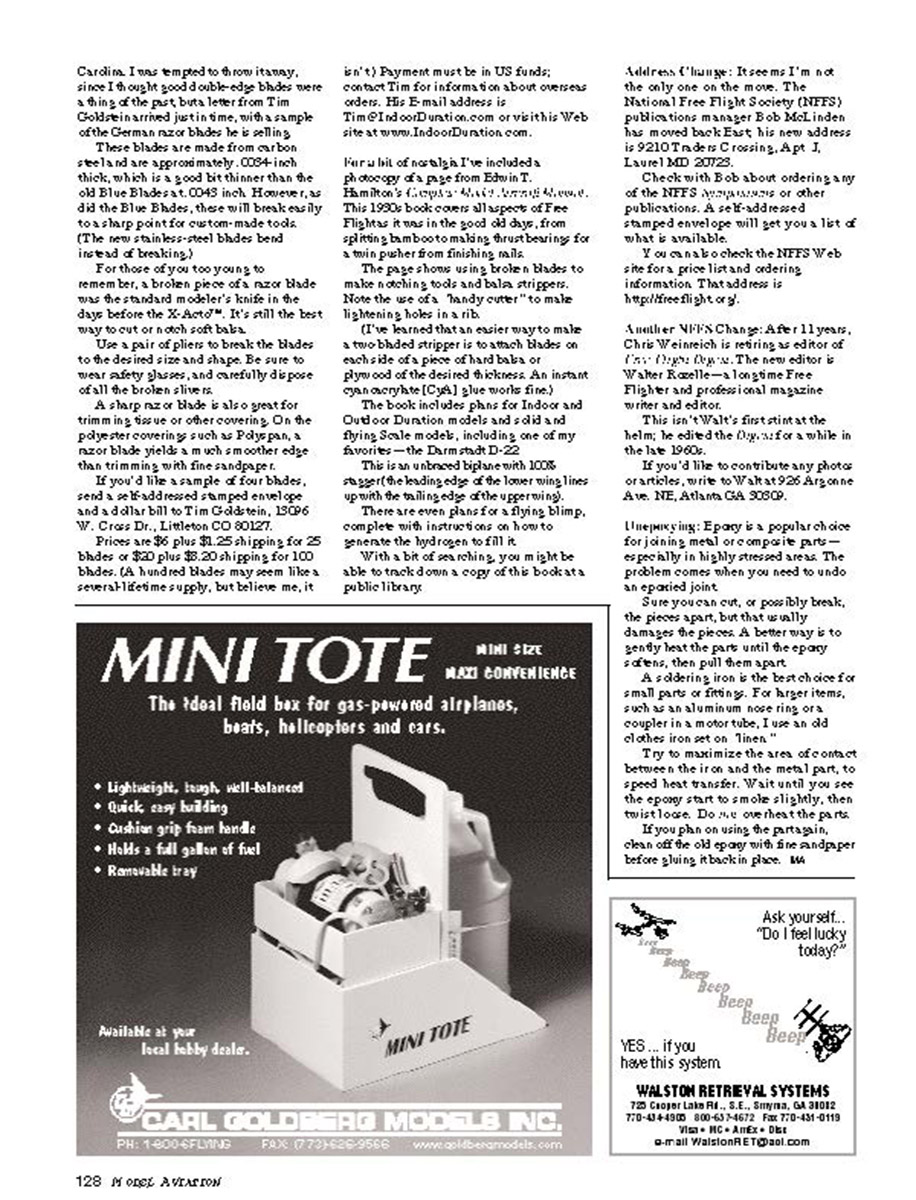
In a fit of nostalgia, I've included a photocopy of a page from Edwin T. Hamilton's Complete Model Airplane (a reprint of the 1930 book) that covers all aspects of free flight; it takes you back to the good old days, from splicing bamboo to making thrust bearings for a twin pusher from finishing nails.
The page shows six or so blades to make notches in ribs and balsa strippers. Note the use of a "handy cutter" to make lightening holes in a rib.
I've learned that an easier way to make a two-bladed stripper is to attach blades on each side of a piece of hard balsa or plywood of the desired thickness. An instant cyanoacrylate (CYA) glue works fine.
The book includes plans for indoor and outdoor duration models and a solid array of flying scale models, including one of my favorites—the Darmstadt D-22. This is an unbraced biplane with 100% stagger (the leading edge of the lower wing lines up with the trailing edge of the upper wing).
There are even plans of a flying blimp, complete with instructions on how to generate the hydrogen to fill it. With a bit of searching, you might be able to track down a copy of this book at a public library.
Address Change
It seems I'm not the only one on the move. The National Free Flight Society (NFFS) publications manager, Bob McLinden, has moved back East; his new address is:
- Bob McLinden, 9210 Traders Crossing, Apt. J, Laurel, MD 20782
Check with Bob about ordering any of the NFFS reprints or other publications. A self-addressed stamped envelope will get you a list of what is available. Or you can check the NFFS web site for a price list and ordering information: http://freeflight.org.
Another NFFS Change
After 11 years, Chris Weinreich is retiring as editor of the NFFS Journal. The new editor is Walter Rossell—a longtime free flighter and professional magazine writer and editor.
This isn't Walt's first stint at the helm; he edited the Journal for a while in the late 1960s.
If you'd like to contribute any photos or articles, write to:
- Walter Rossell, 926 Argonne Ave. NE, Atlanta, GA 30306
Removing Epoxied Joints
Epoxy is a popular choice for joining metal or composite parts—especially in highly stressed areas. The problem comes when you need to undo an epoxied joint.
A better way than cutting or breaking the pieces apart is to gently heat the parts until the epoxy softens, then pull them apart.
- For small parts or fittings, use a soldering iron.
- For larger items, such as an aluminum nose ring or a coupler in a motor tube, use an old clothes iron set on "linen."
- Maximize the area of contact between the iron and the metal part to speed heat transfer.
- Wait until you see the epoxy start to smoke slightly, then twist and loosen. Do not overheat the parts.
- If you plan on using the part again, clean off the softened epoxy with fine sandpaper before re-gluing.
Transcribed from original scans by AI. Minor OCR errors may remain.

