

Free Flight Duration Louis Joyner [[email protected]]
New construction materials for gliders
MATERIAL CHANGES: For at least 80 years, balsa has been the material of choice for hand-launch gliders. But, just as the event has dramatically changed from the traditional javelin launch to tip launch, construction materials and techniques are also starting to change.
Javelin-launch gliders typically measured 16 to 22 inches in wingspan and weighed roughly an ounce. Models were also considered somewhat expendable. Serious fliers produced large batches of gliders knowing that some would be broken, some wouldn't fly well, and others (always the good ones) would be lost in thermals. Because it is readily available and easily worked using simple tools, balsa was the perfect material choice for these disposable models.
However, the new tip-launch gliders are much larger, typically with a wingspan from 30 inches up to the maximum of 1 meter (39.37 inches). The weight is triple that of a javelin-launch glider. With the nearly universal use of a DT, flyaways are greatly reduced. Consequently the tip-launch gliders last longer, allowing more time and money to be invested in construction. This also means that models can be accurately constructed.
Although balsa is still a viable choice for larger tip-launch models, some modelers are exploring other options for wing construction. Although the choices vary in the materials and building techniques used, they all utilize a stressed-skin structure.
Unlike a solid balsa wing, a stressed-skin structure uses two different materials, each to its best advantage. The top and bottom surface "skins" provide the bending and torsional strength; the lightweight core provides the airfoil shape and keeps the top and bottom skins apart under bending loads.
Stressed-skin structures are nothing new in modeling. Many RC models utilize a foam core covered with thin-sheet balsa or even heavy plastic film. Others use fiberglass, aramid, or carbon fabric to handle thinner airfoils and higher flight loads. In FF, wings sheeted top and bottom with thin balsa have been used for years. Closely spaced balsa ribs provide the core function. More recently, thin, hard aluminum foil, fiberglass cloth, or carbon fabric have provided the stiff outer skin, either over a fully sheeted wing or a foam core. In principle, even a traditional stick-and-tissue wing is a stressed-skin structure, with the taut tissue adding both bending and torsional strength to a lightweight balsa framework core.
The Core
For tip-launch gliders, the most popular core choices are insulation foam, Spyder Foam, and Rohacell foam. Pink and blue insulation foam is available at most home stores in 4 x 8-foot sheets in a variety of thicknesses.
Although inexpensive and readily available, these are not the best choices among insulation foams, because the compressive strength is quite low—typically 15 to 25 pounds per square inch (psi). For a core material, compressive strength is one of the most important attributes.
Specialized insulating foam, designed for certain commercial applications, has at least twice the compressive strength. Dow Styrofoam Highload 60 insulation has a compressive strength of 60 psi and a weight of 2.3 pounds per cubic foot (pcf). The sheet size for the pale blue material is 2 x 8 feet in both 2-inch and 3-inch thickness. Dow also offers slightly lighter Highload 40 with a 40 psi compressive strength in both 2 x 8 and 4 x 8 sheets and 2- and 3-inch thickness. Cost for a 2 x 8 sheet of 2-inch material should be less than $25, provided you can find a local dealer that stocks it. (In my town, the Highload foam is a special order item with a three-pallet minimum; I didn't bother to ask the price.) Owens Corning offers a similar product. Foamular is pink, high-compressive-strength rigid foam. Foamular 600 has a 60 psi compressive strength and a weight of 2.2 pcf; Foamular 400 has a strength rating of 40 psi and weighs 1.8 pcf.
Spyder Foam, also known as surfboard foam, is extruded so that its maximum compressive strength is in thickness, just where it is needed for a wing core. Spyder Foam has similar strength and weight characteristics to Highload 60, with a weight of 2.3 pcf and a compressive strength of 60 psi. Formerly available only in white, Spyder Foam now comes in blue.
The Composites Store (CST) stocks Spyder Foam in 1.75-inch thickness; a 12 x 36-inch sheet is $15.95 plus shipping; a 24 x 36-inch sheet is also available for $27.95, but there is a $20 packing charge and an oversize shipping charge for the wider sheet. According to Gail Gewain of CST, the manufacturer discontinued production of Spyder Foam in late July. When the current stock is gone, it will no longer be available.
The foams I’ve mentioned are extruded polystyrene foam (EPF). The next foam choice is Rohacell, a white, closed-cell acrylic foam. Unlike polystyrene, Rohacell cannot be hot-wired. It must be machined or sanded to shape.
Rohacell industrial grade (IG) foam comes in three weights:
- IG 31: 2 pcf, compressive strength 57 psi
- IG 51: 3.2 pcf, compressive strength 128 psi
- IG 71: 4.7 pcf, compressive strength 213 psi
Rohacell is widely used in industry as a core material for such things as wind turbine blades, helicopter rotors, and even hockey sticks.
Rohacell IG 31 is available from CST in 3.0 mm, 1/8 inch, and 1/4 inch thickness, and in a range of sheet sizes. IG 51 comes in the widest thickness range: 1.0 mm, 1.5 mm, 2.0 mm, 3.0 mm, and 1/4 inch. IG 71 is offered in 3.0 mm, 1/4 inch, 1/2 inch, and 1 inch. As with the Spyder Foam, there are extra charges for sheets wider than 12 inches. Rohacell also offers IG-F, which has a finer cell structure for reduced resin absorption. CST is starting to carry IG-F in some weights and thicknesses.
As a core material, Rohacell offers a higher ratio of compressive strength-to-weight than EPF. Rohacell IG 51 has double the compressive strength of Highload 40 (128 psi compared to 60 psi), but only weighs roughly 1.4 times as much. Rohacell also resists temperatures up to 428° F (220° C), an important consideration for models that often sit in the sun. The maximum use temperature recommendation for one brand of EPF is only 165° F (74° C).
"Rohacell is really hard to beat when you look at all the properties," said Gail. But the good qualities do come at a price. A 12 x 48-inch sheet of 1/4-inch Rohacell is almost $60, or roughly $20 per tip-launch glider wing.
Shaping the Core
For EPF foam cores, the easiest solution is to use the hot-wire technique. The basic idea is to cut the wing panel to outline shape, attach airfoil-shaped templates to both ends, then use a heated wire to cut through the foam, following the templates.
The main limitation is that the wire only cuts in a straight line, so panels need to be rectangular or trapezoidal in shape. However, by using a six-panel wing and tapering each panel, you can approximate an elliptical planform. The tips can be sanded after hot-wiring.
Since Rohacell foam can't be hot-wired, it must be sanded or machined to shape. Sanding actually goes much faster than with balsa. As with balsa, a vacuum and face mask should be used to control the dust. Rohacell also cuts easily with a saw or router. For faster and more accurate production, a jig could be devised to hold a router at the correct angle to shape the sloping rear of the wing airfoil.
The Skin
Possible choices for the skin include fiberglass cloth, carbon-fiber cloth, and carbon tissue (also known as carbon veil).
- Fiberglass cloth: Lightweight fiberglass cloth is familiar to most modelers. The silklike material comes in weights as light as 1/2 ounce per square yard. When using fiberglass or carbon cloth, it is best to use a cloth with a balanced weave—one with the same number of threads per inch in both directions (for example, 0.7 ounce fiberglass cloth with a 56 x 56 thread count). This will ensure equal strength in both directions and minimize the chance of warping.
- Handling: Carefully unfold the cloth onto a smooth surface such as a large piece of illustration board or brown wrapping paper to reduce snags. Smooth it out with gentle strokes of a drafting board brush, then mist with clear nitrate dope. This will lock the threads together, stiffen it slightly, and make it easier to handle.
- Carbon-fiber cloth: Comes in a variety of weights; the most usable for FF are approximately 2.25 to 2.9 ounces per square yard. Carbon cloth is considerably stronger and much more expensive than fiberglass cloth. As with fiberglass, carbon fabric is almost always used on the bias (threads at 45° to the wing chord) to increase torsional strength. Use drafting tape to outline an area of cloth and cut along the center of the tape to minimize unraveling.
- Carbon tissue: Instead of woven cloth, carbon tissue is a thin mat of random fibers—imagine black silkspan. Available weights range from 0.2 to 0.7 ounces per square yard. No special handling is required; simply cut to shape with scissors.
Costs:
- Fiberglass cloth and carbon tissue: roughly $16 to $18 per square yard for carbon tissue; light glass cloth may be slightly less.
- Carbon-fiber cloth: expensive—roughly $150 per square yard and up for lighter cloths. For certain applications, the added strength, rigidity, and dimensional stability are worth the cost.
Bagging It
Attaching the skin to the top and bottom of the core is straightforward.
- Place the cloth or tissue pieces on a piece of thick Mylar and wet them out with epoxy resin, then blot off the excess resin.
- Position the bottom skin, place the core over it, and then place the top skin on the core.
- Draped another piece of Mylar over the assembly and put everything inside a vacuum bag.
- Seal the bag and use a vacuum pump to remove the air. Atmospheric pressure evenly pushes the skins tight against the core.
- Hold the vacuum until the epoxy hardens.
The result is a stiff wing that won't flutter on a hard launch and won't change between contests. More importantly, you can make another one just like it without spending weeks searching for a perfect piece of balsa.
Matt Gewain has created an excellent tutorial about vacuum bagging, which can be seen on the CST website. Other websites offer tips, instructions, and even how-to videos.
Is it worth it?
Composite glider wings require an investment in both time and money, as does any new technology. For some of us, the feel of a razor-sharp plane on a piece of C-grain balsa offers more rewards than messing with epoxy and strange plastics. For others the challenge of trying something new may be its own reward.
Neither the thermal nor the stopwatch care how the wing was made or what materials were used.
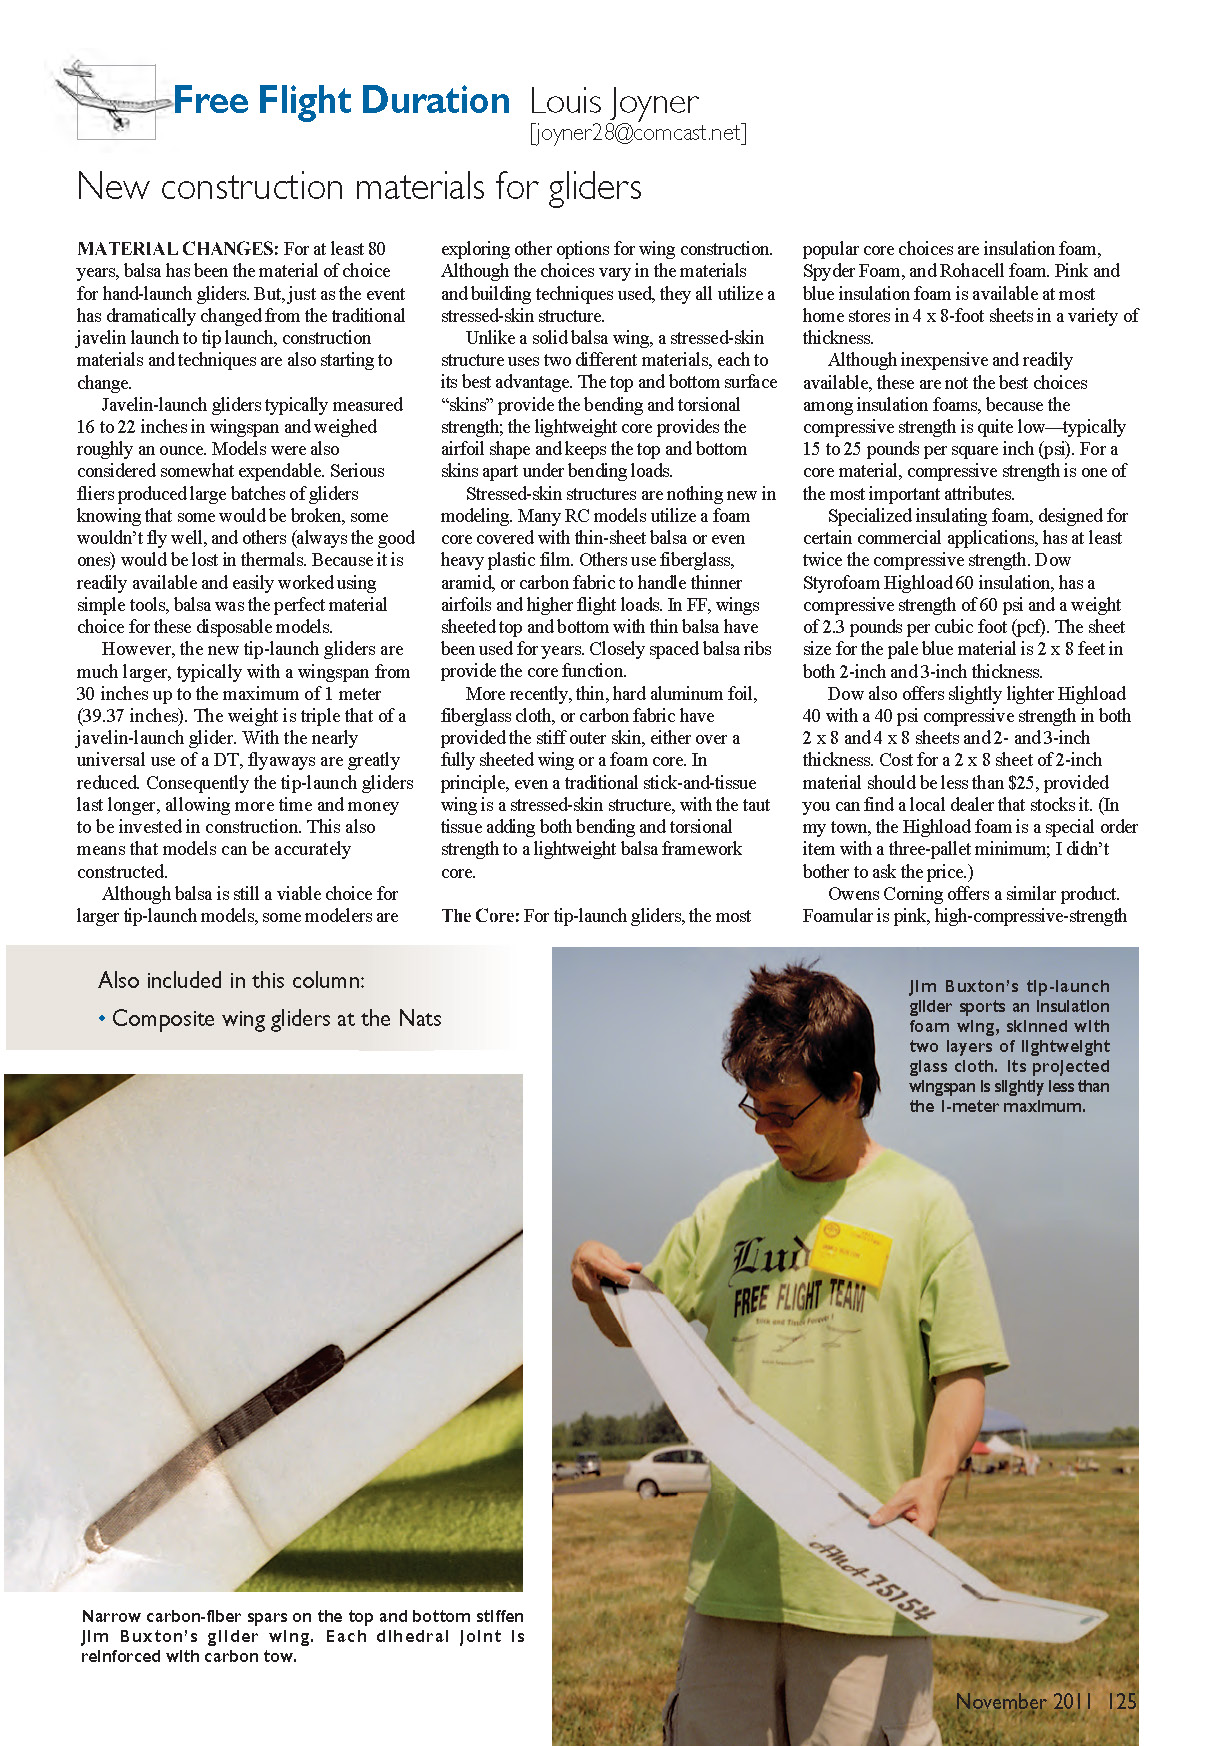
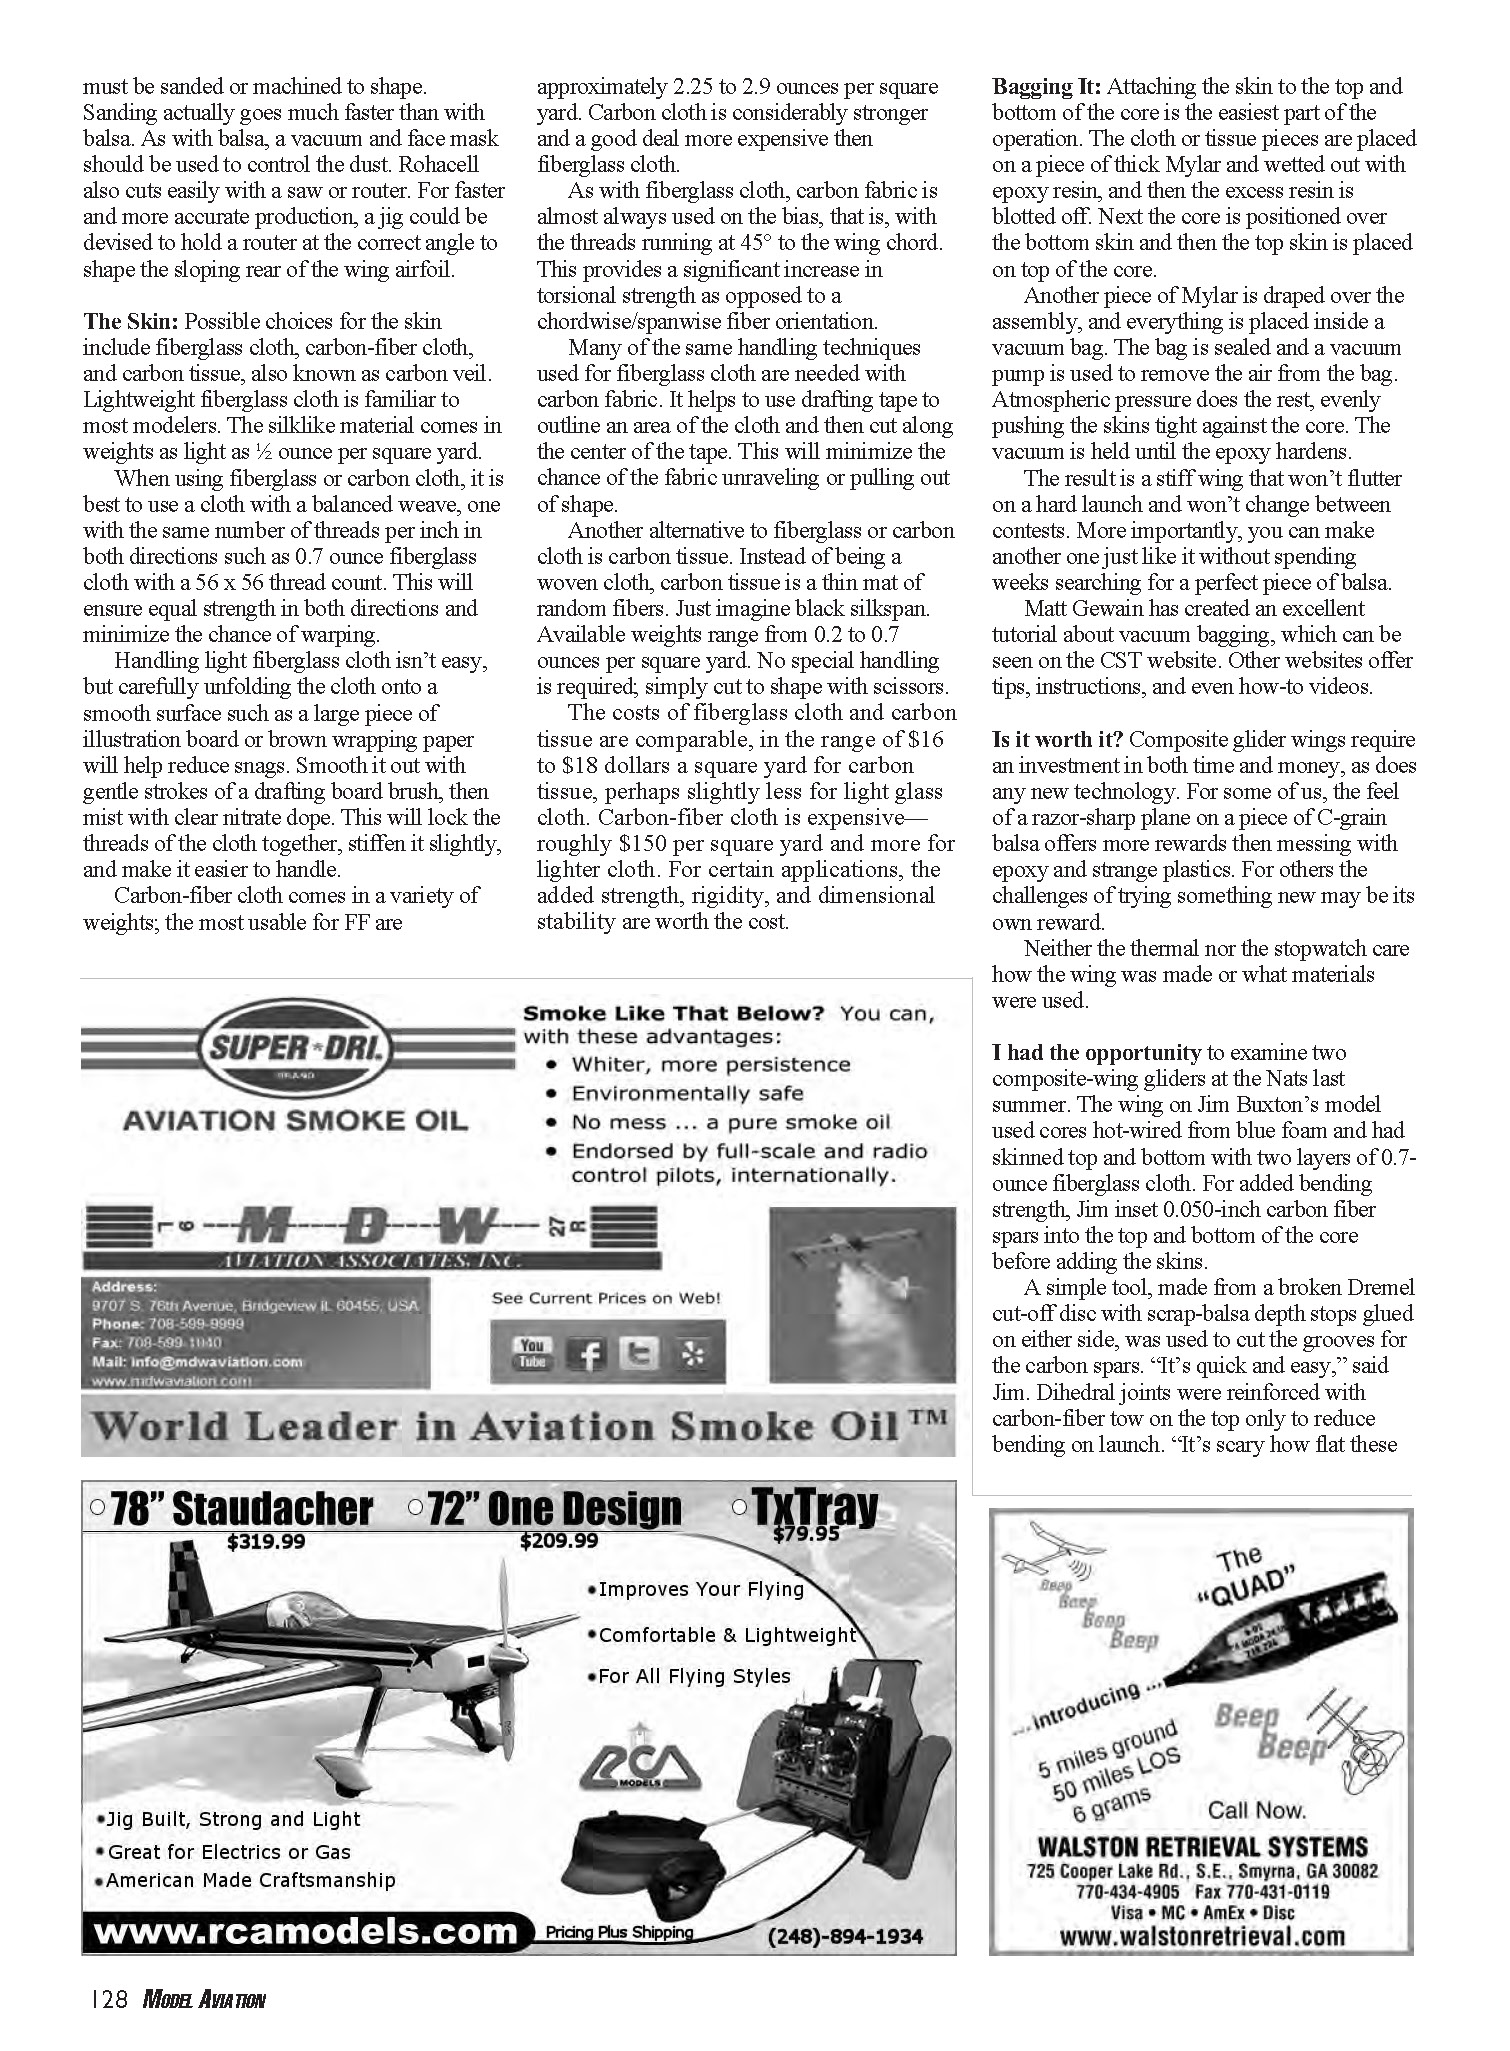
I had the opportunity to examine two composite-wing gliders at the Nats last summer. The wing on Jim Buxton's model used cores hot-wired from blue foam and had skins top and bottom with two layers of 0.7-ounce fiberglass cloth. For added bending strength, Jim inset 0.050-inch carbon fiber spars into the top and bottom of the core before adding the skins. A simple tool, made from a broken Dremel cut-off disc with scrap-balsa depth stops glued on either side, was used to cut the grooves for the carbon spars. "It's quick and easy," said Jim. Dihedral joints were reinforced with carbon-fiber tow on the top only to reduce bending on launch.
Final note
Try the techniques that interest you and evaluate the trade-offs of cost, weight, strength, and build time. If you're curious, small experiments and one-off wings are a good way to learn without committing to a full fleet conversion.
Till next time, fly Stunt. MA
GSCB Old-Time Stunt (OTS) memories and the 40th Anniversary
I found the club officials dressed in old-time garb, complete with red-and-white striped vests and straw hats reminiscent of a barbershop quartet. They even drafted Beth England, a GSCB member’s daughter, to dress in old-time feminine attire and preside over the event as “Miss Old Time Stunt.”
There were only approximately eight entrants in that first contest, but it hit a chord with all who attended to fly and watch. The event was added to all of the GSCB Stunt contest menus, and soon after that other clubs began running OTS meets. It grew quickly in popularity, and the rest is history.
I’m very proud of the fact that I won that first OTS contest, edging out John D’Ottavio, an East Coast CL Stunt legend who was flying a Hal deBolt-designed All American Senior. Tom Niebuhr, who drove up from Saint Louis, Missouri (he had lived in northern New Jersey for most of his young life and was a fixture at the GSCB field during that time), flew an accurate replica of the Lou Andrews-designed Barnstormer to third place that day.
Other notables who competed in that first OTS meet included 1969 Nats CL Stunt Champion Bob Lampione, Jim Damerell, Vic Macaluso, Sam Bridges, Wayne Colgan, and renowned FF designer/flier Jean Pailet. Jean received the 20 bonus points for flying an ignition-engine-powered Ringmaster!
Fast-forward 40 years and zone in on the same GSCB field. The famous trees surrounding that field are a bunch taller, and a new chain-link fence has replaced the old wooden split-rail type. New-model cars in the parking lot, modern attire, and somewhat grayer features of most of the contestants are the only evidence that this is not four decades ago.
Oh yeah, the food back then at the GSCB meets was great, and it still is. Ron Testa, a current GSCB member, owns Ron’s Deli in West Orange, New Jersey, and he cooks and supplies food for the club contests these days. His sausage-and-pepper sandwiches are worth the trip from anywhere to attend!
Memories of that first OTS contest were vivid in my mind as I rode to the GSCB’s 40th Anniversary celebration of OTS with my flying buddy, Tom Hampshire. Merely pulling through the field entrance brought forth unexpected goose bumps. I had not realized just how deeply my feelings had become for the heritage of that club, that field, and especially the people who fly at this event.
Jon Miske had been suffering from the effects of a severe stroke, and it was uncertain whether or not he would be able to attend. At close to 10 a.m., while Tom and I were judging the Classic Stunt event, I heard an announcement that flying was to be suspended for a few minutes; John and Elaine Miske had just rolled in!
A line formed at John’s car to greet this great man and tell him how much we all appreciated his vision of an event that would help to sustain such amazing activity in CL flying. He was visibly moved.
The contest must have been good medicine for John, because he and Elaine stayed for most of the day and participated in a group photo. It reminded me of the group picture we took in 1970, except this time many more fliers were present.
GSCB Membership Chairman Rich Peabody presented John with a special photo plaque that commemorated the first OTS event. We all got a chance to sign the photo before it was encased in glass. I got another case of goose bumps as I signed it.
I’m taking this opportunity to thank John Miske from the bottom of my heart for his steadfast work behind the scenes for so many years to make CL flying a more enjoyable and successful sport, and especially for his guidance in my early modeling life. He was, and still is, a beacon for me of what a true modeler should be.
Thanks also go out to GSCB members past and present. This club has become an institution in the East. It is known worldwide and is respected for keeping the flame of CL burning brightly.
Try hard to make it to the 45th anniversary of this contest! And for the record, Tom Hampshire won the 40th Anniversary OTS meet flying his F&B Sharpy.
3M 77 Original Formula
In the September column I wrote about how I used to make foam-backed sanding blocks using 3M Super 77 Spray Adhesive to attach the sandpaper to the foam. I lamented that I could no longer do this, because the new 77 spray adhesive had apparently undergone a change in formula and now includes a solvent that attacks expanded polystyrene foam.
Well, there is some good news. Mickey Nowell of Longwood, Florida, emailed me a note telling me that 3M 77 original formula is still available. I went to the company Web site and found a link to the 3M 77 Classic Spray Adhesive; the address is in the “Sources” list at the end of the column.
This is good news for many modelers who used that adhesive for a number of modeling chores in the past, including as an adhesive for covering foam-core wings. Thanks to Mickey for alerting us to this fact!
In the next column we’ll get back to discussing the necessary tools for equipping a shop in which to build great CL Stunt models—or models of any type, for that matter. I promised a report on a special line of sanding and filing tools, and we’ll get to that for sure!
Till next time, fly Stunt. MA
Sources
- Classic 3M 77 Spray Adhesive: http://bit.ly/a7XeUg
- Precision Aerobatics Model Pilots Association: www.control-line.org
Transcribed from original scans by AI. Minor OCR errors may remain.

