
FREE FLIGHT INDOOR
Bud Tenny, Box 830545, Richardson TX 75083
Contact / Contributions
A REMINDER: My E-mail address has changed to [email protected]. Please update your records and let me hear from you. This column is for you, but I need help since there are no indoor contests close enough for me to attend. I need to hear your ideas and see pictures of your gadgets.
It is helpful for you to send the text as an E-mail message so I don't have to retype it. Until further notice, the pictures must be 35mm photos since I can't handle digital pictures. Digital pictures are nice, and it seems as though everyone has a digital camera. I don't have a printer that is able to print digital files; without that, I can't see the image to integrate it into the text.
Following are a few examples of what I would like to receive from readers if this column is to remain viable.
Propeller assembly and alignment
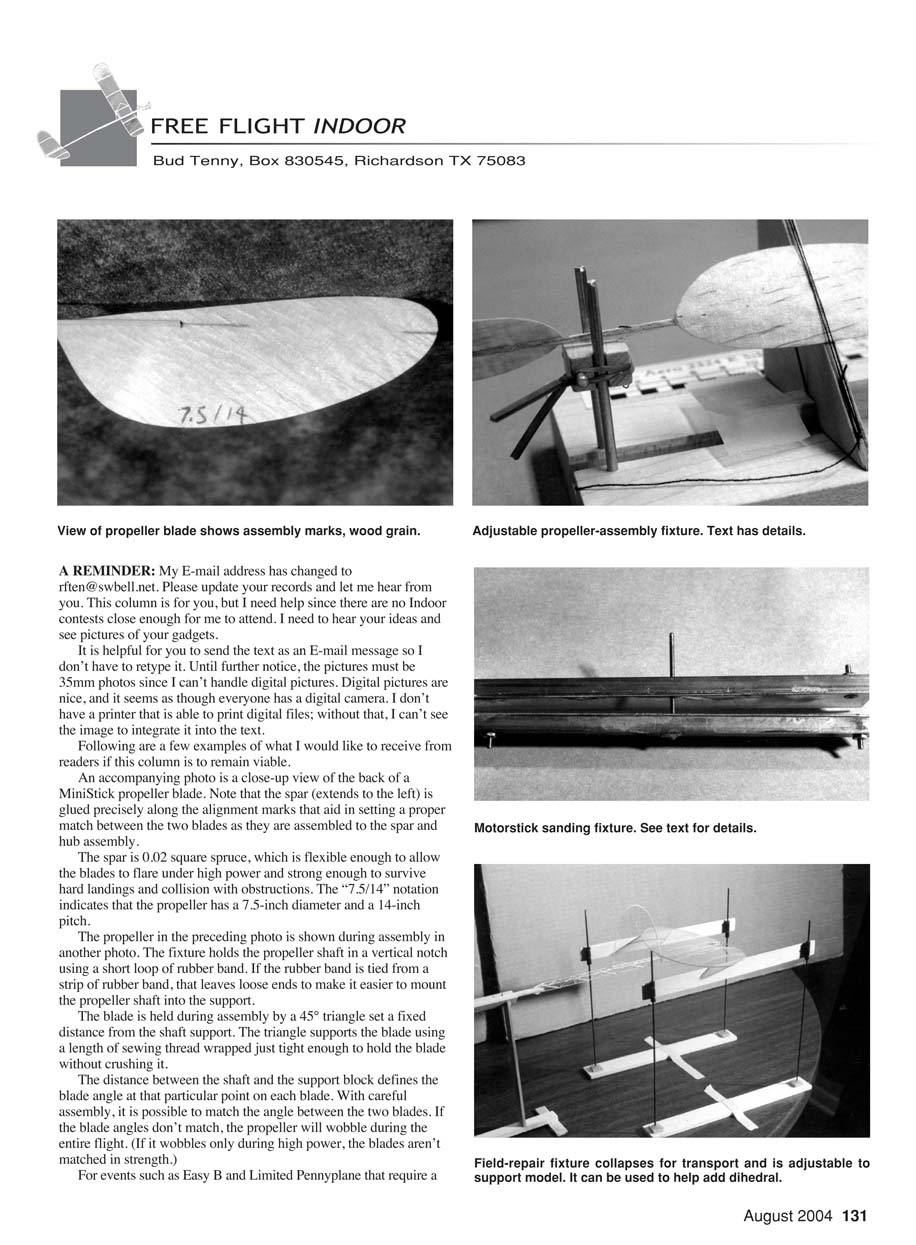
An accompanying photo is a close-up view of the back of a MiniStick propeller blade. Note that the spar (extends to the left) is glued precisely along the alignment marks that aid in setting a proper match between the two blades as they are assembled to the spar and hub assembly.
The spar is 0.020-inch square spruce, which is flexible enough to allow the blades to flare under high power and strong enough to survive hard landings and collision with obstructions. The "7.5/14" notation indicates that the propeller has a 7.5-inch diameter and a 14-inch pitch.
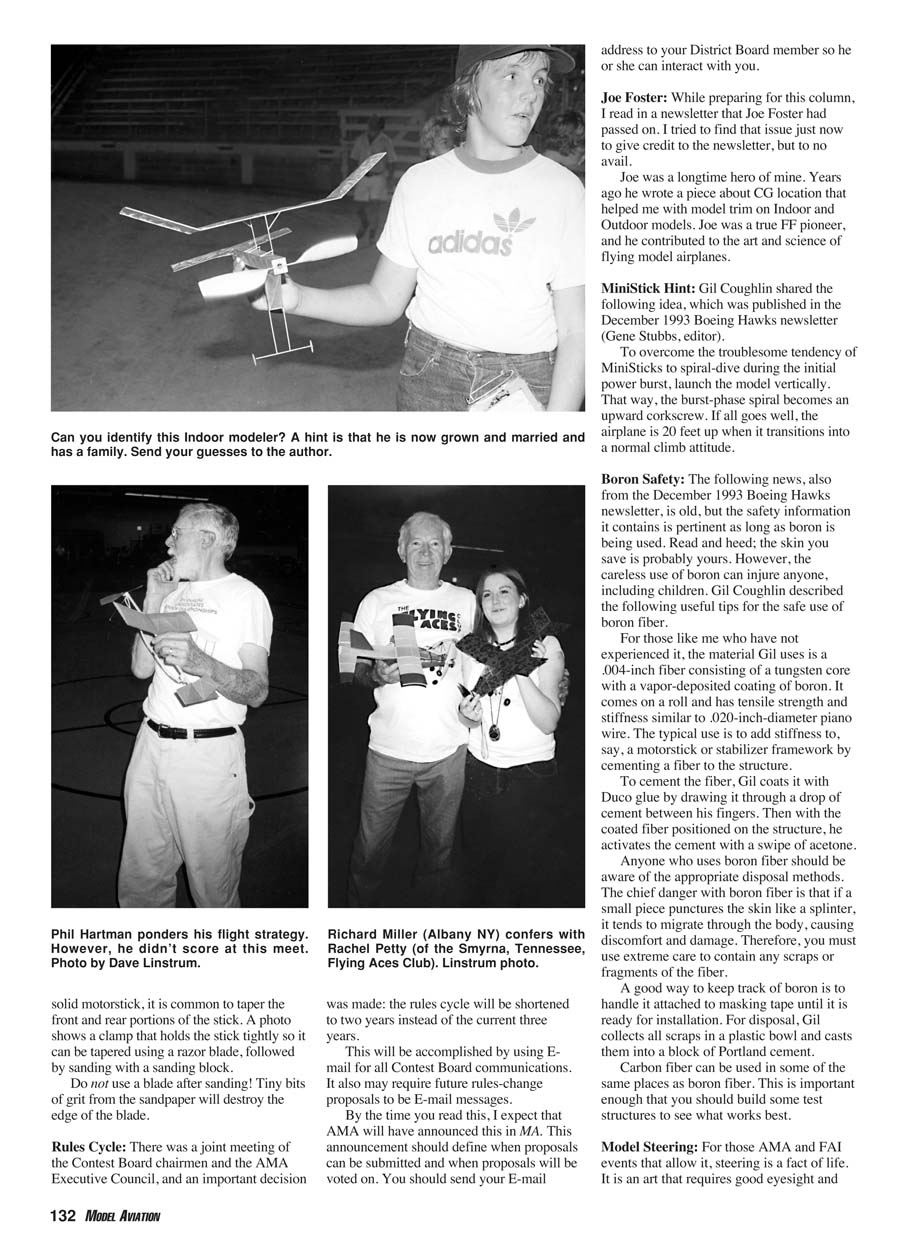
The propeller in the preceding photo is shown during assembly in another photo. The fixture holds the propeller shaft in a vertical notch using a short loop of rubber band. If the rubber band is tied from a strip of rubber band, that leaves loose ends to make it easier to mount the propeller shaft into the support.
The blade is held during assembly by a 45° triangle set a fixed distance from the shaft support. The triangle supports the blade using a length of sewing thread wrapped just tight enough to hold the blade without crushing it.
The distance between the shaft and the support block defines the blade angle at that particular point on each blade. With careful assembly, it is possible to match the angle between the two blades. If the blade angles don't match, the propeller will wobble during the entire flight. (If it wobbles only during high power, the blades aren't matched in strength.)
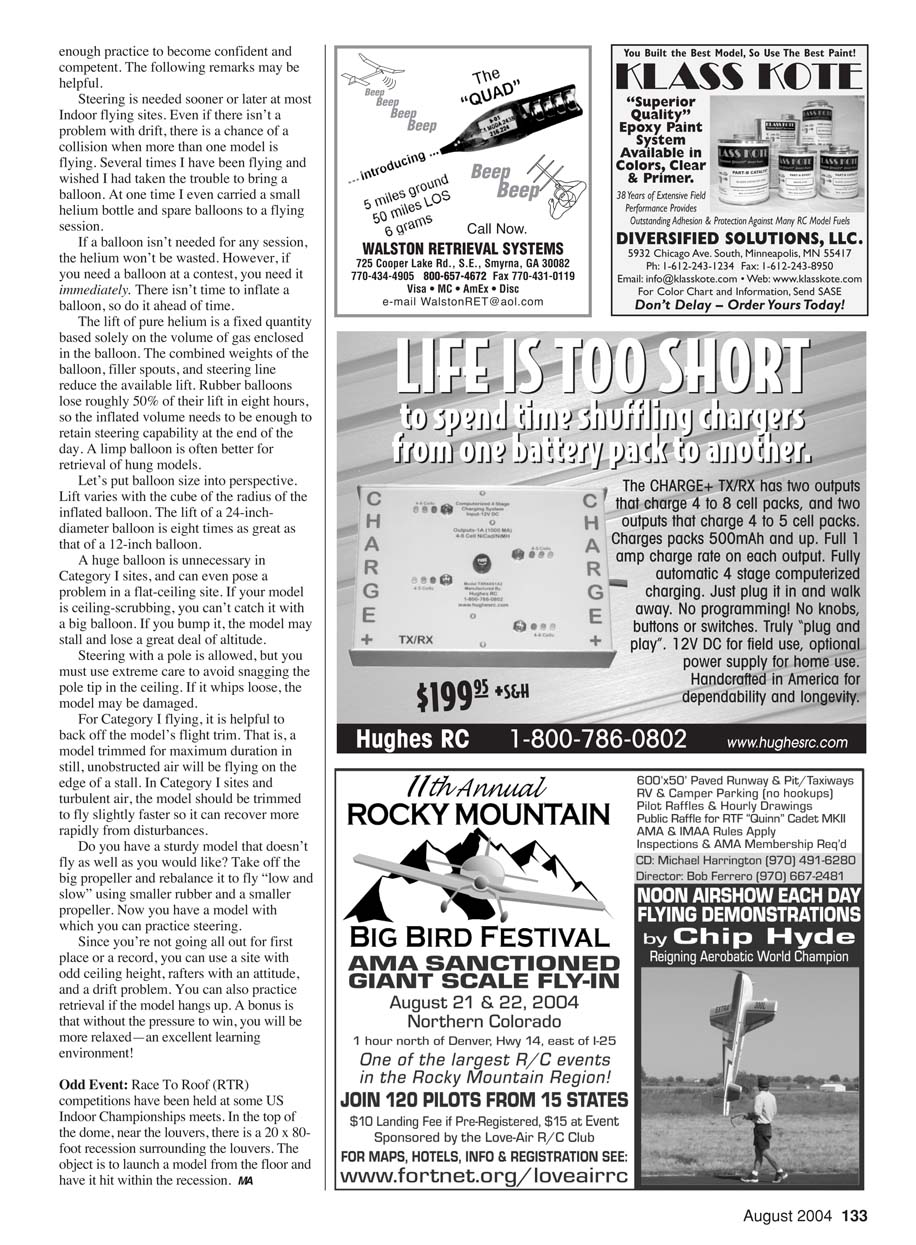
Motorstick tapering
For events such as Easy B and Limited Pennyplane that require a solid motorstick, it is common to taper the front and rear portions of the stick. A photo shows a clamp that holds the stick tightly so it can be tapered using a razor blade, followed by sanding with a sanding block. Do not use a blade after sanding! Tiny bits of grit from the sandpaper will destroy the edge of the blade.
Rules Cycle
There was a joint meeting of the Contest Board chairmen and the AMA Executive Council, and an important decision was made: the rules cycle will be shortened to two years instead of the current three years.
This will be accomplished by using E-mail for all Contest Board communications. It also may require future rules-change proposals to be E-mail messages.
By the time you read this, I expect that AMA will have announced this in MA. This announcement should define when proposals can be submitted and when proposals will be voted on. You should send your E-mail address to your District Board member so he or she can interact with you.
Joe Foster
While preparing for this column, I read in a newsletter that Joe Foster had passed on. I tried to find that issue just now to give credit to the newsletter, but to no avail.
Joe was a longtime hero of mine. Years ago he wrote a piece about CG location that helped me with model trim on indoor and outdoor models. Joe was a true free-flight pioneer, and he contributed to the art and science of flying model airplanes.
MiniStick Hint
Gil Coughlin shared the following idea, which was published in the December 1993 Boeing Hawks newsletter (Gene Stubbs, editor).
To overcome the troublesome tendency of MiniSticks to spiral-dive during the initial power burst, launch the model vertically. That way, the burst-phase spiral becomes an upward corkscrew. If all goes well, the airplane is 20 feet up when it transitions into a normal climb attitude.
Boron Safety
The following news, also from the December 1993 Boeing Hawks newsletter, is old, but the safety information it contains is pertinent as long as boron is being used. Read and heed; the skin you save is probably yours. The careless use of boron can injure anyone, including children. Gil Coughlin described the following useful tips for the safe use of boron fiber.
- Material: The material Gil uses is a .004-inch fiber consisting of a tungsten core with a vapor-deposited coating of boron. It comes on a roll and has tensile strength and stiffness similar to .020-inch-diameter piano wire. The typical use is to add stiffness to, say, a motorstick or stabilizer framework by cementing a fiber to the structure.
- Cementing: To cement the fiber, Gil coats it with Duco glue by drawing it through a drop of the cement between his fingers. Then with the coated fiber positioned on the structure, he activates the cement with a swipe of acetone.
- Disposal and handling: The chief danger with boron fiber is that if a small piece punctures the skin like a splinter, it tends to migrate through the body, causing discomfort and damage. Therefore, you must use extreme care to contain any scraps or fragments of the fiber.
- A good way to keep track of boron is to handle it attached to masking tape until it is ready for installation.
- For disposal, Gil collects all scraps in a plastic bowl and casts them into a block of Portland cement.
- Alternatives: Carbon fiber can be used in some of the same places as boron fiber. This is important enough that you should build some test structures to see what works best.
Model Steering
For those AMA and FAI events that allow it, steering is a fact of life. It is an art that requires good eyesight and enough practice to become confident and competent. The following remarks may be helpful.
Steering is needed sooner or later at most indoor flying sites. Even if there isn't a problem with drift, there is a chance of a collision when more than one model is flying. Several times I have been flying and wished I had taken the trouble to bring a balloon. At one time I even carried a small helium bottle and spare balloons to a flying session.
- Preparation: If a balloon isn't needed for any session, the helium won't be wasted. However, if you need a balloon at a contest, you need it immediately. There isn't time to inflate a balloon, so do it ahead of time.
- Balloon lift: The lift of pure helium is a fixed quantity based solely on the volume of gas enclosed in the balloon. The combined weights of the balloon, filler spouts, and steering line reduce the available lift. Rubber balloons lose roughly 50% of their lift in eight hours, so the inflated volume needs to be enough to retain steering capability at the end of the day. A limp balloon is often better for retrieval of hung models.
- Size considerations: Lift varies with the cube of the radius of the inflated balloon. The lift of a 24-inch-diameter balloon is eight times as great as that of a 12-inch balloon. A huge balloon is unnecessary in Category I sites, and can even pose a problem in a flat-ceiling site. If your model is ceiling-scrubbing, you can't catch it with a big balloon. If you bump it, the model may stall and lose a great deal of altitude.
- Poles: Steering with a pole is allowed, but you must use extreme care to avoid snagging the pole tip in the ceiling. If it whips loose, the model may be damaged.
- Trim for steering: For Category I flying, it is helpful to back off the model's flight trim. A model trimmed for maximum duration in still, unobstructed air will be flying on the edge of a stall. In Category I sites and turbulent air, the model should be trimmed to fly slightly faster so it can recover more rapidly from disturbances.
- Practice model: If you have a sturdy model that doesn't fly as well as you would like, take off the big propeller and rebalance it to fly "low and slow" using smaller rubber and a smaller propeller. Now you have a model with which you can practice steering. Since you're not going all out for first place or a record, you can use a site with odd ceiling height, rafters with an attitude, and a drift problem. You can also practice retrieval if the model hangs up. Without the pressure to win, you will be more relaxed—an excellent learning environment.
Odd Event: Race To Roof (RTR)
Race To Roof (RTR) competitions have been held at some US indoor championship meets. In the top of the dome, near the louvers, there is a 20 x 80-foot recession surrounding the louvers. The object is to launch a model from the floor and have it hit within the recession.
Transcribed from original scans by AI. Minor OCR errors may remain.

