
Country Boy One Design for 2010
Author
Gene Smith [[email protected]]
The Country Boy (1/2A Gas One Design)
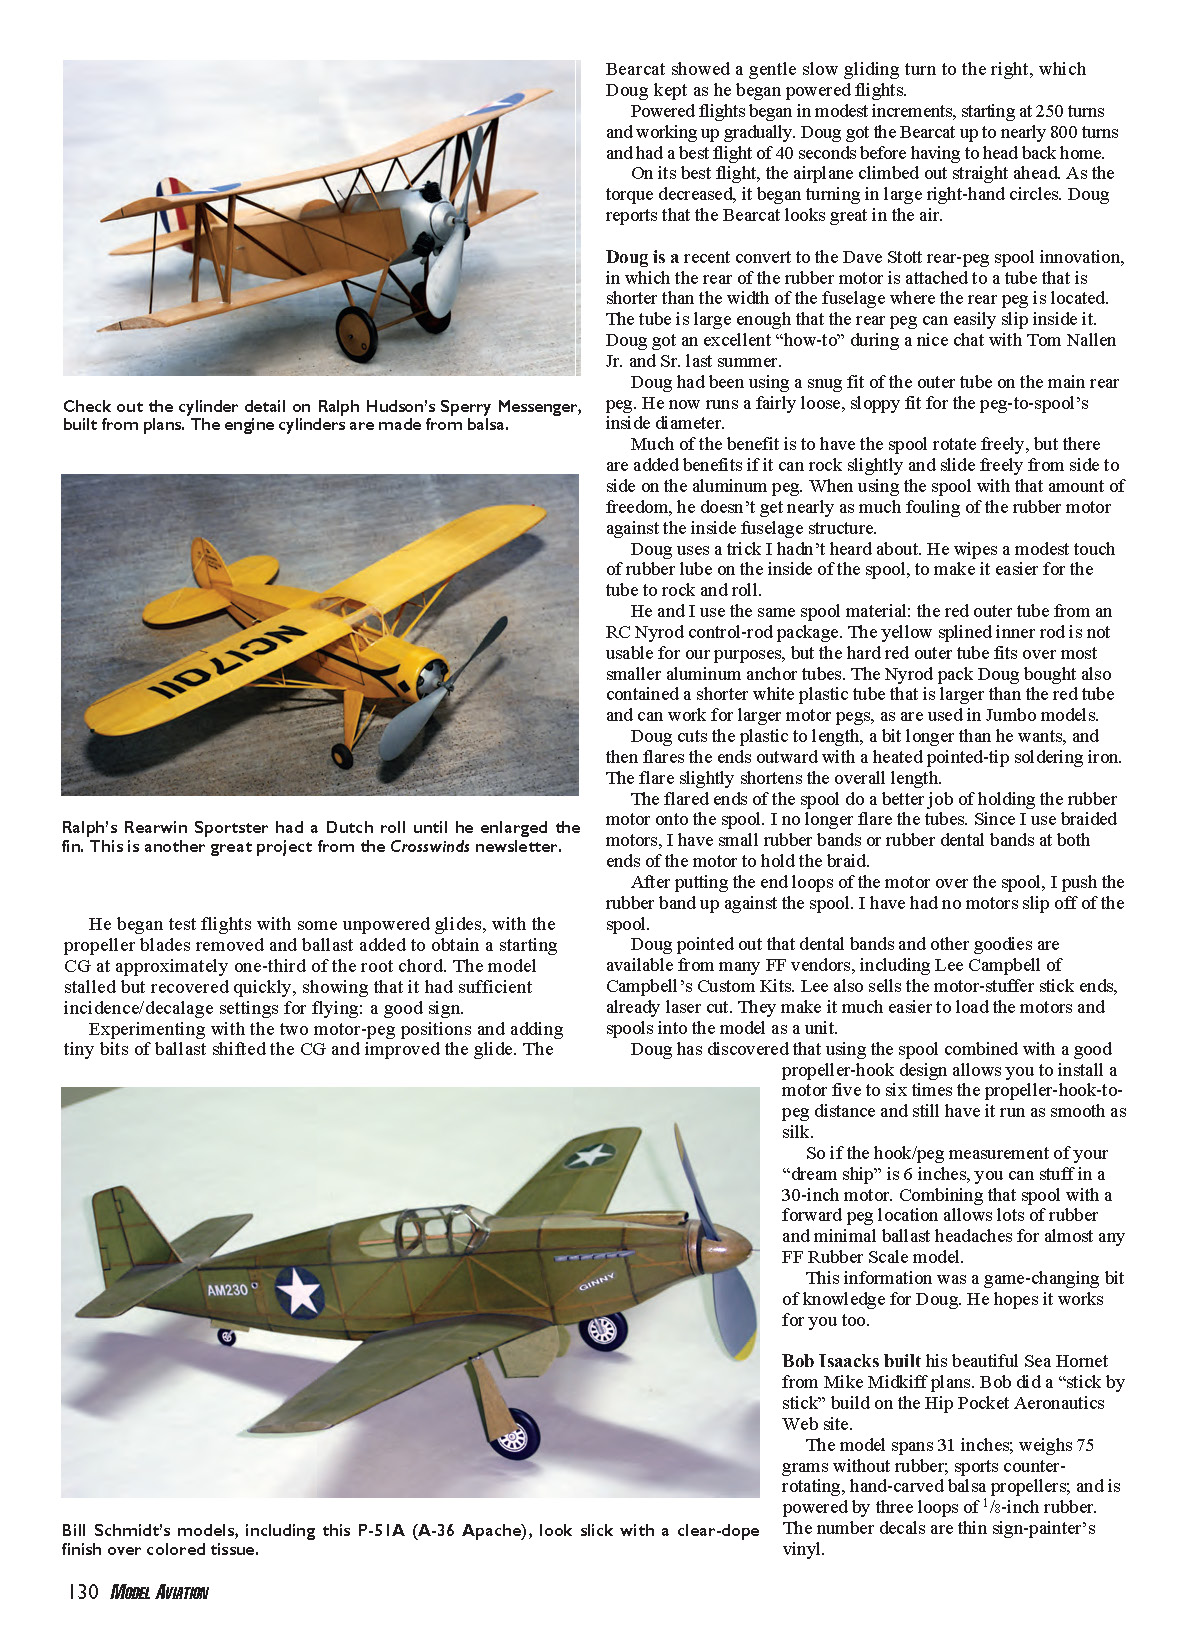
THE COUNTRY BOY by Jim Clem is the 1/2A Gas One Design model for 2010. It flies great and is perfect for that spare Cox TD .049–.051 or Nostalgia-legal 1/2A engine you have in the drawer. Plans are available from the National Free Flight Society (set 341, $8). Kits are available from BMJR Model Products.
Comet P-51A
One of my favorite models I have yet to build is the 18-inch-span Comet P-51A. Bill Schmidt applied a classic tissue-with-clear-dope finish on his version. It is a natural for World War II combat events.
Stabilizer modification
As shown on the plans, the stabilizer is approximately 18% of the wing area. When I build mine, I will enlarge the stabilizer by 15%. The increase will bring the stabilizer to roughly 23% of the wing area and will make the model much easier to trim.
Doug Beardsworth’s Bearcat
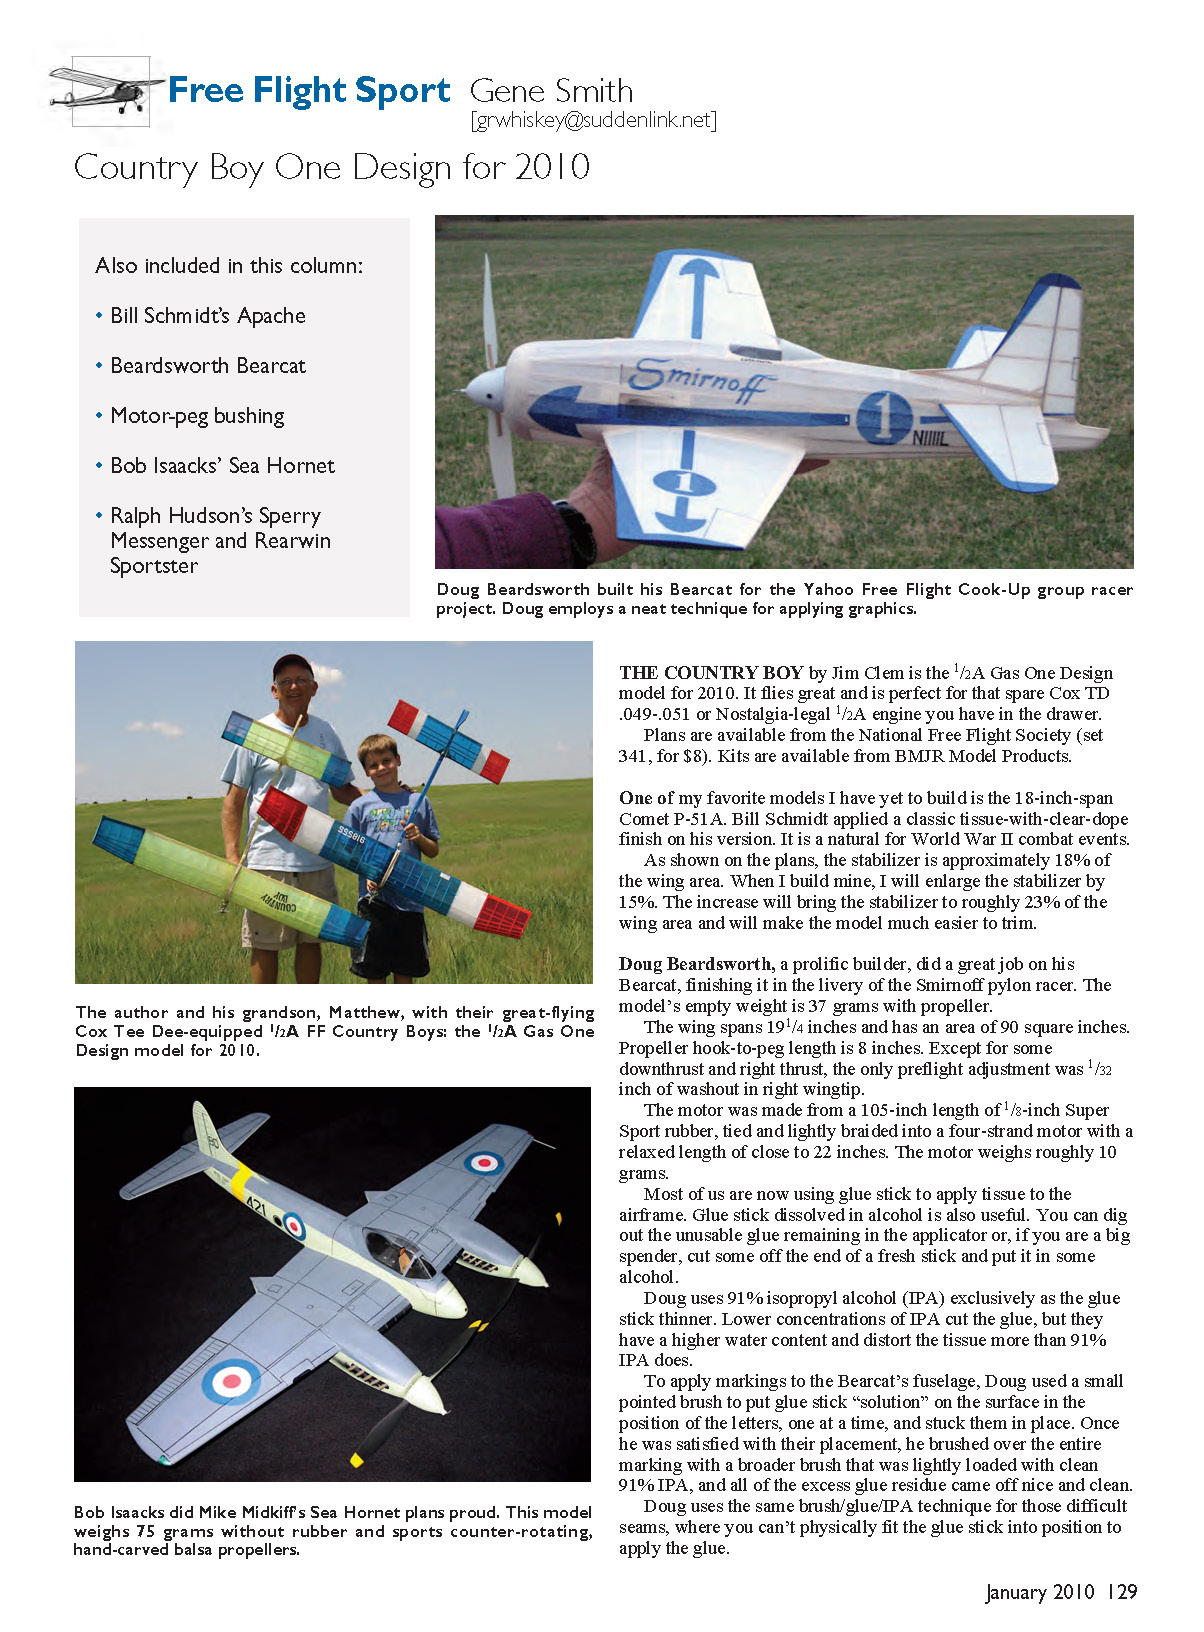
#### Construction and finish Doug Beardsworth, a prolific builder, did a great job on his Bearcat, finishing it in the livery of the Smirnoff pylon racer. The model’s empty weight is 37 grams with propeller. The wing spans 19 1/4 inches and has an area of 90 square inches. Propeller hook-to-peg length is 8 inches. Except for some downthrust and right thrust, the only preflight adjustment was 1/32 inch of washout in the right wingtip.
#### Motor and power The motor was made from a 105-inch length of 1/8-inch Super Sport rubber, tied and lightly braided into a four-strand motor with a relaxed length of close to 22 inches. The motor weighs roughly 10 grams.
Doug has discovered that using a spool combined with a good propeller-hook design allows you to install a motor five to six times the propeller-hook-to-peg distance and still have it run smoothly. So if the hook/peg measurement of your model is 6 inches, you can stuff in a 30-inch motor. Combining that spool with a forward peg location allows lots of rubber and minimal ballast headaches for almost any free-flight rubber scale model.
#### Glue-stick and IPA techniques Most of us now use glue stick to apply tissue to the airframe. Glue stick dissolved in alcohol is also useful. You can dig out the unusable glue remaining in the applicator or, if you prefer, cut some off the end of a fresh stick and put it in some alcohol.
Doug uses 91% isopropyl alcohol (IPA) exclusively as the glue-stick thinner. Lower concentrations of IPA cut the glue, but their higher water content tends to distort the tissue more than 91% IPA does.
To apply markings to the Bearcat’s fuselage, Doug used a small pointed brush to put glue-stick “solution” on the surface in the position of the letters, one at a time, and stuck them in place. Once satisfied with placement, he brushed over the entire marking with a broader brush lightly loaded with clean 91% IPA; the excess glue residue came off cleanly. He uses the same brush/glue/IPA technique for difficult seams where the glue stick itself won’t physically fit.
#### Test flights and trimming Doug began test flights with unpowered glides, with the propeller blades removed and ballast added to obtain a starting CG at approximately one-third of the root chord. The model stalled but recovered quickly, showing sufficient incidence/decalage settings for flying.
Experimenting with two motor-peg positions and adding tiny bits of ballast shifted the CG and improved the glide. The Bearcat showed a gentle slow gliding turn to the right, which Doug kept as he began powered flights. Powered flights began in modest increments, starting at 250 turns and working up gradually. Doug got the Bearcat up to nearly 800 turns and had a best flight of 40 seconds before having to head back home. On its best flight, the airplane climbed out straight ahead; as the torque decreased, it began turning in large right-hand circles.
#### Rear-peg spool innovation and tips Doug is a recent convert to the Dave Stott rear-peg spool innovation. In this setup the rear of the rubber motor is attached to a tube that is shorter than the width of the fuselage where the rear peg is located. The tube is large enough that the rear peg can slip inside it. Doug learned the technique from Tom Nallen Jr. and Sr.
Doug now runs a fairly loose fit for the peg-to-spool inside diameter so the spool rotates freely and can rock slightly and slide from side to side on the aluminum peg. That freedom reduces fouling of the rubber motor against the inside fuselage structure. He wipes a modest touch of rubber lube on the inside of the spool to make it easier for the tube to rock and roll.
Both he and I use the red outer tube from an RC Nyrod control-rod package for spool material. The yellow splined inner rod is not usable for our purposes, but the hard red outer tube fits over most smaller aluminum anchor tubes. The Nyrod pack also contained a shorter white plastic tube that is larger than the red tube and can work for larger motor pegs (as used in Jumbo models).
Doug cuts the plastic to a length slightly longer than needed, then flares the ends outward with a heated pointed-tip soldering iron; the flare slightly shortens the overall length and helps hold the rubber motor on the spool. I no longer flare the tubes. Since I use braided motors, I use small rubber bands or rubber dental bands at both ends of the motor to hold the braid. After putting the end loops of the motor over the spool, I push the rubber band up against the spool; I have had no motors slip off.
Dental bands and other supplies are available from many free-flight vendors, including Lee Campbell of Campbell's Custom Kits. Lee also sells motor-stuffer stick ends, already laser cut. They make it much easier to load motors and spools into the model as a unit.
This spool information was a game-changing bit of knowledge for Doug. He hopes it works for you too.
Other notable builds and flights
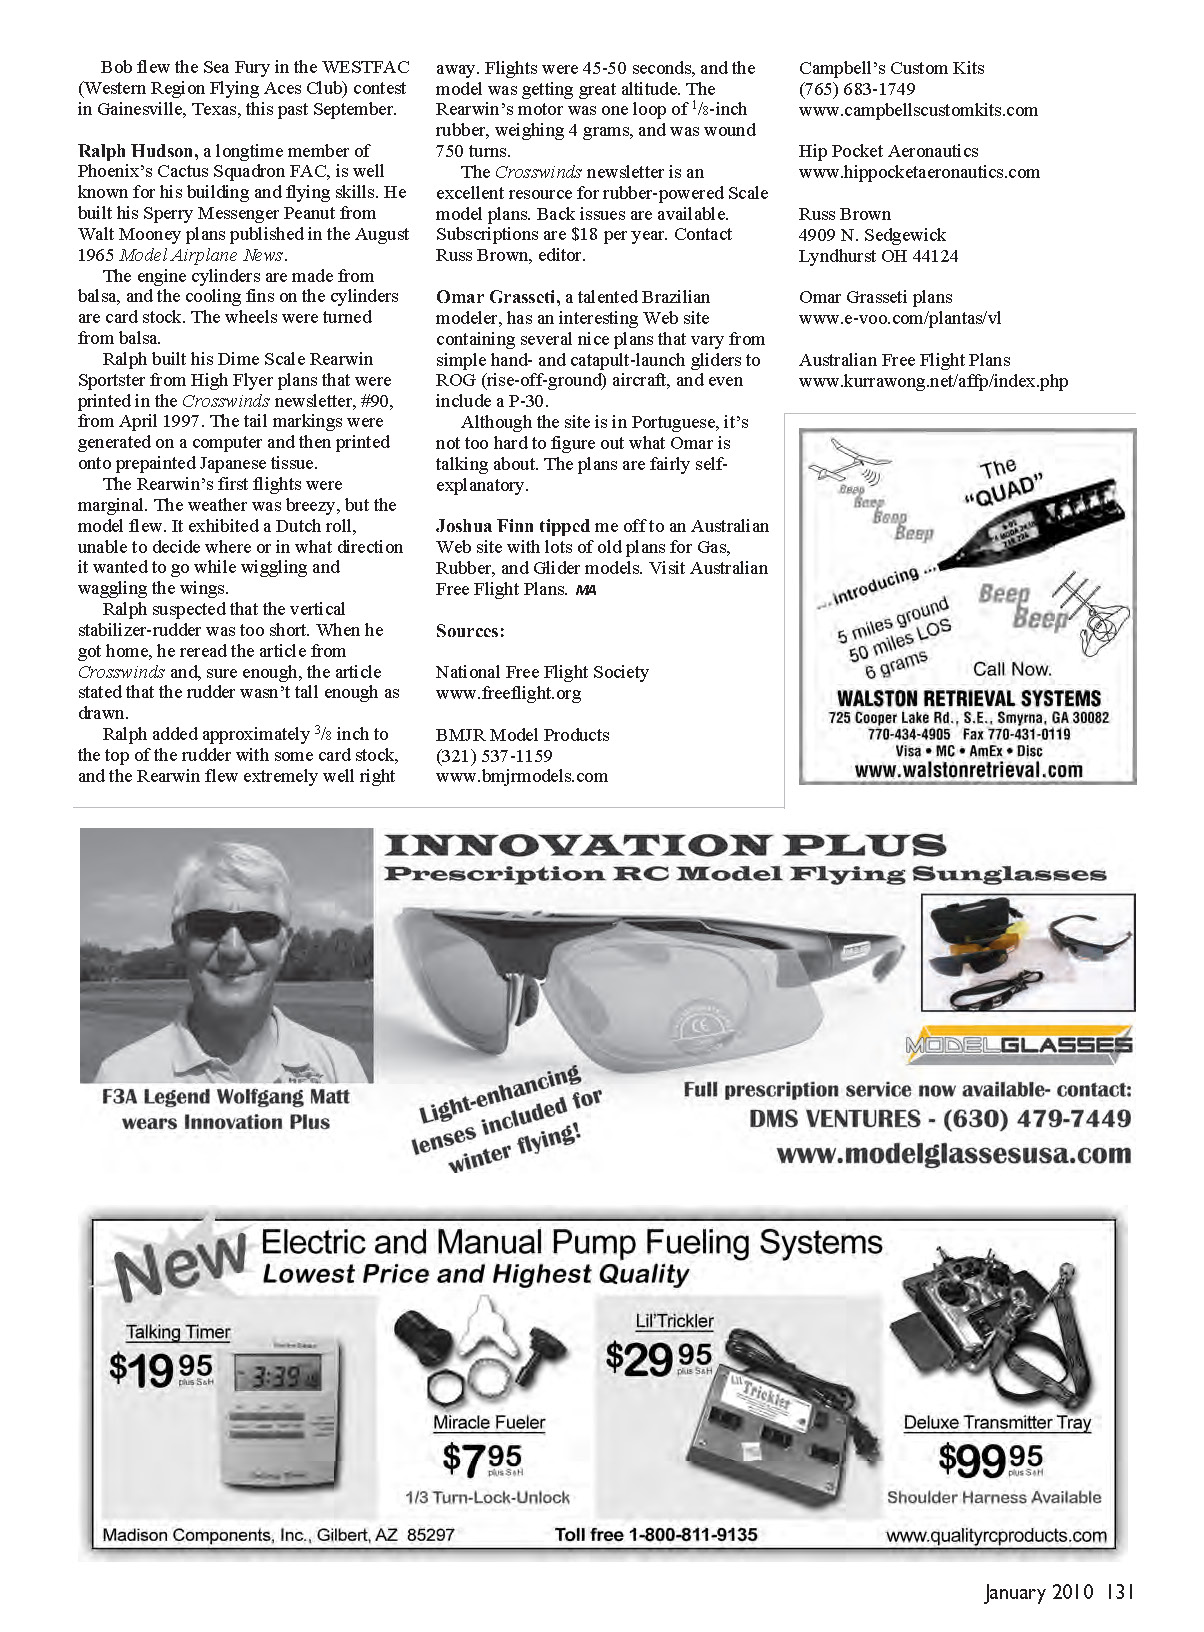
#### Bob Isaacks — Sea Hornet Bob Isaacks built his Sea Hornet from Mike Midkiff plans. Bob did a "stick-by-stick" build posted on the Hip Pocket Aeronautics website. The model spans 31 inches, weighs 75 grams without rubber, sports counter-rotating hand-carved balsa propellers, and is powered by three loops of 1/8-inch rubber. The number decals are thin sign-painter's vinyl. Bob flew the Sea Hornet in the WESTFAC (Western Region Flying Aces Club) contest in Gainesville, Texas, this past September.
#### Ralph Hudson — Sperry Messenger and Rearwin Sportster Ralph Hudson, a longtime member of Phoenix’s Cactus Squadron FAC, is well known for his building and flying skills. He built his Sperry Messenger Peanut from Walt Mooney plans published in the August 1965 Model Airplane News. The engine cylinders are made from balsa, with cooling fins on the cylinders made from cardstock. The wheels were turned from balsa.
Ralph built his Dime Scale Rearwin Sportster from High Flyer plans printed in Crosswinds newsletter #90 (April 1997). The tail markings were generated on a computer and printed onto prepainted Japanese tissue. The Rearwin’s first flights were marginal in breezy conditions; the model exhibited a Dutch roll and could not settle on a direction.
Ralph suspected the vertical stabilizer/rudder was too short. After rereading the Crosswinds article at home, he confirmed the rudder needed to be taller. He added approximately 3/8 inch to the top of the rudder with cardstock, and the Rearwin flew extremely well immediately. Flights were 45–50 seconds with great altitude. The Rearwin’s motor was one loop of 1/8-inch rubber weighing 4 grams and was wound 750 turns.
Crosswinds is an excellent resource for rubber-powered scale model plans. Back issues are available; subscriptions are $18 per year. Contact Russ Brown, editor.
#### Plans and websites Omar Grassetti, a skilled Brazilian modeler, has an interesting website containing several nice plans ranging from simple hand- and catapult-launch gliders to ROG aircraft and a P-30. Although the site is in Portuguese, the plans are fairly self-explanatory.
Joshua Finn tipped me off to an Australian website with lots of old plans for gas, rubber, and glider models (Australian Free Flight Plans).
Sources
- National Free Flight Society
- BMJR Model Products
(321) 537-1159 www.bmjrmodels.com
- Campbell’s Custom Kits
(765) 683-1749 www.campbellscustomkits.com
- Hip Pocket Aeronautics
- Russ Brown (Crosswinds newsletter)
4909 N. Sedgewick Lyndhurst, OH 44124
- Omar Grassetti plans
- Australian Free Flight Plans
www.kurrawong.net/affp/index.php
Transcribed from original scans by AI. Minor OCR errors may remain.

