
FREE FLIGHT SPORT
Gene Smith, 1401 N. Husband St., Stillwater OK 74075; E-mail: [email protected]
TERRY RIMERT'S Three Fixed Laws of FF
- Watch the weight.
- Keep it light.
- It shouldn't weigh much.
Down With Torque
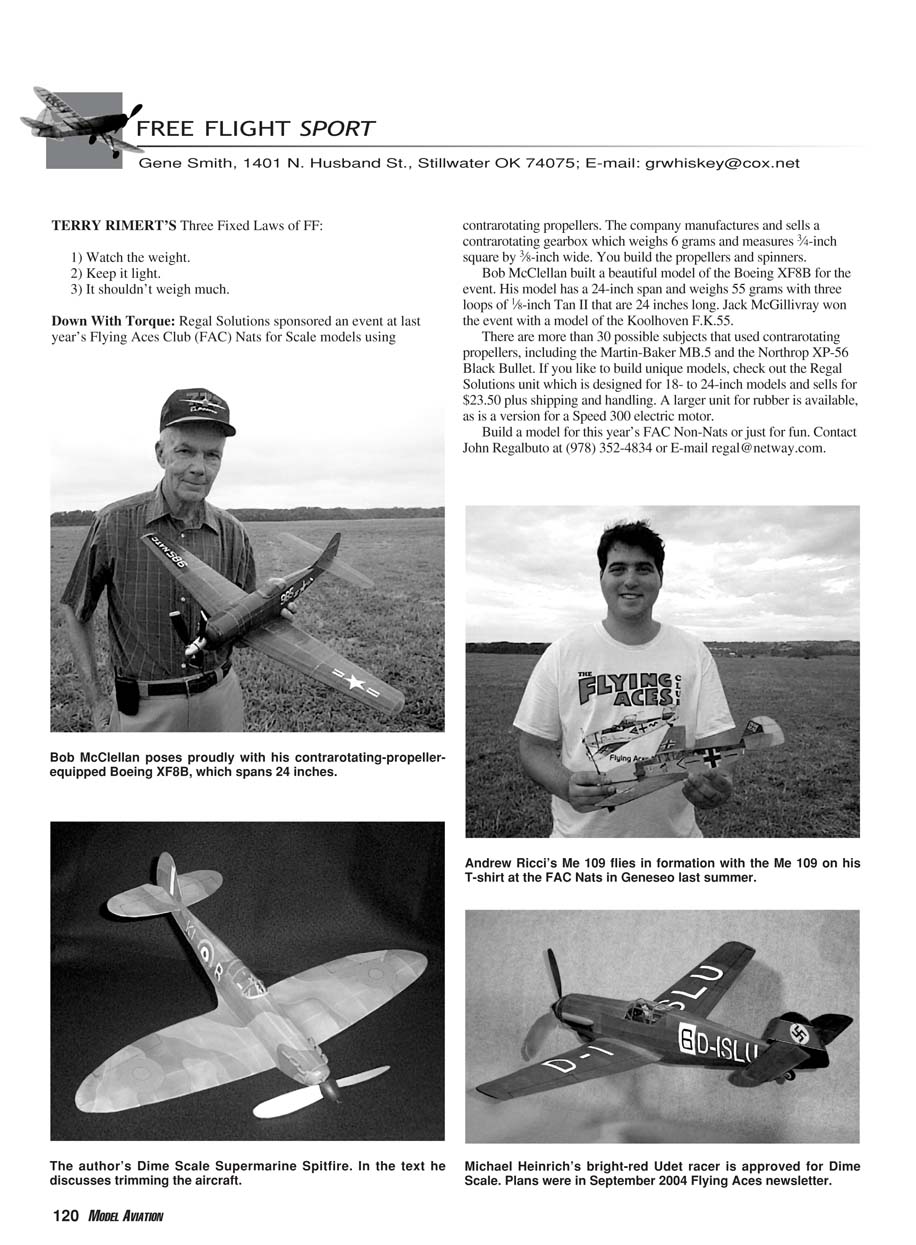
Regal Solutions sponsored an event at last year's Flying Aces Club (FAC) Nats for scale models using contrarotating propellers. The company manufactures and sells a contrarotating gearbox which weighs 6 grams and measures 3/4-inch square by 3/8-inch wide. You build the propellers and spinners.
Bob McClellan built a beautiful model of the Boeing XF8B for the event. His model has a 24-inch span and weighs 55 grams with three loops of 1/8-inch Tan II, each 24 inches long. Jack McGillivray won the event with a model of the Koolhoven F.K.55.
There are more than 30 possible subjects that used contrarotating propellers, including the Martin-Baker MB.5 and the Northrop XP-56 Black Bullet. If you like to build unique models, check out the Regal Solutions unit which is designed for 18- to 24-inch models and sells for $23.50 plus shipping and handling. A larger unit for rubber is available, as is a version for a Speed 300 electric motor.
Build a model for this year's FAC Non-Nats or just for fun. Contact John Regalbuto at (978) 352-4834 or E-mail [email protected].
The Death Trap Squadron FAC
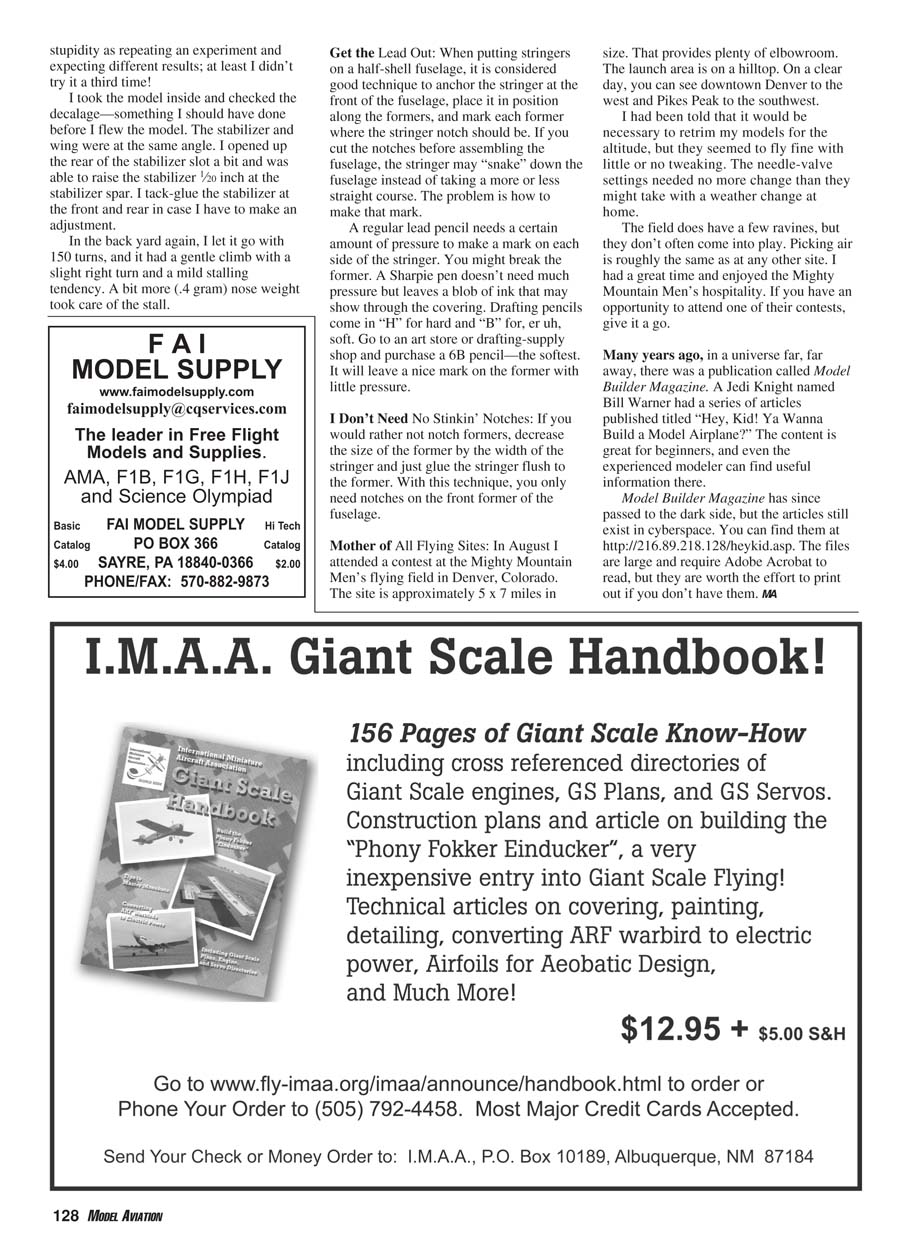
Michael Heinrich and Rocky Russo collaborated on new pseudo Dime Scale plans that were published in the September/October 2004 issue of the Flying Aces newsletter.
The airplane—an early version of the Bf 109—was to be flown by Ernst Udet in the Circuit of the Alps race at Zurich, Switzerland, in July 1937, but it was wrecked after engine trouble. You can just make out Ernst, looking as though he had a rough night, sitting uneasily in the cockpit.
The finished model came in at 17 grams, including 4 grams of propeller. Michael wanted to try a three-blade propeller for better scale effect. The original propeller had three plywood blades, 5.5 inches diameter and 7.8 inches pitch, and provided only marginal performance. I remembered reading that, as a guideline, a three-blade propeller should be roughly 80% of the diameter of the two-blade propeller you would otherwise use. Michael cut the propeller down to just under 5 inches in diameter, narrowed the blades slightly, and lowered the pitch. The model’s performance improved dramatically.
The Bf 109 is covered with preshrunk tissue, borrowing from Chris Parent’s superb work. Michael blended inks to get something close to RLM 28 (Weinrot, or maroon) and sprayed it onto red Esaki tissue hung loosely. The resultant crinkly tissue was ironed and tacked down to carrier sheets with a restickable glue stick, and all markings and the few panel lines were applied. Contrasting fields such as the white areas and the RLM 23 (Rot, or red) fin stripe were glued in. White lettering was done with gel pens and Wite-Out—a technique Michael found unsatisfactory. He advises cutting out opaque tissue and pasting it on. The finished panels were adhered to the model using glue stick.
The preshrunk tissue has a fine matte texture—a soft, plush feel. It can be stretched a bit, so you can tack it at one spot and gently pull to stick it smoothly over the whole area. Small glitches can be picked up and repositioned with tweezers. Once everything is in place, a wipe with a hot trim iron sets it all down. If it’s done right, you get a smooth, rounded appearance to the airplane. The tissue was sealed with Krylon Crystal Clear (number 1301).
Using preshrunk tissue on the flying surfaces means you can’t count on skin tension to induce warps when trimming. Where you would normally twist a wing by wetting it and holding it over a heat source until it’s set, now you must twist the wing by heating the balsa framework and glue joints and persuading it to stay. This technique is doable, but after doing it this way Michael realized that he prefers shrinking the tissue on the model.
You’ve Got Mail
Chris Dante sent a note about his experiences with the Guillows 905 series. These models are just the right size to fly in the limited area of his dead-end street.
He also enclosed Aerographics plans of the 1/6-inch-span Speck which he obtained from Peck-Polymers. The plans show sheet tail feathers, but Chris built them up from 1/16-inch square stock. He flies his model almost every day and notes that it’s a “sweet” flier. He thinks the Speck would fly great with a small electric motor—and he is right. Check with Peck-Polymers for the plans and build your own version.
Right on the Nose
Joe Wagner uses the small rare-earth magnets that RadioShack sells (item 64-1895) to retain nose blocks. He says they will even work when separated by a couple layers of card-stock shim.
Modelers have also used these magnets to hold the wings on small rubber-powered models; I use them on my MiG-9. Each wing has a length of 3/32-inch aluminum tubing at the wing spars (two pairs of spars per wing) that slides onto 1/16-inch aluminum tubing in the fuselage wing-mount area. One magnet is in the root rib of the wing, and the other is in the fuselage.
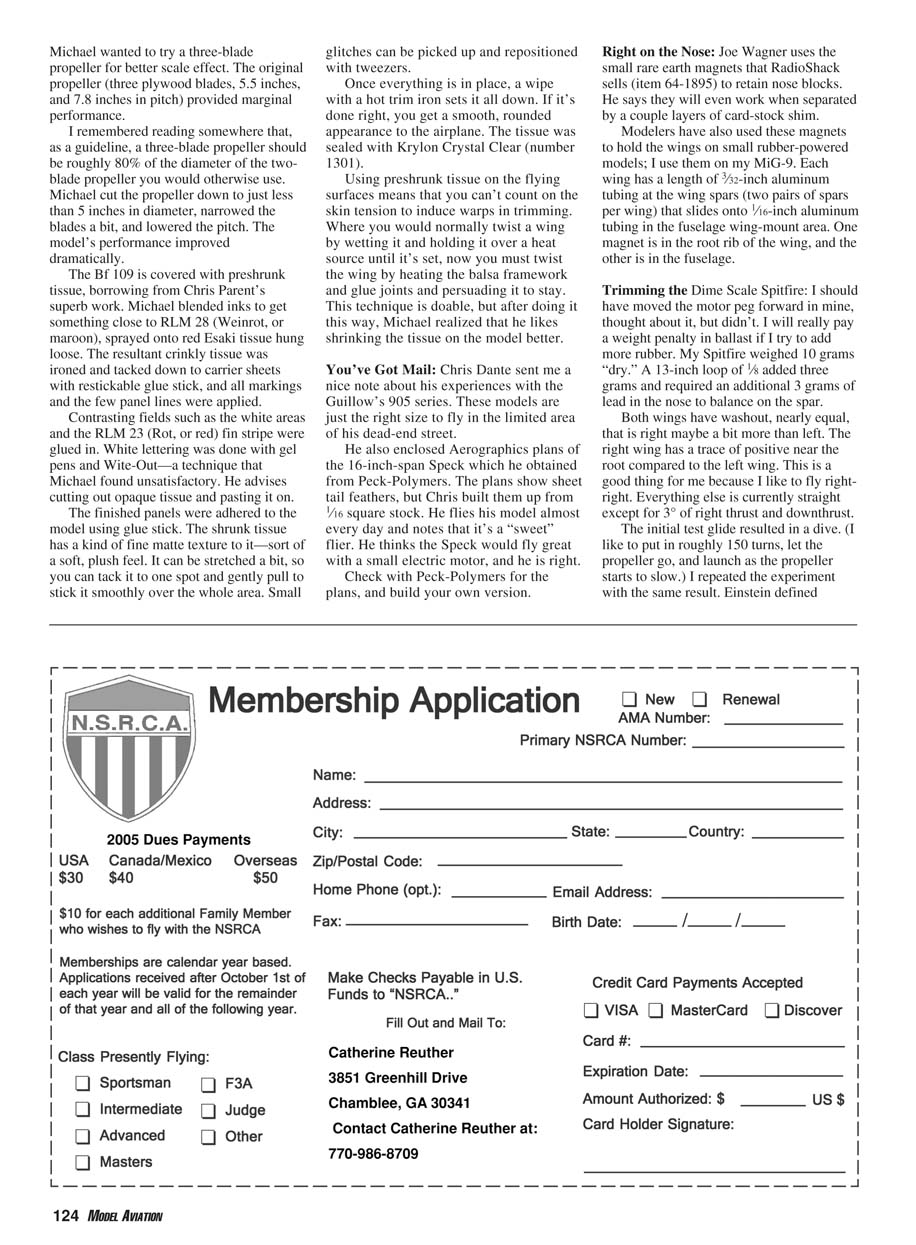
Trimming the Dime Scale Spitfire
I should have moved the motor peg forward in mine—thought about it, but didn’t. I would really pay a weight penalty in ballast if I try to add more rubber. My Spitfire weighed 10 grams “dry.” A 13-inch loop of 1/8-inch added three grams and required an additional 3 grams of lead in the nose to balance on the spar.
Both wings have washout, nearly equal—maybe a bit more on the right than the left. The right wing has a trace of positive incidence near the root compared to the left wing. This is a good thing for me because I like to fly right-right. Everything else is currently straight except for 3° of right thrust and some downthrust.
The initial test glide resulted in a dive. (I like to put in roughly 150 turns, let the propeller go, and launch as the propeller starts to slow.) I repeated the experiment with the same result. Einstein defined stupidity as repeating an experiment and expecting different results; at least I didn't try it a third time!
I took the model inside and checked the decalage—something I should have done before I flew the model. The stabilizer and wing were at the same angle. I opened up the rear of the stabilizer slot a bit and was able to raise the stabilizer 1/20 inch at the stabilizer spar. I tack-glue the stabilizer at the front and rear in case I have to make an adjustment.
Back in the backyard, I let it go with 150 turns, and it had a gentle climb with a slight right turn and a mild stalling tendency. A bit more (0.4 gram) nose weight took care of the stall.
Get the Lead Out
When putting stringers on a half-shell fuselage, it is considered good technique to anchor the stringer at the front of the fuselage, place it in position along the formers, and mark each former where the stringer notch should be. If you cut the notches before assembling the fuselage, the stringer may "snake" down the fuselage instead of taking a more-or-less straight course. The problem is how to make that mark.
A regular lead pencil needs a certain amount of pressure to mark each side of the stringer and you might break the former. A Sharpie pen doesn't need much pressure but leaves a blob of ink that may show through the covering. Drafting pencils come in "H" for hard and "B" for soft. Go to an art store or drafting-supply shop and purchase a 6B pencil—the softest. It will leave a nice mark on the former with little pressure.
I Don't Need No Stinkin' Notches
If you would rather not notch formers, decrease the size of the former by the width of the stringer and glue the stringer flush to the former. With this technique, you only need notches on the front former of the fuselage.
Mother of All Flying Sites
In August I attended a contest at the Mighty Mountain Men's flying field in Denver, Colorado. The site is approximately 5 by 7 miles in size. That provides plenty of elbowroom. The launch area is on a hilltop. On a clear day you can see downtown Denver to the west and Pikes Peak to the southwest.
I had been told that it would be necessary to retrim my models for the altitude, but they seemed to fly fine with little or no tweaking. The needle-valve settings needed no more change than they might take with a weather change at home.
The field does have a few ravines, but they don't often come into play. Picking air is roughly the same as at any other site. I had a great time and enjoyed the Mighty Mountain Men's hospitality. If you have an opportunity to attend one of their contests, give it a go.
Model Builder Magazine
Many years ago, there was a publication called Model Builder Magazine. A series of articles by Bill Warner titled "Hey, Kid! Ya Wanna Build a Model Airplane?" is great for beginners, and even experienced modelers can find useful information there.
Model Builder Magazine has since passed away, but the articles still exist in cyberspace. You can find them at http://216.89.218.128/heykid.asp. The files are large and require Adobe Acrobat to read, but they are worth the effort to print out if you don't have them.
Transcribed from original scans by AI. Minor OCR errors may remain.

