
FREE FLIGHT SPORT
Gene Smith, 1401 N. Husband St., Stillwater OK 74075; E-mail: [email protected]
TIPS FOR STRIPPERS
Stripping wood may seem quite simple, but there are some basic techniques you need to know. Your first attempts should be in the privacy of your shop — not at your model club’s demo in a mall.
There are three reasons to make your own strip wood:
- You can select the balsa for the proper weight and strength for your application.
- It is less expensive to strip your own wood.
- You can cut sizes that are unavailable in the hobby shop.
I use two strippers:
- The Master Airscrew variety — inexpensive and does a nice job for most modelers’ needs. It is readily available at your hobby shop or by mail order.
- The Jim Jones stripper — can strip wood up to 1/8 inch wide and is primarily for indoor-model use. Unfortunately it is no longer produced.
If you want to make your own stripper, check the web site www.mindspring.com/~thayer5/ and look under “tools.” And then there is the old standby: a straightedge and a sharp #11 blade. I like the metal rulers with cork backing for freehand stripping. The cork minimizes slippage.
My first mistake was trying to use wood that was too light. Although 4- to 6-pound stock is fine for some structural use, it is too weak for 1/16-inch stringers. I usually end up using 8- to 12-pound stock for strip wood, depending on the quality of the wood and its intended use. If the balsa is light yet stiff, it is “indoor quality.” If you are serious about it, you can determine the quality of your balsa with a stiffness calculation. Don Slusarczyk’s web site — www.indoorfreeflight.com — features a stiffness calculator and guidelines to let you know what a “good” value would be.
After selecting the proper weight of wood, make sure the stock is straight-grained. If the sheet is otherwise satisfactory but the grain is at a slight angle to the edge of the sheet, use a straightedge as a guide and make a cut parallel to the grain so that the strip wood can be taken from the new edge with straight grain. Be sure the blade is sharp. If there is a little deviation in the grain, make the pass so that the grain moves away from the free edge of the strip; otherwise, the strip will narrow as the blade tries to follow the grain.
When using the Master Airscrew stripper, make the first pass using relatively little pressure so the blade will not have a tendency to wander with the grain. Each pass can be slightly deeper until the cut is complete. When cutting 1/4-inch or thicker stock, flip the sheet over to complete the cut. Rocky Russo has found that the heavier #10 blade gives a more accurate cut.
I strip all the wood for my models except for the occasional kit-build. If you are using kit strip wood, you still need to check the strips before you use them. Some will be stronger (heavier) than others. Use the heavier stock for main stringers and the lighter stock for the tail feathers. Another nuance: if your strip is heavier at one end than the other, use the heavy end for the front of the model so the lighter end is near the tail. Weighing sheet balsa has been a great learning experience for me. With time you can judge wood weight fairly well by just looking at it.
Develop the habit of holding the sheet wood up to a light. You can see the areas of lighter and heavier wood within the sheet, at least up to 1/16 inch in thickness.
My friend Clarence Mather, an experienced modeler who was on the U.S. free-flight indoor team years ago and has published a number of original designs, uses 1/32 square in his Peanut-size models. He was often unable to find light wood in his local hobby shop, but they almost always had some heavy 1/32 sheet.
Clarence discovered that he could use the hard 1/32 sheet in crossbracing and other applications and achieve the same strength and light weight as “better” wood. You can see two of his models — a P-39 and P-51B — in the old Model Builder Flying Scale Models of WWII plans book. He used 1/32 x 1/16 for the fuselage stringers and 1/32 sheet for the wing ribs.
Plastic Nose Surgery
Let’s say you bought a neat-looking model kit with a molded plastic nose that has provisions for a small thrust button. Not only is the nose opening too small for a decent rubber motor, but trying to make thrust adjustments would be a nightmare. You could improvise a built-up nose or carve a nose block, but there is that nice-looking molded cowl begging to be used.
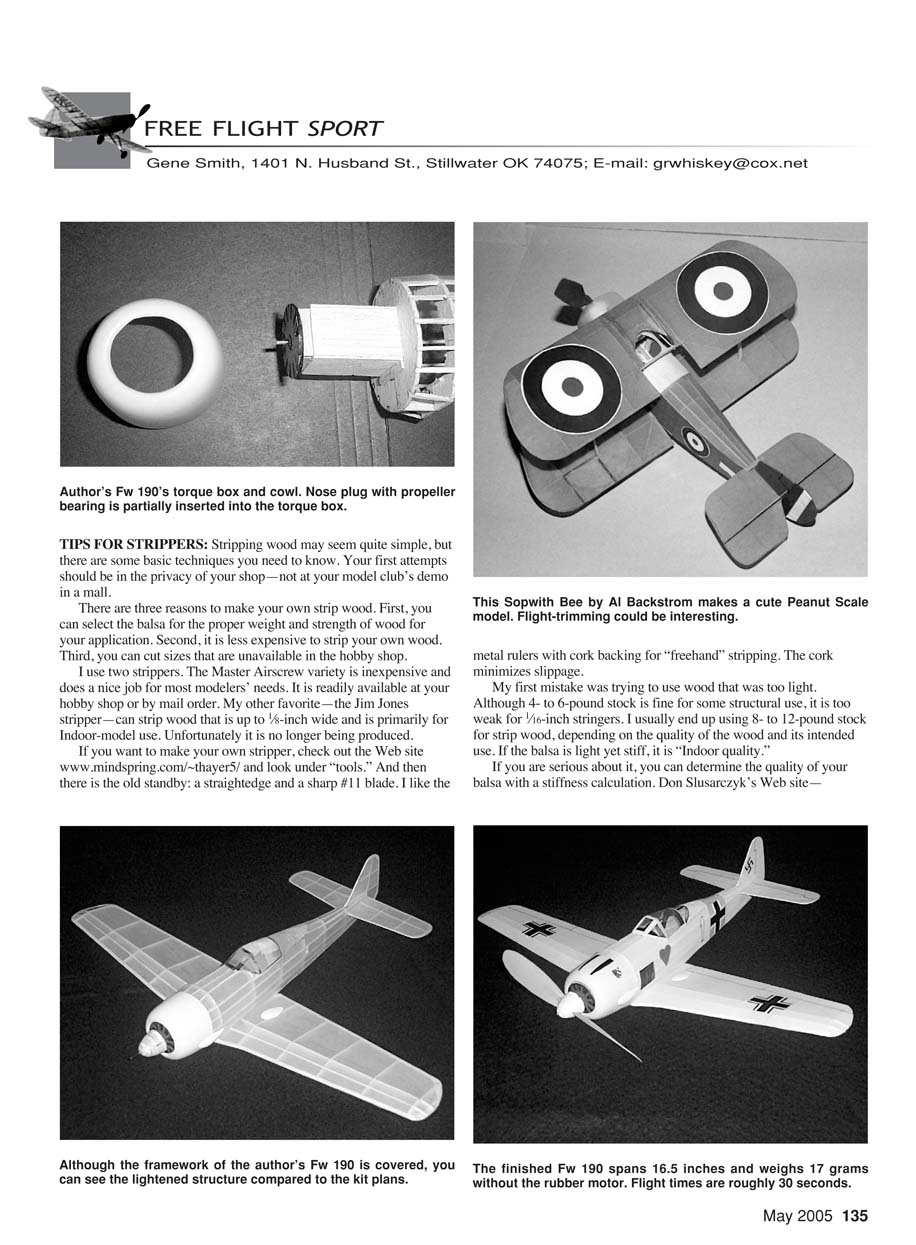
Enter Howard Littman with a neat solution. He builds what he calls a “torque box” in front of the number-one former. This sheet-balsa box has an opening in the front for a nose block that allows thrust adjustments. The plastic cowl does not even have to be glued to the torque box.
Howard also often adds a small ballast box below the torque box. The ballast box, as the name implies, holds BB shot as needed for nose weight. A small hole in the box allows shot to be added; once the proper amount is in place, a couple drops of cyanoacrylate glue keep it from rattling around.
The Stuka did not need a separate box because of the shape of the cowl. Howard put a hole in the former behind the radiator louvers and dropped the shot into the bottom of the cowl from the back.
Another problem is that the small size of Guillow’s 500-series models leaves room for only a 5/8-inch square torque box under the cowl of liquid-cooled-engined airplanes such as the Stuka and the Spitfire. That can result in the rubber climbing off the propeller hook and binding inside the torque box early in the power run.
This can be solved by using a sleeve of heat-shrink tubing over the first inch or so of the motor. That also smooths the motor run and allows for as short a propeller shaft as possible to make the thrustline adjustments more effective. The binding problem does not exist in 500-series models of radial-engined airplanes or the larger Guillow’s kits since those cowls have room for a larger torque box.
The Stuka is resplendent in its orange-and-black finish with Japanese markings. Howard explains that the Japanese Stuka “probably was.” Some sources say that the Japanese had several Stukas supplied by the Germans for testing with a view to possible licensed production. The overall orange with black cowling was a typical experimental aircraft color scheme in Japan during the period.
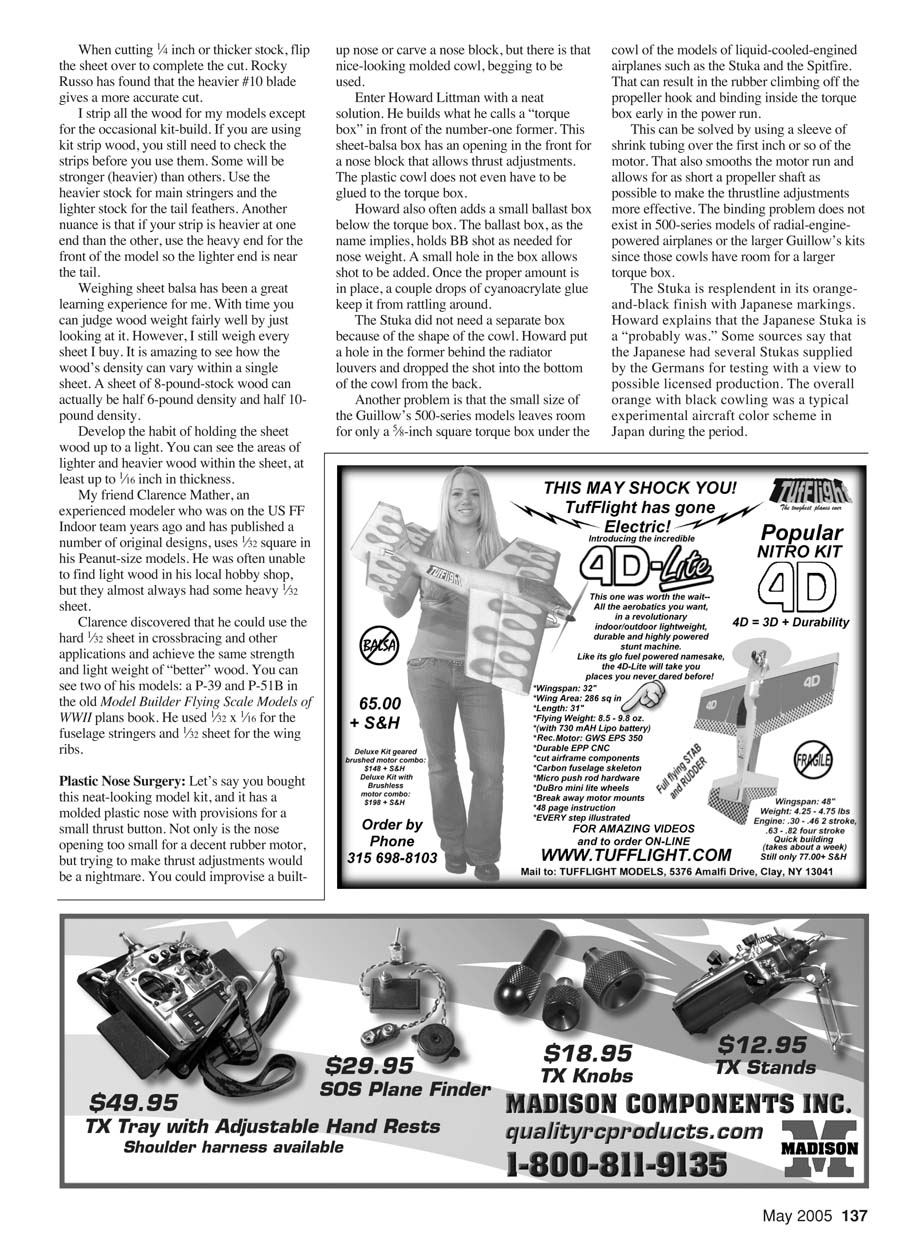
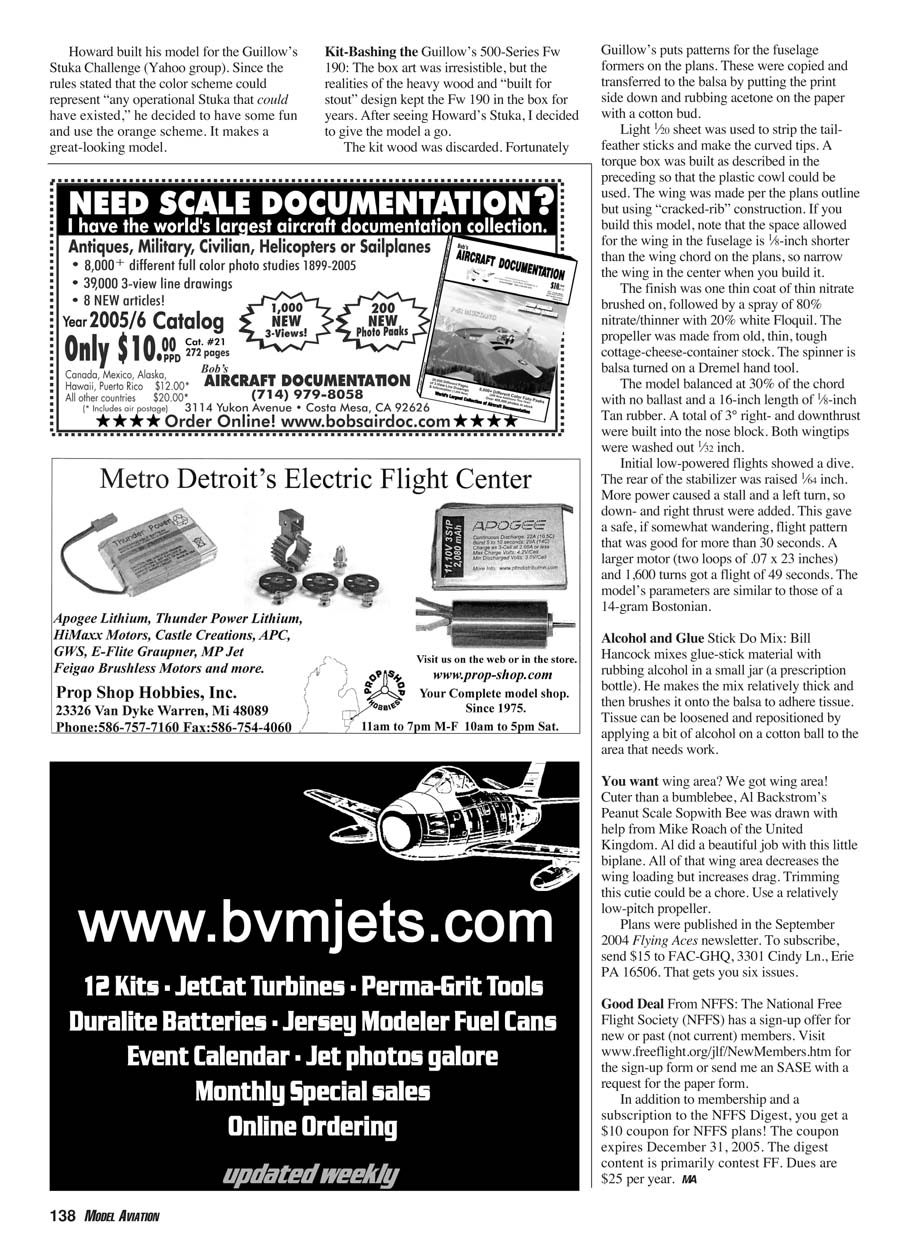
Kit-Bashing the Guillow’s 500-Series Fw 190
The box art was irresistible, but the realities of the heavy wood and “built for stout” design kept the Fw 190 in the box for years. After seeing Howard’s Stuka, I decided to give the model a go.
The kit wood was discarded. Fortunately Guillow’s puts patterns for the fuselage formers on the plans. These were copied and transferred to the balsa by putting the print side down and rubbing acetone on the paper with a cotton bud.
Light 1/16 sheet was used to strip the tailfeather sticks and make the curved tips. A torque box was built as described above so that the plastic cowl could be used. The wing was made per the plan’s outline but using “cracked-rib” construction. If you build this model, note that the space allowed for the wing in the fuselage is 1/8 inch shorter than the wing chord on the plans, so narrow the wing in the center when you build it.
The finish was one thin coat of thin nitrate brushed on, followed by a spray of 80% nitrate/thinner with 20% white Floquil. The propeller was made from old, thin, tough cottage-cheese-container stock. The spinner is also turned on a Dremel hand tool.
The model balanced at 30% of the chord with no ballast and a 1/16-inch length of 1/8-inch tan rubber. A total of 3° right- and downthrust were built into the nose block. Both wingtips were washed out 1/32 inch.
Initial low-powered flights showed a dive. The rear of the stabilizer was raised 1/64 inch. More power caused a stall and a left turn, so down- and right-thrust were added. This gave a safe, if somewhat wandering, flight pattern that was good for more than 30 seconds. A larger motor (two loops of .07 x 23 inches) and 1,600 turns got a flight of 49 seconds. The model’s parameters are similar to those of a 14-gram Bostonian.
Alcohol and Glue-Stick Do Mix
Bill Hancock mixes glue-stick material with rubbing alcohol in a small jar (a prescription bottle). He makes the mix relatively thick and then brushes it onto the balsa to adhere tissue. Tissue can be loosened and repositioned by applying a bit of alcohol on a cotton ball to the area that needs work.
You Want Wing Area? We Got Wing Area!
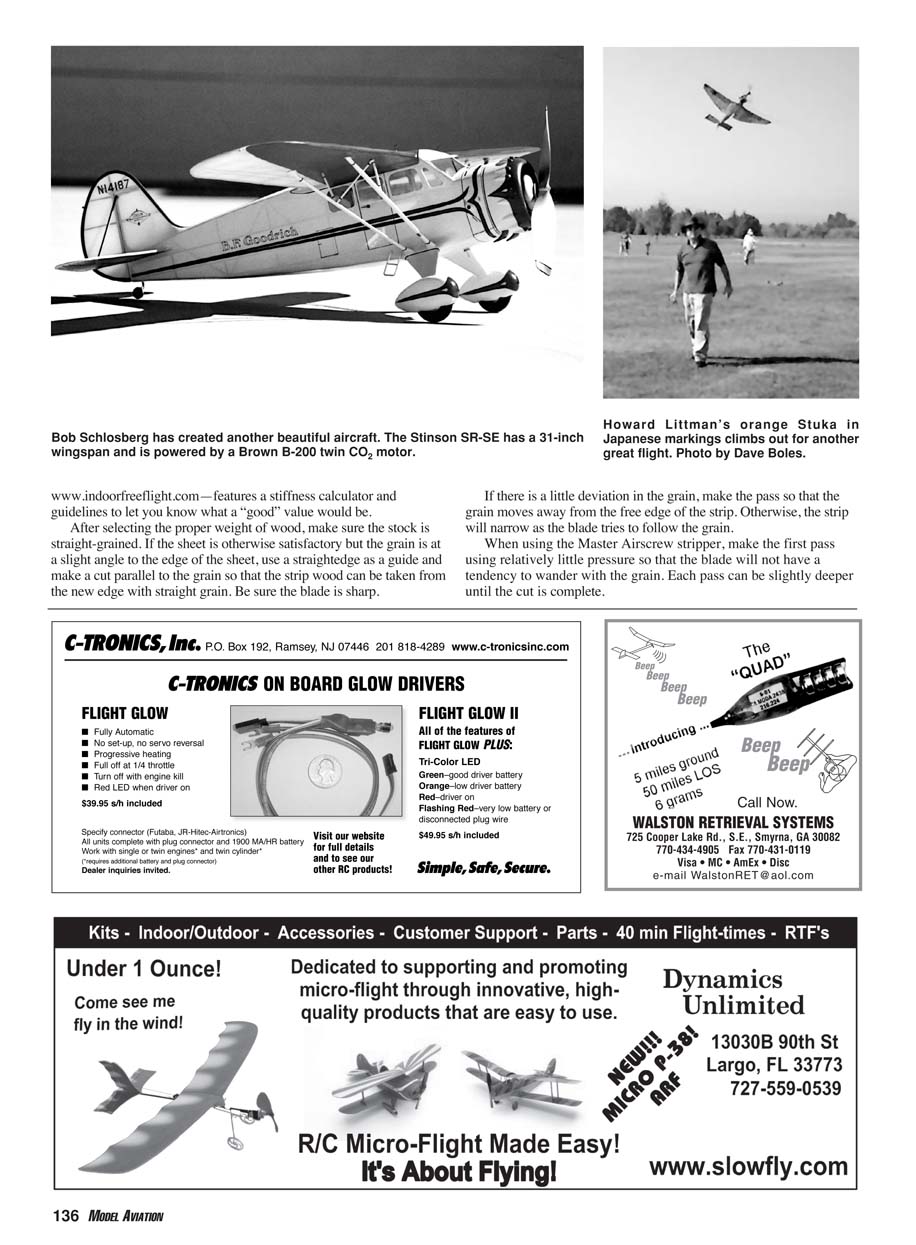
Cuter than a bumblebee, Al Backstrom’s Peanut Scale Sopwith Bee was drawn with help from Mike Roach of the United Kingdom. Al did a beautiful job with this little biplane. All of that wing area decreases the wing loading but increases drag. Trimming this cutie could be a chore. Use a relatively low-pitch propeller.
Plans were published in the September 2004 Flying Aces newsletter. To subscribe, send $15 to FAC-GHQ, 3301 Cindy Ln., Erie PA 16506. That gets you six issues.
Good Deal From NFFS
The National Free Flight Society (NFFS) has a sign-up offer for new or past (not current) members. Visit www.freeflight.org/join/NewMembers.htm for the sign-up form or send me an SASE with a request for the paper form.
In addition to membership and a subscription to the NFFS Digest, you get a $10 coupon for NFFS plans. The coupon expires December 31, 2005. The digest content is primarily contest free flight. Dues are $25 per year.
Transcribed from original scans by AI. Minor OCR errors may remain.

