

Free Flight Sport - 2007/07
Gene Smith [[email protected]]
An electric-conversion Heath Parasol on floats
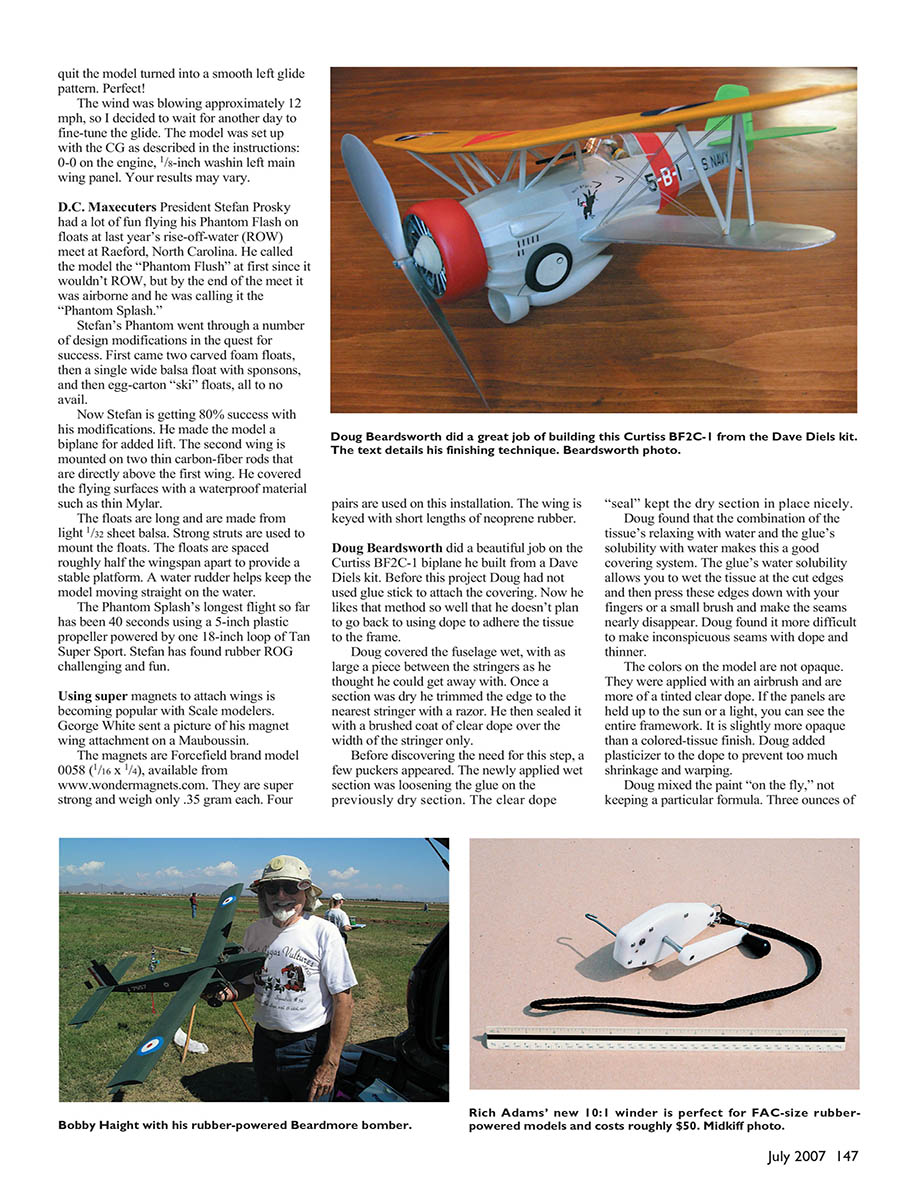
Buzz Trabic did a great job on his Heath Parasol on floats. The model spans 37 inches and weighs 8.5 ounces. Originally built for rubber power, it didn't have much duration. Buzz hopes to solve those short flight times by converting it to electric.
The model now sports an EPU7 electric motor and an ElectriFly 10 x 4.5 propeller from Tower Hobbies. The flight pack is six 250 mAh Ni-Cd cells. As of this writing, flight tests are pending.
Bounty Hunter trimming session
The first trimming session with my BMJR Model Products kit Bounty Hunter (see the March 2007 column) was short and sweet. The Texas Timers Micro timer was set for three seconds with a quick DT. The Tee Dee .049 was peaked and the model launched a bit left of the wind. The Bounty Hunter had a nice turn to the left, kept its nose up, and had a quick glide transition just before the DT.
For the second flight the timer was set at just more than six seconds and the quick DT was set for a 10-second delay. The climb was a perfect nose-up left spiral. When the engine quit the model turned into a smooth left glide pattern. Perfect!
The wind was blowing approximately 12 mph, so I decided to wait for another day to fine-tune the glide. The model was set up with the CG as described in the instructions: 0-0 on the engine, 1/8-inch wash-in on the left main wing panel. Your results may vary.
Phantom Flash / Phantom Splash on floats
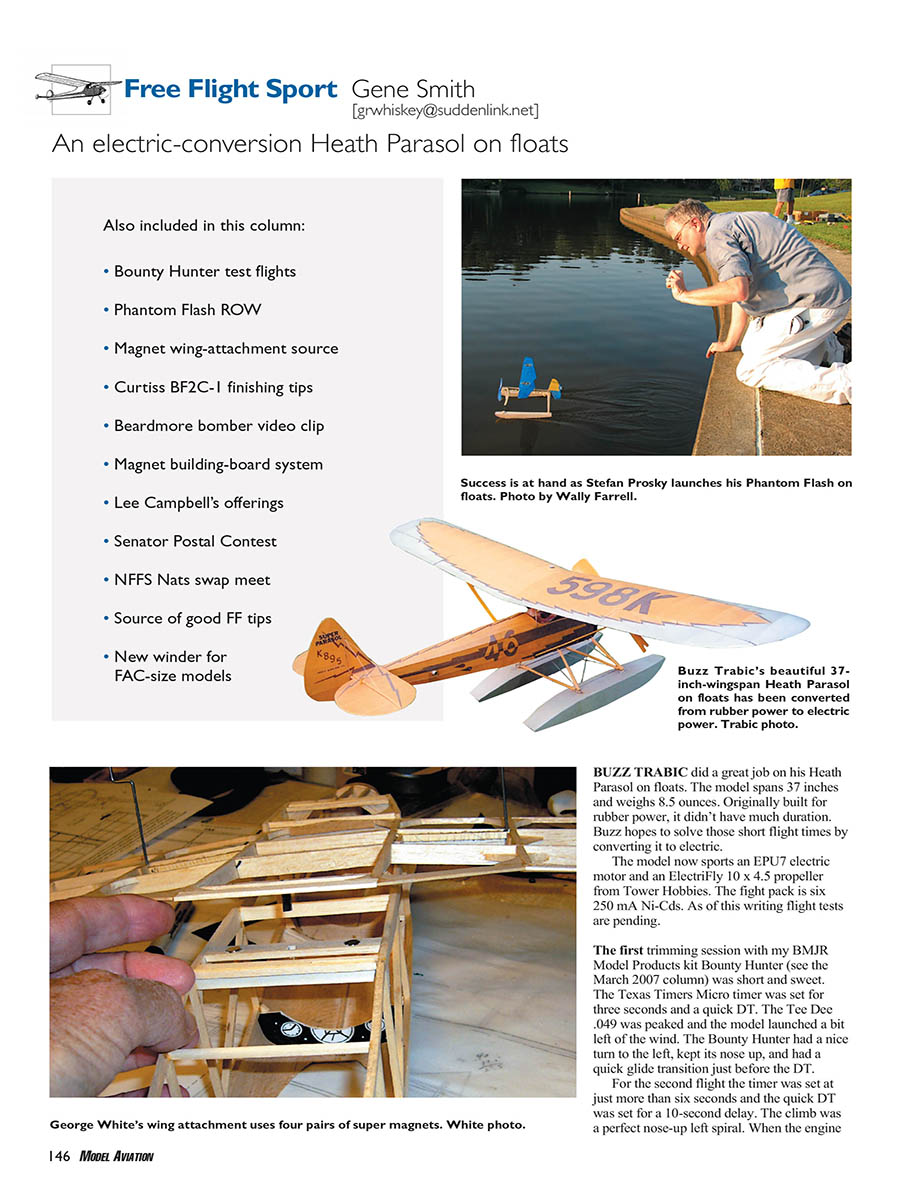
D.C. Maxecuters' president Stefan Prosky had a lot of fun flying his Phantom Flash on floats at last year's rise-off-water (ROW) meet at Raeford, North Carolina. He called the model the "Phantom Flush" at first since it wouldn't ROW, but by the end of the meet it was airborne and he was calling it the "Phantom Splash."
Stefan's Phantom went through a number of design modifications in the quest for success. First came two carved foam floats, then a single wide balsa float with sponsons, and then egg‑carton "ski" floats, all to no avail.
Now Stefan is getting about 80% success with his modifications. He made the model a biplane for added lift. The second wing is mounted on two thin carbon-fiber rods that are directly above the first wing. He covered the flying surfaces with a waterproof material such as thin Mylar.
The floats are long and are made from light 1/32-inch sheet balsa. Strong struts are used to mount the floats. The floats are spaced roughly half the wingspan apart to provide a stable platform. A water rudder helps keep the model moving straight on the water.
The Phantom Splash's longest flight so far has been 40 seconds using a 5-inch plastic propeller powered by one 18-inch loop of Tan Super Sport. Stefan has found rubber ROG challenging and fun.
Magnet wing attachments
Using super magnets to attach wings is becoming popular with Scale modelers. George White sent a picture of his magnet wing attachment on a Mauboussin.
- Magnets: Forcefield brand model 0058 (1/16 x 1/4 inches), available from www.wondermagnets.com
- Weight: 0.35 gram each
- Installation: four pairs are used; the wing is keyed with short lengths of neoprene rubber
Curtiss BF2C-1 finishing technique (Doug Beardsworth)
Doug Beardsworth did a beautiful job on his Curtiss BF2C-1 biplane he built from a Dave Diels kit. Before this project Doug had not used a glue stick to attach the covering. Now he likes that method so well that he doesn't plan to go back to using dope to adhere the tissue to the frame.
Doug covered the fuselage wet, using as large a piece between the stringers as he thought he could get away with. Once a section was dry he trimmed the edge to the nearest stringer with a razor. He then sealed the edge with a brushed coat of clear dope over the width of the stringer only.
Before discovering the need for this step, a few puckers appeared. The newly applied wet section was loosening the glue on the previously dry section. The clear-dope "seal" kept the dry section in place nicely.
Doug found that the combination of the tissue's relaxing with water and the glue's solubility with water makes this a good covering system. The glue's water solubility allows you to wet the tissue at the cut edges, press these edges down with your fingers or a small brush, and make the seams nearly disappear. Doug found it more difficult to make inconspicuous seams with dope and thinner.
The colors on the model are not opaque. They were applied with an airbrush and are more of a tinted clear dope. If the panels are held up to the sun or a light, you can see the outline of the framework. It is slightly more opaque than a colored-tissue finish. Doug added plasticizer to the dope to prevent too much shrinkage and warping.
Paint mixing and application
- Clear base: three ounces of clear base were made with 40% nitrate dope, 60% thinner, and four or five drops of Dave Brown Products' plasticizer per ounce of dope. Each color was made using this clear base.
- Floquil mix: approximately 30% Floquil, 30% clear base, and 40% thinner (or enough to spray well).
- Coats: each surface received four or five lightly sprayed coats.
Since you are spraying mostly thinner, you can carefully build up color and opacity. Adding more clear dope and less Floquil gives a slightly glossier finish; a heavier percentage of Floquil to the clear base gives a more matte finish.
Doug sprayed the wing and tail surfaces without predoping the surfaces. He did apply some thinned, nonplasticized clear nitrate to parts of the fuselage to shrink out a few loose sections before painting. The tissue became a bit saggy when sprayed but tightened once it dried. Doug was careful to have the silver and chrome yellow paint ready to spray in the same evening so he would shoot the top and bottom within an hour of each other. Painting both in relatively quick succession seems to help minimize warping.
Doug believes using a larger percentage of thinner allows larger, wetter coats to be sprayed without building up the solids of the dope and pigment (and weight) too fast. He waits only roughly five minutes between each of the four to five coats since it dries so fast.
Ventilation and finish
- Doug made a spray booth/table to suck the fumes away and out of the house; this is important given the amount of fumes the thinner generates.
- Some Floquil colors spray out much flatter in finish than others: yellow was quite glossy, while red and gray were more matte.
- Blending Floquil with clear to make the tinted dope for the initial color spray helped moderate differences. The best fix was a final top coat of thinned, plasticized nitrate dope.
- That final coat made the tones much more consistent—close to the decals' semigloss finish—and helped the decal film to disappear once applied. A bit of silver added to the final coat and shot over the silver fuselage gave the colors a nice overall metallic finish.
- After the final coat, apply decals; Doug applied the kit's decals directly over the painted finish and they sank down into the surface nicely.
Thanks to Doug for the detailed explanation of his finishing technique.
Beardmore bomber (Bobby Haight)
Bobby Haight of the Las Vegas Vultures Flying Aces Club (FAC) group flew his 50-inch-span Beardmore bomber at the Catalina Squadron Annual. The electric-powered version uses three geared HiLine MINI-6 motors turning 6-inch-diameter propellers and is powered by four 270 mAh batteries. The rubber-powered version uses a 12-inch flying propeller and two small scale propellers.
Bobby's Beardmore was inspired by a model he saw on a video. He had been mulling over a three-view of the airplane, but seeing Eddie Novak's model inspired him to build his own.
In another fortuitous coincidence Bobby discovered that his modeling buddy Chuck Wenlock had built a Beardmore and offered Bobby a set of plans. Chuck has had several successful 24-inch-span models published in the Flying Models "Spin, Crash & Bern" series. His company logo is "Miracle Model Airplane Company." If it flies, it's a miracle.
Bobby has been pleased with his Beardmore. The rubber-powered version has a flight of more than three minutes to its credit. You can see a fascinating 1928 short newsreel clip of the original airplane at www.hallamstudios.com/aviation1928.mov.
Resources and classifieds
- Magnet building-board system: useful information at www.airfieldmodels.com (also a fun site for those with a cat in the workshop).
- Easy Built Models: board with 20 magnets for $21.95 plus shipping and handling. Call (334) 358-5184 or visit www.easybuiltmodels.com/parts.htm.
- Lee Campbell kits: Scale, sport, and contest FF kits at www.campbellcustomkits.com.
- Senator Postal Contest 2007/2008: runs until February 28, 2008. Contact Jim Moseley at [email protected]. He already has almost $300 for the general prize list and a $50 donation to be awarded to the top-placing Junior in this event.
- NFFS swap meet at the NFFS Nats: David Mills ([email protected]) is coordinating the swap meet on Monday evening, July 30, from 5 p.m. until dark.
- To reserve a table ($5): send a check made out to NFFS to Don Brown, 477 Safari Cir., Stone Mountain, GA 30083. Proceeds benefit the NFFS scholarship fund.
- New England Wakefield Group: tips and information at www.newg.info/index.html.
- New FAC-size rubber winder: 10:1 ratio, 5 inches long, weighs 2.5 ounces. Successfully tested on as many as four loops of 1/4-inch rubber.
- Seller: Rich Adams, $47.95 plus $5 shipping and handling (USPS Priority Mail in the continental US).
- Contact: [email protected] or write to Rich Adams, 1446 Cat Mountain Tr., Keller, TX 76248.
Transcribed from original scans by AI. Minor OCR errors may remain.

