
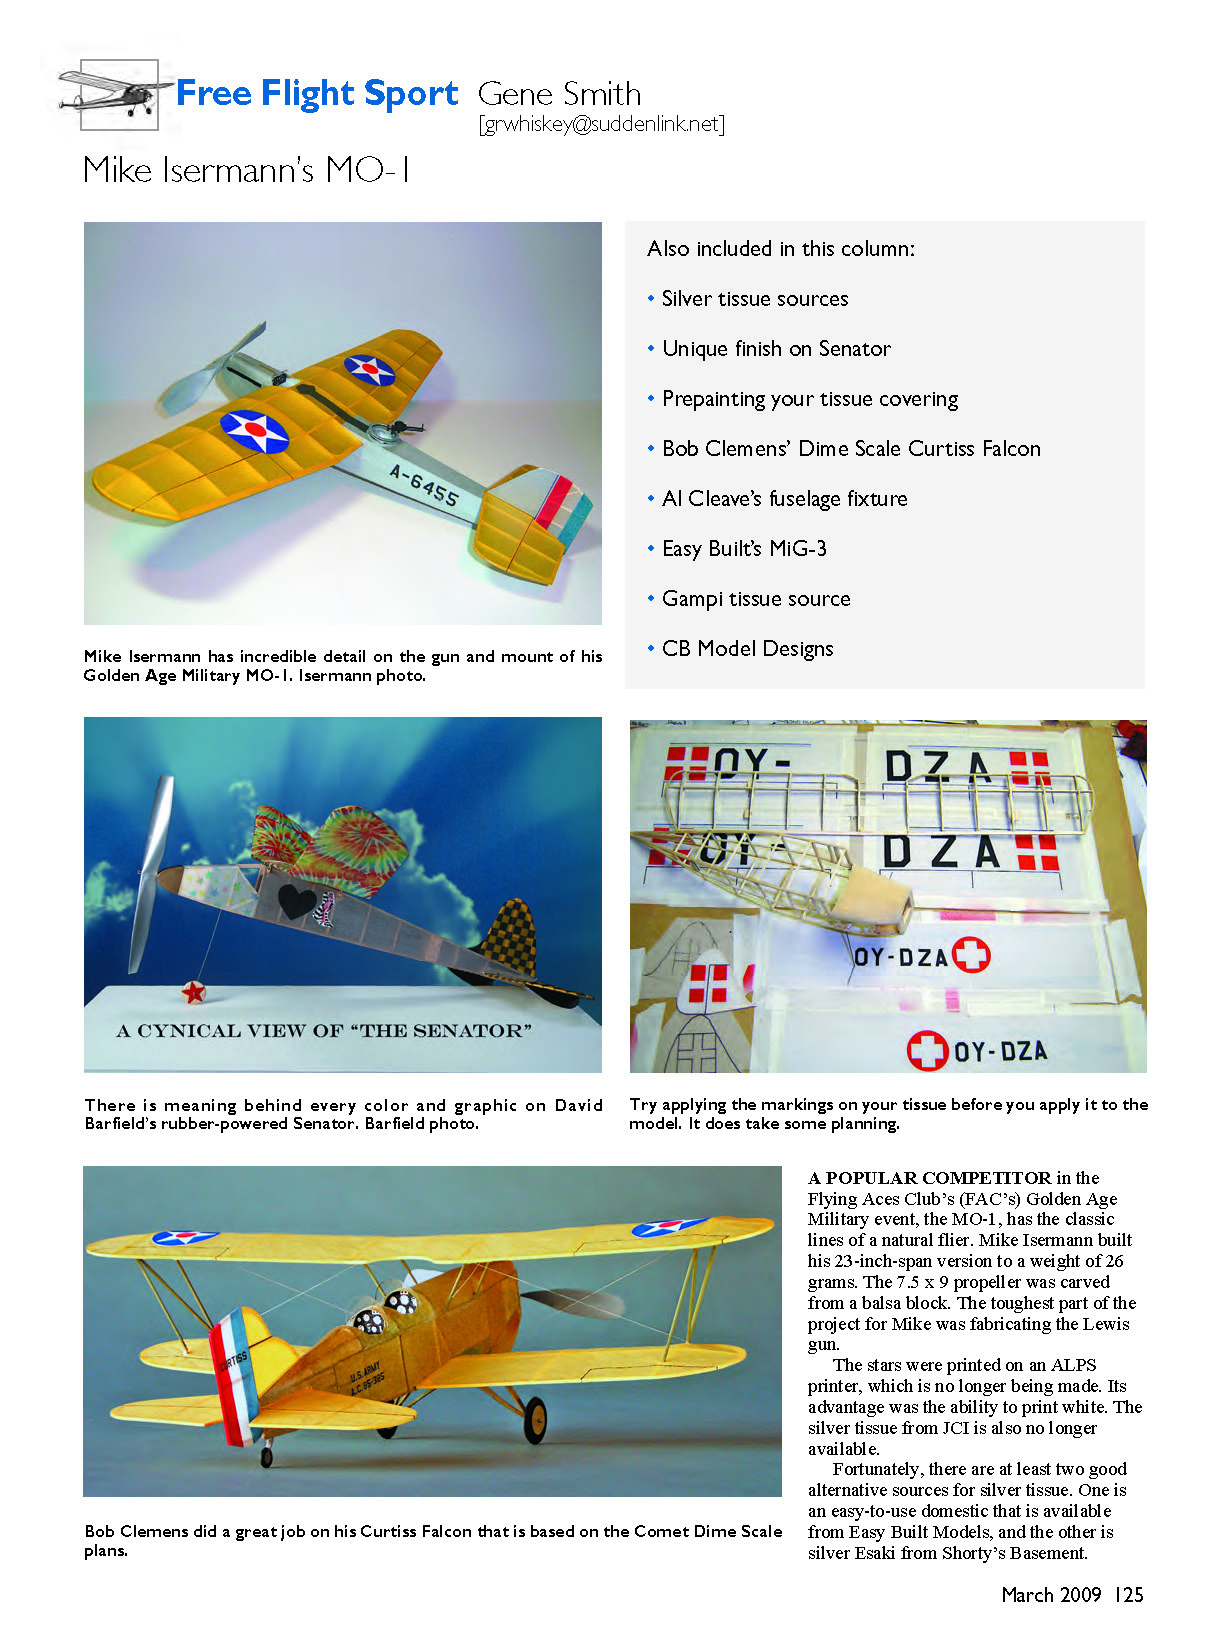
Mike Isermann's MO-1
A popular competitor in the Flying Aces Club's (FAC) Golden Age Military event, the MO-1 has the classic lines of a natural flier. Mike Isermann built his 23-inch-span version to a weight of 26 grams. The 7.5 x 9 propeller was carved from a balsa block. The toughest part of the project for Mike was fabricating the Lewis gun.
Silver tissue and decals
The stars were printed on an ALPS printer, which is no longer being made. Its advantage was the ability to print white. The silver tissue from JCI is also no longer available. Fortunately, there are at least two good alternative sources for silver tissue: Easy Built Models (Easy Built Lite Silver Metallic) and silver Esaki from Shorty's Basement.
Easy Built Lite Silver Metallic (Easy Built Models)
David Niedzielski of Easy Built Models carries Easy Built Lite Silver Metallic tissue. It has a grain running the length of the sheet and each side has a distinct finish: one shiny and the other a natural, brushed-aluminum appearance. A 20 x 30-inch sheet weighs about 7.1 grams, and the sheet is roughly 30% larger than Esaki tissue.
Dave's technique:
- Use a 50/50 mix of rubbing alcohol and water to wet and shrink the silver tissue.
- Apply with a UHU glue stick.
- Cut the tissue oversize for the panel, mist both sides, and set it on a towel while applying glue to the airframe.
- Dab off any large drops of water/alcohol, then apply the tissue—not taut, but without big wrinkles. It will shrink almost completely.
- Usually requires three more light mistings with water to finish shrinking.
- While wet, the tissue can be worked around compound curves (used on his Silver Lancer).
- He does not preshrink the tissue and has found it doesn't overtighten or continue to shrink later.
- When dry, spray the whole airplane with two light coats of Krylon clear, allowing drying between coats.
Dave built his Taylorcraft Auster specifically to use the natural brushed side of the silver tissue; it produced an extremely realistic look (see Easy Built Models website for photos).
Silver Esaki (Shorty's Basement and Peck-Polymers)
I have not tried the new silver Esaki from Shorty's Basement, but others have. George White reported that the tissue looked great but gave him a surprise when he applied it dry (his usual method with Esaki using a UHU glue stick): steaming had no effect on wrinkles, and spraying or even dipping the covered rudder in water produced no shrink—the water beaded up and ran off.
Paul Grabski forwarded an Internet post from Bob Clemens recommending that Esaki must be applied wet: wet the backside, blot off excess water, and apply with white glue (Bob warned that dope can melt the silver and cause appearance problems). George tried Bob's advice but used a UHU glue stick instead of white glue; he found the Esaki shrank nicely with only a few minuscule wrinkles around the edges and did not seem to warp the stabilizer.
Peck-Polymers also stocks genuine Esaki tissue in silver. Tim Goldstein reports that the silver Esaki weighs about 4.2 grams per sheet, compared to 3.4 grams per sheet for regular Esaki.
Other models, techniques, and products
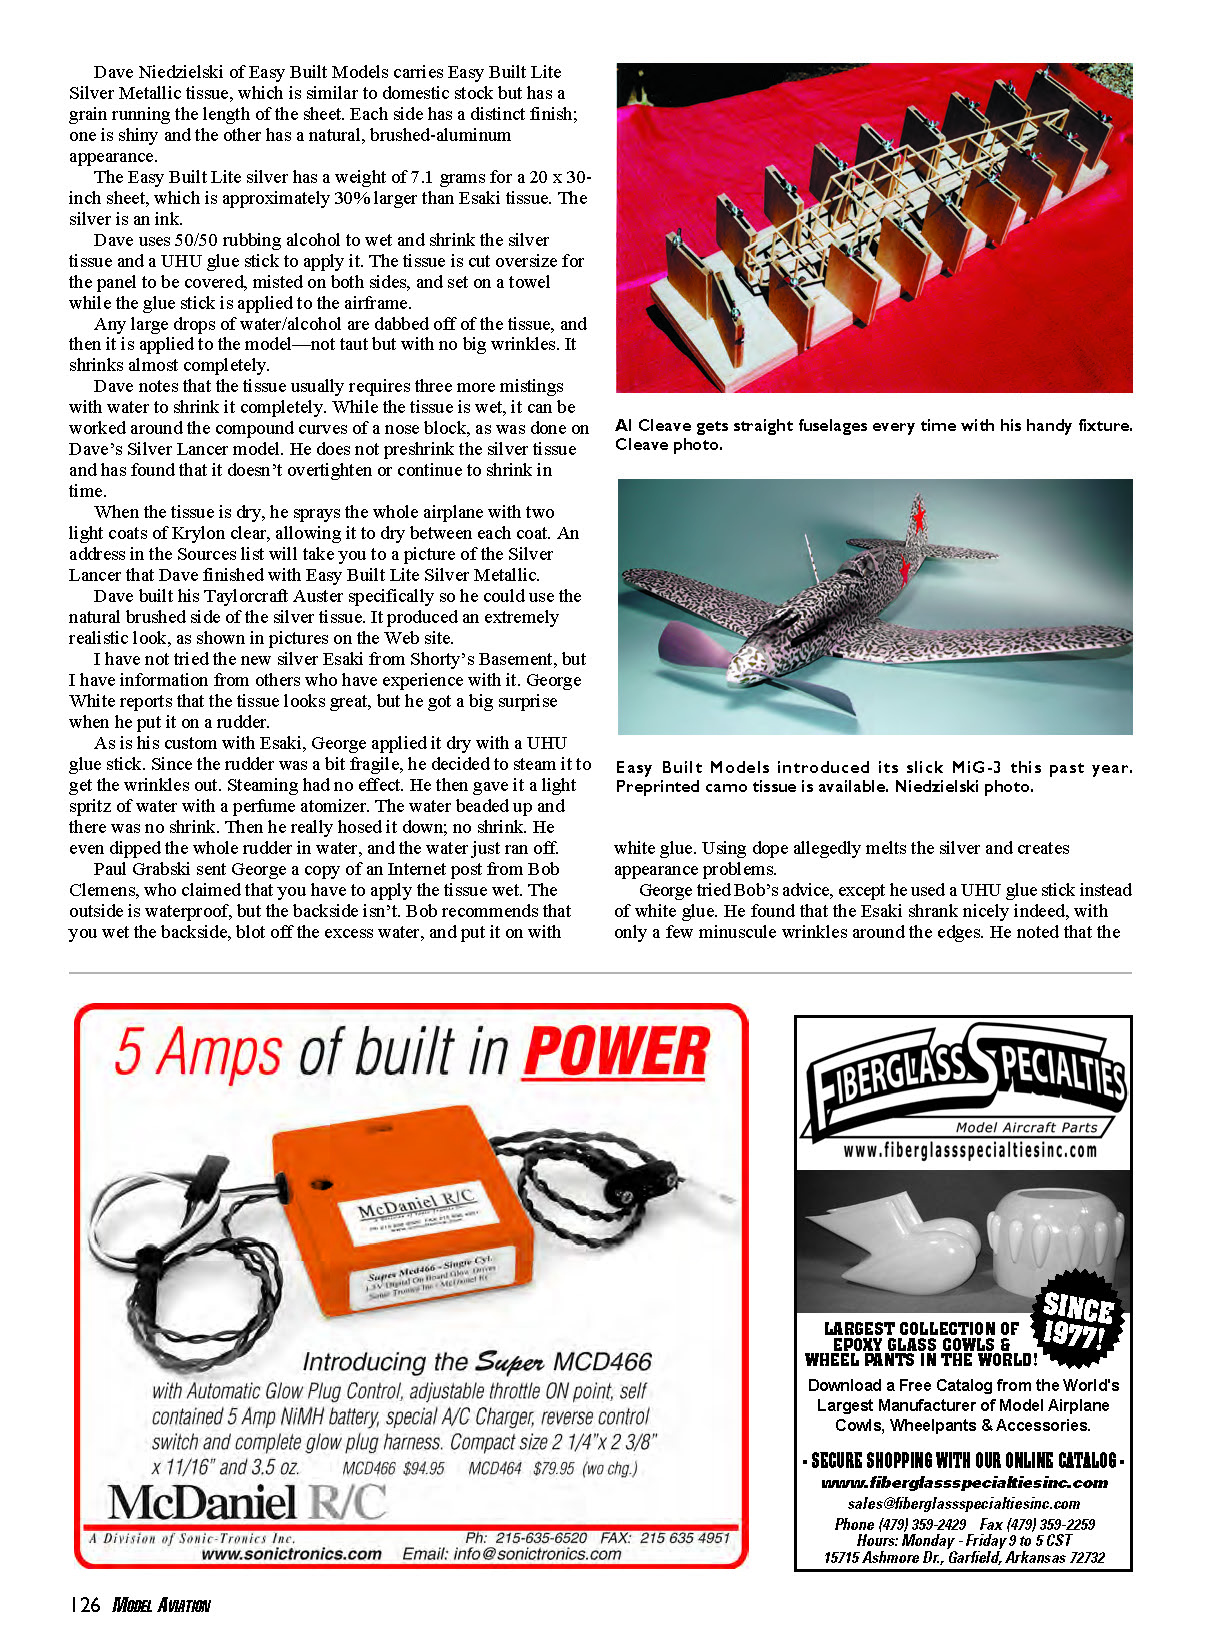
- David Barfield (a member of the Thermal Thumbers of Metro Atlanta, TTOMA) built a model called the Senator as a tongue-in-cheek statement about politicians:
- Propeller color represents silver tongues asking for the "gold" (the nose block).
- Single-leg landing gear symbolizes that they are lucky to have a leg on which to stand.
- Transparent window because they are "transparent."
- Psychedelic wings represent flights of fancy; elsewhere you may find the mistress and a checkered past.
- The nose is mostly hollow; at the core it’s all about power.
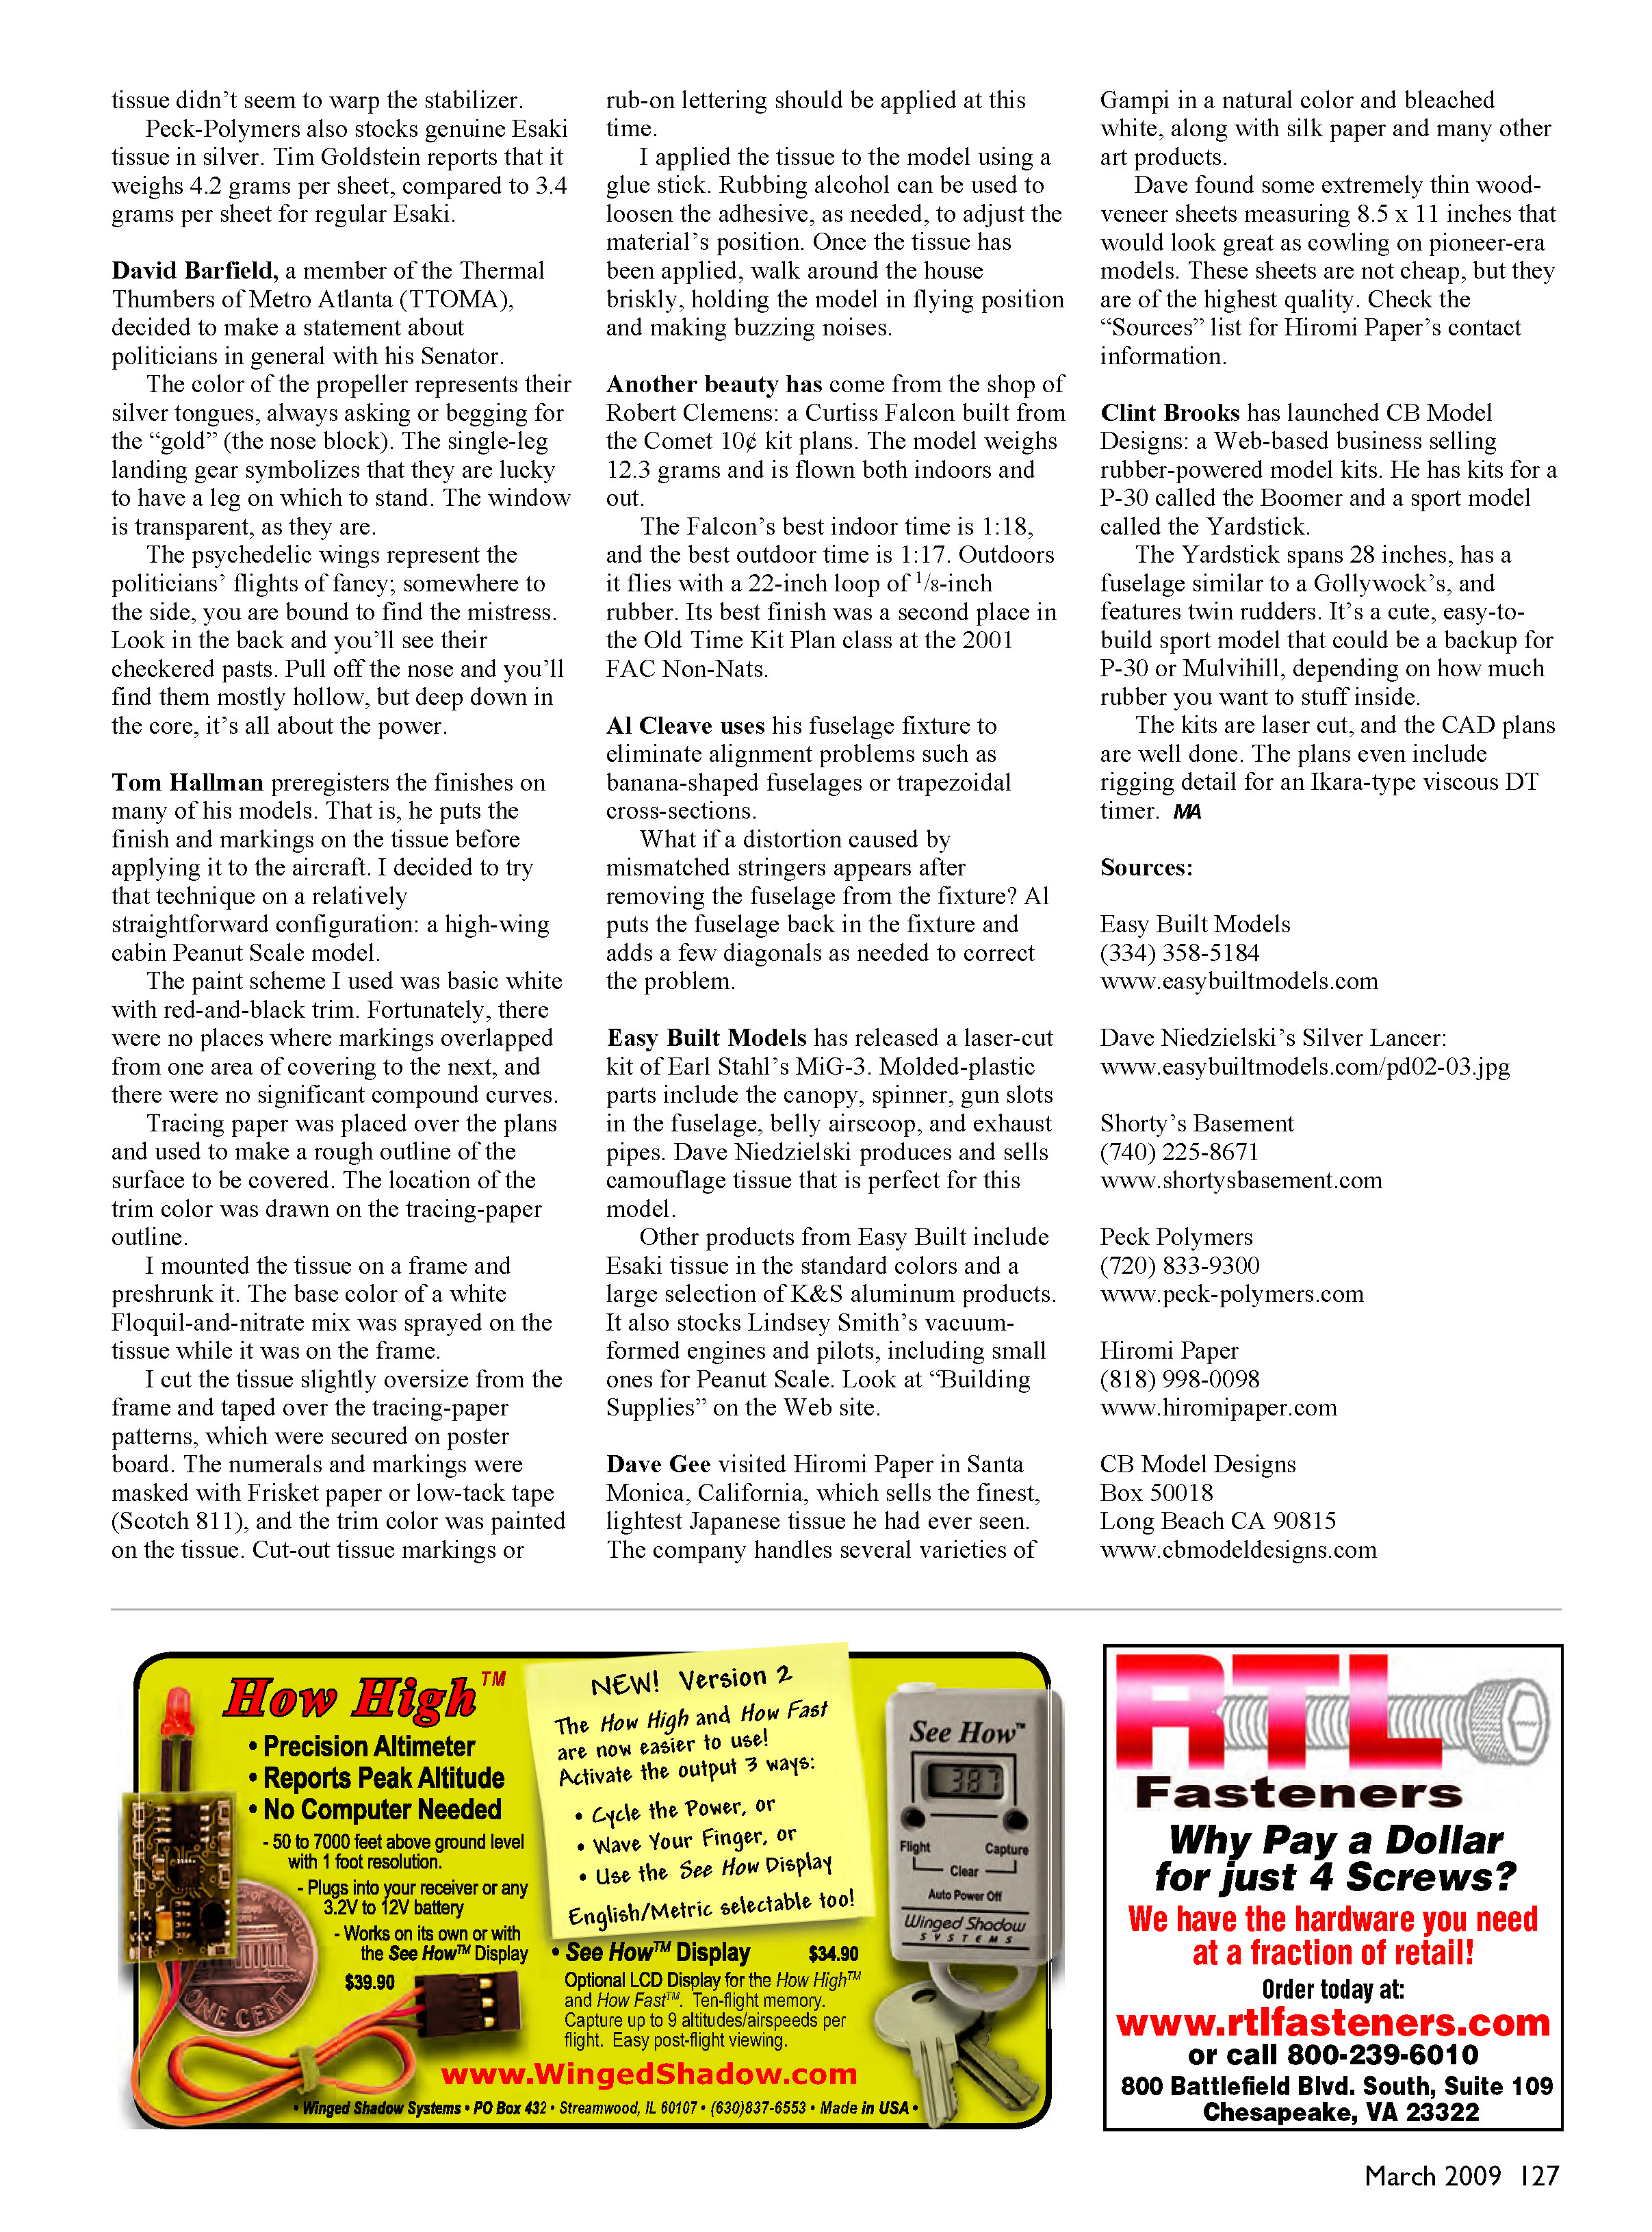
- Tom Hallman preregisters finishes on many models—that is, he applies finishes and markings to the tissue before applying it to the aircraft. I tried this on a straightforward high-wing cabin Peanut Scale model:
- Trace the surface to be covered on tracing paper and draw the trim locations.
- Mount the tissue on a frame and preshrink it.
- Spray the base color (I used a white Floquil-and-nitrate mix) while the tissue is on the frame.
- Cut the tissue slightly oversize and tape over tracing-paper patterns secured on poster board.
- Mask numerals and markings with frisket paper or low-tack tape (Scotch 811), then paint the trim color on the tissue.
- Apply cut-out tissue markings or rub-on lettering now.
- Apply the tissue to the model with a glue stick. Rubbing alcohol can loosen the adhesive to adjust positioning as needed.
- (Optional: take the model for a brisk walk around the house, holding it in flying position and making buzzing noises.)
- Robert Clemens built a Curtiss Falcon from Comet 10¢ kit plans. The model weighs 12.3 grams and is flown both indoors and out. Best indoor time: 1:18; best outdoor time: 1:17 (outdoors flown with a 22-inch loop of 1/8-inch rubber). One of its best finishes was second place in the Old Time Kit Plan class at the 2001 FAC Non-Nats.
- Al Cleave uses a fuselage fixture to eliminate alignment problems like banana-shaped fuselages or trapezoidal cross-sections. If distortion from mismatched stringers appears after removal, he puts the fuselage back in the fixture and adds a few diagonals as needed to correct the problem.
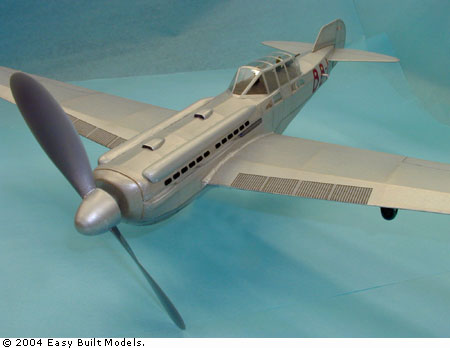
- Easy Built Models has released a laser-cut kit of Earl Stahl's MiG-3. Molded-plastic parts include the canopy, spinner, gun slots in the fuselage, belly airscoop, and exhaust pipes. Dave Niedzielski also produces and sells camouflage tissue suitable for this model. Other Easy Built products include Esaki tissue in standard colors, a large selection of K&S aluminum products, and Lindsey Smith's vacuum-formed engines and pilots (including small ones for Peanut Scale). See the "Building Supplies" section on the Easy Built website.
- Dave Gee visited Hiromi Paper in Santa Monica, California, which sells very fine, light Japanese tissue. They handle several varieties of gampi (natural and bleached), silk paper, and many other art products. Dave also found extremely thin wood-veneer sheets (8.5 x 11 inches) that would make attractive cowlings on pioneer-era models—high quality but not cheap.
- Clint Brooks has launched CB Model Designs, a web-based business selling rubber-powered model kits. Available kits include a P-30 called the Boomer and a sport model called the Yardstick. The Yardstick spans 28 inches, has a fuselage similar to a Gollywock's, and features twin rudders. It's an easy-to-build sport model that could serve as a backup for P-30 or Mulvihill classes depending on how much rubber you install. The kits are laser cut and the CAD plans are well done; plans even include rigging detail for an Ikara-type viscous DT timer.
Sources:
- Easy Built Models
(334) 358-5184 www.easybuiltmodels.com
- Dave Niedzielski's Silver Lancer photo:
www.easybuiltmodels.com/pd02-03.jpg
- Shorty's Basement
(740) 225-8671 www.shortysbasement.com
- Peck Polymers
(720) 833-9300 www.peck-polymers.com
- Hiromi Paper
(818) 998-0098 www.hiromipaper.com
- CB Model Designs
Box 50018 Long Beach, CA 90815 www.cbmodeldesigns.com
Transcribed from original scans by AI. Minor OCR errors may remain.

