
Free Flight Sport - 2009/09
Gene Smith <[email protected]>
Online memorabilia of one of the first US aeromodelling clubs
The heyday of model aviation was in the 10 years after Charles Lindbergh’s historic crossing of the Atlantic Ocean via aircraft in 1927. Tens of thousands of youth built and flew model airplanes, and many groups were developed to organize modelers and promote model aviation.
One of those organizations was the Junior Birdmen of America, which the Hearst newspaper company sponsored. There are many interesting photos of Junior Birdmen memorabilia, as well as a brief history of the organization, online. The Web site address is in the “Sources” list at the end of this column.
Glues and adhesives for stick-and-tissue and indoor models
Cellulose-based glues have been the mainstay of modeling for 80 years. Three common brands currently available are Duco household cement, Ambroid, and Sig-Ment. Duco is generally available in hardware and craft stores, Ambroid at some hobby shops and A2Z Corp, and Sig-Ment from Sig Manufacturing.
- Most of these glues are a bit too thick as they come. Many modelers put the adhesive in an applicator bottle (available from A2Z Corp) and thin it roughly 50/50 with acetone. The blunt-needle applicator allows good control to put the right amount of glue in the right spot.
- These adhesives work better with double gluing: put a small amount on both sides of the joint, let it dry for a few minutes, reapply a small amount to both sides, then join the pieces. The key to a strong seam is having no gaps and using the least amount of glue needed.
- Advantages of cellulose glues: extremely lightweight, give the builder time to position parts before they set, and joints can be released with acetone if repositioning is needed. This lightweight characteristic is crucial for building indoor models. For scale aircraft, tack-gluing stabilizers during flight-trimming lets you change stabilizer incidence if needed.
- Disadvantages: they take time to set and have a slight smell. Minimize setup time by double-gluing and using minimal adhesive.
My current favorite for framing stick-and-tissue models is Titebond II.
- Do not apply it directly from the bottle. Dispense a small puddle onto a corner of your plans’ waxed-paper covering and use a craft pick or scrap-balsa stick to apply a minute amount to both sides of the joint.
- You can thin Titebond about 50/50 with water or alcohol if desired.
- Double-glue end-grain joints: Titebond soaks into end grain quickly, so pregluing both surfaces is necessary to leave enough glue for a strong joint.
- For crossmembers with end grain: dip the end of the stick in Titebond, touch it to the fuselage frame, wipe off excess from both parts, but do not assemble yet. Let the adhesive dry while you fit the next crossmember. Within a minute reapply to both parts and put the piece in place. Thin layers set quickly but still allow time for final adjustments.
- Advantages of Titebond II: odorless, inexpensive, sets reasonably quickly, and is easy to sand. It’s especially useful for wingtip and tailfeather laminations.
- Disadvantage: it is water-soluble. If a model sits in a puddle or overnight dew, laminations can come apart — it takes time to happen, so it’s rarely a problem.
Sometimes I use medium CA when in a hurry.
- Place a small puddle on the waxed paper, dip the end of the crossmember in the glue, and put the crossmember in place. Pregluing is unnecessary and counterproductive.
- Apply the adhesive to one side of the joint and put the pieces together. Do it perfectly; there is little room for error. Adjustments must be made quickly.
- For parts you can’t dip, use an applicator: a 2-inch triangle of waxed paper. Touch the tip of the triangle to the puddle of CA and apply the small amount it picks up to the model.
- Less glue is better. Use the smallest amount that will create a bond.
- Thin CA wicks quickly into balsa and can run along spars, which may be problematic. Even small applicator tubes that apply a single drop often provide too much glue for a typical stick-and-tissue joint. CA doesn’t stick well to itself, so poor joints are difficult to reglue. Good joints are almost impossible to adjust because the wood will break before the joint, and CA won’t bond well if there is a gap. Thin CA is best for instant repairs.
I protect my plans with waxed paper. Complaints that waxed paper sticks more now may be due to too much glue or thin CA usage. I have tried parchment paper but prefer waxed paper because it’s more translucent.
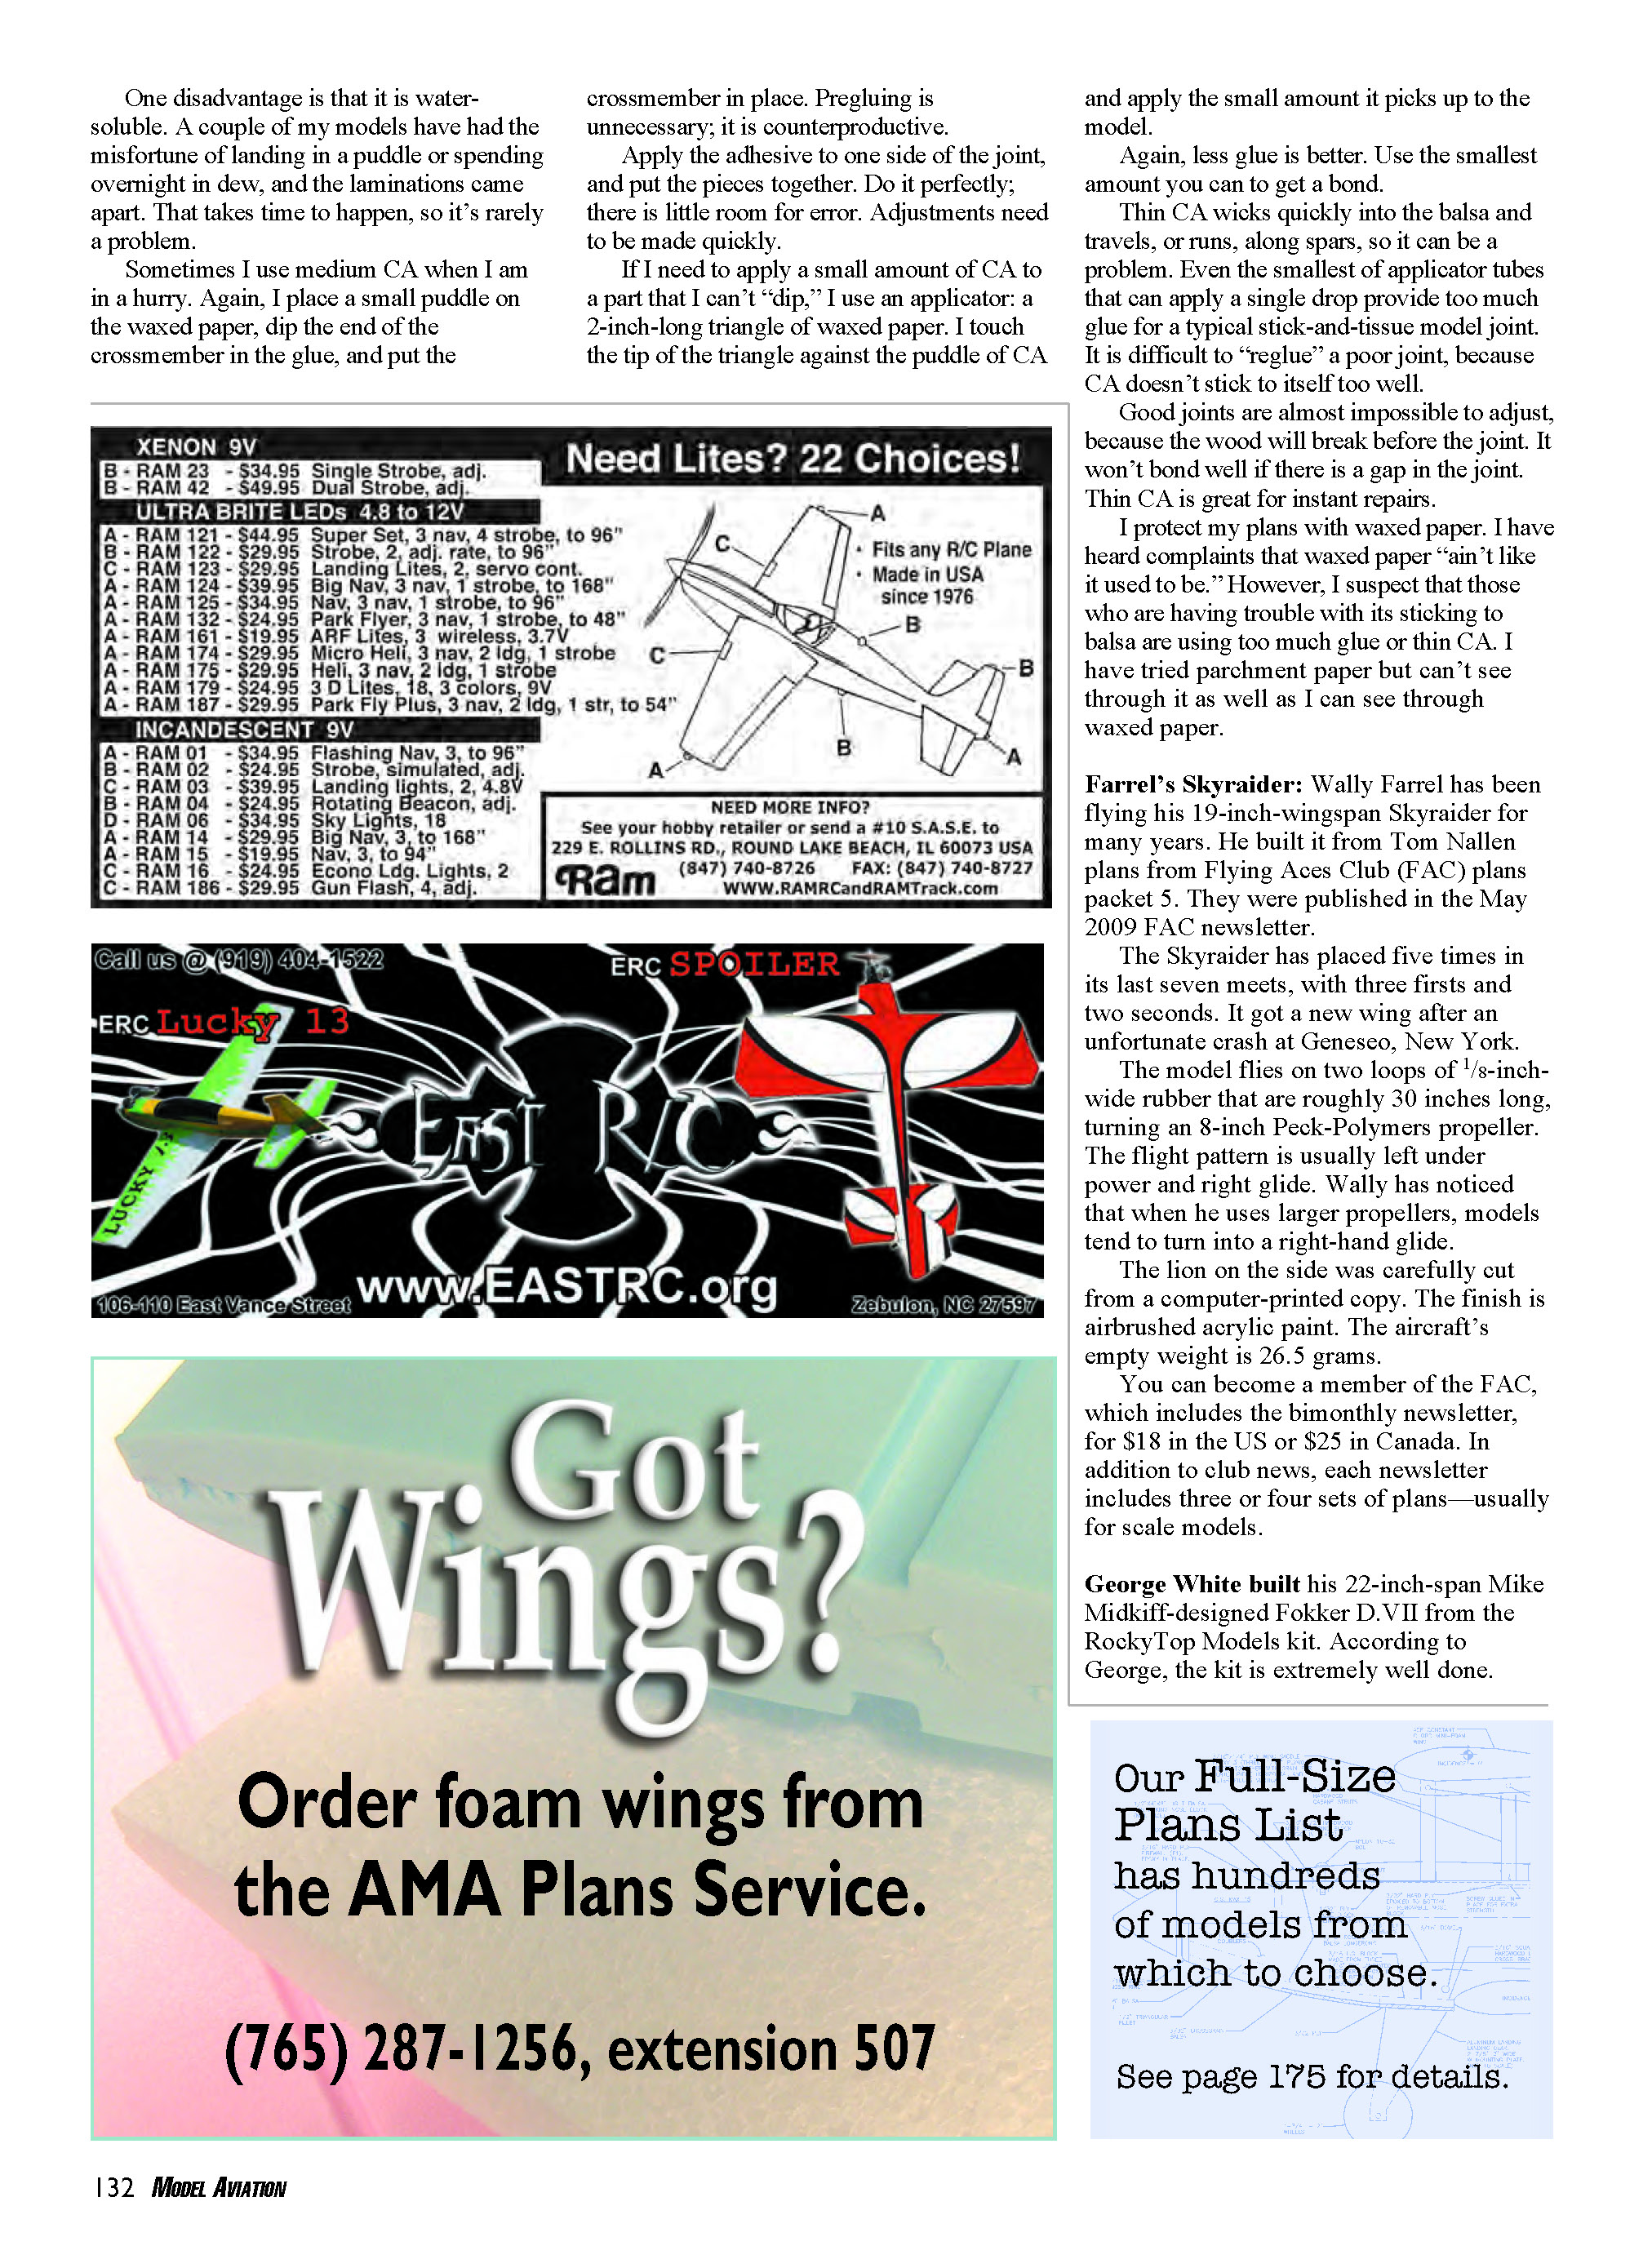
Farrel's Skyraider
Wally Farrel has been flying his 19-inch-wingspan Skyraider for many years. He built it from Tom Nallen plans from Flying Aces Club (FAC) plans packet 5, published in the May 2009 FAC newsletter.
- The Skyraider placed five times in its last seven meets, with three firsts and two seconds. It received a new wing after an unfortunate crash at Geneseo, New York.
- Powertrain: two loops of 1/8-inch-wide rubber roughly 30 inches long, turning an 8-inch Peck-Polymers propeller.
- Typical pattern: left under power and right glide. Wally notes that larger propellers tend to make models turn into a right-hand glide.
- Finish: a lion on the side was carefully cut from a computer-printed copy; finish is airbrushed acrylic paint. Empty weight: 26.5 grams.
You can become a member of the FAC (which includes a bimonthly newsletter) for $18 in the US or $25 in Canada. Each newsletter typically includes three or four sets of plans, usually for scale models.
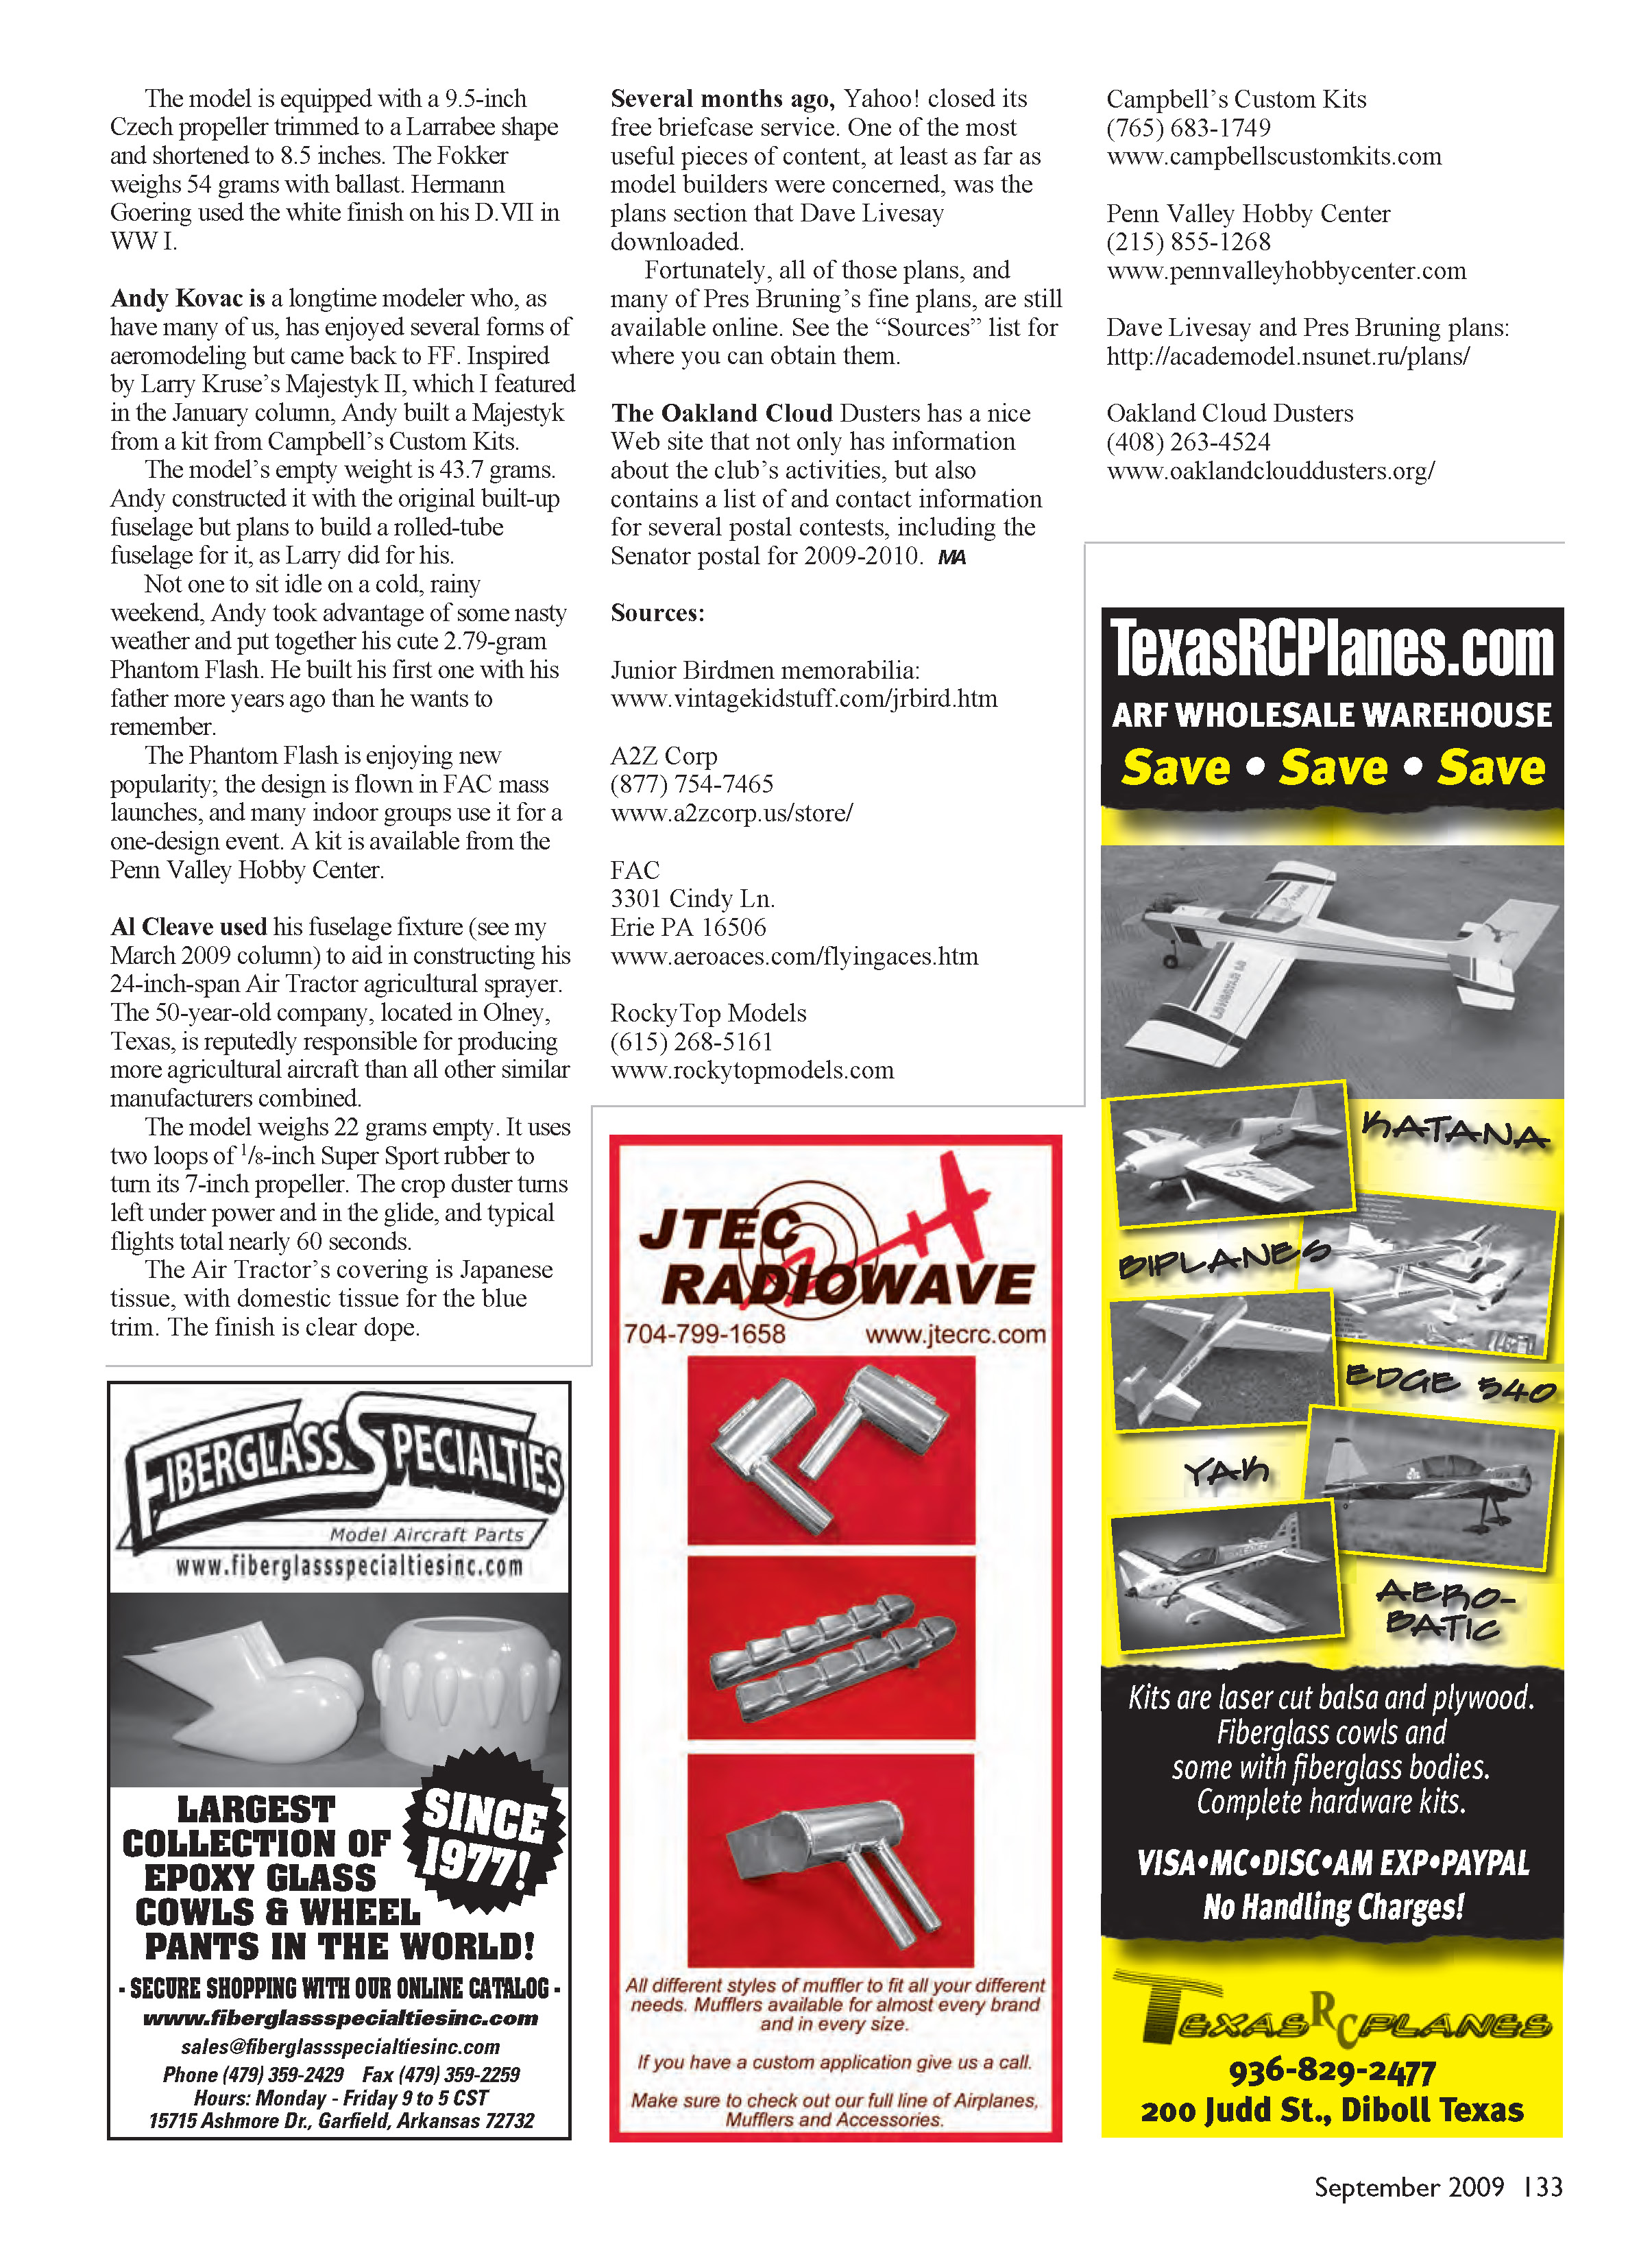
George White built a 22-inch-span Mike Midkiff–designed Fokker D.VII from a RockyTop Models kit.
- The kit is well done. The model uses a 9.5-inch Czech propeller trimmed to a Larrabee shape and shortened to 8.5 inches. Weight with ballast: 54 grams. Hermann Goering used the white finish on his D.VII in WWI.
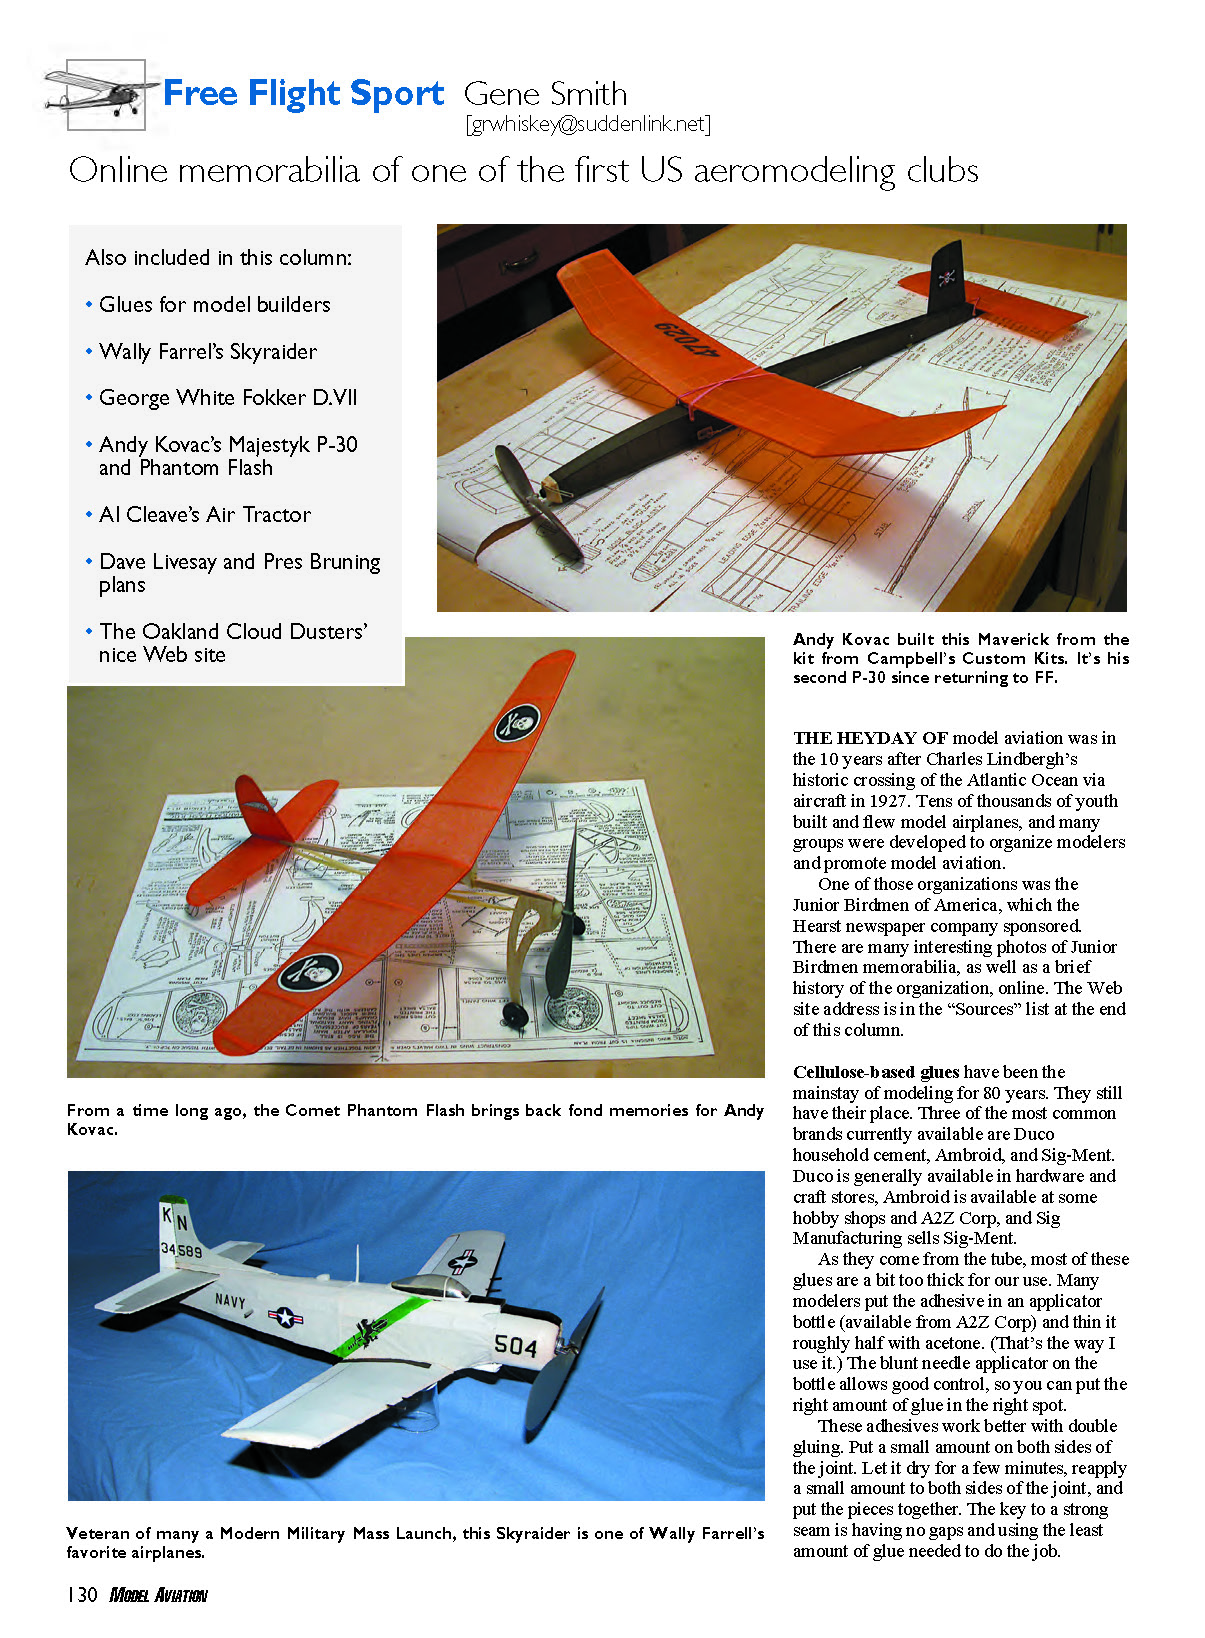
Andy Kovac, a longtime modeler, returned to free flight after several forms of aeromodeling.
- Inspired by Larry Kruse’s Majestyk II (featured in the January column), Andy built a Majestyk from a Campbell’s Custom Kits kit. Empty weight: 43.7 grams. He constructed the original built-up fuselage but plans to build a rolled-tube fuselage later.
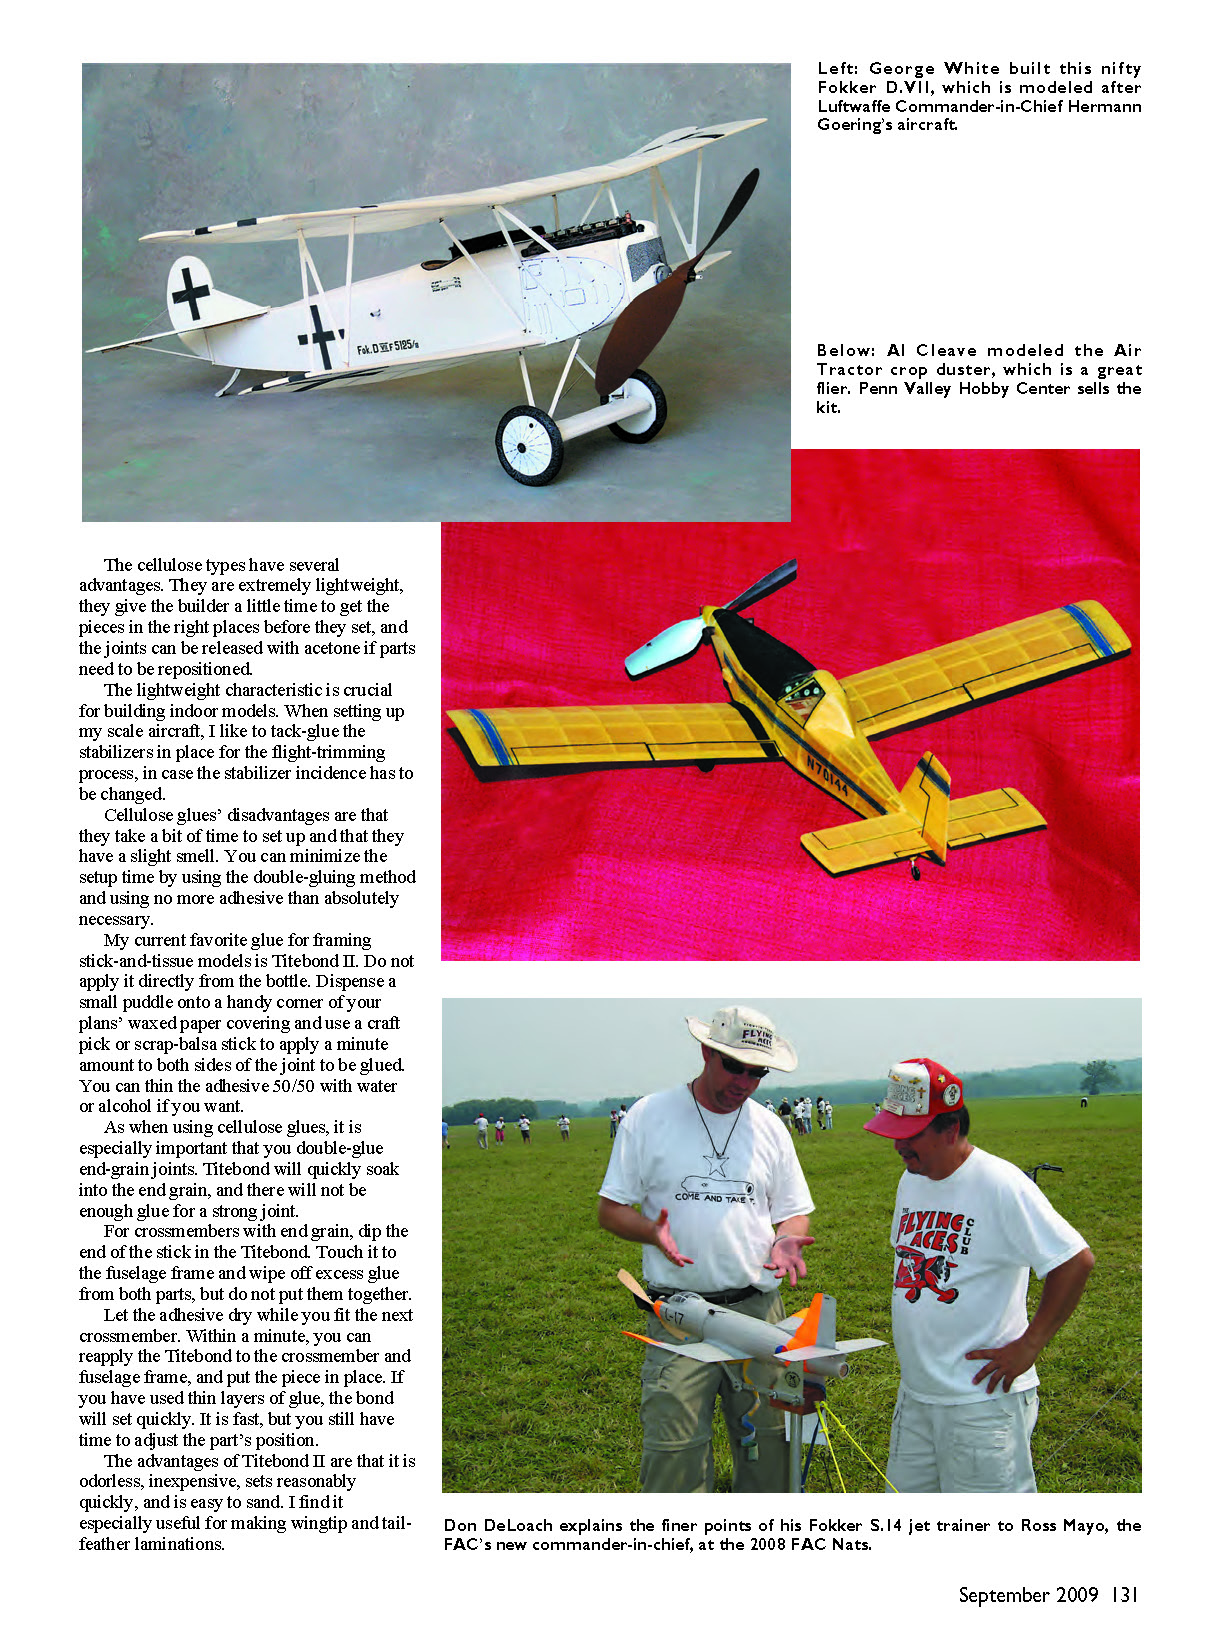
- On a cold, rainy weekend Andy built a 2.79-gram Phantom Flash for fun. He first built one with his father many years ago. The Phantom Flash is enjoying renewed popularity; it’s flown in FAC mass launches and many indoor groups use it for one-design events. Kits are available from Penn Valley Hobby Center.
Al Cleave used his fuselage fixture (see the March 2009 column) to help construct a 24-inch-span Air Tractor agricultural sprayer model.
- The Air Tractor company (Olney, Texas) is reputed to have produced more agricultural aircraft than all other similar manufacturers combined.
- Model empty weight: 22 grams. Power: two loops of 1/8-inch Super Sport rubber turning a 7-inch propeller. Flight: turns left under power and in the glide; typical flights last nearly 60 seconds.
- Covering: Japanese tissue with domestic tissue for blue trim. Finish: clear dope.
Several months ago Yahoo! closed its free Briefcase service. One of the most useful pieces of content lost from it was the plans section that Dave Livesay had downloaded. Fortunately, those plans and many of Pres Bruning’s fine plans are still available online (see Sources). The Oakland Cloud Dusters web site not only has club information but also lists and contact information for several postal contests, including the Senator postal for 2009–2010.
Sources:
- Junior Birdmen memorabilia: www.vintagekidstuff.com/jrbird.htm
- A2Z Corp — (877) 754-7465 — www.a2zcorp.us/store/
- FAC — 3301 Cindy Ln., Erie PA 16506 — www.aeroaces.com/flyingaces.htm
- RockyTop Models — (615) 268-5161 — www.rockytopmodels.com
- Campbell’s Custom Kits — (765) 683-1749 — www.campbellscustomkits.com
- Penn Valley Hobby Center — (215) 855-1268 — www.pennvalleyhobbycenter.com
- Dave Livesay and Pres Bruning plans: http://academodel.nsunet.ru/plans/
- Oakland Cloud Dusters — (408) 263-4524 — www.oaklandclouddusters.org/
Transcribed from original scans by AI. Minor OCR errors may remain.

