
Tom Arnold's Ki-100
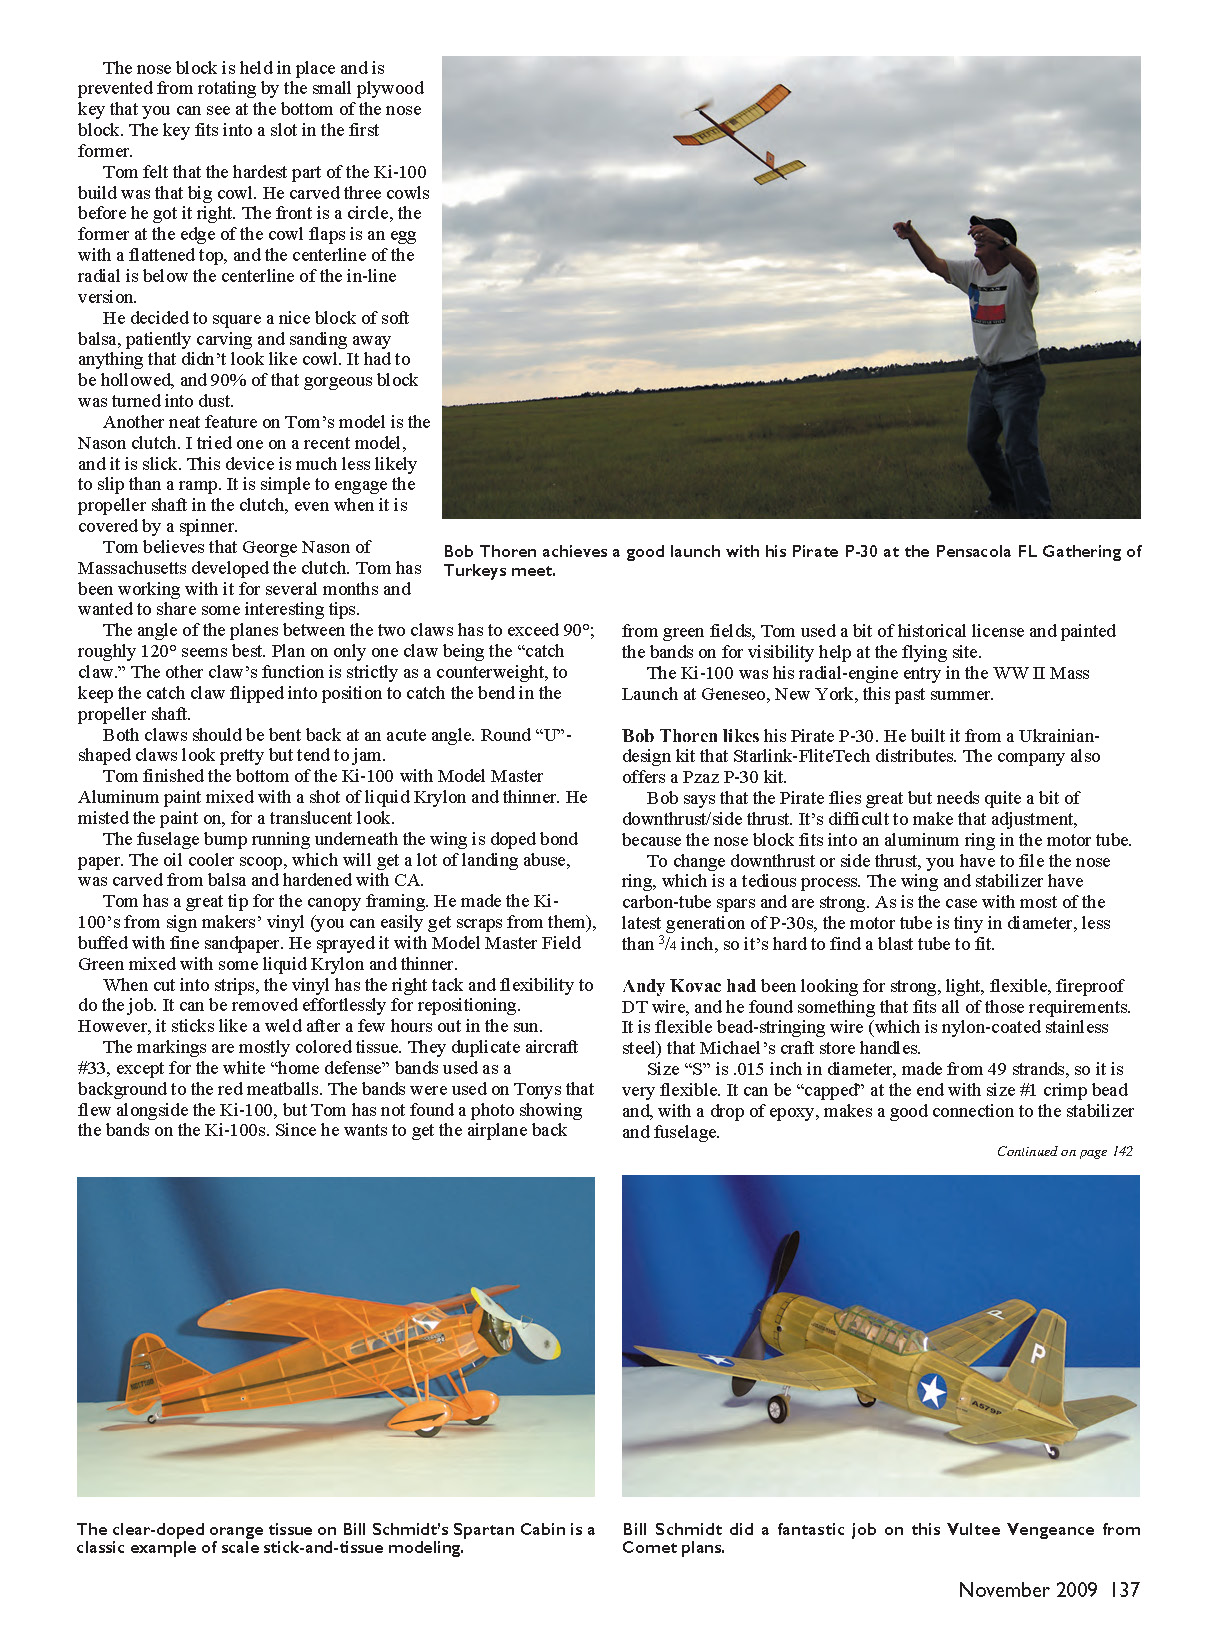
Tom Arnold built a beautiful Ki-100: the radial-engine version of the Japanese Tony. From the top, you can see the Ki-100's Tony heritage, with the long wings and skinny fuselage married to that big radial engine. The wings are the cracked-rib type, with an internal spar of 1/32" sheet topped with pieces of 1/16" x 1/8" between the ribs on the top, forming a T‑beam.
Although Tom likes movable elevators and rudders for trimming, he did not install them on his Ki-100 in an effort to save a few grams. The elevator is held in place with glue at the rear and aligned with small internal blocks, so that the leading edge (LE) can be adjusted up or down in a small slot.
The motor peg is directly behind the wing trailing edge (TE), so the motor is balanced over the model's CG. Tom was taken with Clive Gamble's Sopwith Camel that has a similar arrangement. Tom used a variation of the "wobbly peg" that can twist and rotate as the motor unwinds. Rather than using telescoping tubing to allow the wobble, Tom made the holes for the motor peg slightly oversized so the peg is loose in the holes and can wobble and twist. He used a doughnut of sliced fuel tubing on the ends of the peg to hold it in place.
The Ki-100's wing is removable, using magnets at the rear of the wing and a forward pin to align and secure the wing. This was done more for shipping ease than crash-damage control.
The cowl is the defining point of Tom's aircraft, and the long air scoop on the top is its crowning glory. Bending that scoop to the side and down for thrustline adjustment would ruin the model's look, so he made an internally adjustable propeller shaft. Tom's method is a sheet‑metal bearing plate held in place with wood screws — an old trick he picked up from a newsletter, and it works well. The single screw will hold the propeller shaft setting during trim flights. When Tom was satisfied with the adjustment, he put a screw in the second hole to permanently lock the setting.
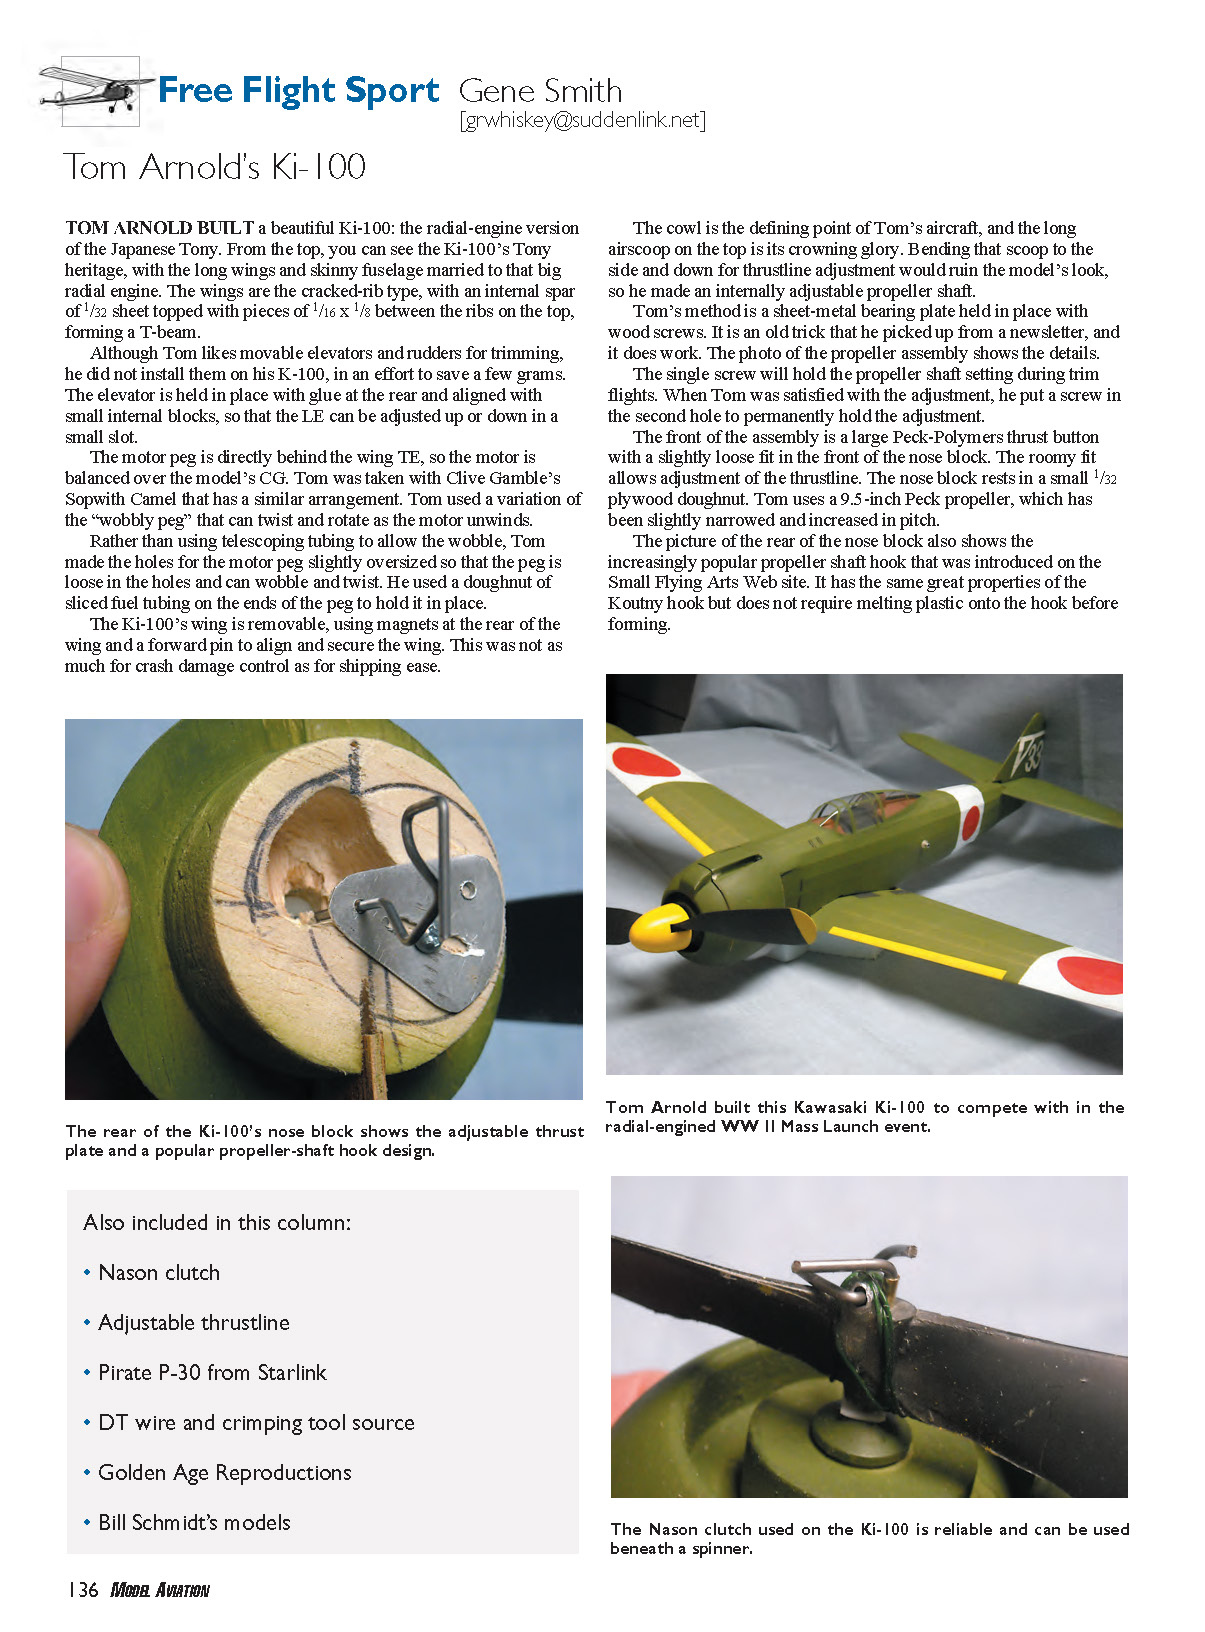
The front of the assembly uses a large Peck‑Polymers thrust button with a slightly loose fit in the front of the nose block. The roomy fit allows adjustment of the thrustline. The nose block rests in a small 1/32" plywood doughnut. Tom uses a 9.5" Peck propeller, which has been slightly narrowed and increased in pitch.
The rear of the nose block shows the increasingly popular propeller‑shaft hook introduced on the Small Flying Arts web site. It has the same great properties as the Koutny hook but does not require melting plastic onto the hook before forming. The nose block is held in place and prevented from rotating by a small plywood key at the bottom of the nose block; the key fits into a slot in the first former.
Tom felt that the hardest part of the Ki-100 build was that big cowl. He carved three cowls before he got it right. The front is a circle, the former at the edge of the cowl flaps is an egg with a flattened top, and the centerline of the radial is below the centerline of the in‑line version. He squared a nice block of soft balsa and patiently carved and sanded away anything that didn't look like a cowl. It had to be hollowed, and 90% of that gorgeous block was turned into dust.
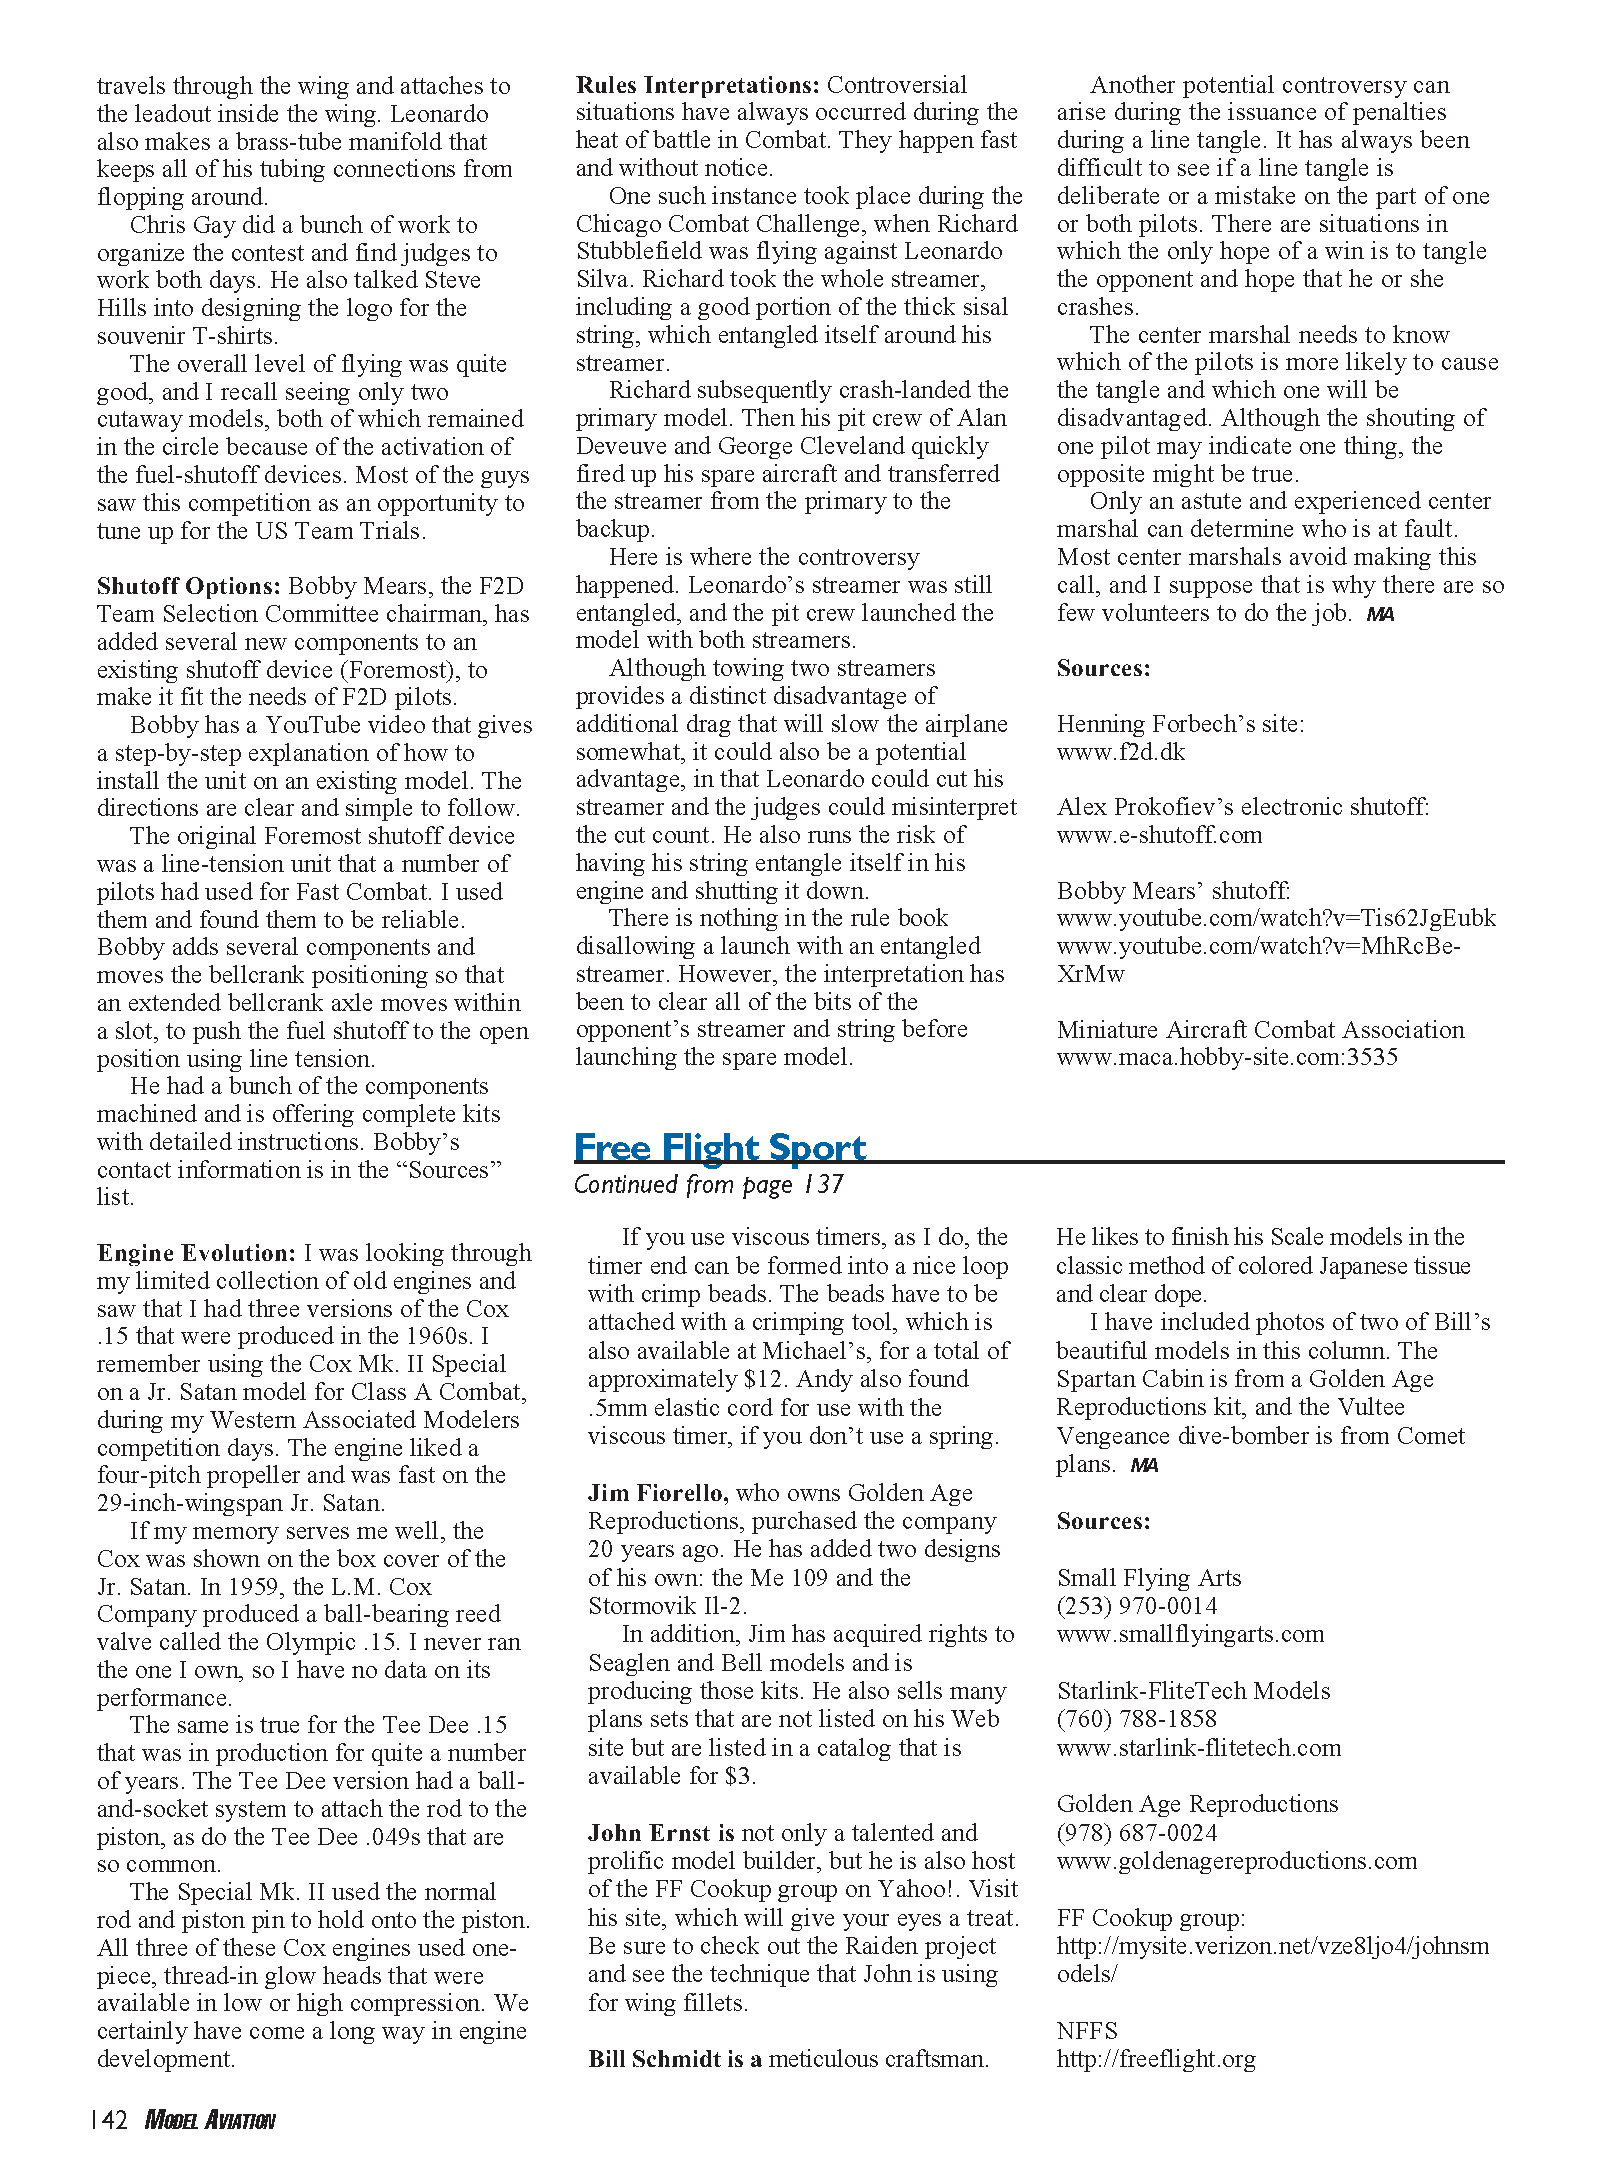
Another neat feature on Tom's model is the Nason clutch. I tried one on a recent model, and it is slick. This device is much less likely to slip than a ramp. It is simple to engage the propeller shaft in the clutch, even when it is covered by a spinner. Tom believes that George Nason of Massachusetts developed the clutch. Tom has been working with it for several months and wanted to share some tips:
- The angle of the planes between the two claws has to exceed 90°; roughly 120° seems best.
- Plan on only one claw being the "catch claw." The other claw's function is strictly as a counterweight, to keep the catch claw flipped into position to catch the bend in the propeller shaft.
- Both claws should be bent back at an acute angle. Round "U"-shaped claws look pretty but tend to jam.
Tom finished the bottom of the Ki-100 with Model Master Aluminum paint mixed with a shot of liquid Krylon and thinner. He misted the paint on for a translucent look.
The fuselage bump running underneath the wing is doped bond paper. The oil cooler scoop, which will get a lot of landing abuse, was carved from balsa and hardened with CA.
Tom has a great tip for the canopy framing: he made the Ki-100's frames from sign‑makers' vinyl (you can easily get scraps from them), buffed with fine sandpaper. He sprayed it with Model Master Field Green mixed with some liquid Krylon and thinner. When cut into strips, the vinyl has the right tack and flexibility to do the job. It can be removed effortlessly for repositioning, but it sticks like a weld after a few hours out in the sun.
The markings are mostly colored tissue. They duplicate aircraft #33, except for the white "home defense" bands used as a background to the red meatballs. The bands were used on Tonys that flew alongside the Ki-100, but Tom has not found a photo showing the bands on the Ki-100s. Since he wants to get the airplane back from green fields, Tom used a bit of historical license and painted the bands on for visibility at the flying site.
The Ki-100 was his radial‑engine entry in the WWII Mass Launch at Geneseo, New York, this past summer.
Bob Thoren likes his Pirate P‑30. He built it from a Ukrainian‑design kit that Starlink‑FliteTech distributes. The company also offers a Pzaz P‑30 kit. Bob says the Pirate flies great but needs quite a bit of downthrust/side thrust. It's difficult to make that adjustment because the nose block fits into an aluminum ring in the motor tube; to change downthrust or side thrust you have to file the nose ring, which is tedious. The wing and stabilizer have carbon‑tube spars and are strong. As is the case with most of the latest generation of P‑30s, the motor tube is tiny in diameter (less than 3/4"), so it's hard to find a blast tube to fit.
Andy Kovac had been looking for strong, light, flexible, fireproof DT wire, and he found something that fits all those requirements: flexible bead‑stringing wire (nylon‑coated stainless steel) available at Michael's craft stores. Size "S" is .015" diameter, made from 49 strands, so it is very flexible. It can be "capped" at the end with a size #1 crimp bead and, with a drop of epoxy, makes a good connection to the stabilizer and fuselage.
Free Flight Sport
If you use viscous timers, as I do, the timer end can be formed into a nice loop with crimp beads. The beads have to be attached with a crimping tool, which is also available at Michael's, for a total of approximately $12. Andy also found 0.5 mm elastic cord for use with the viscous timer if you don't use a spring.
Jim Fiorello, who owns Golden Age Reproductions, purchased the company 20 years ago. He has added two designs of his own: the Me 109 and the Stormovik Il‑2. In addition, Jim has acquired rights to Seaglen and Bell models and is producing those kits. He also sells many plan sets that are not listed on his web site but are available in a catalog for $3.
John Ernst is not only a talented and prolific model builder, but he is also host of the FF Cookup group on Yahoo!. Visit his site for a visual treat. Be sure to check out the Raiden project and the technique John is using for wing fillets.
Bill Schmidt is a meticulous craftsman who likes to finish his scale models in the classic method of colored Japanese tissue and clear dope. I have included photos of two of Bill's beautiful models in this column: the Spartan Cabin (from a Golden Age Reproductions kit) and the Vultee Vengeance dive‑bomber (from Comet plans).
Sources:
- Small Flying Arts
(253) 970-0014 www.smallflyingarts.com
- Starlink‑FliteTech Models
(760) 788-1858 www.starlink-flitetech.com
- Golden Age Reproductions
(978) 687-0024 www.goldenagereproductions.com
- FF Cookup group:
http://mysite.verizon.net/vze8lj0o4/johnsmodels/
- NFFS:
Transcribed from original scans by AI. Minor OCR errors may remain.

