
Nats One Design category
Free Flight Sport — Gene Smith [[email protected]]
You still have time to build a Country Boy for this year’s One Design event at the Nats. Don’t forget the One Design Combo on Tuesday for prior .049 One Designs.
Also included in this column:
- Three brothers enjoy FF together
- Dohrm Crawford’s Spacer
- More shop tips
- Paul’s MiG-15 Catapult Glider
- Karl Gies’s Pepper
- Dime Scale Lysander
- Texas Timers
- Sources on the Web
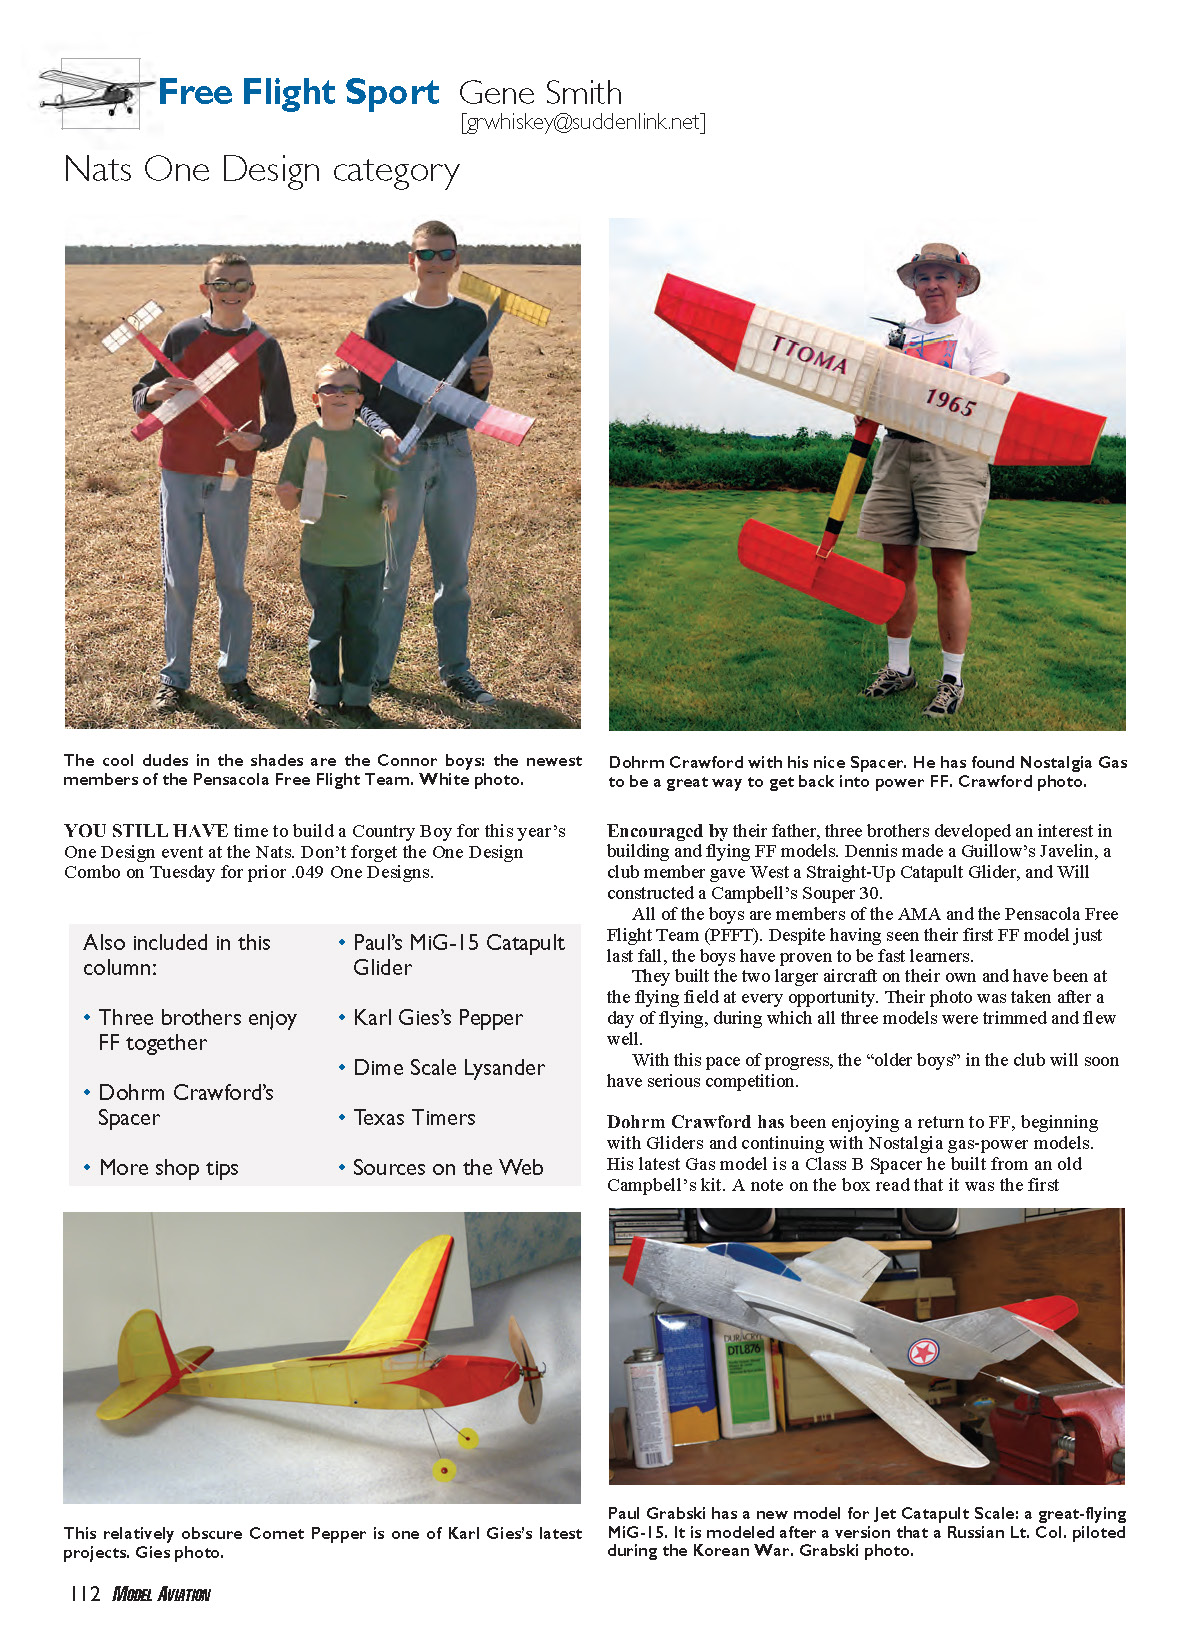
Three brothers enjoy FF together
Encouraged by their father, three brothers developed an interest in building and flying free flight (FF) models. Dennis made a Guillow’s Javelin, a club member gave West a Straight-Up Catapult Glider, and Will constructed a Campbell’s Souper 30.
All of the boys are members of the AMA and the Pensacola Free Flight Team (PFFT). Despite having seen their first FF model just last fall, the boys have proven to be fast learners. They built the two larger aircraft on their own and have been at the flying field at every opportunity. Their photo was taken after a day of flying, during which all three models were trimmed and flew well.
With this pace of progress, the “older boys” in the club will soon have serious competition.
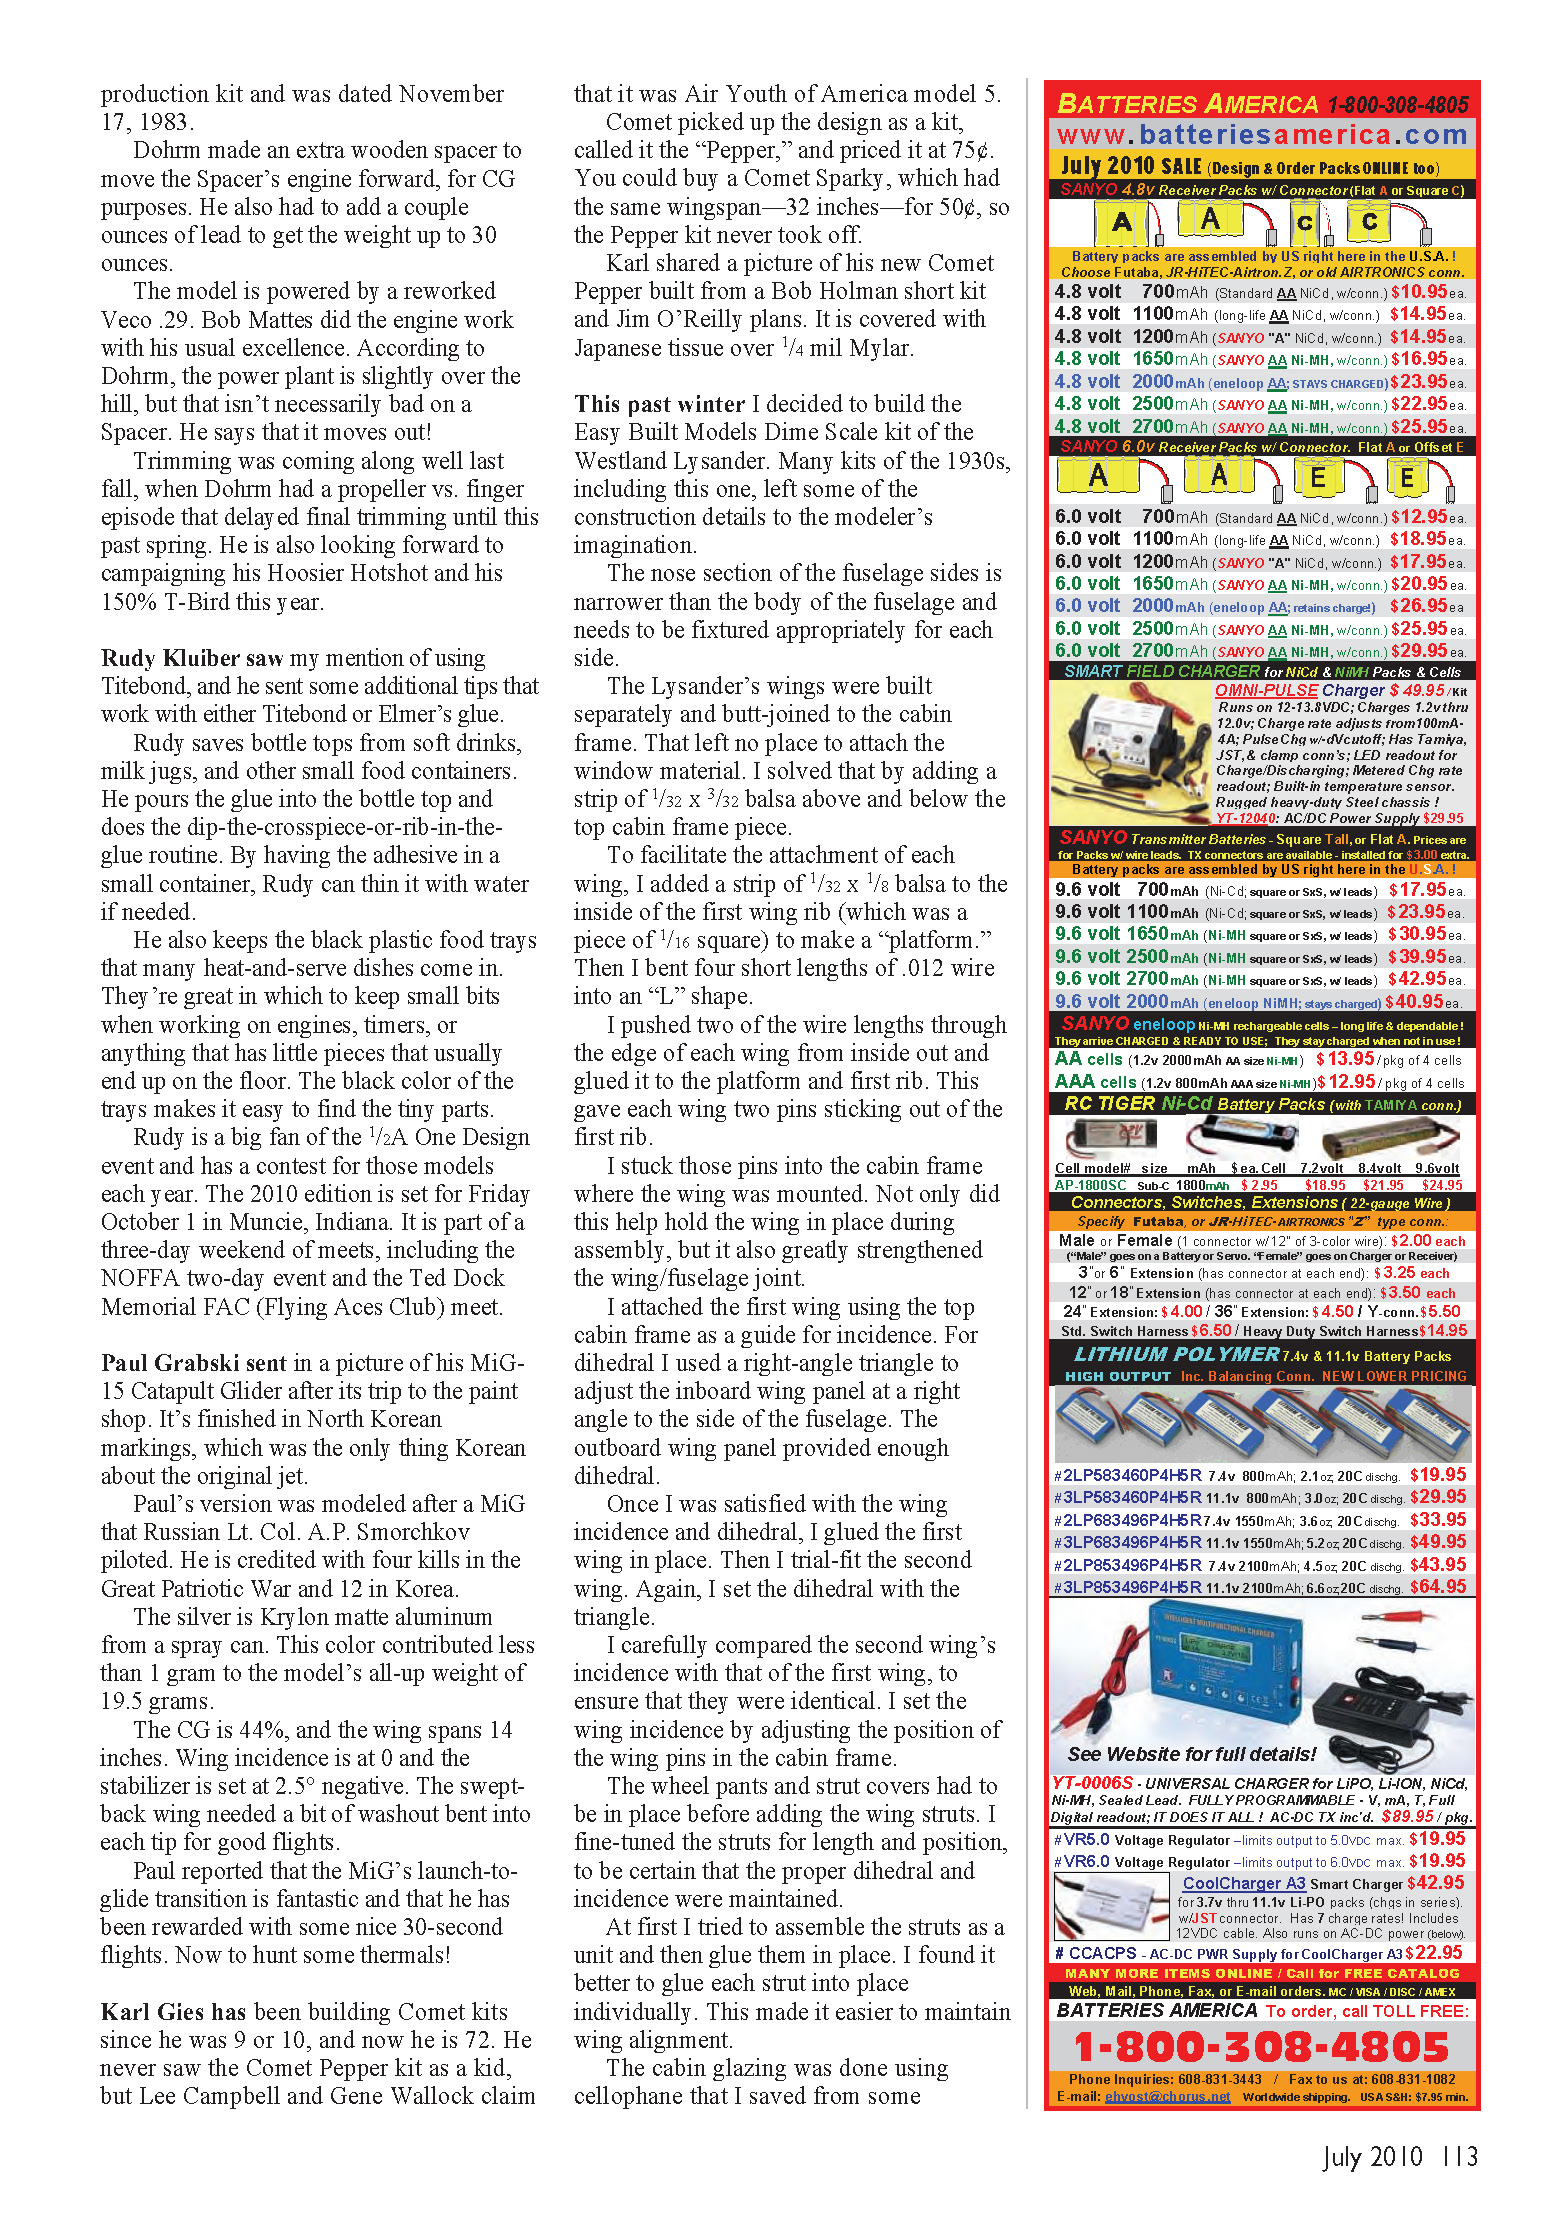
Dohrm Crawford’s Spacer
Dohrm Crawford has been enjoying a return to FF, beginning with gliders and continuing with nostalgia gas-power models. His latest gas model is a Class B Spacer he built from an old Campbell’s kit. A note on the box read that it was the first production kit and was dated November 17, 1983.
Dohrm made an extra wooden spacer to move the Spacer’s engine forward for CG purposes. He also had to add a couple ounces of lead to get the weight up to 30 ounces.
The model is powered by a reworked Veco .29. Bob Mattes did the engine work with his usual excellence. According to Dohrm, the power plant is slightly over the hill, but that isn’t necessarily bad on a Spacer — he says that it moves out!
Trimming was coming along well last fall, when Dohrm had a propeller-versus-finger episode that delayed final trimming until this past spring. He is also looking forward to campaigning his Hoosier Hotshot and his 150% T‑Bird this year.
More shop tips
Rudy Kluiber saw my mention of using Titebond, and he sent some additional tips that work with either Titebond or Elmer’s glue.
Rudy saves bottle tops from soft drinks, milk jugs, and other small food containers. He pours the glue into the bottle top and does the dip-the-crosspiece-or-rib-in-the-glue routine. By having the adhesive in a small container, Rudy can thin it with water if needed.
He also keeps the black plastic food trays that many heat-and-serve dishes come in. They’re great in which to keep small bits when working on engines, timers, or anything that has little pieces that usually end up on the floor. The black color of the trays makes it easy to find the tiny parts.
Rudy is a big fan of the 1/2A One Design event and has a contest for those models each year. The 2010 edition is set for Friday, October 1 in Muncie, Indiana. It is part of a three-day weekend of meets, including the NOFFA two-day event and the Ted Dock Memorial FAC (Flying Aces Club) meet.
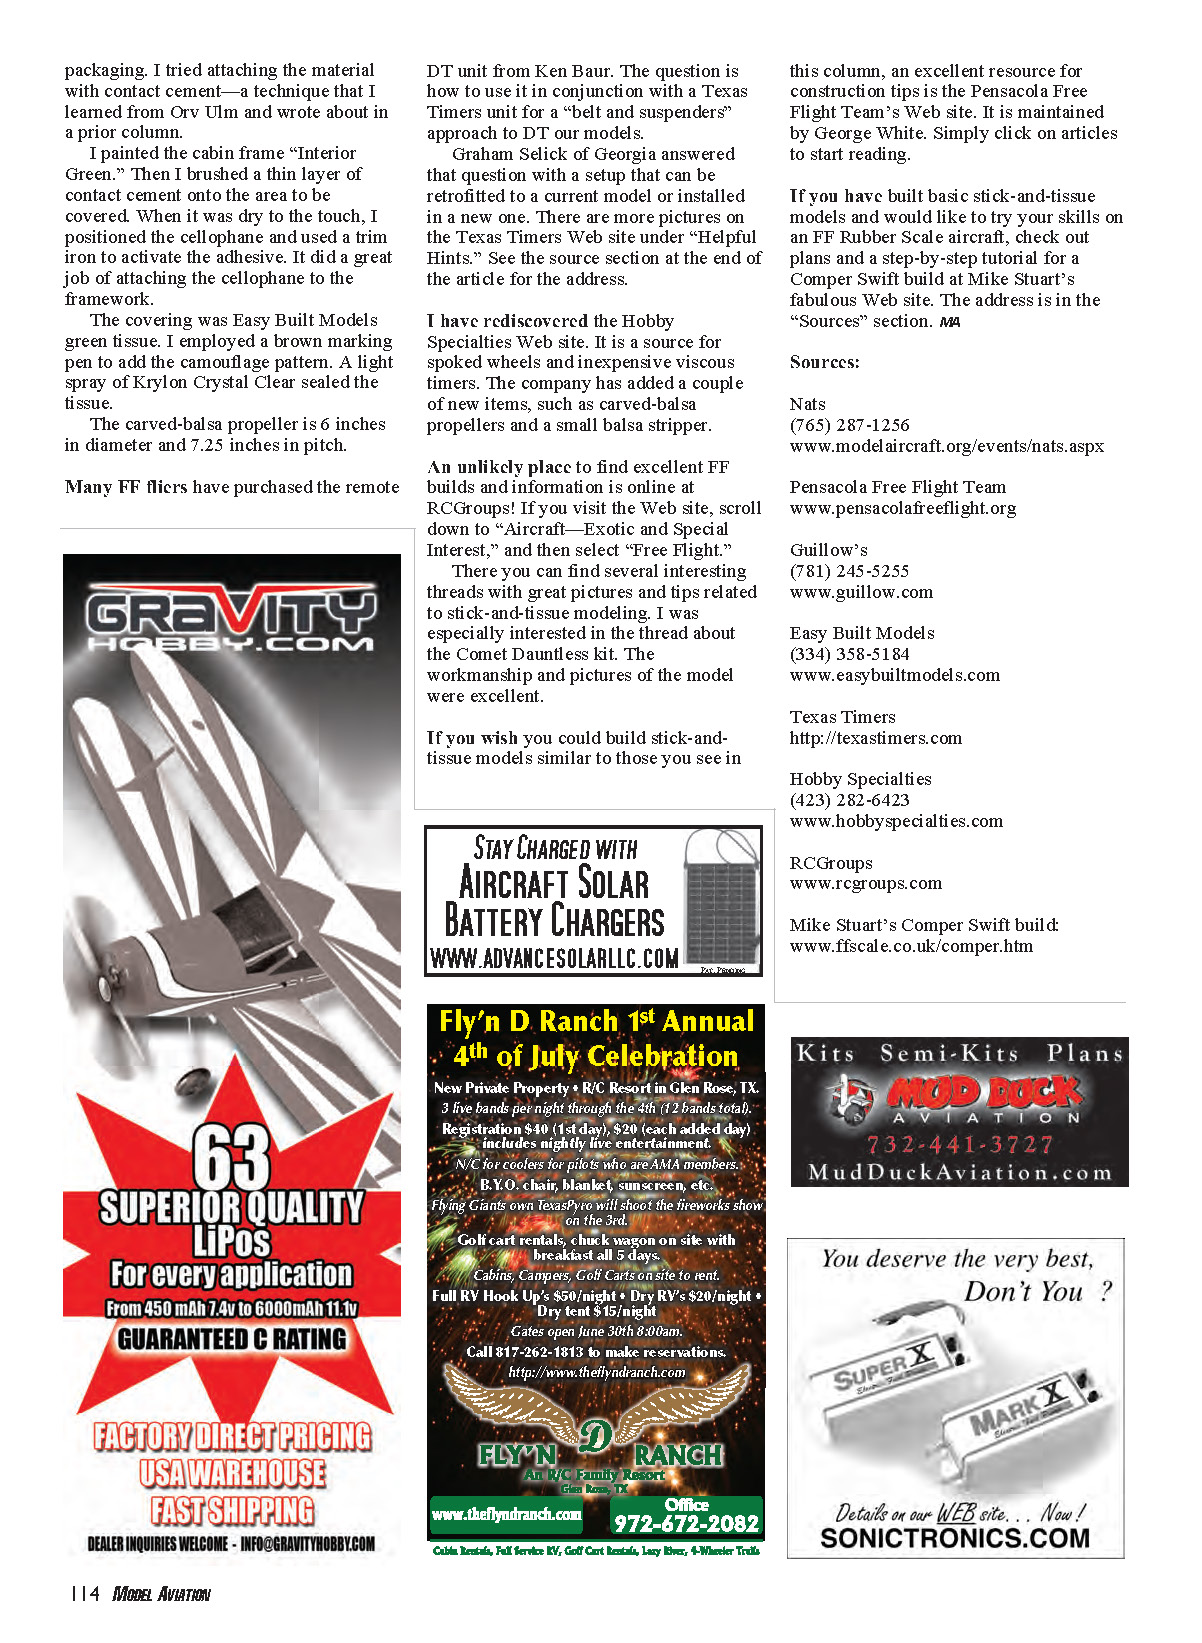
Paul’s MiG-15 Catapult Glider
Paul Grabski sent in a picture of his MiG-15 Catapult Glider after its trip to the paint shop. It’s finished in North Korean markings, which was the only thing Korean about the original jet.
Paul’s version was modeled after a MiG that Russian Lt. Col. A.P. Smorchkov piloted. He is credited with four kills in the Great Patriotic War and 12 in Korea.
The silver is Krylon matte aluminum from a spray can. This color contributed less than 1 gram to the model’s all-up weight of 19.5 grams.
The CG is 44%, and the wing spans 14 inches. Wing incidence is at 0° and the stabilizer is set at 2.5° negative. The swept-back wing needed a bit of washout bent into each tip for good flights.
Paul reported that the MiG’s launch-to-glide transition is fantastic and that he has been rewarded with some nice 30-second flights. Now to hunt some thermals!
Karl Gies’s Pepper
Karl Gies has been building Comet kits since he was 9 or 10, and now he is 72. He never saw the Comet Pepper kit as a kid, but Lee Campbell and Gene Wallock claim that it was Air Youth of America model 5. Comet picked up the design as a kit, called it the “Pepper,” and priced it at 75¢. You could buy a Comet Sparky, which had the same wingspan—32 inches—for 50¢, so the Pepper kit never took off.
Karl shared a picture of his new Comet Pepper built from a Bob Holman short kit and Jim O’Reilly plans. It is covered with Japanese tissue over 1/4 mil Mylar.
Dime Scale Lysander
This past winter I decided to build the Easy Built Models Dime Scale kit of the Westland Lysander. Many kits of the 1930s, including this one, left some of the construction details to the modeler’s imagination.
The nose section of the fuselage sides is narrower than the body of the fuselage and needs to be fixtured appropriately for each side.
The Lysander’s wings were built separately and butt-joined to the cabin frame. That left no place to attach the window material. I solved that by adding a strip of 1/32 x 3/32 balsa above and below the top cabin frame piece.
To facilitate the attachment of each wing, I added a strip of 1/32 x 1/8 balsa to the inside of the first wing rib (which was a piece of 1/16 square) to make a “platform.” Then I bent four short lengths of .012 wire into an “L” shape.
I pushed two of the wire lengths through the edge of each wing from inside out and glued them to the platform and first rib. This gave each wing two pins sticking out of the first rib.
I stuck those pins into the cabin frame where the wing was mounted. Not only did this help hold the wing in place during assembly, but it also greatly strengthened the wing/fuselage joint.
I attached the first wing using the top cabin frame as a guide for incidence. For dihedral I used a right-angle triangle to adjust the inboard wing panel at a right angle to the side of the fuselage. The outboard wing panel provided enough dihedral.
Once I was satisfied with the wing incidence and dihedral, I glued the first wing in place. Then I trial-fit the second wing. Again, I set the dihedral with the triangle.
I carefully compared the second wing’s incidence with that of the first wing, to ensure that they were identical. I set the wing incidence by adjusting the position of the wing pins in the cabin frame.
The wheel pants and strut covers had to be in place before adding the wing struts. I fine-tuned the struts for length and position, to be certain that the proper dihedral and incidence were maintained.
At first I tried to assemble the struts as a unit and then glue them in place. I found it better to glue each strut into place individually. This made it easier to maintain wing alignment.
The cabin glazing was done using cellophane that I saved from some packaging. I tried attaching the material with contact cement—a technique that I learned from Orv Ulm and wrote about in a prior column.
I painted the cabin frame "Interior Green." Then I brushed a thin layer of contact cement onto the area to be covered. When it was dry to the touch, I positioned the cellophane and used a trim iron to activate the adhesive. It did a great job of attaching the cellophane to the framework.
The covering was Easy Built Models green tissue. I employed a brown marking pen to add the camouflage pattern. A light spray of Krylon Crystal Clear sealed the tissue.
The carved-balsa propeller is 6 inches in diameter with a 7.25-inch pitch.
Texas Timers
Many FF fliers have purchased the remote DT unit from Ken Baur. The question is how to use it in conjunction with a Texas Timers unit for a "belt and suspenders" approach to DT our models.
Graham Selick of Georgia answered that question with a setup that can be retrofitted to a current model or installed in a new one. There are more pictures on the Texas Timers website under "Helpful Hints." See the Sources section at the end of the article for the address.
I have rediscovered the Hobby Specialties website. It is a source for spoked wheels and inexpensive viscous timers. The company has added a couple of new items, such as carved-balsa propellers and a small balsa stripper.
An unlikely place to find excellent FF builds and information is online at RCGroups. If you visit the website, scroll down to "Aircraft—Exotic and Special Interest," and then select "Free Flight."
There you can find several interesting threads with great pictures and tips related to stick-and-tissue modeling. I was especially interested in the thread about the Comet Dauntless kit. The workmanship and pictures of the model were excellent.
If you wish you could build stick-and-tissue models similar to those you see in this column, an excellent resource for construction tips is the Pensacola Free Flight Team's website. It is maintained by George White. Simply click on Articles to start reading.
If you have built basic stick-and-tissue models and would like to try your skills on an FF rubber-scale aircraft, check out plans and a step-by-step tutorial for a Comper Swift build at Mike Stuart's site. The address is in the Sources section. MA
Sources:
- Nats
(765) 287-1256 www.modelaircraft.org/events/nats.aspx
- Pensacola Free Flight Team
- Guillow's
(781) 245-5255 www.guillow.com
- Easy Built Models
(334) 358-5184 www.easybuiltmodels.com
- Texas Timers
- Hobby Specialties
(423) 282-6423 www.hobbyspecialties.com
- RCGroups
- Mike Stuart's Comper Swift build
Transcribed from original scans by AI. Minor OCR errors may remain.

