
Free Flight Sport - 2010/09
Gene Smith [[email protected]]
Fuselage repair — not so hard
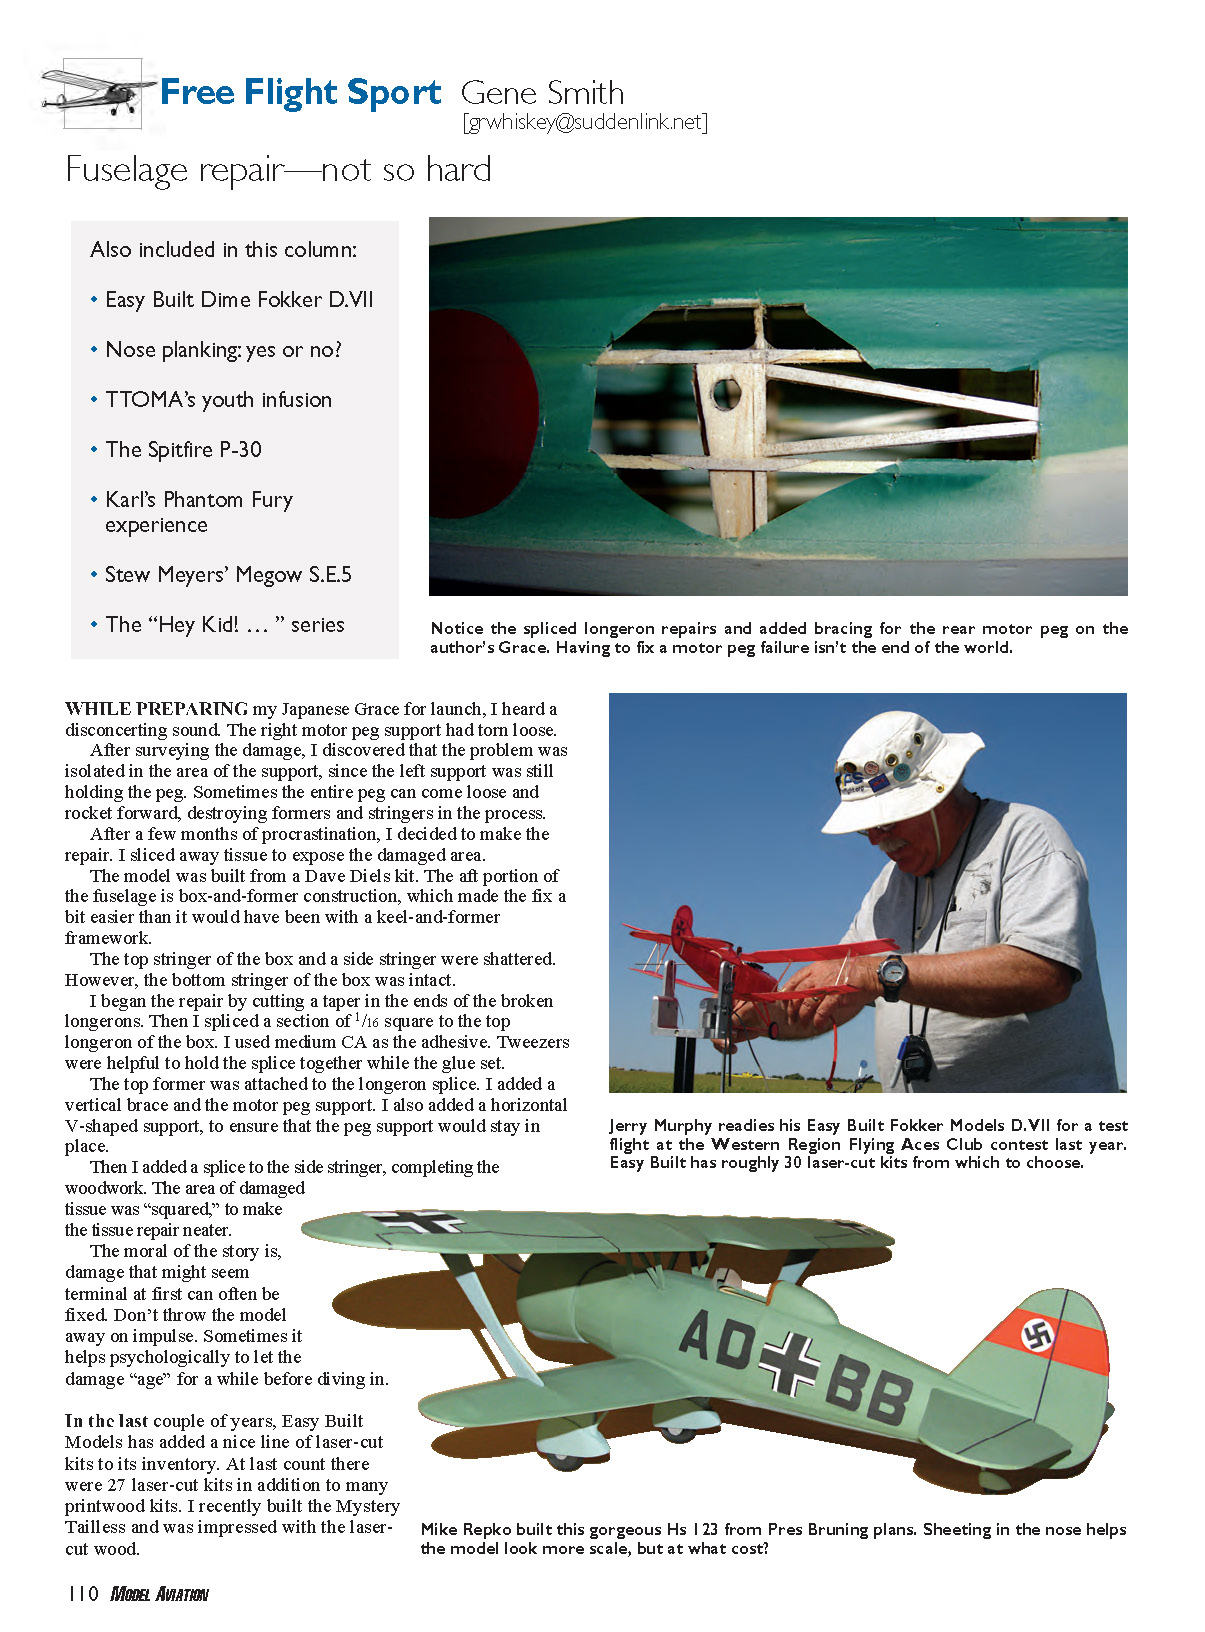
While preparing my Japanese Grace for launch, I heard a disconcerting sound. The right motor peg support had torn loose.
After surveying the damage, I discovered the problem was isolated to the area of the support; the left support was still holding the peg. Sometimes the entire peg can come loose and rocket forward, destroying formers and stringers in the process.
After a few months of procrastination, I decided to make the repair. I sliced away tissue to expose the damaged area.
The model was built from a Dave Diels kit. The aft portion of the fuselage is box-and-former construction, which made the fix a bit easier than it would have been with a keel-and-former framework.
The top stringer of the box and a side stringer were shattered. However, the bottom stringer of the box was intact.
I began the repair by cutting a taper in the ends of the broken longerons. Then I spliced a section of 1/16" square to the top longeron of the box. I used medium CA as the adhesive. Tweezers were helpful to hold the splice together while the glue set.
The top former was attached to the longeron splice. I added a vertical brace and the motor peg support. I also added a horizontal V-shaped support to ensure the peg support would stay in place.
Then I added a splice to the side stringer, completing the woodwork. The area of damaged tissue was squared to make the tissue repair neater.
The moral of the story is that damage that might seem terminal at first can often be fixed. Don't throw the model away on impulse. Sometimes it helps psychologically to let the damage "age" for a while before diving in.
Kits, builds, and performance notes
In the last couple of years, Easy Built Models has added a nice line of laser-cut kits to its inventory. At last count there were 27 laser-cut kits in addition to many printwood kits. I recently built the Mystery Tailless and was impressed with the laser-cut wood.
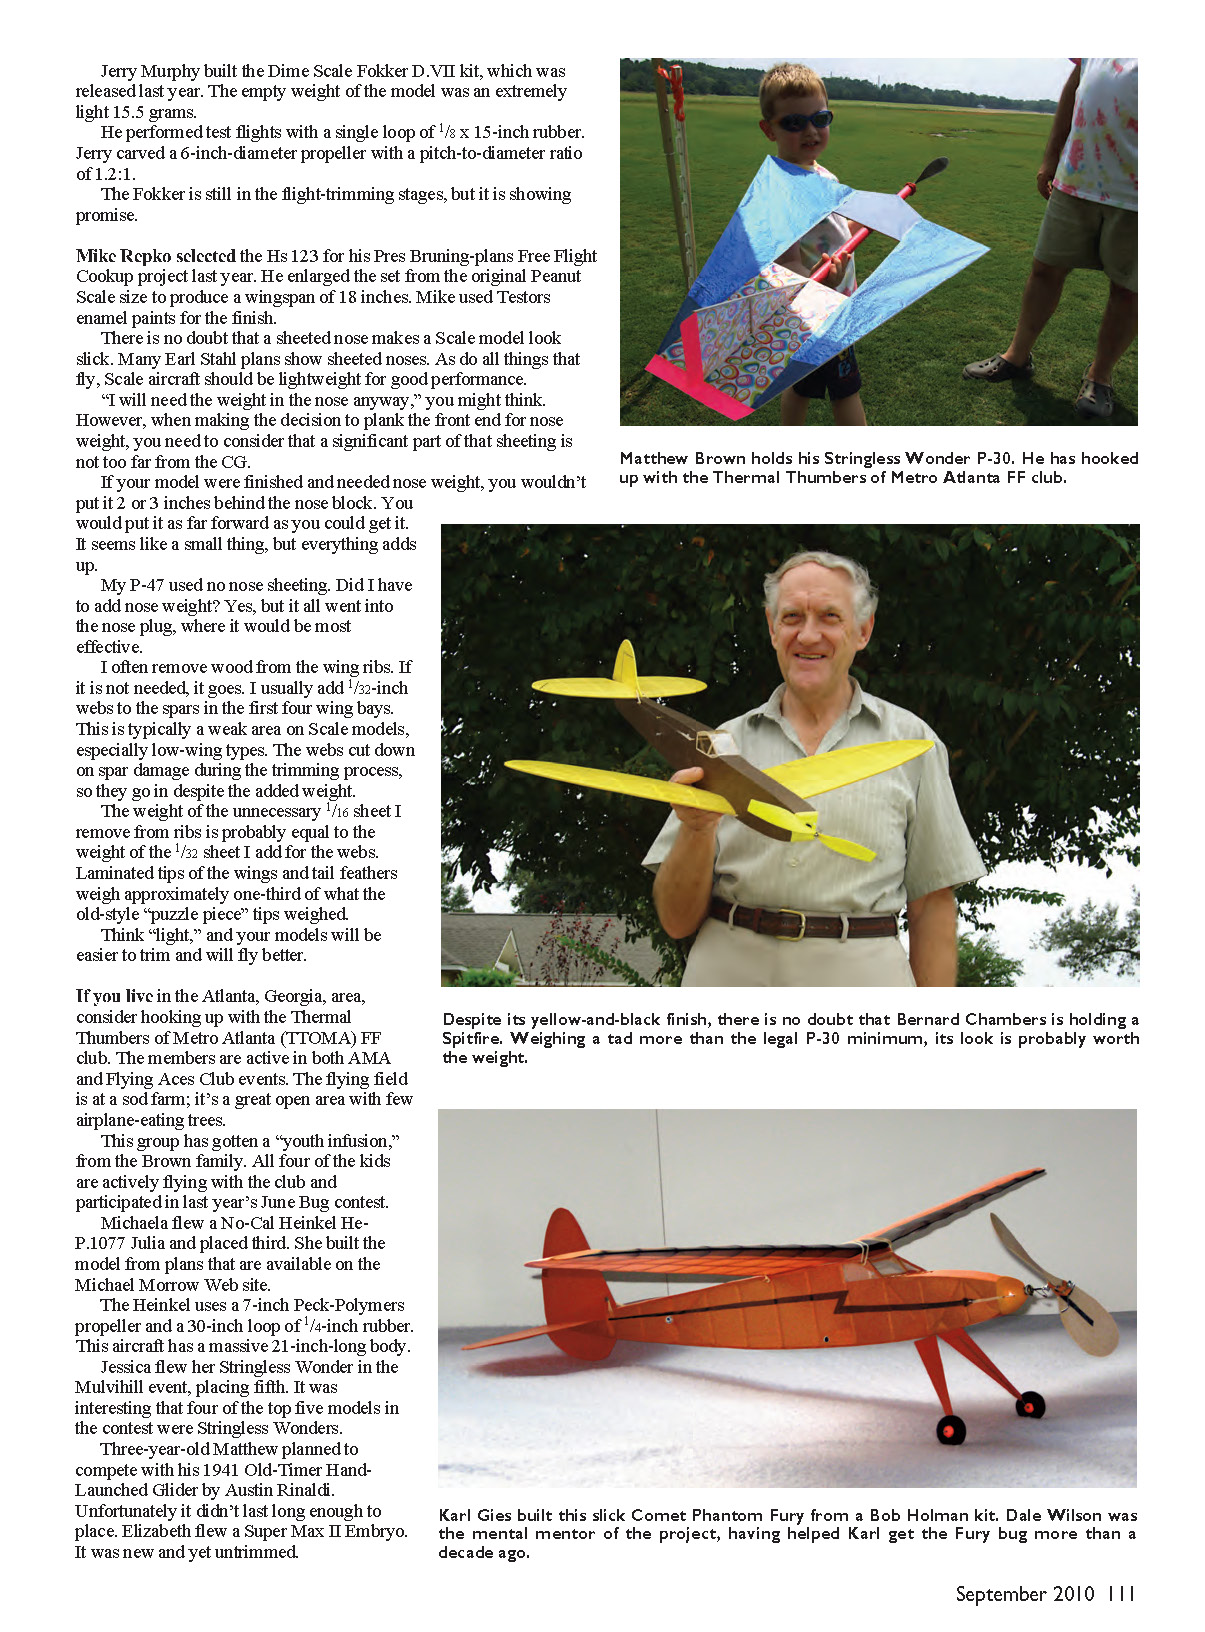
Jerry Murphy built the Dime Scale Fokker D.VII kit, which was released last year. The empty weight of the model was an extremely light 15.5 grams. He performed test flights with a single loop of 1/8" x 15" rubber. Jerry carved a 6" diameter propeller with a pitch-to-diameter ratio of 1.2:1. The Fokker is still in the flight-trimming stages, but it is showing promise.
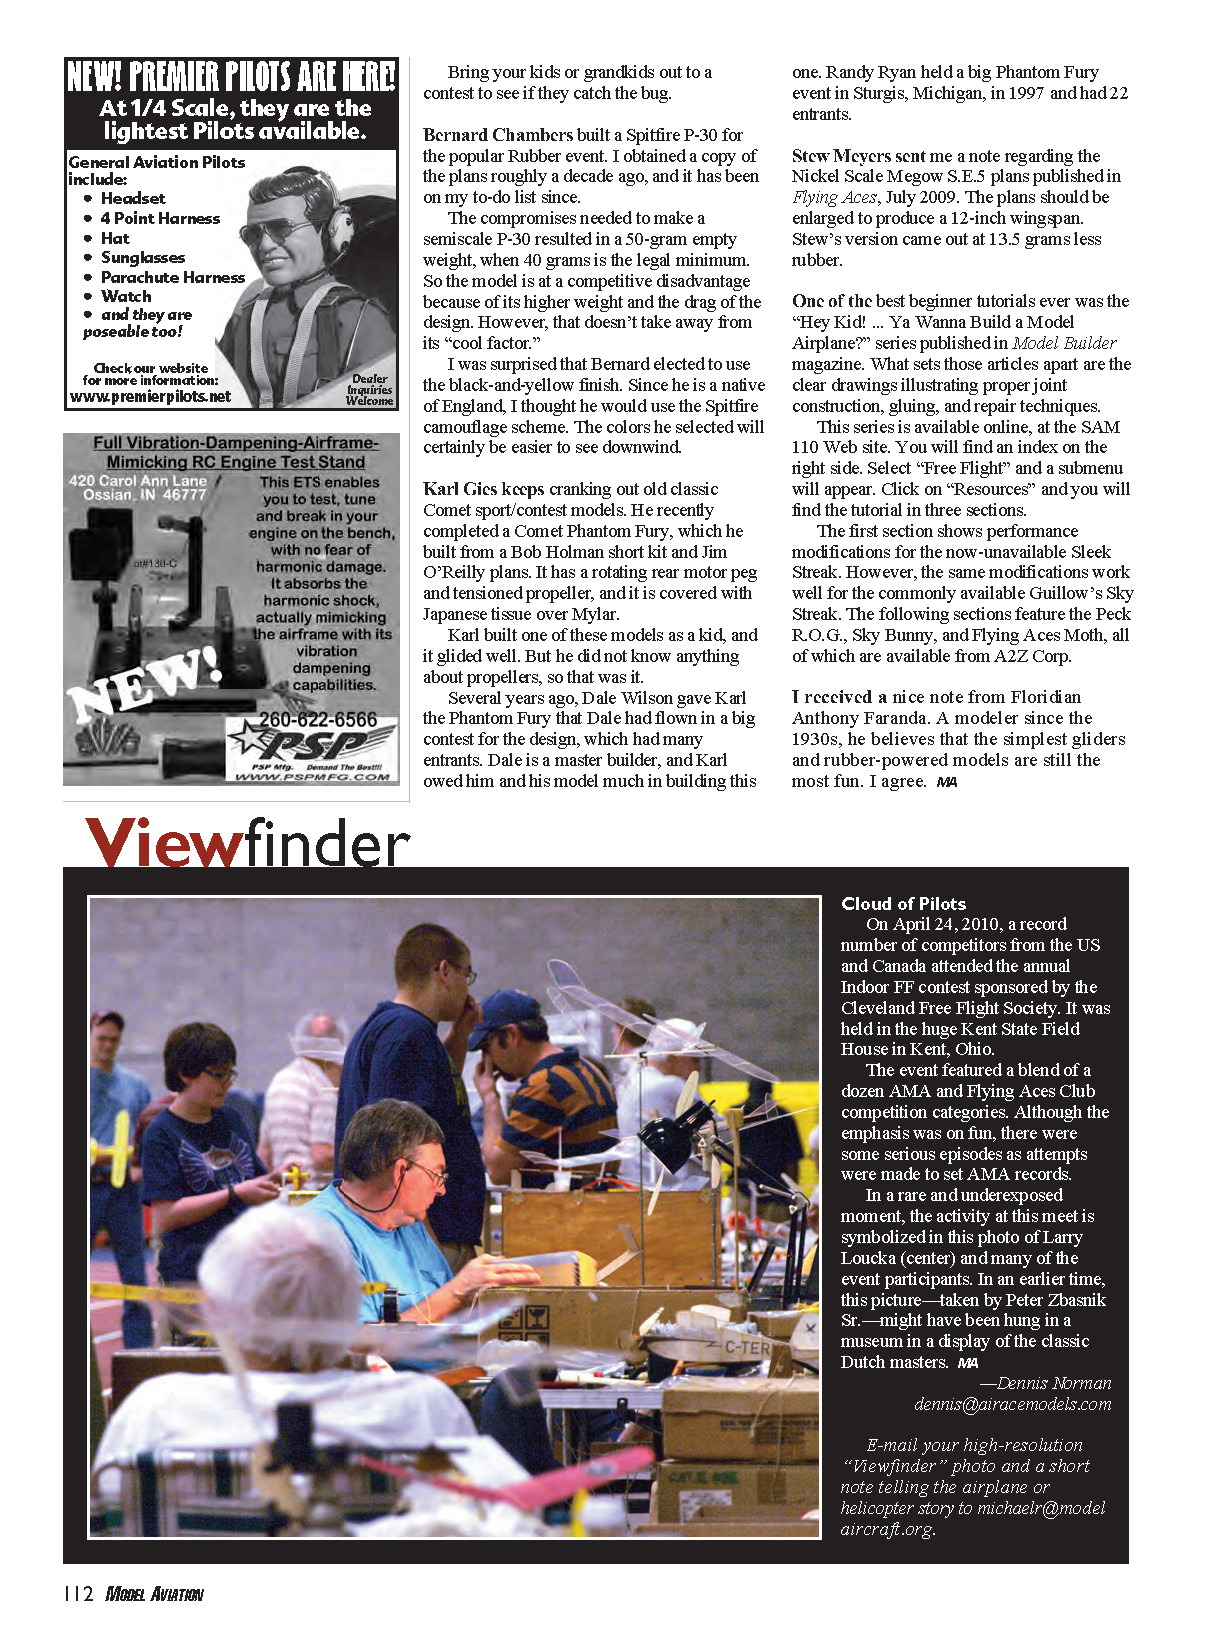
Mike Repko selected the Hs 123 for his Pres Bruning-plans Free Flight Cookup project last year. He enlarged the set from the original Peanut Scale size to produce an 18" wingspan. Mike used Testors enamel paints for the finish.
There is no doubt that a sheeted nose makes a scale model look slick. Many Earl Stahl plans show sheeted noses. As with all things that fly, scale aircraft should be lightweight for good performance. "I will need the weight in the nose anyway," you might think. However, when deciding to plank the front end for nose weight, consider that a significant part of that sheeting is not far from the CG. If your model were finished and needed nose weight, you wouldn't put it 2 or 3 inches behind the nose block — you would put it as far forward as you could get it. It seems like a small thing, but everything adds up.
My P-47 used no nose sheeting. Did I have to add nose weight? Yes, but it all went into the nose plug, where it would be most effective.
I often remove wood from the wing ribs. If it is not needed, it goes. I usually add 1/32" webs to the spars in the first four wing bays. This is typically a weak area on scale models, especially low-wing types. The webs cut down on spar damage during the trimming process, so they go in despite the added weight.
The weight of the unnecessary 1/16" sheet I remove from ribs is probably equal to the weight of the 1/32" sheet I add for the webs. Laminated tips of the wings and tail feathers weigh approximately one-third of what the old-style "puzzle piece" tips weighed.
Think "light," and your models will be easier to trim and will fly better.
Thermal Thumbers of Metro Atlanta (TTOMA)
If you live in the Atlanta, Georgia, area, consider hooking up with the Thermal Thumbers of Metro Atlanta (TTOMA) free-flight club. The members are active in both AMA and Flying Aces Club events. The flying field is at a sod farm; it's a great open area with few airplane-eating trees.
This group has gotten a "youth infusion" from the Brown family. All four of the kids are actively flying with the club and participated in last year's June Bug contest.
- Michaela flew a No-Cal Heinkel He P.1077 Julia and placed third. She built the model from plans available on the Michael Morrow website. The Heinkel uses a 7" Peck-Polymers propeller and a 30" loop of 1/4" rubber. This aircraft has a massive 21" long body.
- Jessica flew her Stringless Wonder in the Mulvihill event, placing fifth. Interestingly, her top five models in the contest were Stringless Wonders.
- Three-year-old Matthew planned to compete with his 1941 Old-Timer hand-launched glider by Austin Rinaldi, but it didn't last long enough to place.
- Elizabeth flew a Super Max II Embryo. It was new and yet untrimmed.
Bring your kids or grandkids out to a contest to see if they catch the bug.
More on recent models and events
Bernard Chambers built a Spitfire P-30 for the popular Rubber event. I obtained a copy of the plans roughly a decade ago, and it has been on my to-do list since.
The compromises needed to make a semi-scale P-30 resulted in a 50-gram empty weight, when 40 grams is the legal minimum. So the model is at a competitive disadvantage because of its higher weight and the drag of the design. However, that doesn't take away from its "cool factor."
I was surprised that Bernard elected to use the black-and-yellow finish. Since he is a native of England, I thought he would use the Spitfire camouflage scheme. The colors he selected will certainly be easier to see downwind.
Karl Gies keeps cranking out old classic Comet sport/contest models. He recently completed a Comet Phantom Fury, which he built from a Bob Holman short kit and Jim O'Reilly plans. It has a rotating rear motor peg and tensioned propeller, and it is covered with Japanese tissue over Mylar.
Karl built one of these models as a kid, and it glided well. But he did not know anything about propellers, so that was it. Several years ago, Dale Wilson gave Karl the Phantom Fury that Dale had flown in a big contest for the design, which had many entrants. Dale is a master builder, and Karl owed him and his model much in building this one. Randy Ryan held a big Phantom Fury event in Sturgis, Michigan, in 1997 and had 22 entrants.
Stew Meyers sent me a note regarding the Nickel Scale Megow S.E.5 plans published in Flying Aces, July 2009. The plans should be enlarged to produce a 12" wingspan. Stew's version came out at 13.5 grams less rubber.
Tutorials, resources, and correspondence
One of the best beginner tutorials ever was the "Hey Kid! ... Ya Wanna Build a Model Airplane?" series published in Model Builder magazine. What sets those articles apart are the clear drawings illustrating proper joint construction, gluing, and repair techniques.
This series is available online at the SAM 110 website. You will find an index on the right side. Select "Free Flight" and a submenu will appear. Click on "Resources" and you will find the tutorial in three sections.
The first section shows performance modifications for the now-unavailable Sleek Streak. However, the same modifications work well for the commonly available Guillows Sky Streak. The following sections feature the Peck R.O.G., Sky Bunny, and Flying Aces Moth, all of which are available from A2Z Corp.
I received a nice note from Floridian Anthony Faranda. A modeler since the 1930s, he believes that the simplest gliders and rubber-powered models are still the most fun. I agree.
MA
Transcribed from original scans by AI. Minor OCR errors may remain.

