
Frank Rowsome's Messerschmitt Bf 109
By Gene Smith [[email protected]]
The Messerschmitt Bf 109 has been one of my favorite airplanes since, well, forever. Part of the appeal is the plethora of cool paint schemes from the airplane’s service in Europe, Africa, and Russia.
Frank Rowsome also likes the appearance of the 109. He especially liked the scheme of the Bf 109 Emil that was on the Flying Aces Club (FAC) Nats T-shirt in 2004. That particular Emil fought in the Battle of Britain and it had no swastika.
Although Frank is an experienced builder, the Emil was his first effort at a Jumbo model. As we often find with first efforts, it turned into a learning experience. The nose kept collapsing on landing, so he had to sheet the nose section.
Jumbo model and wing attachment
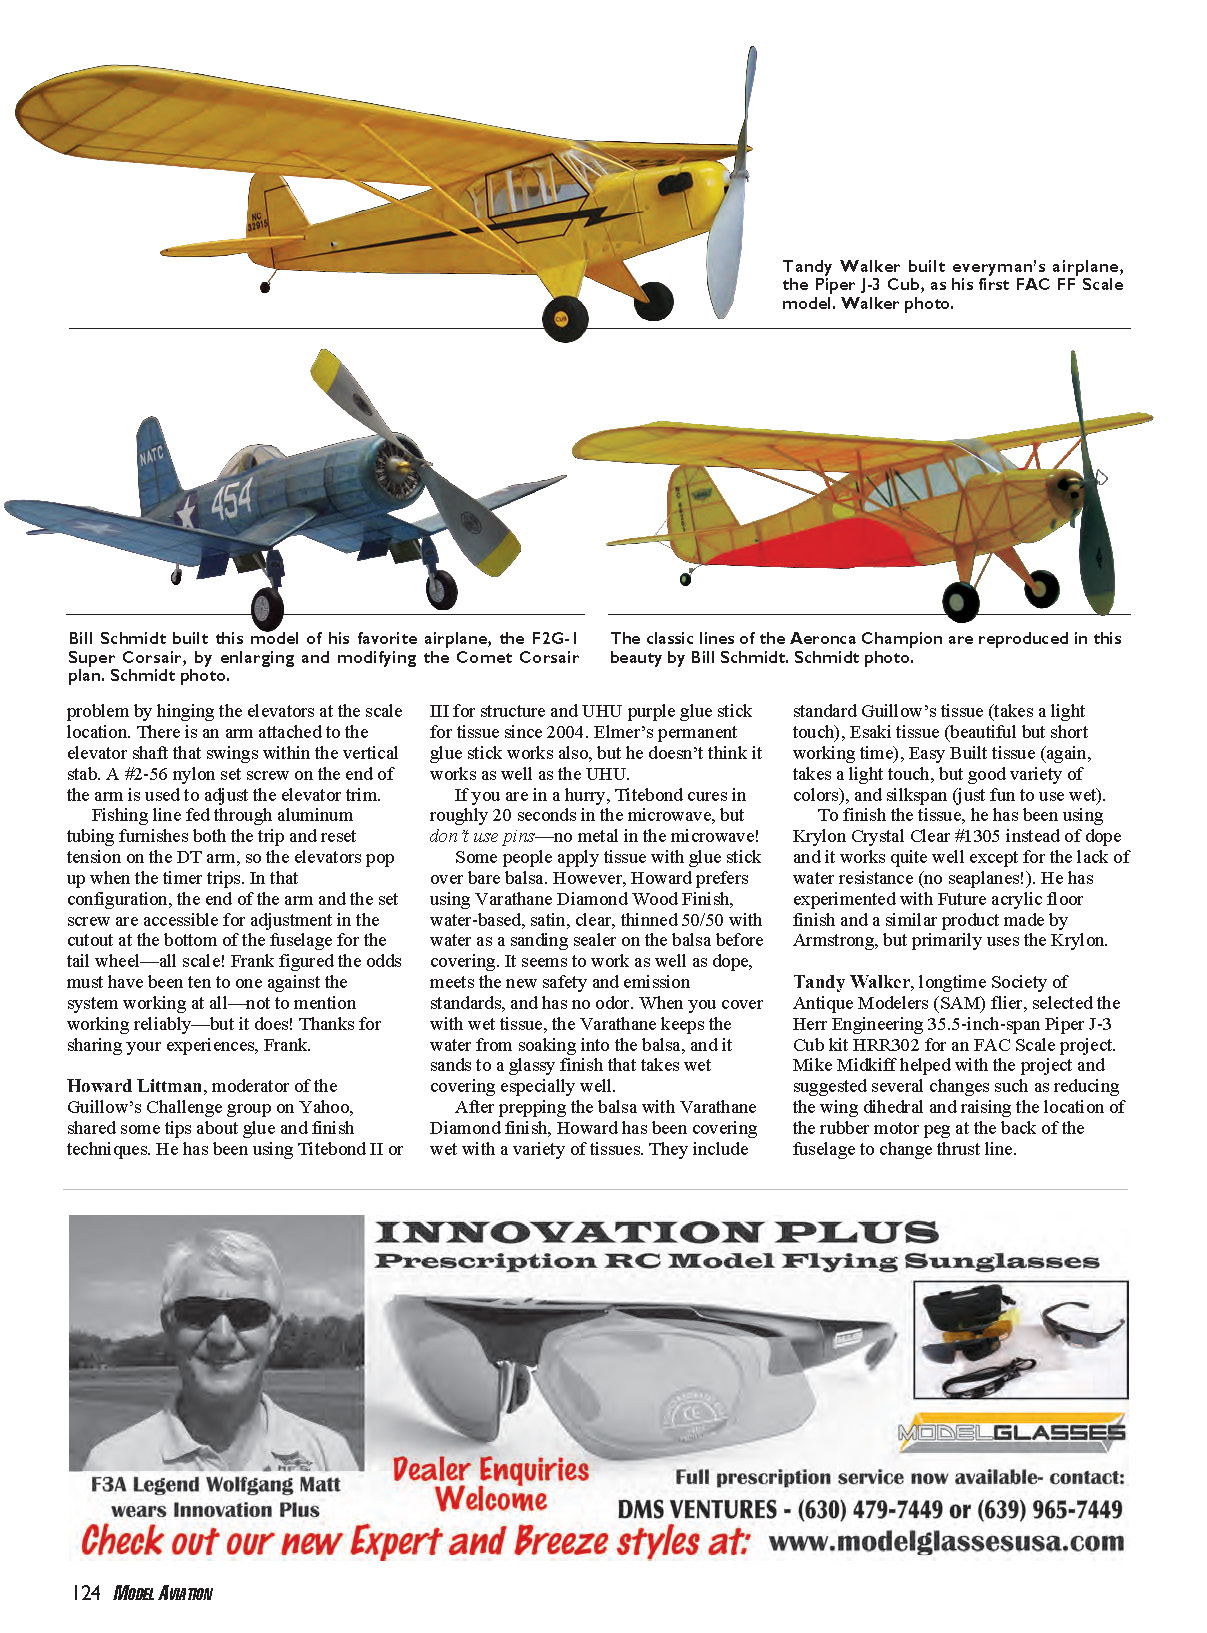
A Jumbo has a wingspan greater than 36 inches. To make the model easier to transport, Frank elected to use plug-in wings. He mounted a 1/8-inch carbon-fiber tube through the fuselage. The carbon fiber slides into aluminum tubes epoxied to the main spar in each wing. Alignment dowels near the wing trailing edge and small rare-earth magnets are used to keep the wings seated properly.
Frank found that the slightest knock will cause dislocation of the alignment dowel and subsequent crash damage on landing. Rather than using an alignment dowel, I like to add a second set of spars in the first two wing bays roughly 3/4 the chord from the leading edge. This second set of spars is used for another tube-in-tube fixture to secure the wing. This, in conjunction with a strong magnet, allows the wing to stay in place during flight but still pop off in hard landings or for storage.
The Bf 109’s wing attachment problems produced one of the best scale reenactment crashes Frank has ever seen. In Round 1 of the World War II mass launch at Ingleside, Maryland, last November, it had a gentle, glancing mid-air with Stew Meyers’ little F6F Hellcat. The Bf 109’s wing dislocated, producing a realistic shoot-down spin! Stew’s Hellcat went on to win the event.
Rudder and trim
Frank wanted the rudder to be adjustable so he hinged it at the scale location for looks, but discovered that produced a hopelessly over-sensitive control. Rudder offsets almost too small to see produce death spirals, often resulting in significant damage to the model. I experienced the same problem with my Reggiane 2005. I had to glue the rudder in place to get the model to perform consistently. I have started building an adjustable trim tab into the rudder. That allows trim adjustments without the extreme sensitivity.
Dethermalizer (DT)
One thing that does work on the model is its dethermalizer (DT). Since the horizontal stabilizer is mounted up on the vertical stabilizer with struts down to the fuselage, it is challenging to rig a DT. Frank solved the problem by hinging the elevators at the scale location. There is an arm attached to the elevator shaft that swings within the vertical stab. A #2-56 nylon set screw on the end of the arm is used to adjust the elevator trim.
Fishing line fed through aluminum tubing furnishes both the trip and reset tension on the DT arm, so the elevators pop up when the timer trips. In that configuration, the end of the arm and the set screw are accessible for adjustment in the cutout at the bottom of the fuselage for the tail wheel—all scale! Frank figured the odds must have been ten to one against the system working at all—not to mention working reliably—but it does! Thanks for sharing your experiences, Frank.
Adhesives and finishes
While doing repairs, Frank discovered that Midwest Products Aero-Gloss dope releases the adhesion of UHU glue sticks even after years of drying time. In other words, applying Aero-Gloss over tissue attached with UHU glue stick can cause the tissue to lose adhesion.
Howard Littman, moderator of the Guillow's Challenge group on Yahoo, shared some tips about glue and finish techniques. He has been using Titebond II or Titebond III for structure and UHU purple glue stick for tissue since 2004. Elmer's permanent glue stick works also, but he doesn't think it works as well as the UHU.
If you are in a hurry, Titebond cures in roughly 20 seconds in the microwave, but don't use pins—no metal in the microwave!
Some people apply tissue with glue stick over bare balsa. However, Howard prefers using Varathane Diamond Wood Finish, water-based, satin, clear, thinned 50/50 with water as a sanding sealer on the balsa before covering. It seems to work as well as dope, meets the new safety and emission standards, and has no odor. When you cover with wet tissue, the Varathane keeps the water from soaking into the balsa, and it sands to a glassy finish that takes wet covering especially well.
After prepping the balsa with Varathane Diamond finish, Howard has been covering wet with a variety of tissues. They include:
- standard Guillow's tissue (takes a light touch),
- Esaki tissue (beautiful but short working time),
- Easy Bilt tissue (again, takes a light touch, but good variety of colors),
- silkspan (just fun to use wet).
To finish the tissue, he has been using Krylon Crystal Clear #1305 instead of dope and it works quite well except for the lack of water resistance (no seaplanes!). He has experimented with Futura acrylic floor finish and a similar product made by Armstrong, but primarily uses the Krylon.
Doug Beardsworth used the plasticized nitrate/Floquil blend finish that he has described in previous columns.
Doug also offered a masking tip. In the past he has used frisket paper to mask areas for airbrushing. Frisket paper is a clear, flexible plastic with a mild adhesive on one side, but it is hard to see. On his next project, Doug is going to try this tip from Orv Olm:
- Spray a sheet of domestic tissue with two or three coats of Krylon Crystal Clear.
- Cut your masks out of that tissue and attach them to the model with 3M Scotch Repositionable Glue Stick (Post-It Note glue).
This makes nice, clean lines when airbrushing, peels off with no paint pull, and is easier to handle than airbrush frisket.
Other builders and projects
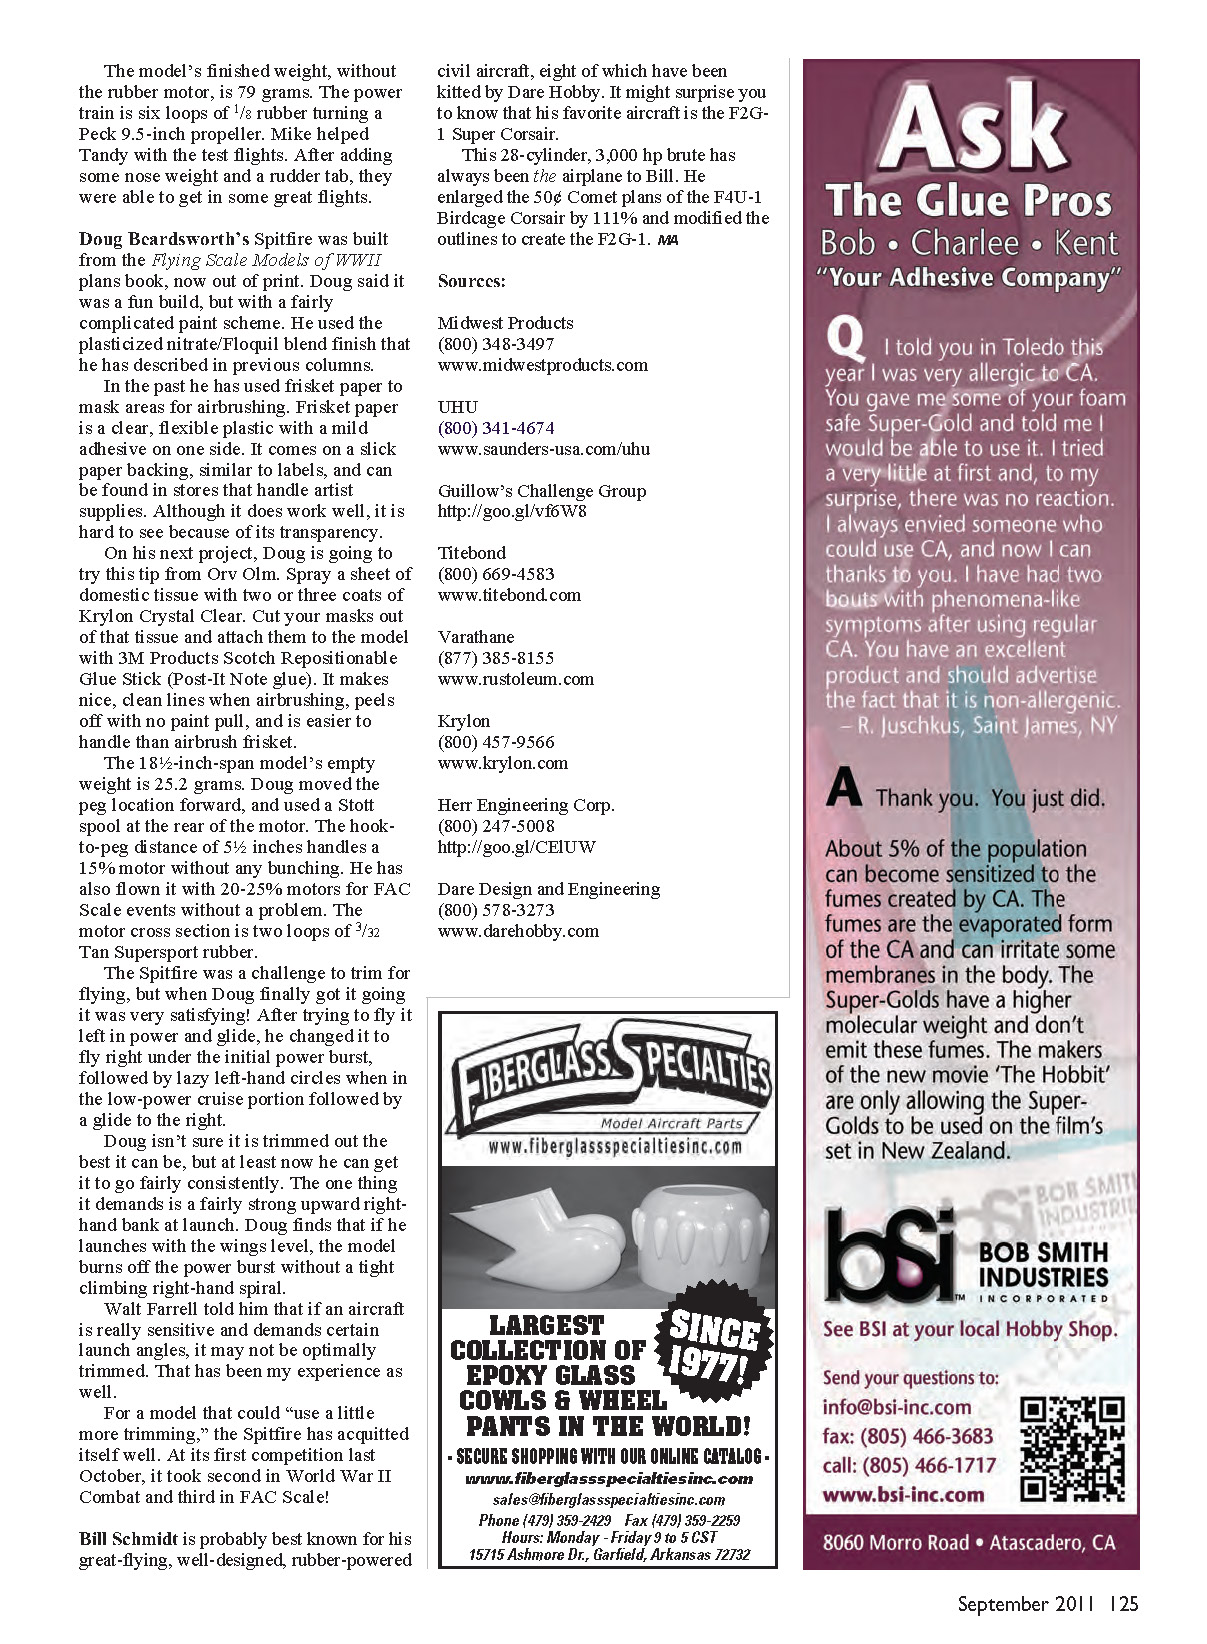
Tandy Walker, longtime Society of Antique Modelers (SAM) flier, selected the Herr Engineering 35.5-inch-span Piper J-3 Cub kit HRR302 for an FAC Scale project. Mike Midkiff helped with the project and suggested several changes such as reducing the wing dihedral and raising the location of the rubber motor peg at the back of the fuselage to change thrust line. The model’s finished weight, without the rubber motor, is 79 grams. The power train is six loops of 1/8 rubber turning a Peck 9.5-inch propeller. Mike helped Tandy with the test flights. After adding some nose weight and a rudder tab, they were able to get in some great flights.
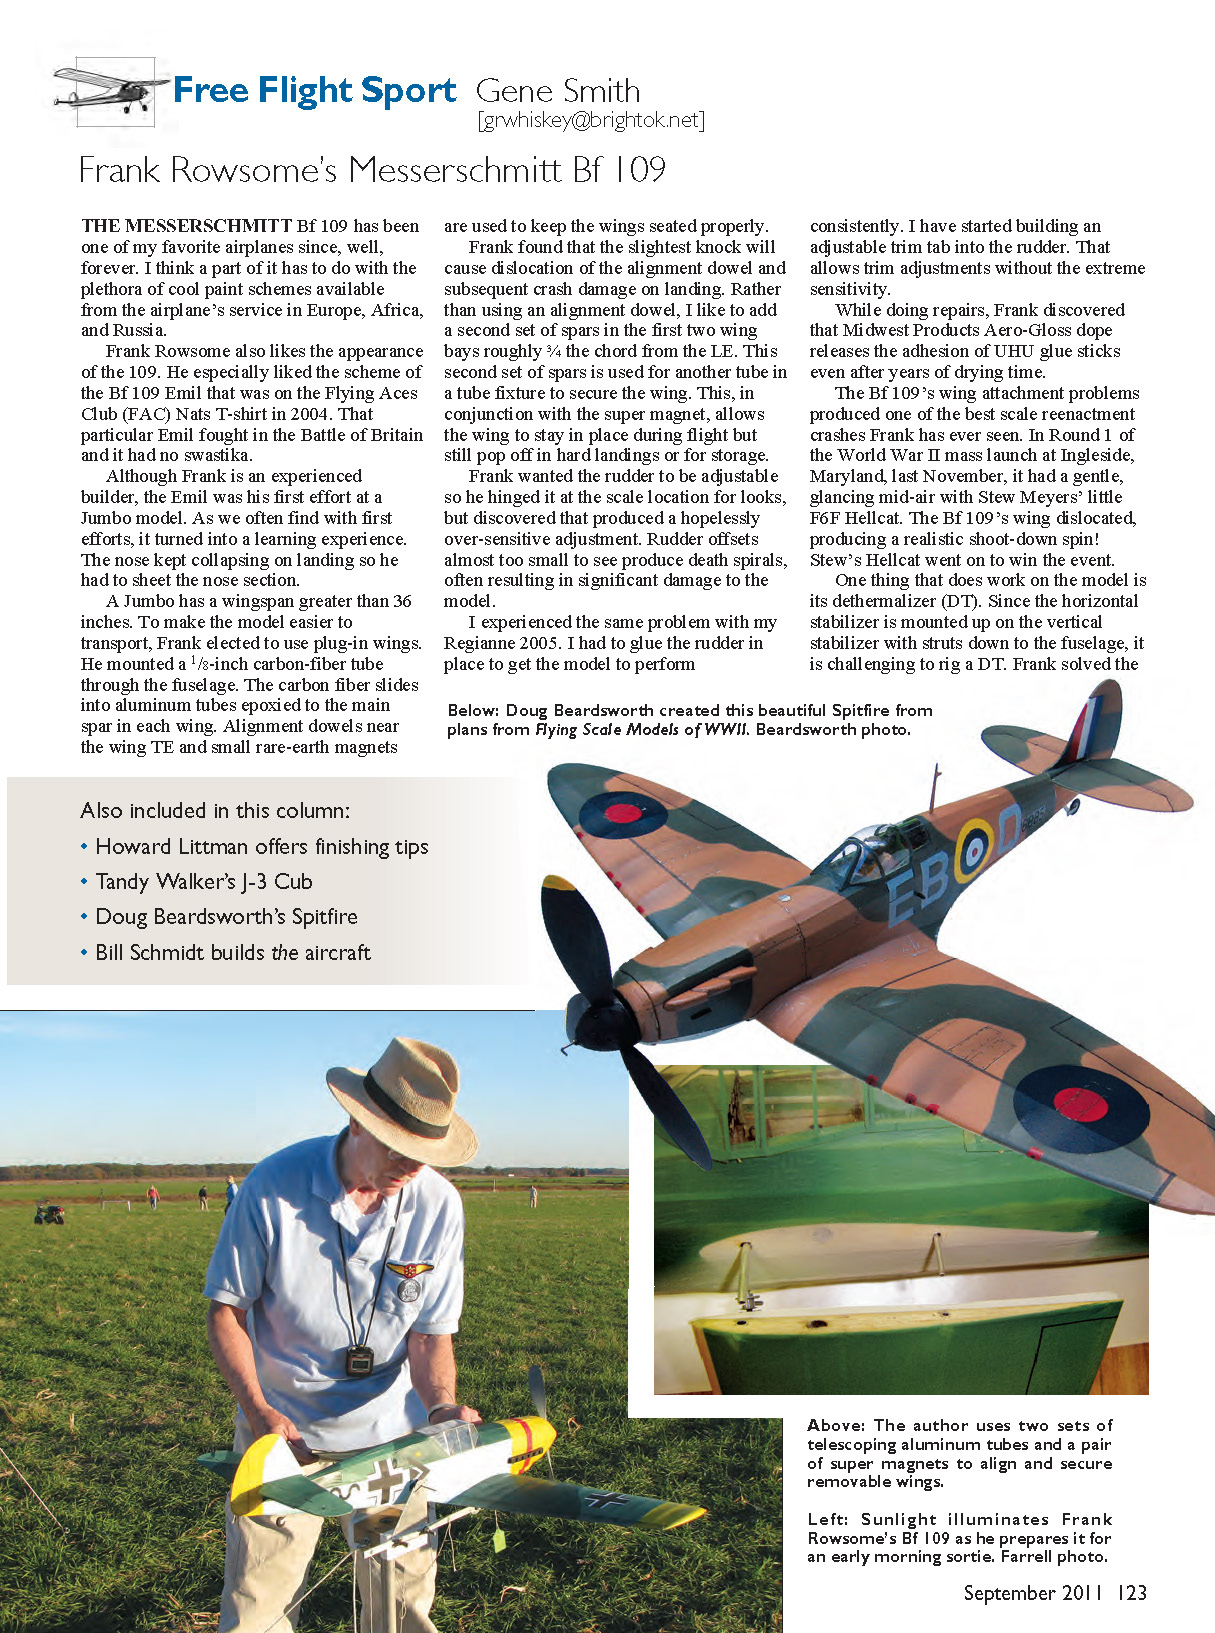
Doug Beardsworth’s Spitfire was built from the Flying Scale Models of WWII plans book, now out of print. Doug said it was a fun build, but with a fairly complicated paint scheme. The 18.5-inch-span model’s empty weight is 25.2 grams. Doug moved the peg location forward, and used a Stott spool at the rear of the motor. The hook-to-peg distance of 5.5 inches handles a 15% motor without any bunching. He has also flown it with 20–25% motors for FAC Scale events without a problem. The motor cross section is two loops of 3/32 Tan Supersport rubber.
The Spitfire was a challenge to trim for flying, but when Doug finally got it going it was very satisfying! After trying to fly it left in power and glide, he changed it to fly right under the initial power burst, followed by lazy left-hand circles when in the low-power cruise portion and then a glide to the right.
Doug isn’t sure it is trimmed out the best it can be, but at least now he can get it to go fairly consistently. The one thing it demands is a fairly strong upward right-hand bank at launch. Doug finds that if he launches with the wings level, the model burns off the power burst without a tight climbing right-hand spiral. Walt Farrell told him that if an aircraft is really sensitive and demands certain launch angles, it may not be optimally trimmed. That has been my experience as well.
For a model that could “use a little more trimming,” the Spitfire has acquitted itself well. At its first competition last October, it took second in World War II Combat and third in FAC Scale!
Bill Schmidt is probably best known for his great-flying, well-designed, rubber-powered civil aircraft, eight of which have been kitted by Dare Hobby. It might surprise you to know that his favorite aircraft is the F2G-1 Super Corsair. This 28-cylinder, 3,000 hp brute has always been the airplane to Bill. He enlarged the 50¢ Comet plans of the F4U-1 Birdcage Corsair by 111% and modified the outlines to create the F2G-1. —MA
Sources:
- Midwest Products
(800) 348-3497 www.midwestproducts.com
- UHU
(800) 341-4674 www.saunders-usa.com/uhu
- Guillow’s Challenge Group
- Titebond
(800) 669-4583 www.titebond.com
- Varathane
(877) 385-8155 www.rustoleum.com
- Krylon
(800) 457-9566 www.krylon.com
- Herr Engineering Corp.
(800) 247-5008 http://goo.gl/CE1UW
- Dare Design and Engineering
(800) 578-3273 www.darehobby.com
Transcribed from original scans by AI. Minor OCR errors may remain.

