

The case for building model aircraft
Bob Aberle
This month, I'm departing from my usual column format. This issue of Model Aviation has a designated theme, building model aircraft, as opposed to purchasing ARF or RTF models.
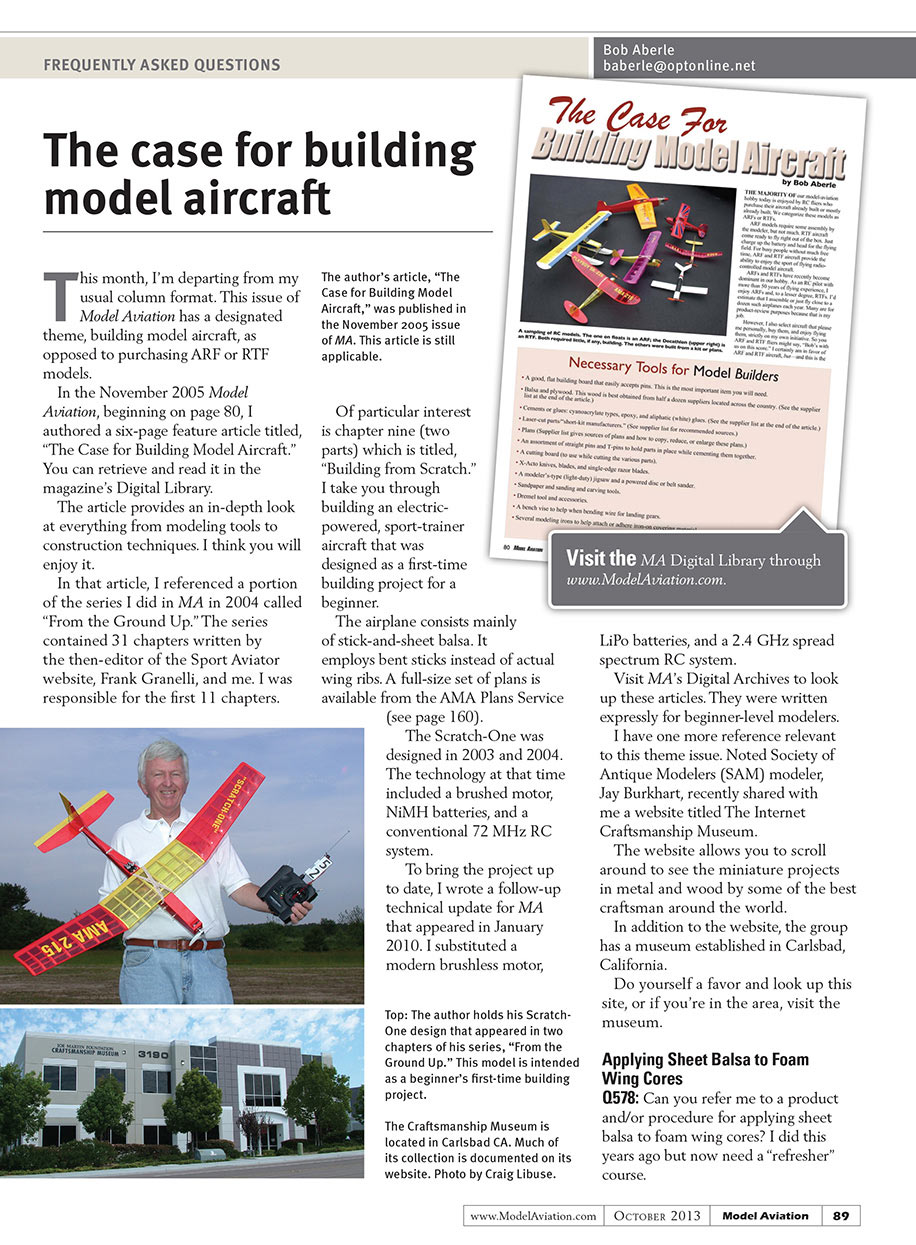
In the November 2005 Model Aviation, beginning on page 80, I authored a six-page feature article titled, "The Case for Building Model Aircraft." You can retrieve and read it in the magazine's Digital Library.
The article provides an in-depth look at everything from modeling tools to construction techniques. I think you will enjoy it.
In that article, I referenced a portion of the series I did in MA in 2004 called "From the Ground Up." The series contained 31 chapters written by the then-editor of the Sport Aviator website, Frank Granelli, and me. I was responsible for the first 11 chapters.
The author's article, "The Case for Building Model Aircraft," was published in the November 2005 issue of MA. This article is still applicable.
Of particular interest is chapter nine (two parts) which is titled, "Building from Scratch." I take you through building an electric-powered, sport-trainer aircraft that was designed as a first-time building project for a beginner.
The airplane consists mainly of stick-and-sheet balsa. It employs bent sticks instead of actual wing ribs. A full-size set of plans is available from the AMA Plans Service (see page 160).
The Scratch-One was designed in 2003 and 2004. The technology at that time included a brushed motor, NiMH batteries, and a conventional 72 MHz RC system.
To bring the project up to date, I wrote a follow-up technical update for MA that appeared in January 2010. I substituted a modern brushless motor, LiPo batteries, and a 2.4 GHz spread spectrum RC system.
Visit MA's Digital Archives to look up these articles. They were written expressly for beginner-level modelers.
I have one more reference relevant to this theme issue. Noted Society of Antique Modelers (SAM) modeler, Jay Burkhart, recently shared with me a website titled The Internet Craftsmanship Museum.
The website allows you to scroll around to see the miniature projects in metal and wood by some of the best craftsmen around the world.
In addition to the website, the group has a museum established in Carlsbad, California.
Do yourself a favor and look up this site, or if you're in the area, visit the museum.
Applying Sheet Balsa to Foam Wing Cores
0578: Can you refer me to a product and/or procedure for applying sheet balsa to foam wing cores? I did this years ago but now need a "refresher" course. "Edge Balsa Cap" and Part 2: "Sheeting the Actual Wing." Bob lists contact information in this PDF if you have any questions.
Converting Old Ignition Engines to Electric Power 0579: I've heard that old ignition engines can be converted so that an electric motor actually turns the crankshaft, but it still has the appearance of the old engine. Can you provide any details about how this is done? A579: The expert in this area of Old-Timer-to-electric conversion is Ralph Bradley (brother of Paul Bradley, who writes MA's "Small-Field Flying" column).
Ralph took an old Brown Jr. engine that was no longer in working order. He adapted an Atlas AM2915/10 brushless motor that was originally available from Hobby Lobby. Any equivalent .40-size electric motor will work. The motor should be roughly the same diameter as the engine backplate.
Ralph extended the shaft with a 4mm x 4mm shaft coupler and short extension. The shaft coupler came from an old Graupner folding-propeller drive set. He removed the Brown Jr. crankshaft and piston.
The crankshaft diameter was 0.374 inches so he was able to buy a pair of 3/8-inch diameter flanged ball bearings that were a light press fit onto the factory-installed bronze crankshaft bearing in the Brown Jr. This provides support for the drive shaft at the front of the engine directly behind the propeller and at the rear of the crankshaft location.
The ball bearing ID was 5/16 inches, so he needed to machine a couple of bore reducers to fit the 4mm output shaft. He also machined a set of standoffs that mount the motor to the Brown Jr. backplate.
The only non-reversible modification to the Brown Jr. was the holes drilled in the backplate. This motor was used in a Quaker Old-Timer design. From a short distance away, you would think that the engine shown in the photo was a fully operational Brown Jr. ignition engine because it is so realistic.
Ralph was kind enough to allow me to share his email address if you have problems trying to do this same conversion.
SOURCES:
"From the Ground Up" www.ModelAviation.com/buildingfromscratch
The Internet Craftsmanship Museum www.craftsmanshipmuseum.com [email protected] index.html
"How to Sheet a Foam Wing" www.aeromaniacs.com/tips.html
Ralph Bradley [email protected]
Frequently Asked Questions
Bob Aberle
Transcribed from original scans by AI. Minor OCR errors may remain.

