

Frequently Asked Questions
Bob Aberle | [email protected]
Tricks for installing flat control-surface hinges
Q349: "I WAS assembling an ARF model aircraft recently and really messed up the hinge installation job. I knew I should have bought a model that came with the hinges already installed. What can I do to save this particular aircraft and what can I do to prevent this kind of problem in the future?"
A349: There have probably been many how-to articles about hinge installation through the years. I know a couple of tricks that may prove helpful, but first I have to rescue my reader from the problem he has created for himself. If your hinges are out of alignment, set at an angle, or you get glue in the hinge joint, the only thing to do is remove the problem hinge. The easiest approach is to insert a knife blade at the hinge line and try to break the glue free.
Depending on what kind of cement and what type of hinge were used, it could still be a real problem. It gets worse when several hinges are involved on a single control surface, such as a long strip aileron. The worst-case scenario is that you will have to remove a chunk of the aircraft structure and lift out the troublesome hinge. Then you replace it with a new hinge and replace the chunk of the model. After that you will have to re-cover or repaint that area. Any way you look at it, your airplane will never look quite right again.
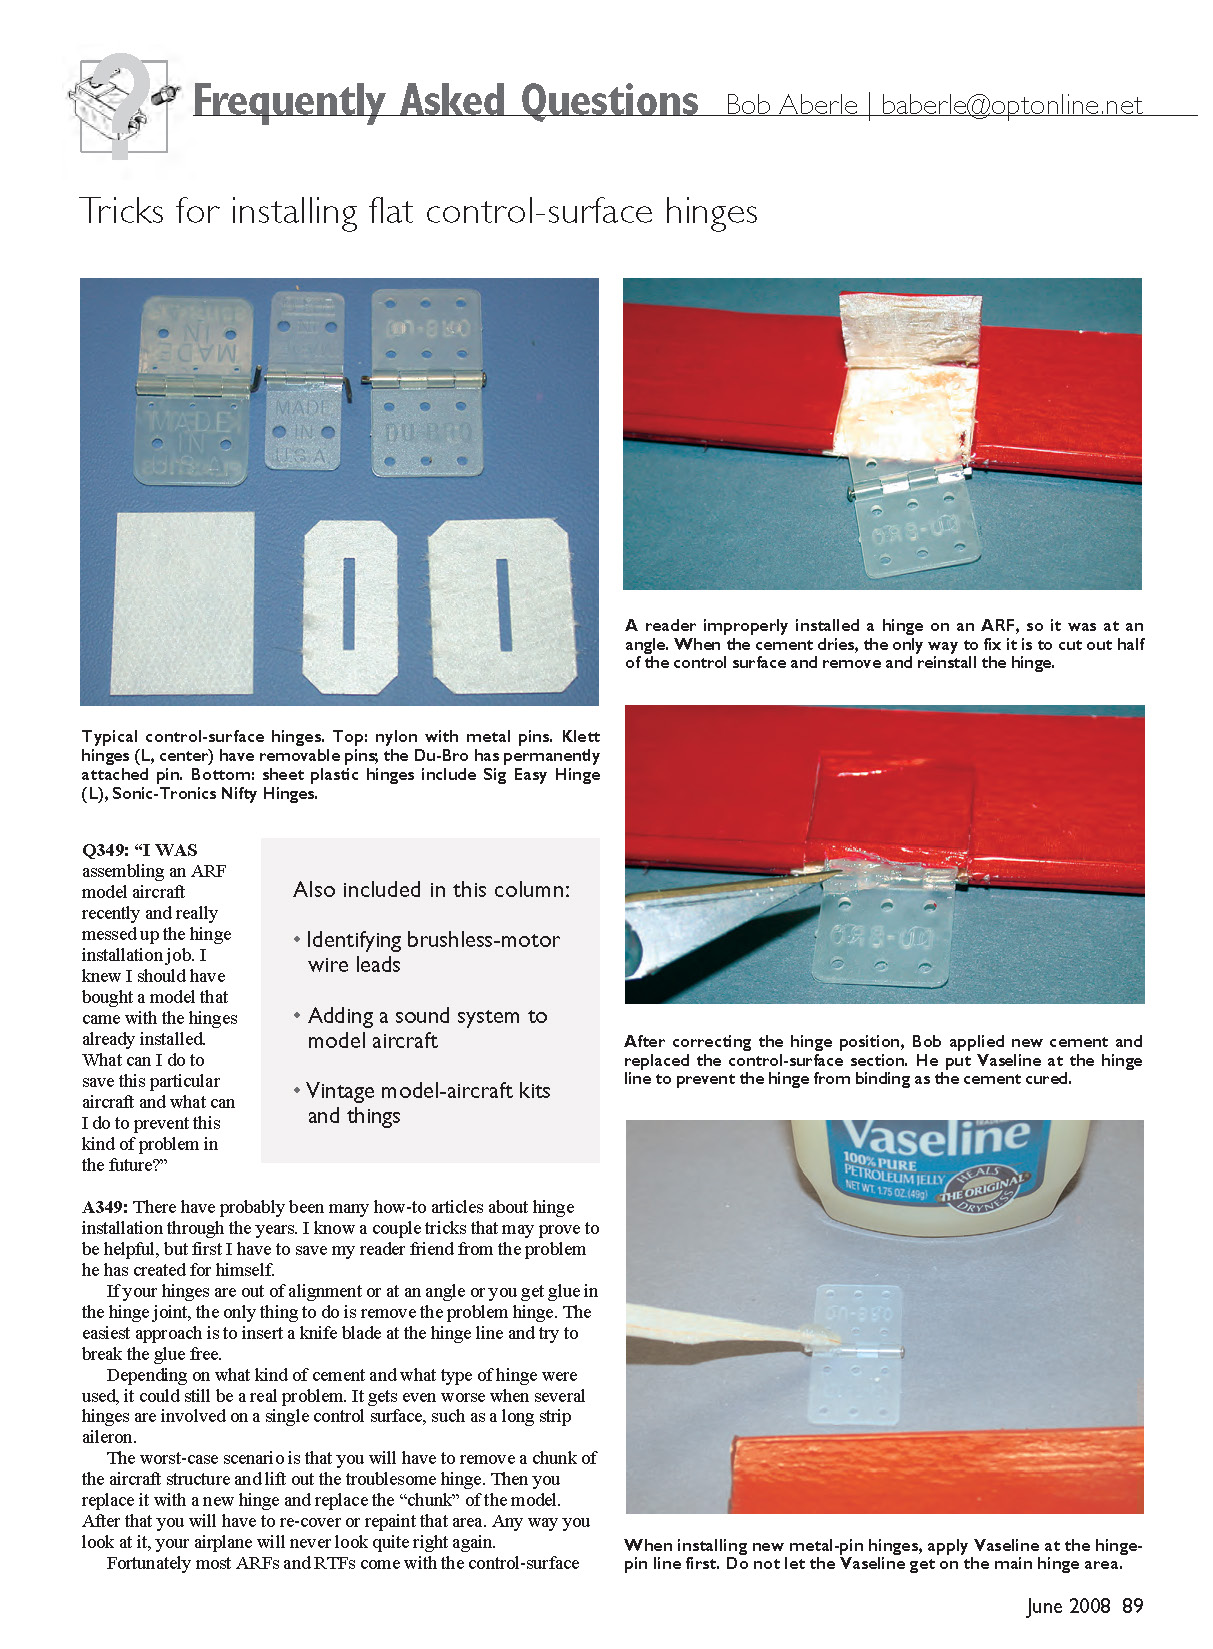
Fortunately most ARFs and RTFs come with the control-surface hinges already in place, but some don't. And if you do your own building, you should know some of the easy tricks. For small parking-lot or indoor/micro-size aircraft, the best hinge I have found is the gapless hinge tape that SR Batteries sells. For the larger parking-lot models, up to 6–8 pounds, I have successfully used light hinges made from thin plastic sheet material. A couple of this type are Sig Manufacturing's Easy Hinges and Sonic-Tronics' Nifty Hinges. Another popular hinge for medium to larger models is the nylon two-piece variety with a metal hinge pin. Du-Bro, Klett, and several other manufacturers have been supplying this type of hinge for years. The metal pin on some of these hinges cannot be removed, while removable pins (and cotter pins) are provided on others. The removable-pin type is easy to cement in place, but you have to make sure the locations on the aircraft and control surface match. More of a problem occurs when using the hinges with permanent pins.
Now for my tips. The biggest problem occurs when you try to install a hinge in one step. You cut slots in both surfaces, push the hinge into the slots until the two surfaces almost touch, and then apply some cement. With the light hinges you would generally use cyanoacrylate glue and accelerator. For the nylon hinges with pins, epoxy is better. But in either case, do one half of the hinge at a time.
For the light hinges: insert the hinge halfway into the control surface and then apply cyanoacrylate. As soon as the cement cures, insert the other half of the hinge into the slot cut in the aircraft. Push the surfaces together, leaving a small space (or gap) to allow for surface movement. Keep moving the control surface while the cement is curing to make sure it doesn't "lock up" the hinge.
For the nylon-hinge-pin variety: use petroleum jelly (or Teflon grease) to prevent the cement from clogging the pin, and again install one half at a time so the first side sets before you join the other.
Following these simple suggestions should make for a perfect hinge job every time.
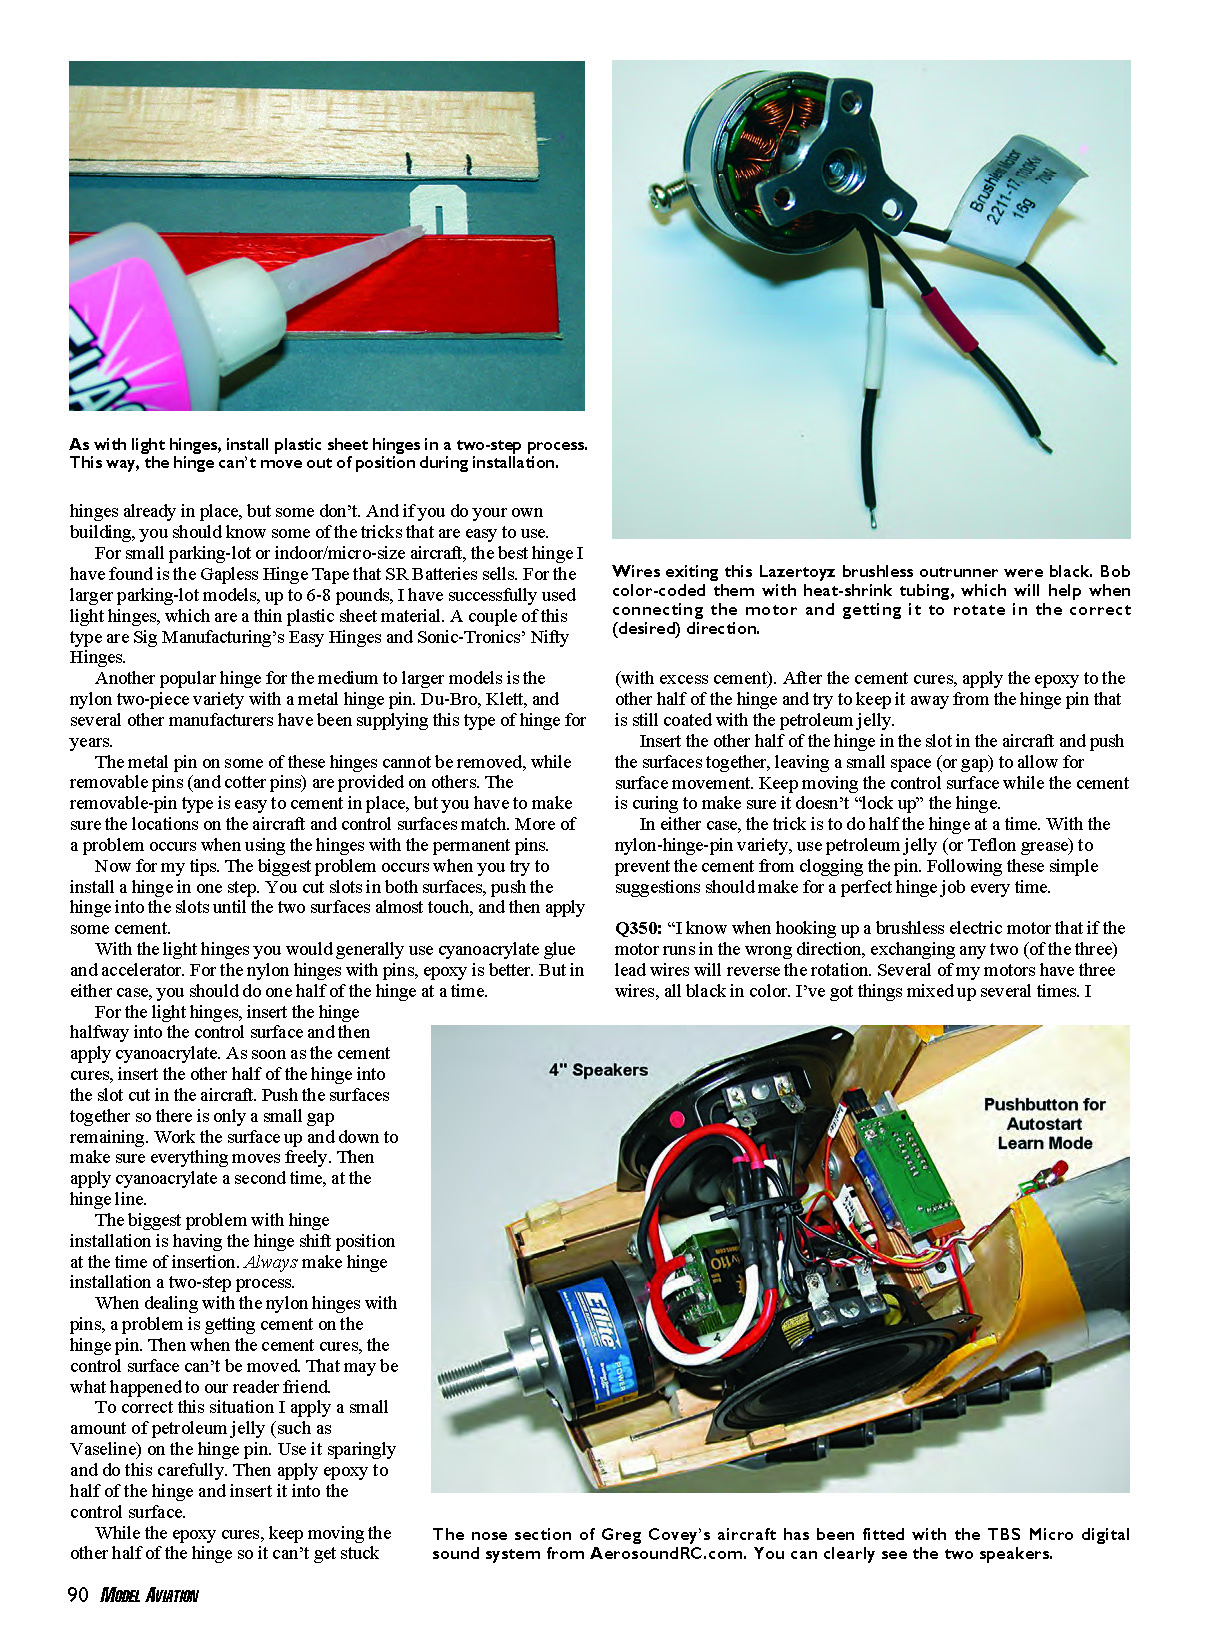
Q350: "I know when hooking up a brushless electric motor that if the motor runs in the wrong direction, exchanging any two (of the three) lead wires will reverse the rotation. Several of my motors have three wires, all black in color. I've got things mixed up several times. I realize this isn't a major problem, but I'd like to know how you handle this type situation."
A350: Several times I've swapped two wires and found the motor still running in the same direction. Then I realized that with no color identification, I thought I had swapped the wires but hadn't.
When I have a motor with all the same color wire, I use small pieces of colored heat-shrink tubing. It takes only two pieces; you can leave one wire the original color. I buy various heat-shrink tubing sizes and colors from Dave Thacker of Radical RC when I'm at trade shows.
Q351: "I saw a reference recently to a sound system that can be added to scale model aircraft to make them sound like the real thing. I know in this day and age we are always looking for quiet power, like better muffler systems and electric power. Is this concept for real?"
A351: At first I was surprised to hear about this system. But it does have merit for scale model aircraft. I won't take sides in this concept; my purpose is to make you aware of the product.
AeroSoundRC.com designed and manufactures the device. It is a German company, and Thomas Benedini perfected the system. The device is the TBS Micro Digital Sound System. Its primary purpose is to add scale-like engine sounds to electric-powered scale model aircraft, but it could be added to any type of aircraft.
Greg Covey, a noted electric-power flier and author, has written a comprehensive article about the application of this system, and it is posted on the RCUniverse forum. If you have any interest in this kind of system, I urge you to read Greg's article.
Q352: "I'm an old free flight modeler who still gets a kick out of tracking down interesting vintage model aircraft. I look for articles, old kits, plans, photos, you name it. This isn't exactly a question, but I was wondering if you saw the Web site for Collect Air."
A352: I encourage these "sort-of" questions because they allow me to share information with readers.
I'm not sure who maintains the Web site, but it kept my attention for hours. It was like having a model-aviation museum on the Internet. The site has information about vintage model kits, both the flying and solid (display) variety, but it goes way beyond that. Start at the home page, which contains an index of all the material and an extensive links section that refers to all kinds of related material.
I thank my reader friend for bringing this to our attention. MA
Sources:
- Radical RC — (937) 256-7727 — www.radicalrc.com
- SR Batteries — (631) 286-0079 — www.srbatteries.com
- Greg Covey's TBS Micro digital sound-system review — RCUniverse: www.rcuniverse.com/magazine/article_display.cfm?article_id=908
- CollectAir — (805) 560-1323 — www.collectair.com/Model_Airplanes.html
Transcribed from original scans by AI. Minor OCR errors may remain.

