
Giant Scale Aerobatic ARF Building Tips
by Mike Hurley
(Editor’s note: This is the second of a two-part series, the first of which was published in last month’s issue.)
Motor-Box Construction
The instructions mention some longitudinal reinforcement pieces for the motor-box construction, but the photographs look as if the covering is removed from the side of the aircraft when they’re installed. The airplane was originally designed with the front hatch removable so those pieces would be fine to fit into place, but with the present design it is impossible to fit those pieces into the fuselage without some deconstruction. So even though the parts are there and the instructions discuss them, the bracing is left out.
The instructions advise measuring for the motor-box length and cutting pieces to fit, but I left the motor-box sides at full length. Right thrust is already calculated, but you must mark the thrustline and calculate the centerline offset on the firewall so the engine will still exit the cowl in the center. I did this and drilled the firewall for blind nuts for the engine before it was glued into the model.
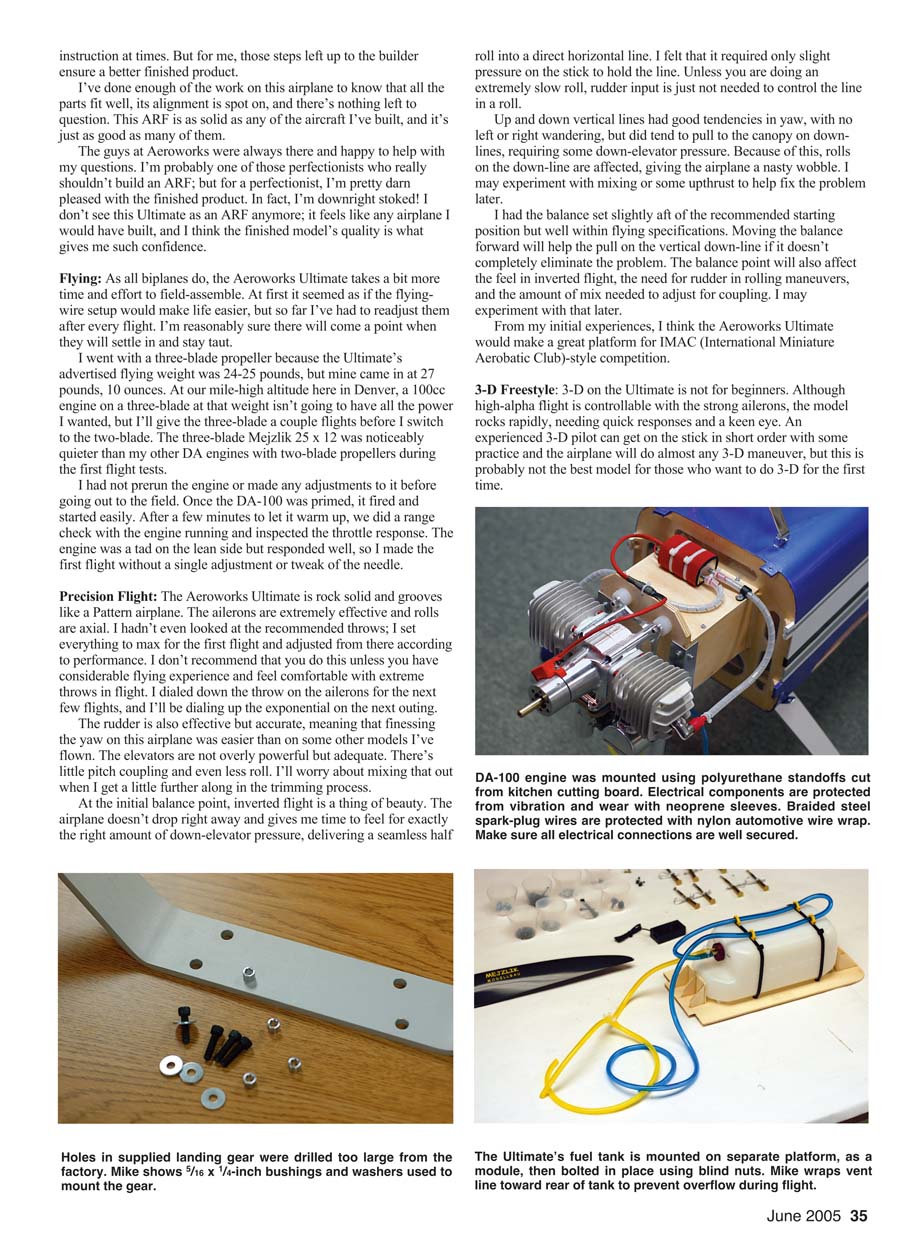
Once the motor-box sides are in place, the firewall is supposed to be gusseted with spruce triangle stock, but the factory supplied only balsa. If you go out and find some 1/2-inch spruce triangle stock and epoxy it in place, you’ll be fine, but I had already glued the balsa into the motor box. Rather than tear all that out, Aeroworks suggested that I bolt some 3/4-inch angled aluminum to the outside of the motor box—a perfect solution.
Landing Gear
The instructions for the landing-gear installation were vague. The gear is clearly swept, but there is no mention of which orientation the sweep is intended for. Then there is the matter of the bolt holes that are predrilled in the gear. You are supplied with 10-32 cap screws and blind nuts to mount the gear, but the gear is drilled to 5/16 inch. The No. 10 cap screws’ heads pass right through!
Sweep the gear toward the rear of the airplane. The axles should be almost even with the leading edge of the bottom wing at the root.
Aeroworks indicated that the latest production run was complete and all of the kits were drilled like this. The company suggested that I drill the holes a little larger and use some wheel collars as a sleeve in the oversized landing-gear holes and use a hefty fender washer under the cap screw. Instead of doing that, I found some 5/16 x 1/4-inch aluminum bushings at the hardware store that fit perfectly, and I found the right size of washer to work with the gear. Either way will yield the same results.
Gas Tank
Putting together a proper gas tank is one of those things you probably won’t see in any instruction manual. Most modelers are supposed to know how to do that, but every year I hear of another airplane going down because of fuel tank problems. I used a 32-ounce Du-Bro tank for this model.
I like a tight-fitting stopper cap and really horse the screw that holds it all together (without deforming the stopper). With the OEM plastic caps, overtightening will cause the cap to collapse. So I use the machined aluminum caps from SWB. Be sure you use the gas-compatible red rubber stopper that comes with the tank.
The first part in assembling the tank is to solder a barb to the internal end of the pickup tube. This is important to keep the clunk line from falling off inside the tank. You can get the barbs from Du-Bro.
If you have to cut the copper tubes, be sure to chamfer all of the edges to relieve any sharp corners that may cut into the Tygon tubing during use. I use Tygon tubing from Du-Bro and Easy Flex from Aerotrend; both are 1/8 inch inside diameter.
Be sure to secure all of the hoses with a nylon wire tie. Bend the copper portion of the pickup tube down inside the tank a bit; this will put the flexible portion of the pickup in a central location so the clunk line will be the same length upright, inverted, or in any orientation. Make sure the clunk moves freely inside the tank and reaches the back corners as closely as possible without hindering any movement.
The vent curves up to the top of the tank just behind the stopper. Make sure it can’t be blocked off by the inside wall of the tank. Outside the tank I loop the vent line back behind the rear edge of the tank so that fuel cannot pour out while in flight. You’ll be surprised by how much your fuel consumption will be improved with this simple loop!
The vent simply exits the bottom of the cowl to a B&B fitting. I use the fitting because it’s a solid mount and it’s neat. You can close off the vent during transportation and moving the model in and out of the shop. The vent is kept open during flight and storage so the tank doesn’t deform or rupture.
The pickup line goes directly to the carburetor. I use a “T” fitting in the pickup as a fill line. Just exit the side of the fuselage or the cowl and plug it off with a fuel dot. You cannot flood the engine during fueling with this method. Gasoline carburetors have a needle and seat that won’t allow gas into the system while the engine is not running.
The Hatch
I was unhappy with the way the hatch fit out of the box. The rear canopy former was too large, so the canopy didn’t match the turtledeck very well. The aft hold-down tabs are supposed to fit tight in the fuselage but had quite a bit of play. Attempting to tighten those rear bolts would surely have led to a broken tab, and one of the hold-down bolts wouldn’t engage because of misaligned holes. So a little work was in order to clear those things up.
I sanded the rear canopy former to fit the turtledeck. That took approximately 10 minutes. For the tabs to fit I had to add 1/32-inch plywood to the outside of the tabs, but before that I popped the blind nut out of the tab that didn’t line up and plugged the hole with a dowel. Then I added the plywood and sanded to get a nice, snug fit. After that, all that was left was to redrill the plugged tab, using the fuselage as a fixture, and reinstall the blind nut.
I want to pass along a building tip that makes a great deal of sense when working with ARFs. Use a machine screw into a blind nut whenever possible and try to avoid using wood screws, especially into balsa. If you have many wood screws in your airplane and have access, change them to bolts with blind nuts.
As a final step, use the appropriate thread locker on all machine screws and cyanoacrylate on wood screws. The only exception I can think of is propeller bolts; I don’t use thread locker there.
The Finished Product
I’ve discussed many things I had to fine-tune or adjust with this model, but I haven’t touched on the things that worked or fit exceptionally well. The vertical fin’s construction and the way it integrates into the rear of the fuselage is outstanding, with a tight fit and perfect alignment. Likewise for the horizontal stabilizers; the fit to the fuselage sides is perfect, and there is no slop in the joiner tubes or alignment pins. In general, the aircraft has excellent fit with tight joints and no slop.
For a factory-built ARF, all of the incidences were amazingly close. I doubt if my adjustments made much difference in flight. The quality of the fiberglass parts, the wood, and the construction overall is first-rate. And as I mentioned, there’s no cheap or inappropriate hardware or materials anywhere in this kit. The same cannot be said for all ARFs.
You can see where some experience with building and with large aerobatic models may pay off when building an ARF. Much of this model’s fit and finish work is left to the builder and without clear instruction at times. But for me, those steps left up to the builder ensure a better finished product.
I’ve done enough of the work on this airplane to know that all the parts fit, the alignment is spot on, and there’s nothing left to question. This ARF is as solid as any of the aircraft I’ve built, and it’s just as good as many of them.
The guys at Aeroworks were always there and happy to help with my questions. I’m probably one of those perfectionists who really shouldn’t build an ARF; but for a perfectionist, I’m pretty darn pleased with the finished product. In fact, I’m downright stoked! I don’t see this Ultimate as an ARF anymore; it feels like any airplane I would have built, and I think the finished model’s quality is what gives me such confidence.
Flying
As all biplanes do, the Aeroworks Ultimate takes a bit more time and effort to field-assemble. At first it seemed as if the flying-wire setup would make life easier, but so far I’ve had to readjust them after every flight. I’m reasonably sure there will come a point when they will settle in and stay taut.
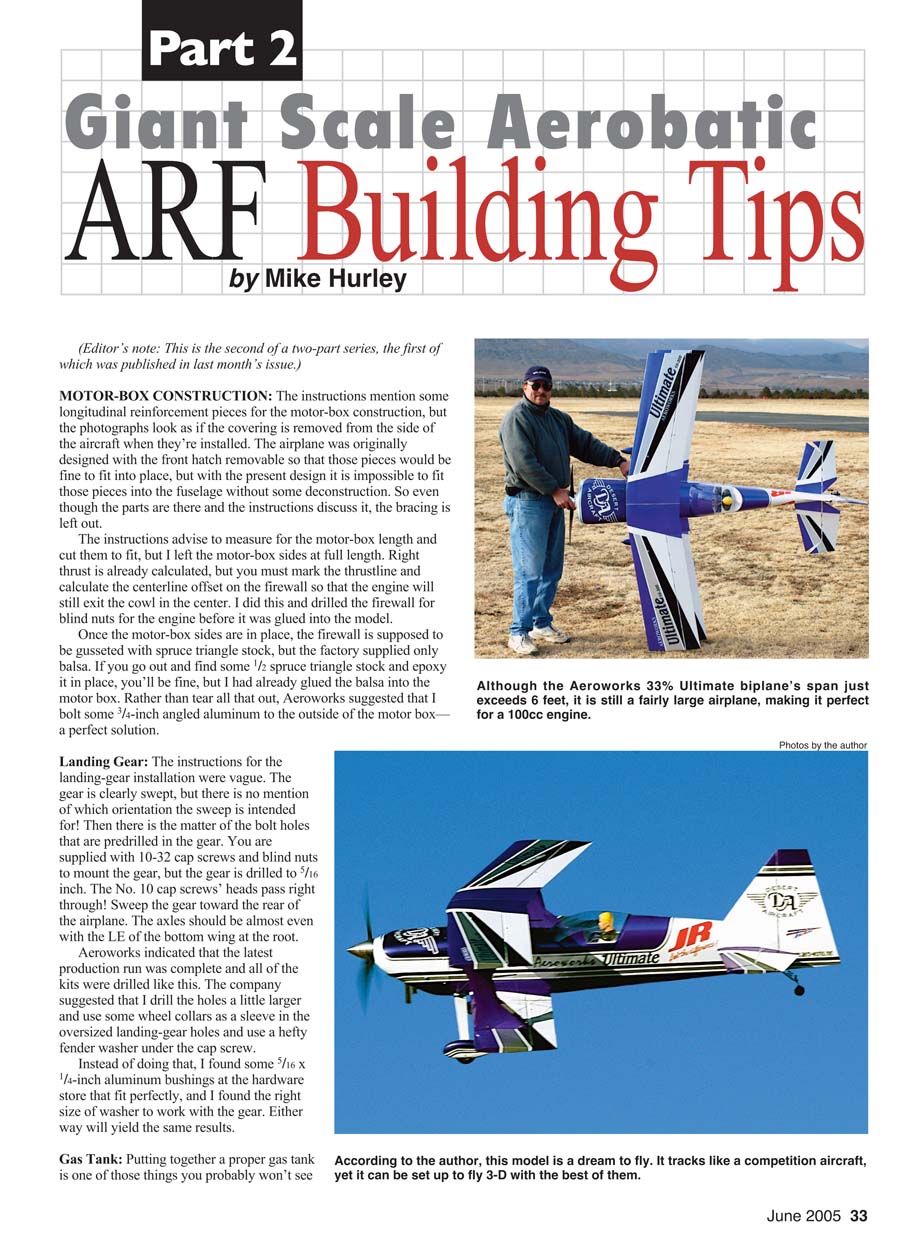
I went with a three-blade propeller because the Ultimate’s advertised flying weight was 24–25 pounds, but mine came in at 27 pounds, 10 ounces. At our mile-high altitude here in Denver, a 100cc engine on a three-blade at that weight isn’t going to have all the power I wanted, but I’ll give the three-blade a couple flights before I switch to the two-blade. The three-blade Mejzlik 25 x 12 was noticeably quieter than my other DA engines with two-blade propellers during the first flight tests.
I had not prerun the engine or made any adjustments to it before going out to the field. Once the DA-100 was primed, it fired and started easily. After a few minutes to let it warm up, we did a range check with the engine running and inspected the throttle response. The engine was a tad on the lean side but responded well, so I made the first flight without a single adjustment or tweak of the needle.
Precision Flight
The Aeroworks Ultimate is rock solid and grooves like a Pattern airplane. The ailerons are extremely effective and rolls are axial. I hadn’t even looked at the recommended throws; I set everything to max for the first flight and adjusted from there according to performance. I don’t recommend that you do this unless you have considerable flying experience and feel comfortable with extreme throws in flight. I dialed down the throw on the ailerons for the next few flights, and I’ll be dialing up the exponential on the next outing.
The rudder is also effective but accurate, meaning that finessing the yaw on this airplane was easier than on some other models I’ve flown. The elevators are not overly powerful but adequate. There’s little pitch coupling and even less roll. I’ll worry about mixing that out when I get a little further along in the trimming process.
At the initial balance point, inverted flight is a thing of beauty. The airplane doesn’t drop right away and gives me time to feel for exactly the right amount of down-elevator pressure, delivering a seamless half-roll into a direct horizontal line. I felt that it required only slight pressure on the stick to hold the line. Unless you are doing an extremely slow roll, rudder input is just not needed to control the line in a roll.
Up and down vertical lines had good tendencies in yaw, with no left or right wandering, but did tend to pull to the canopy on downlines, requiring some down-elevator pressure. Because of this, rolls on the down-line are affected, giving the airplane a nasty wobble. I may experiment with mixing or some upthrust to help fix the problem later.
I had the balance set slightly aft of the recommended starting position but well within flying specifications. Moving the balance forward will help the pull on the vertical down-line if it doesn’t completely eliminate the problem. The balance point will also affect the feel in inverted flight, the need for rudder in rolling maneuvers, and the amount of mix needed to adjust for coupling. I may experiment with that later.
From my initial experiences, I think the Aeroworks Ultimate would make a great platform for IMAC (International Miniature Aerobatic Club)-style competition.
3-D Freestyle
3-D on the Ultimate is not for beginners. Although high-alpha flight is controllable with the strong ailerons, the model rocks rapidly, needing quick responses and a keen eye. An experienced 3-D pilot can get on the stick in short order and with some practice the airplane will do almost any 3-D maneuver, but this is probably not the best model for those who want to do 3-D for the first time.
Inverted high-alpha flight is doable with the Ultimate, but again, you have to be on the ball with the ailerons and know the rudder corrections; the model can roll out quickly. Outside waterfalls had a tendency to roll out on the last quarter, and inverted flat spins take a little finesse and some modulation on the elevator and throttle.
Because the roll rate is so fast on this airplane, Blenders can be extremely violent. Imagine the model rolling at a rate you can’t even count, and then it explodes into a blurry ball and just stops like it reappeared from warp drive—kind of scary.
Torque rolls and hovering are a blast and come easily with this 33% Ultimate, but beware: once its thrust vector hits the vertical balance point, the model will rotate rapidly. A 5° tilt in any direction will stop the torque roll.
Aeroworks indicated that it has had the best success when the airplane is outfitted for "3D mode"; that is, to move the CG roughly an inch behind its center point and increase the elevator throw to approximately 65°. Setting the model up like this could remove some of the rollout problems I was having. But I found the 3-D performance perfectly acceptable at a "normal" 3-D setup of a neutral balance point and only 45° of elevator throw.
The Ultimate biplane can get wild doing ultrafast snaps and rolling in a blur. Tumbles are crazy tight and knife-edge is amazing with the ability to do extraordinarily tight knife-edge loops and figure 8s. I’ll continue to experiment with 3-D flight, and in the meantime I’ll enjoy what it does well right off the board.
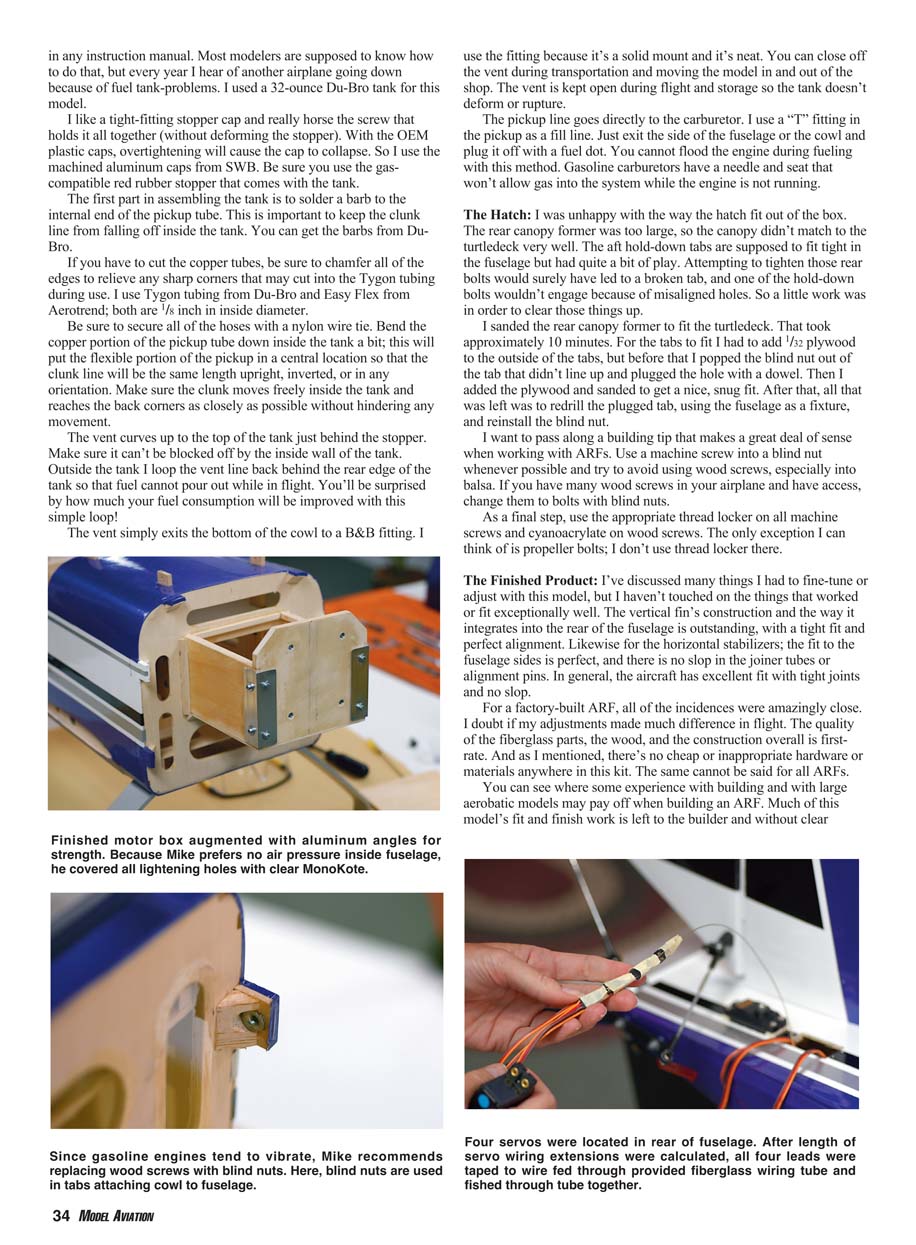
It seems that the Ultimate can be set up as either a good precision aircraft or a good 3-D aircraft, but it may be difficult to set up to do both well in the same flight. It is not like a scale monoplane, but you already know that. It’s best to capitalize on its strong points and enjoy the uniqueness of a high-performance biplane. Whether you want a competition model that stands out in a crowd or an outrageous freestyle airplane, the Ultimate can be set up to excel.
Although the 33% Aeroworks Ultimate biplane was the subject for this article, it was not meant to be a kit review, but rather a collection of thoughts that could be adapted to other giant-scale aerobatic ARF kits.
MA
Mike Hurley 11542 Decatur Ct. Westminster, CO 80234 [email protected]
Manufacturers
- JR radio equipment:
Horizon Hobby Inc. 4105 Fieldstone Rd. Champaign, IL 61822 (217) 352-1913 Toll-free: (800) 338-4639 Fax: (217) 355-1552 www.horizonhobby.com
- Engine, mufflers, propeller:
Desert Aircraft 1815 S. Research Loop Tucson, AZ 85710 (520) 722-0607 Fax: (520) 722-5622 www.desertaircraft.com
- 4-inch Ultimate spinner:
Tru-Turn Precision Model Products 100 W. 1st St. Deer Park, TX 77536 (281) 479-9600 Fax: (281) 479-9090 www.tru-turn.com
- 33% Ultimate biplane:
Aeroworks 401 Laredo St., Suite D Aurora, CO 80011 (303) 366-4205 Fax: (303) 366-4203 www.aero-works.net
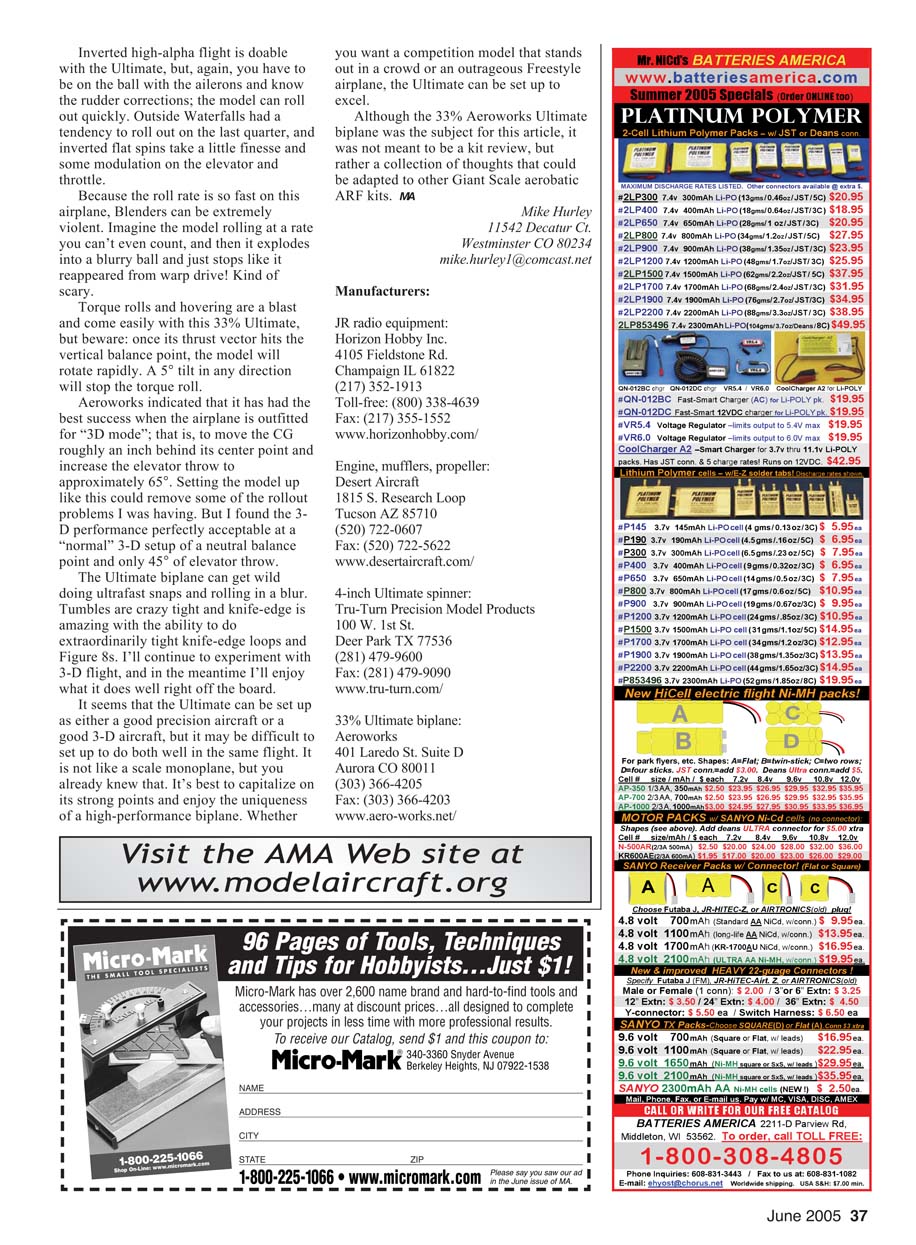
Transcribed from original scans by AI. Minor OCR errors may remain.

