
Great Planes Sequence 1.20 - 2015/01
by Mike Riggs [email protected]
Opening
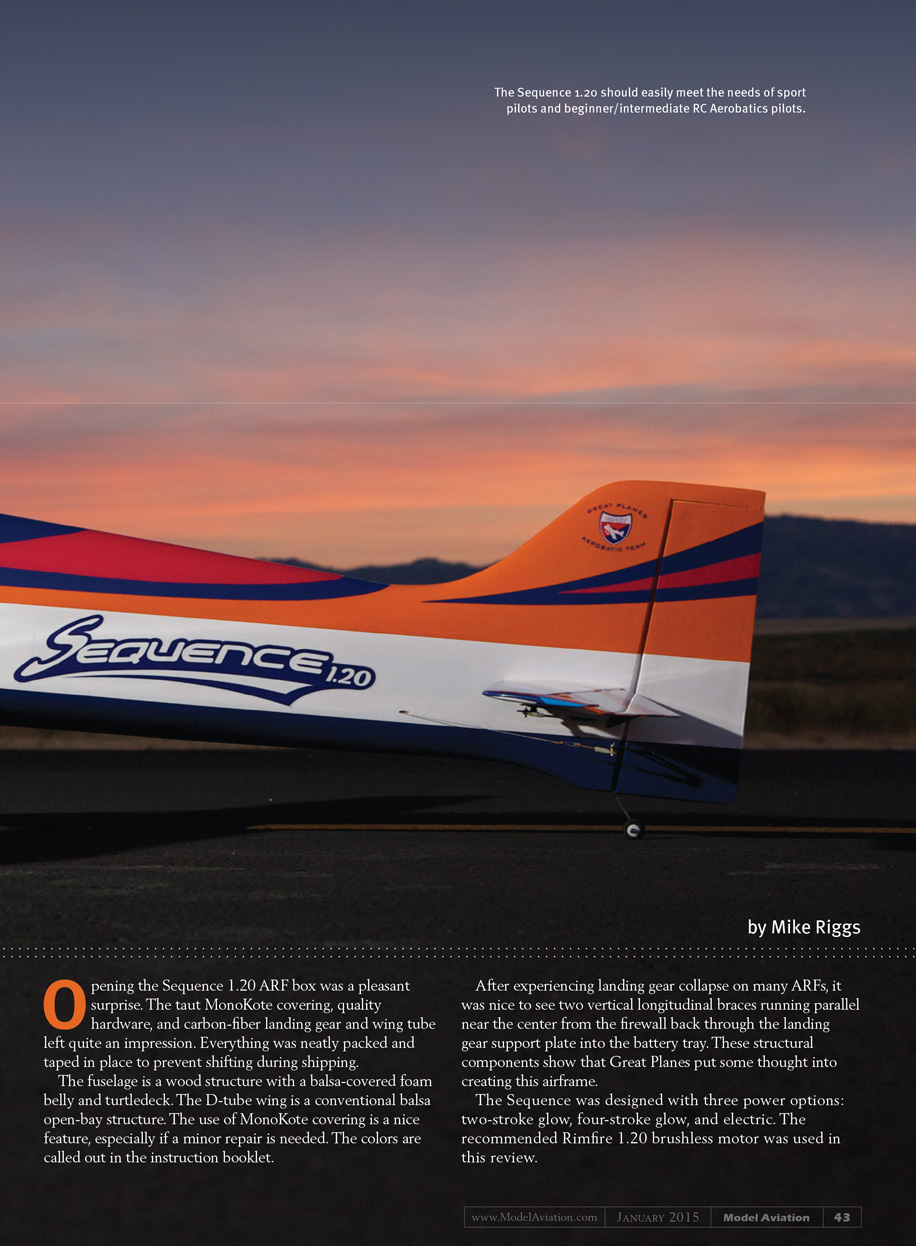
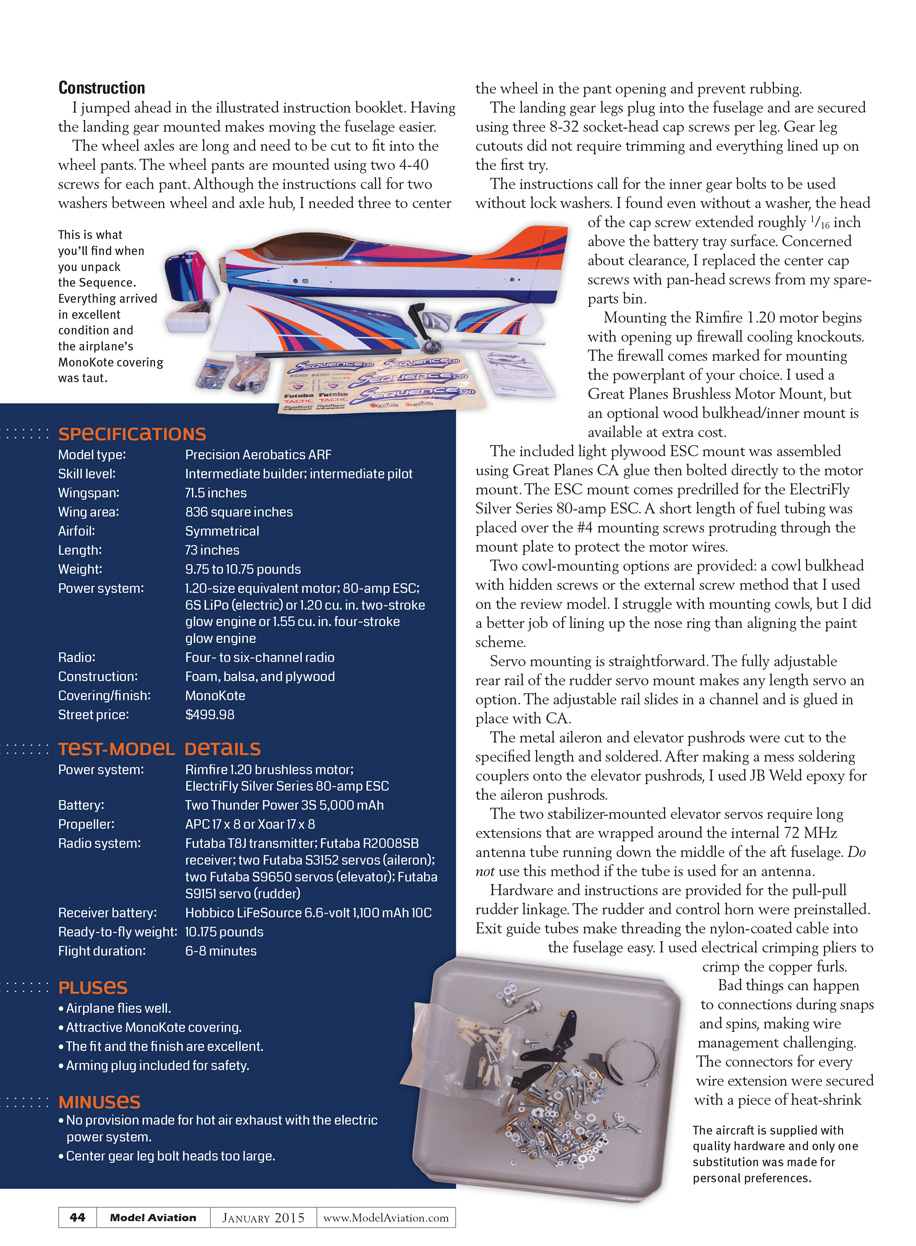
Opening the Sequence 1.20 ARF box was a pleasant surprise. The taut MonoKote covering, quality hardware, and carbon-fiber landing gear and wing tube left quite an impression. Everything was neatly packed and taped in place to prevent shifting during shipping.
The fuselage is a wood structure with a balsa-covered foam belly and turtledeck. The D-tube wing is a conventional balsa open-bay structure. The use of MonoKote covering is a nice feature, especially if a minor repair is needed. The colors are called out in the instruction booklet.
After experiencing landing gear collapse on many ARFs, it was nice to see two vertical longitudinal braces running parallel near the center from the firewall back through the landing gear support plate into the battery tray. These structural components show that Great Planes put some thought into creating this airframe.
The Sequence was designed with three power options: two-stroke glow, four-stroke glow, and electric. The recommended Rimfire 1.20 brushless motor was used in this review.
Construction
Landing gear and wheel pants
I jumped ahead in the illustrated instruction booklet. Having the landing gear mounted makes moving the fuselage easier.
The wheel axles are long and need to be cut to fit into the wheel pants. The wheel pants are mounted using two 4-40 screws for each pant. Although the instructions call for two washers between wheel and axle hub, I needed three to center the wheel in the pant opening and prevent rubbing.
The landing gear legs plug into the fuselage and are secured using three 8-32 socket-head cap screws per leg. Gear leg cutouts did not require trimming and everything lined up on the first try. The instructions call for the inner gear bolts to be used without lock washers. I found even without a washer, the head of the cap screw extended roughly 1/16 inch above the battery tray surface. Concerned about clearance, I replaced the center cap screws with pan-head screws from my spare-parts bin.
Motor, ESC, and cowl
Mounting the Rimfire 1.20 motor begins with opening up firewall cooling knockouts. The firewall comes marked for mounting the powerplant of your choice. I used a Great Planes Brushless Motor Mount, but an optional wood bulkhead/inner mount is available at extra cost.
The included light plywood ESC mount was assembled using CA glue then bolted directly to the motor mount. The ESC mount comes predrilled for the ElectriFly Silver Series 80-amp ESC. A short length of fuel tubing was placed over the #4 mounting screws protruding through the mount plate to protect the motor wires.
Two cowl-mounting options are provided: a cowl bulkhead with hidden screws or the external screw method that I used on the review model. I struggle with mounting cowls, but I did a better job of lining up the nose ring than aligning the paint scheme.
A generous factory cutout in the bottom of the cowl provides ventilation to the power system. The motor and ESC were cold immediately after 6- to 8-minute flights in moderate fall temperatures. The batteries were slightly warm. My hunch is the lack of hot air exhaust vents in the fuselage means battery temperature could become an issue in much warmer weather.
Servos, linkages, and pushrods
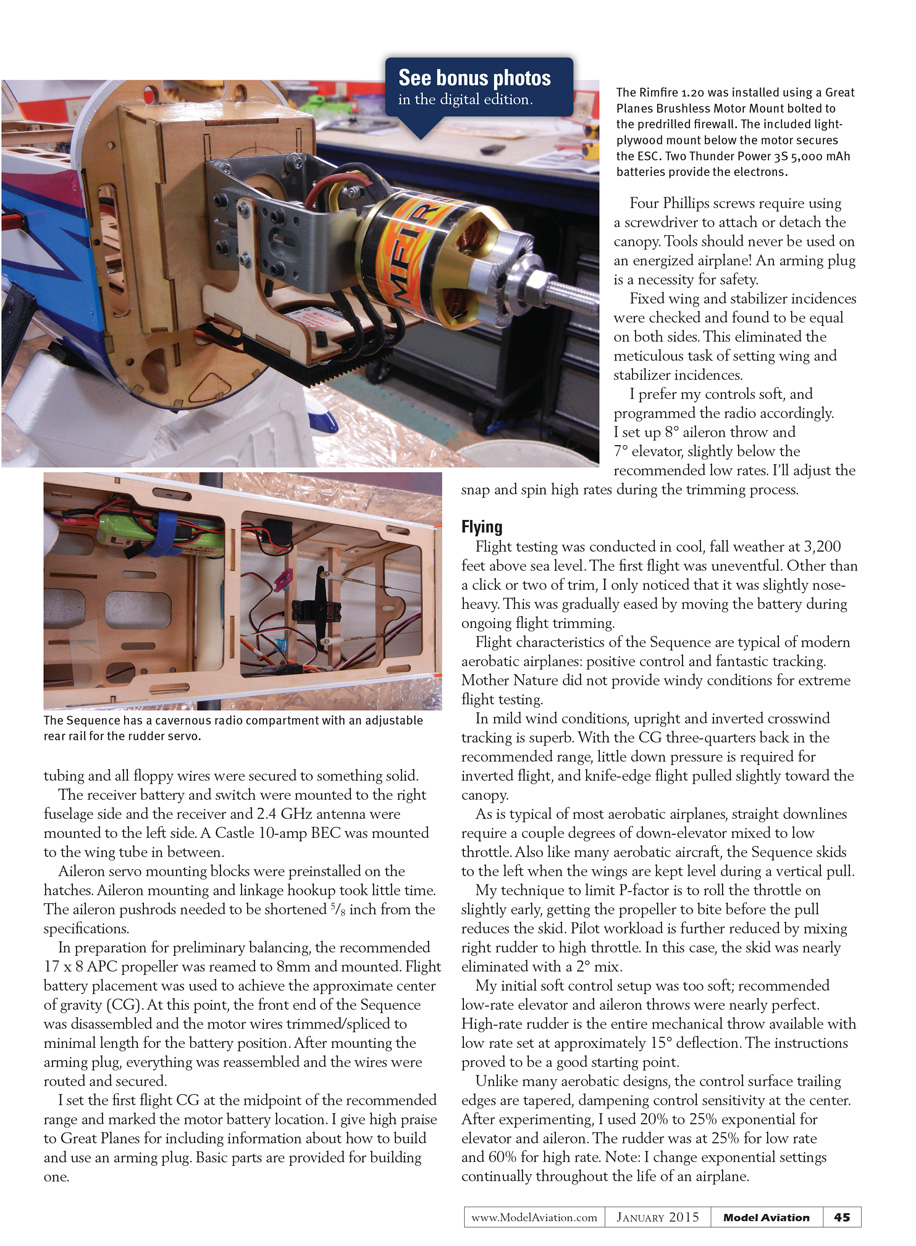
Servo mounting is straightforward. The fully adjustable rear rail of the rudder servo mount makes any length servo an option. The adjustable rail slides in a channel and is glued in place with CA.
The metal aileron and elevator pushrods were cut to the specified length and soldered. After making a mess soldering couplers onto the elevator pushrods, I used JB Weld epoxy for the aileron pushrods.
The two stabilizer-mounted elevator servos require long extensions that are wrapped around the internal 72 MHz antenna tube running down the middle of the aft fuselage. Do not use this method if the tube is used for an antenna.
Hardware and instructions are provided for the pull-pull rudder linkage. The rudder and control horn were preinstalled. Exit guide tubes make threading the nylon-coated cable into the fuselage easy. I used electrical crimping pliers to crimp the copper ferrules.
Aileron servo mounting blocks were preinstalled on the hatches. Aileron mounting and linkage hookup took little time. The aileron pushrods needed to be shortened 5/8 inch from the specifications.
Wiring, receiver, and arming plug
Bad things can happen to connections during snaps and spins, making wire management challenging. The connectors for every wire extension were secured with a piece of heat-shrink. Tubing and all floppy wires were secured to something solid. The receiver battery and switch were mounted to the right fuselage side and the receiver and 2.4 GHz antenna were mounted to the left side. A Castle 10-amp BEC was mounted to the wing tube in between.
I set the first flight CG at the midpoint of the recommended range and marked the motor battery location. I give high praise to Great Planes for including information about how to build and use an arming plug. Basic parts are provided for building one.
The Rimfire 1.20 was installed using a Great Planes Brushless Motor Mount bolted to the predrilled firewall. The included light-plywood mount below the motor secures the ESC. Two Thunder Power 3S 5,000 mAh batteries provide the electrons.
Four Phillips screws require using a screwdriver to attach or detach the canopy. Tools should never be used on an energized airplane! An arming plug is a necessity for safety.
Fixed wing and stabilizer incidences were checked and found to be equal on both sides. This eliminated the meticulous task of setting wing and stabilizer incidences.
I prefer my controls soft, and programmed the radio accordingly. I set up 8° aileron throw and 7° elevator, slightly below the recommended low rates. I'll adjust the snap and spin high rates during the trimming process.
In preparation for preliminary balancing, the recommended 17 x 8 APC propeller was reamed to 8 mm and mounted. Flight battery placement was used to achieve the approximate center of gravity (CG). At this point, the front end of the Sequence was disassembled and the motor wires trimmed/spliced to minimal length for the battery position. After mounting the arming plug, everything was reassembled and the wires were routed and secured.
Flying
Flight testing was conducted in cool fall weather at 3,200 feet above sea level. The first flight was uneventful. Other than a click or two of trim, I only noticed that it was slightly nose-heavy. This was gradually eased by moving the battery during ongoing flight trimming.
Flight characteristics of the Sequence are typical of modern aerobatic airplanes: positive control and fantastic tracking. Mother Nature did not provide windy conditions for extreme flight testing.
In mild wind conditions, upright and inverted crosswind tracking is superb. With the CG three-quarters back in the recommended range, little down pressure is required for inverted flight, and knife-edge flight pulled slightly toward the canopy.
As is typical of most aerobatic airplanes, straight downlines require a couple degrees of down-elevator mixed to low throttle. Also like many aerobatic aircraft, the Sequence skids to the left when the wings are kept level during a vertical pull.
My technique to limit P-factor is to roll the throttle on slightly early, getting the propeller to bite before the pull reduces the skid. Pilot workload is further reduced by mixing right rudder to high throttle. In this case, the skid was nearly eliminated with a 2° mix.
My initial soft control setup was too soft; recommended low-rate elevator and aileron throws were nearly perfect. High-rate rudder is the entire mechanical throw available with low rate set at approximately 15° deflection. The instructions proved to be a good starting point.
Unlike many aerobatic designs, the control surface trailing edges are tapered, dampening control sensitivity at the center. After experimenting, I used 20% to 25% exponential for elevator and aileron. The rudder was at 25% for low rate and 60% for high rate. Note: I change exponential settings continually throughout the life of an airplane.
Stall turns required high-rate rudder in conjunction with some opposite aileron as the outside wing comes over the top.
Axial rolls required less than 1° of aileron differential. The benefits of the larger-volume fuselage show up in slow rolls. A little rudder pressure on the sides is all it takes.
Keeping wings level is one of the biggest problems facing new RC aerobatics pilots. The top of the airplane frequently looks better than the bottom. When flying upright parallel to the runway, if the bottom of the outside wingtip cannot be seen, the wings are not level. Judges know this and deduct points accordingly. The highly visible MonoKote color scheme makes the underside stand out and looks good, too.
The Rimfire 1.20 and ElectriFly 80-amp ESC power system proved to be a reliable, user-friendly power combination that is well suited for sport aerobatic flying. Although the airframe is quite capable, more power and/or less weight is needed to fly the tall vertical maneuvers found in the Advanced and Masters patterns.
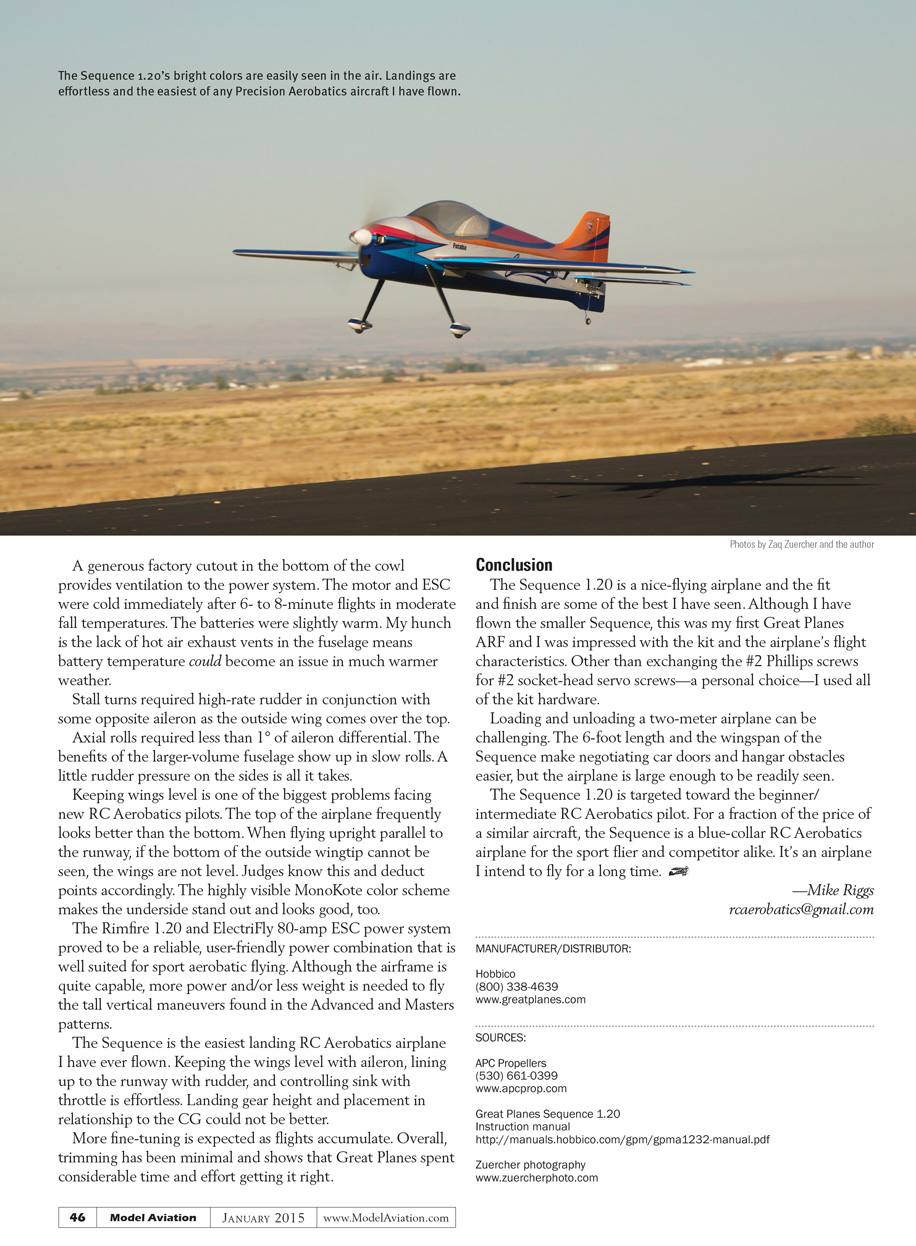
The Sequence is the easiest landing RC aerobatics airplane I have ever flown. Keeping the wings level with aileron, lining up to the runway with rudder, and controlling sink with throttle is effortless. Landing gear height and placement in relationship to the CG could not be better.
More fine-tuning is expected as flights accumulate. Overall, trimming has been minimal and shows that Great Planes spent considerable time and effort getting it right.
Conclusion
The Sequence 1.20 is a nice-flying airplane and the fit and finish are some of the best I have seen. Although I have flown the smaller Sequence, this was my first Great Planes ARF and I was impressed with the kit and the airplane's flight characteristics. Other than exchanging the #2 Phillips screws for #2 socket-head servo screws—a personal choice—I used all of the kit hardware.
Loading and unloading a two-meter airplane can be challenging. The 6-foot length and the wingspan of the Sequence make negotiating car doors and hangar obstacles easier, but the airplane is large enough to be readily seen.
The Sequence 1.20 is targeted toward the beginner/intermediate RC aerobatics pilot. For a fraction of the price of a similar aircraft, the Sequence is a blue-collar RC aerobatics airplane for the sport flier and competitor alike. It's an airplane I intend to fly for a long time.
—Mike Riggs
Manufacturer/Distributor
- Hobbico
- Phone: (800) 338-4639
- Website: www.greatplanes.com
Sources
- APC Propellers — (530) 661-0399 — www.apcprop.com
- Great Planes Sequence 1.20 instruction manual: http://manuals.hobbico.com/gpm/gpma1232-manual.pdf
- Zuercher photography: www.zuercherphoto.com
Transcribed from original scans by AI. Minor OCR errors may remain.

