
Great Planes Extra 300SP EP ARF
Greg Gimlick — [email protected]
An aerobat as exciting as it is colorful
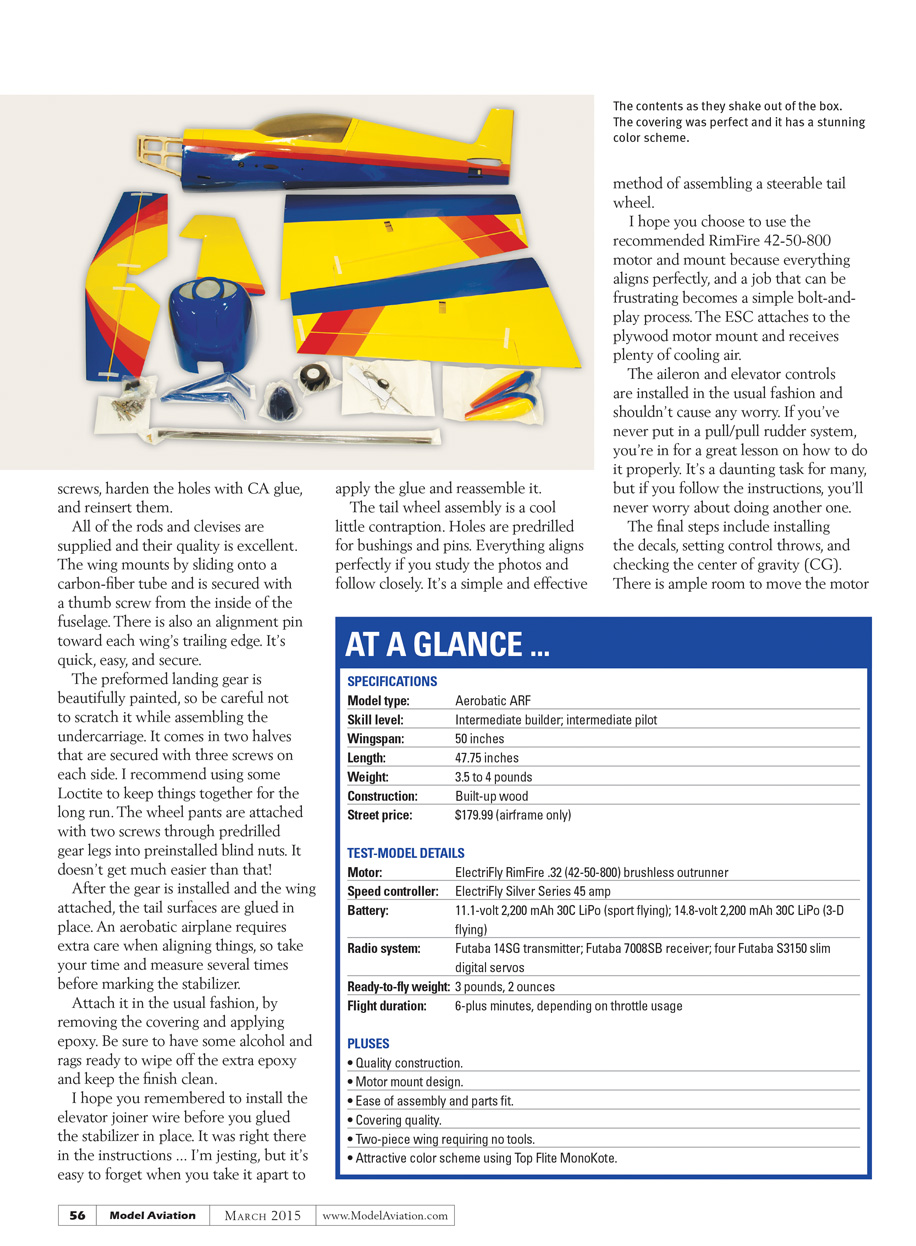
I have previously assembled a couple of Great Planes scale electric aerobatic ARF aircraft and have been happy with them, so I had high expectations for the Extra 300SP. When the box arrived and I began unpacking the carefully packaged contents, I was already getting my hopes up.
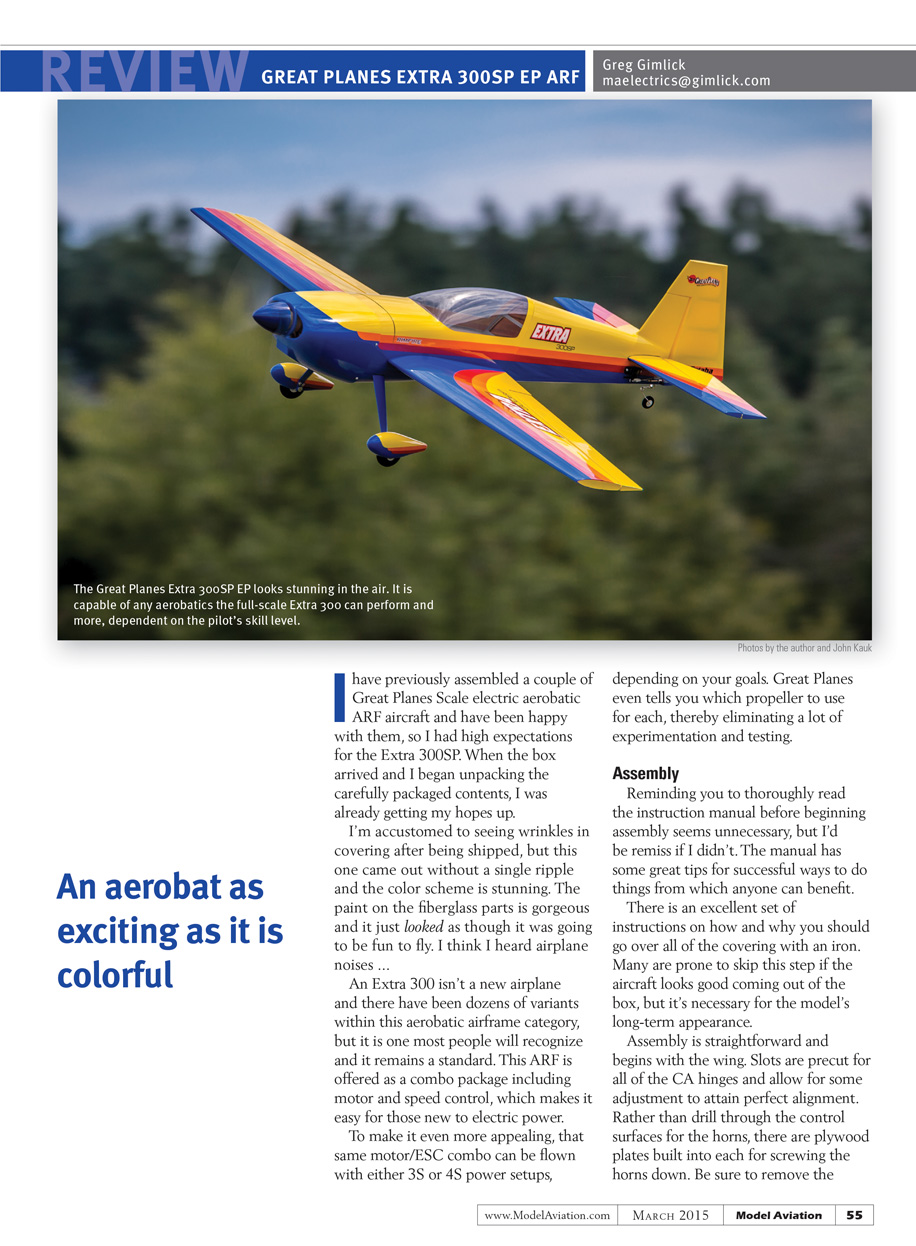
I'm accustomed to seeing wrinkles in covering after being shipped, but this one came out without a single ripple and the color scheme is stunning. The paint on the fiberglass parts is gorgeous and it just looked as though it was going to be fun to fly. I think I heard airplane noises...
An Extra 300 isn't a new airplane and there have been dozens of variants within this aerobatic airframe category, but it is one most people will recognize and it remains a standard. This ARF is offered as a combo package including motor and speed control, which makes it easy for those new to electric power.
To make it even more appealing, that same motor/ESC combo can be flown with either 3S or 4S power setups, depending on your goals. Great Planes even tells you which propeller to use for each, thereby eliminating a lot of experimentation and testing.
Assembly
Reminding you to thoroughly read the instruction manual before beginning assembly seems unnecessary, but I'd be remiss if I didn't. The manual has some great tips for successful ways to do things from which anyone can benefit. There is an excellent set of instructions on how and why you should go over all of the covering with an iron. Many are prone to skip this step if the aircraft looks good coming out of the box, but it's necessary for the model's long-term appearance.
Assembly is straightforward and begins with the wing. Slots are precut for all of the CA hinges and allow for some adjustment to attain perfect alignment. Rather than drill through the control surfaces for the horns, there are plywood plates built into each for screwing the horns down. Be sure to remove the screws, harden the holes with CA, and reinsert them. All of the rods and clevises are supplied and their quality is excellent.
The wing mounts by sliding onto a carbon-fiber tube and is secured with a thumb screw from the inside of the fuselage. There is also an alignment pin toward each wing's trailing edge. It's quick, easy, and secure.
The preformed landing gear is beautifully painted, so be careful not to scratch it while assembling the undercarriage. It comes in two halves that are secured with three screws on each side. I recommend using some Loctite to keep things together for the long run. The wheel pants are attached with two screws through predrilled gear legs into preinstalled blind nuts. It doesn't get much easier than that!
After the gear is installed and the wing attached, the tail surfaces are glued in place. An aerobatic airplane requires extra care when aligning things, so take your time and measure several times before marking the stabilizer. Attach it in the usual fashion, by removing the covering and applying epoxy. Be sure to have some alcohol and rags ready to wipe off the extra epoxy and keep the finish clean.
I hope you remembered to install the elevator joiner wire before you glued the stabilizer in place. It was right there in the instructions... I'm jesting, but it's easy to forget when you take it apart to apply the glue and reassemble it.
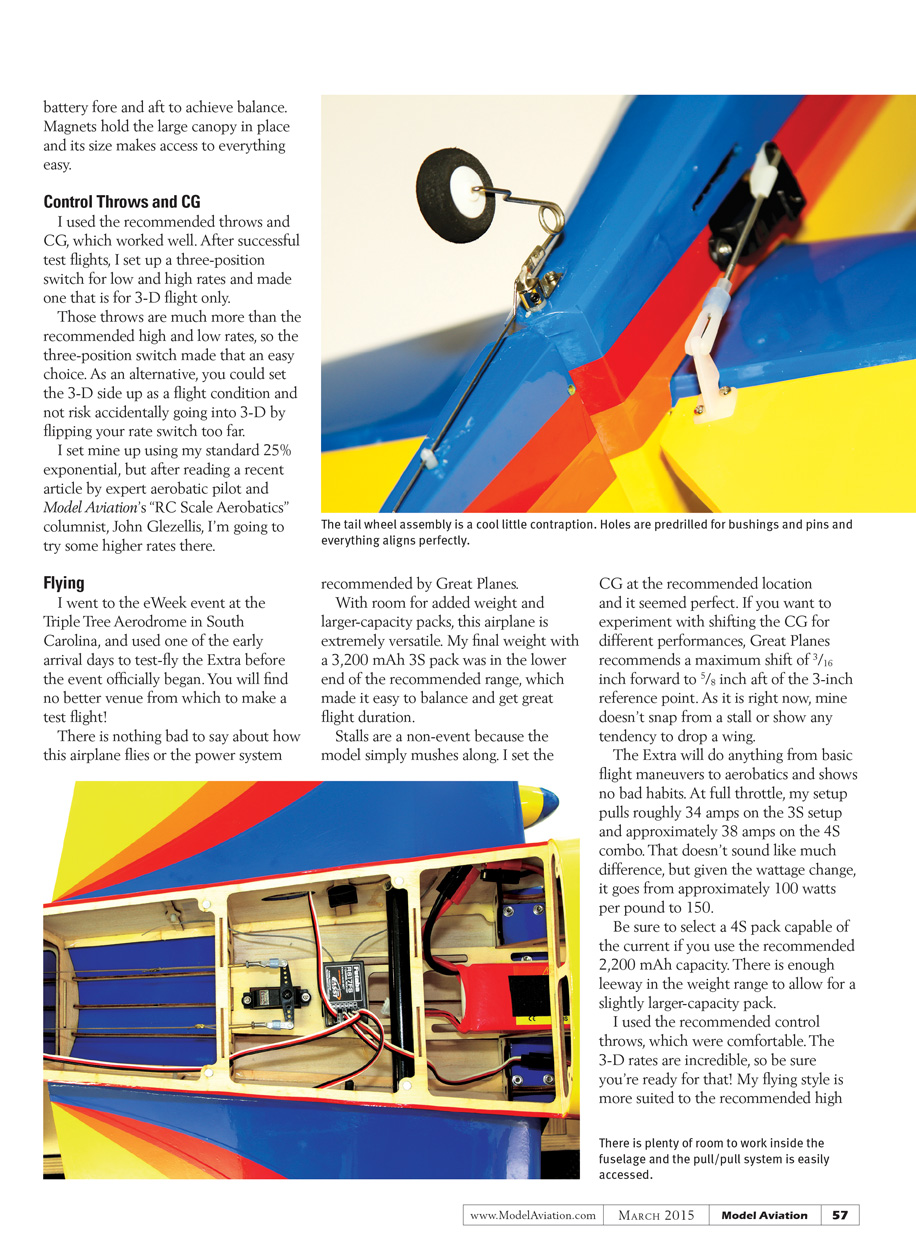
The tail wheel assembly is a cool little contraption. Holes are predrilled for bushings and pins. Everything aligns perfectly if you study the photos and follow closely. It's a simple and effective method of assembling a steerable tail wheel.
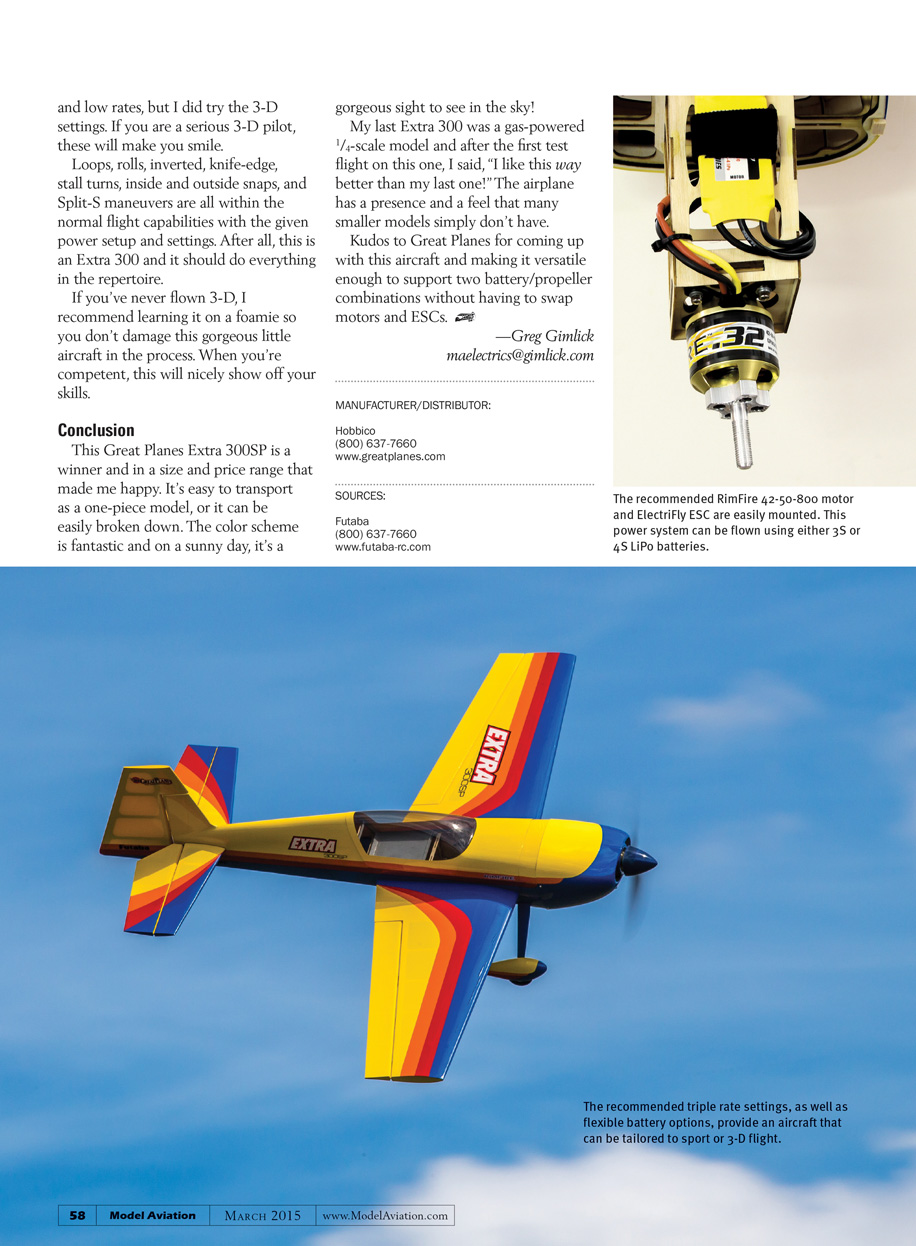
I hope you choose to use the recommended RimFire 42-50-800 motor and mount because everything aligns perfectly, and a job that can be frustrating becomes a simple bolt-and-play process. The ESC attaches to the plywood motor mount and receives plenty of cooling air.
The aileron and elevator controls are installed in the usual fashion and shouldn't cause any worry. If you've never put in a pull/pull rudder system, you're in for a great lesson on how to do it properly. It's a daunting task for many, but if you follow the instructions, you'll never worry about doing another one.
The final steps include installing the decals, setting control throws, and checking the center of gravity (CG). There is ample room to move the motor and battery fore and aft to achieve balance. Magnets hold the large canopy in place and its size makes access to everything easy.
Control Throws and CG
I used the recommended throws and CG, which worked well. After successful test flights, I set up a three-position switch for low and high rates and made one that is for 3-D flight only.
Those throws are much more than the recommended high and low rates, so the three-position switch made that an easy choice. As an alternative, you could set the 3-D side up as a flight condition and not risk accidentally going into 3-D by flipping your rate switch too far.
I set mine up using my standard 25% exponential, but after reading a recent article by expert aerobatic pilot and Model Aviation’s “RC Scale Aerobatics” columnist, John Glezellis, I’m going to try some higher rates there.
Flying
I went to the eWeek event at the Triple Tree Aerodrome in South Carolina, and used one of the early arrival days to test-fly the Extra before the event officially began. You will find no better venue from which to make a test flight!
There is nothing bad to say about how this airplane flies or the power system recommended by Great Planes.
With room for added weight and larger-capacity packs, this airplane is extremely versatile. My final weight with a 3,200 mAh 3S pack was in the lower end of the recommended range, which made it easy to balance and get great flight duration.
Stalls are a non-event because the model simply mushes along. I set the CG at the recommended location and it seemed perfect. If you want to experiment with shifting the CG for different performances, Great Planes recommends a maximum shift of 3/16 inch forward to 5/8 inch aft of the 3-inch reference point. As it is right now, mine doesn’t snap from a stall or show any tendency to drop a wing.
The Extra will do anything from basic flight maneuvers to aerobatics and shows no bad habits. At full throttle, my setup pulls roughly 34 amps on the 3S setup and approximately 38 amps on the 4S combo. That doesn’t sound like much difference, but given the wattage change, it goes from approximately 100 watts per pound to 150.
Be sure to select a 4S pack capable of the current if you use the recommended 2,200 mAh capacity. There is enough leeway in the weight range to allow for a slightly larger-capacity pack.
I used the recommended control throws, which were comfortable. The 3-D rates are incredible, so be sure you’re ready for that! My flying style is more suited to the recommended high and low rates, but I did try the 3-D settings. If you are a serious 3-D pilot, these will make you smile.
Loops, rolls, inverted, knife-edge, stall turns, inside and outside snaps, and Split-S maneuvers are all within the normal flight capabilities with the given power setup and settings. After all, this is an Extra 300 and it should do everything in the repertoire.
If you've never flown 3-D, I recommend learning it on a foamie so you don't damage this gorgeous little aircraft in the process. When you're competent, this will nicely show off your skills.
Conclusion
This Great Planes Extra 300SP is a winner and in a size and price range that made me happy. It's easy to transport as a one-piece model, or it can be easily broken down. The color scheme is fantastic and on a sunny day, it's a gorgeous sight to see in the sky!
My last Extra 300 was a gas-powered 1/4-scale model and after the first test flight on this one, I said, "I like this way better than my last one!" The airplane has a presence and a feel that many smaller models simply don't have. Kudos to Great Planes for coming up with this aircraft and making it versatile enough to support two battery/propeller combinations without having to swap motors and ESCs.
- Greg Gimlick — [email protected]
Manufacturer/Distributor
- Hobbico
- (800) 637-7660
- www.greatplanes.com
Sources
- Futaba
- (800) 637-7660
- www.futaba-rc.com
Transcribed from original scans by AI. Minor OCR errors may remain.

