
Great Planes Sophisticated Lady ARF
Greg Prater
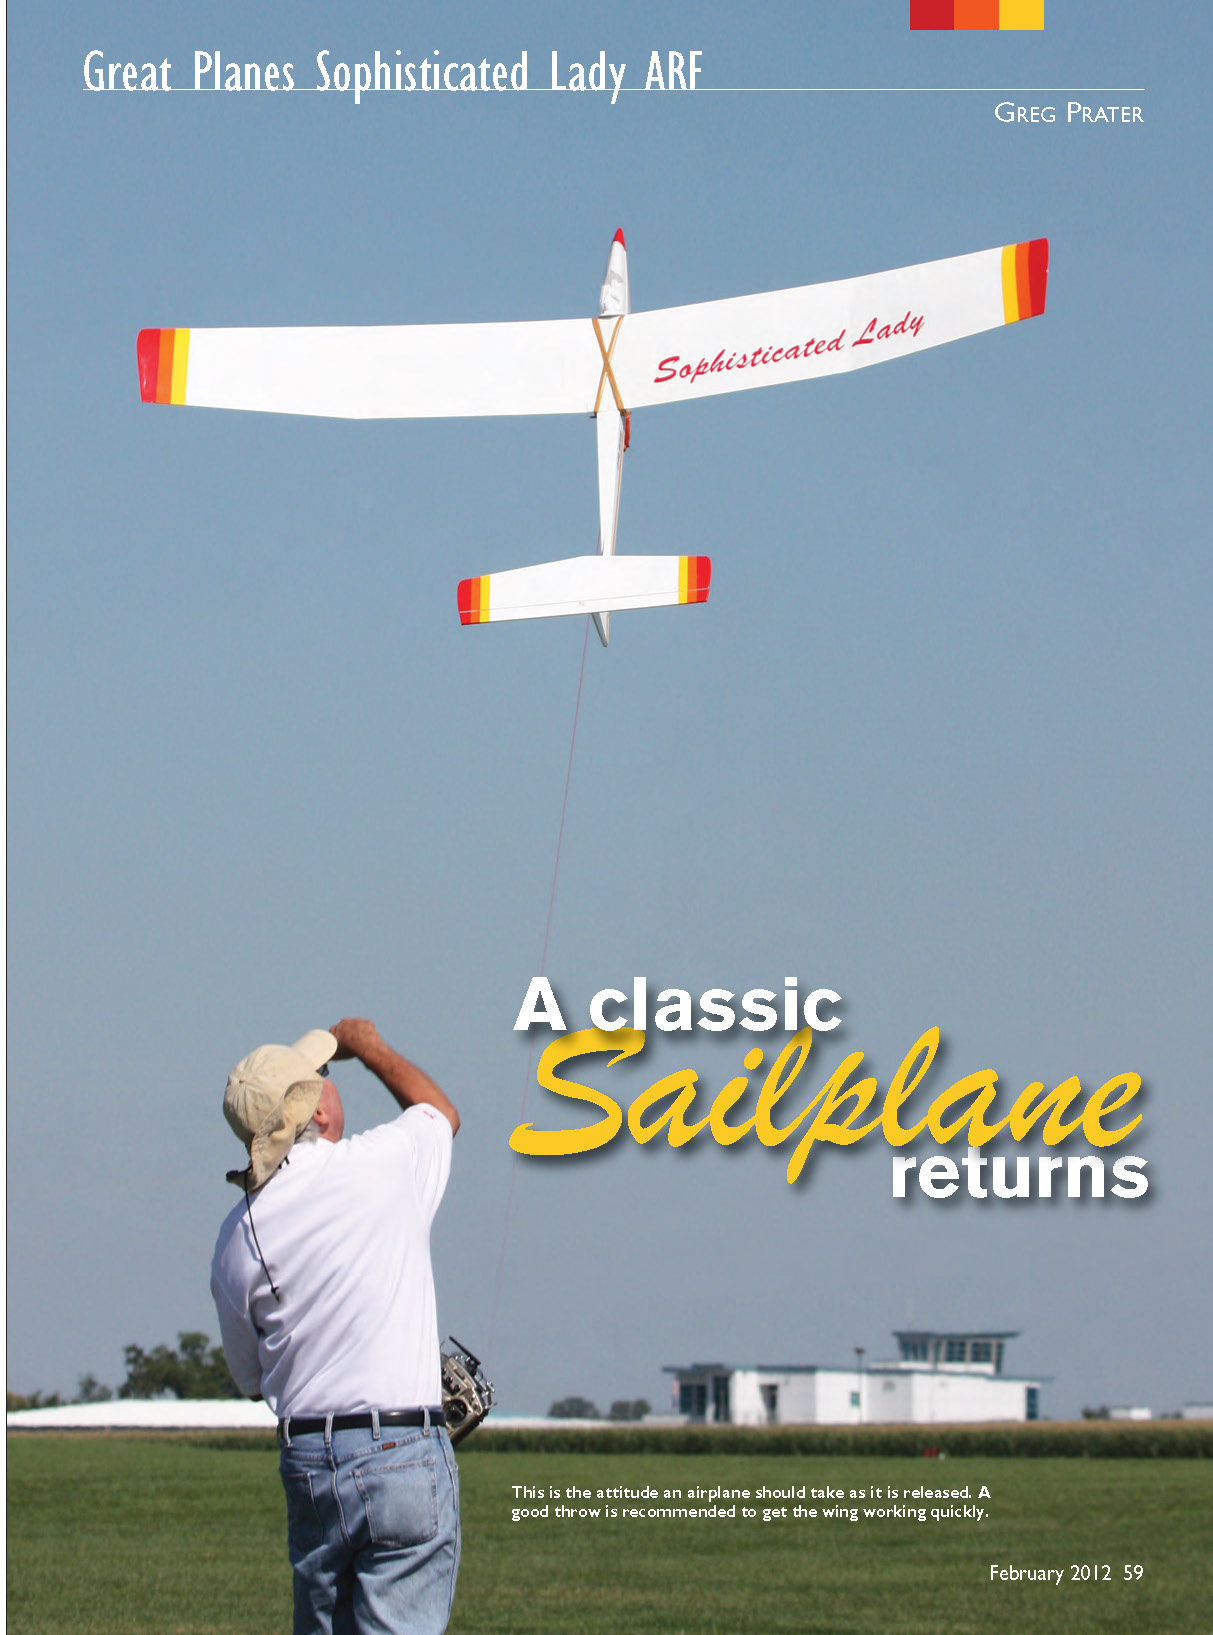
A classic sailplane returns
The Sophisticated Lady ARF is produced by Great Planes as part of the Carl Goldberg Classic series. The series also includes the Gentle Lady ARF and, to my surprise, the Gentle Lady laser-cut kit for traditional builders. The design was originally by Neil Liptak and Dave Patrick, who produced many of the Goldberg designs in the company’s heyday. These airplanes were built by many pilots over the years and were popular for their easy construction and good thermalling characteristics.
Being two-channel airplanes, they fall into the floater category. This is one airplane you take to the field (along with an easy chair and sunscreen) when you want to relax and have a fun day of soaring. I have seen highly modified Gentle Lady models flown in competition by pilots who knew their airplanes well and finished near the top of the score sheet.
This is an ARF, so instead of a stack of balsa and plans you get a built and covered model that requires minimal assembly. The wings and fuselage come pre-covered in MonoKote, which was nearly flawless. The few wrinkles I found were easily fixed with a heat gun. I have always been a fan of MonoKote; it’s easy to apply and makes a nice finish. However, it does add weight to the sailplane.
The wing has no leading-edge (LE) sheeting, so it gains strength from the covering. The tail feathers are covered in the same material, and triangle stock for support is included. The instruction booklet is well written and covers everything needed for the first-time builder. It also contains a section on finding thermals and a list of replacement parts.
I found an original copy of the plans for the Sophisticated Lady from the AMA Plans Service and compared it to this ARF. It is nearly identical—down to the decals—so if you are a fan of the original, you might also like the ARF version.
Construction
The wing came out of the box in two halves, held together with a plywood and aluminum joiner. I prepared the fuselage by removing the glue-surface covering at the tail. The vertical fin and horizontal stabilizer were epoxied in place.
I turned the fuselage upside down, blocking it at the wing saddle to the height where the stabilizer was flat and square to the fin, and placed weight on the bottom of the fuselage. The slots for the CA hinges were already cut, which simplified assembly.
The fuselage is set up for full-size servos. Weight could be trimmed by using mini servos, but you will have to change the mounts. The battery and receiver go in the front under the vacuum-formed canopy.
To balance the aircraft at the recommended CG I added 6 ounces of lead inside the nose. After installing the included decals, the final flying weight came to 35.5 ounces.
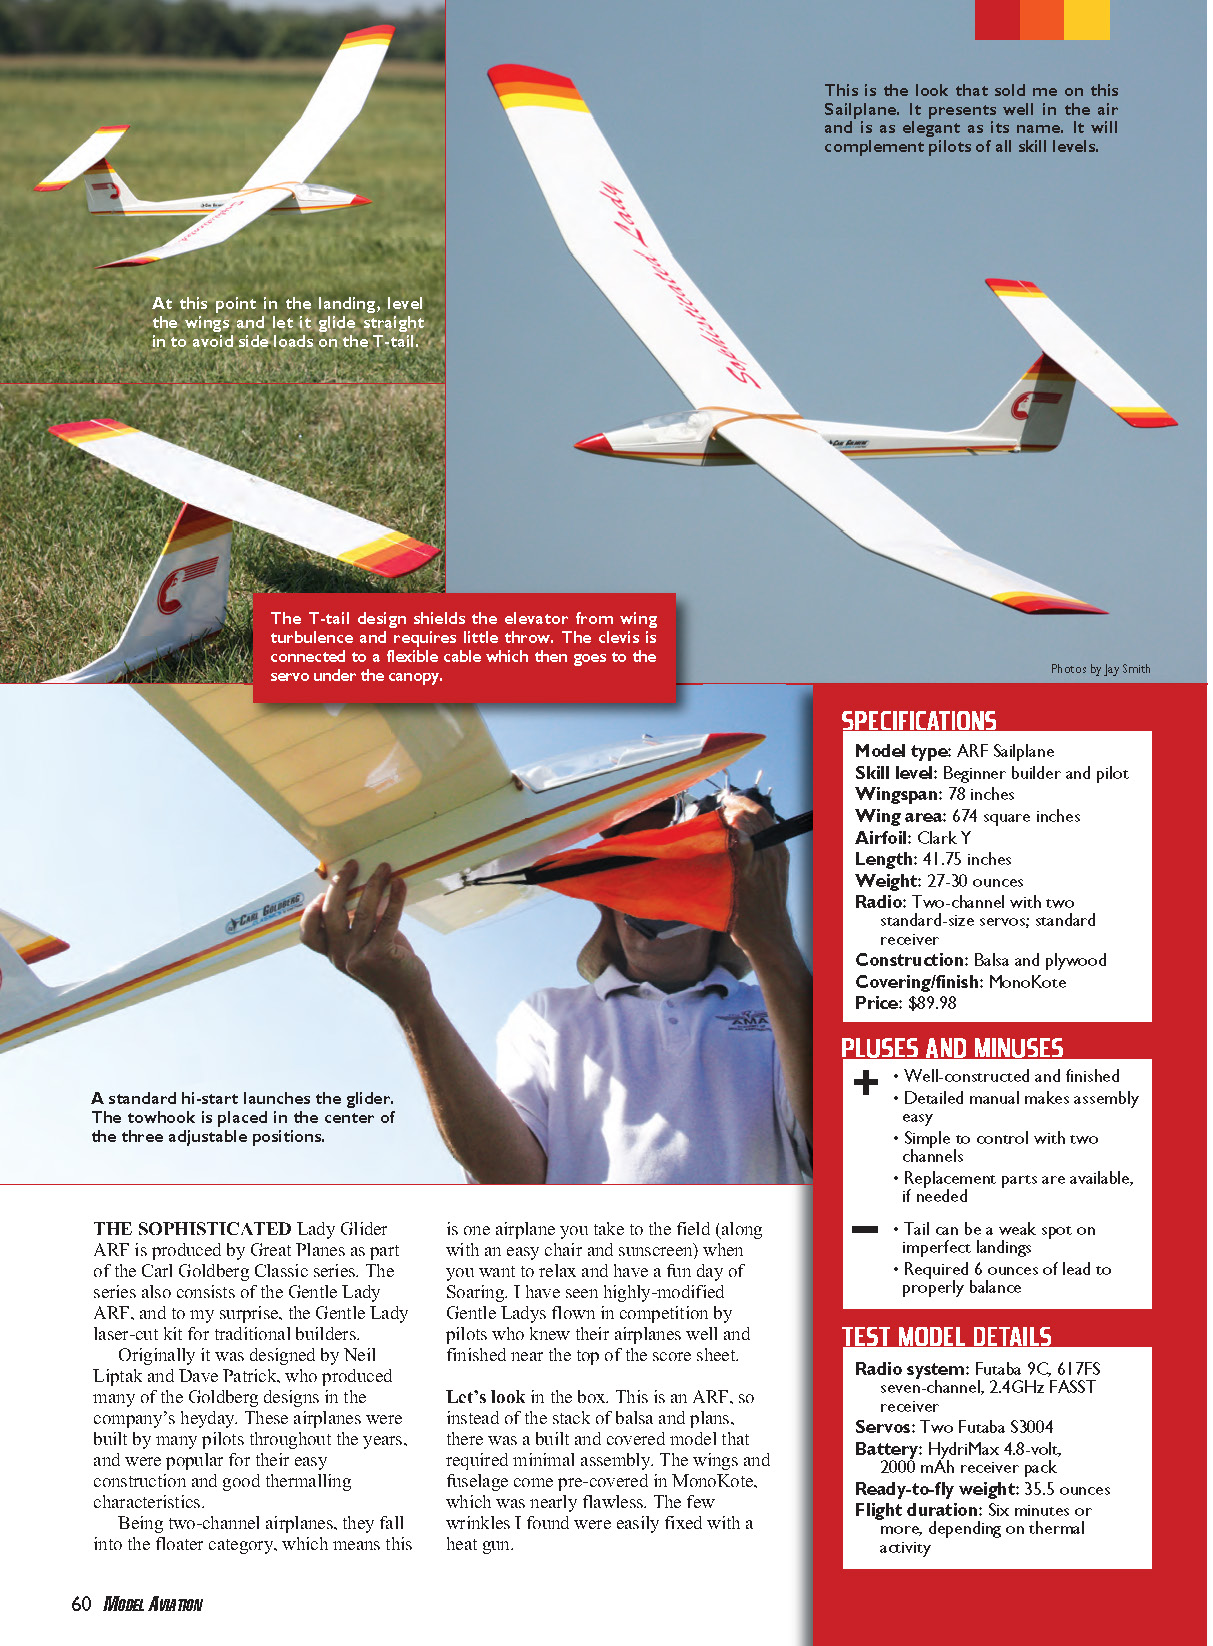
The included tow hook can be mounted in one of three locations on the bottom of the fuselage. I installed it in the middle hole. Make sure you tighten the nut firmly securing the tow hook—if it isn't securely attached, the airplane could veer off at launch.
Flying
It was a beautiful day at the AMA International Flying Site. Winds ranged from 0 to 5 mph, the sky was clear, and humidity was low. I set the standard bungee off to the northwest for a 60-pace stretch and set the CG at 92 mm behind the leading edge of the wing for the first flights.
The maiden flight was nice. The Sophisticated Lady banked well and, when flown at the right speed, produced notable lift. The first flights were for photos.
On the third flight the model signaled it was in light air and I circled, looking for the strongest part of the lift. Before I knew it, the model was too high for photos, but it had proven itself.
The landing was uneventful. When setting up for landing, make sure you are in a straight glide because side loads could break the tail. The weight of the T-tail on top of the vertical fin is unforgiving, but it gives the airplane much of its visual appeal.
Conclusion
I like the Sophisticated Lady, but I would like it better if I could eliminate some of the nose weight. A carbon rod for the rudder would help. Removing 1 ounce from the tail means you can remove about 3 ounces from the nose.
I would also make the stabilizer removable to reduce hangar rash. Flying the Sophisticated Lady is fun — it's a high-quality aircraft, can be quickly assembled, and doesn't require high-tech equipment. All you need is a hi-start, sunscreen, and a comfortable chair.
Manufacturer/Distributor
- Great Planes Model Manufacturing
- Phone: (800) 637-7660
- Website: www.greatplanes.com
Sources
- Futaba
- Phone: (800) 637-7660
- Website: www.futaba-rc.com
Transcribed from original scans by AI. Minor OCR errors may remain.

