


A guide for novice pilots
by John Glezellis [email protected]
PLUS:
- Decoding the jargon
- Rates and exponential
- Choosing the right settings
- Flight modes
- Variable trace rate
I would like to dedicate this month’s column to the novice aerobatic pilot. Too often, unfamiliar terminology is used in the RC world. For example, for the “newbie,” the meaning and proper use of words such as exponential and dual rates and/or triple rates may be unclear.
I want to increase your knowledge and understanding of the various practices that make each of us better pilots, and those practices are all related to properly tuning your aircraft to cater to your needs.
Because examples are essential, and to prove the various points that will be made throughout this column, I will begin by taking a look at Maneuver 10 from the 2012 Sportsman Known sequence. This stunt is a Humpty Bump that is performed on a 45° line.
From upright level flight, the pilot must push to a 45° downline and perform a positive snap roll. Then, he or she must pull half of an inside loop to a 45° upline and perform a half roll and push to upright level flight.
Some pilots may try flying this maneuver while staying on one rate. They may find that the rolling and looping segments are erratic, but they need the control throw when it comes time to perform the snap roll. There are multiple ways to customize an airplane to perform this maneuver.
This month, I will discuss some different programming techniques that can be used and share a few mistakes that I have seen experienced pilots make. Such errors can make a stunt more difficult to perform.
Using Various Rates and Settings
Some radios feature what is called dual rates. This means that the end user can choose a reduced amount of control-surface deflection for a given rate. In other words, you can select 25° of aileron deflection for your low-rate value and 45° of aileron deflection for your high-rate value—all with the flip of a switch!
This can also be applied to the other control surfaces of your aircraft. More advanced radios feature triple rates, which is similar to dual rates but with an additional switch position.
If you have been an avid reader of my columns, you are aware that I use flight modes to the fullest. I use both JR and Spektrum equipment. Flight mode is commonly associated with these two manufacturers. Essentially, this means that all rates can be combined onto one switch. Rather than search for your elevator rate switch or aileron switch, you can use one switch for everything.
Because I am discussing combining all rates onto one switch, I’ll review Futaba’s definition of flight conditions. Although conditions are flexible, they allow the end user the ability to adjust the model on that specific mode/switch position up to nearly 100%. They are separate from the basic model setup. In its basic form, you can apply all rates onto one switch—similar to the way it is done in a flight mode.
In addition to using either flight modes or conditions, you can use Variable Trace Rate (VTR), as long as your computer radio features it. Using VTR is almost like having two different linear rates in one. You can adjust the end-point values for a given control surface in a specific rate and control the slope of the first segment, which determines your control authority, while you move the stick to the end to obtain the maximum amount of control-surface deflection.
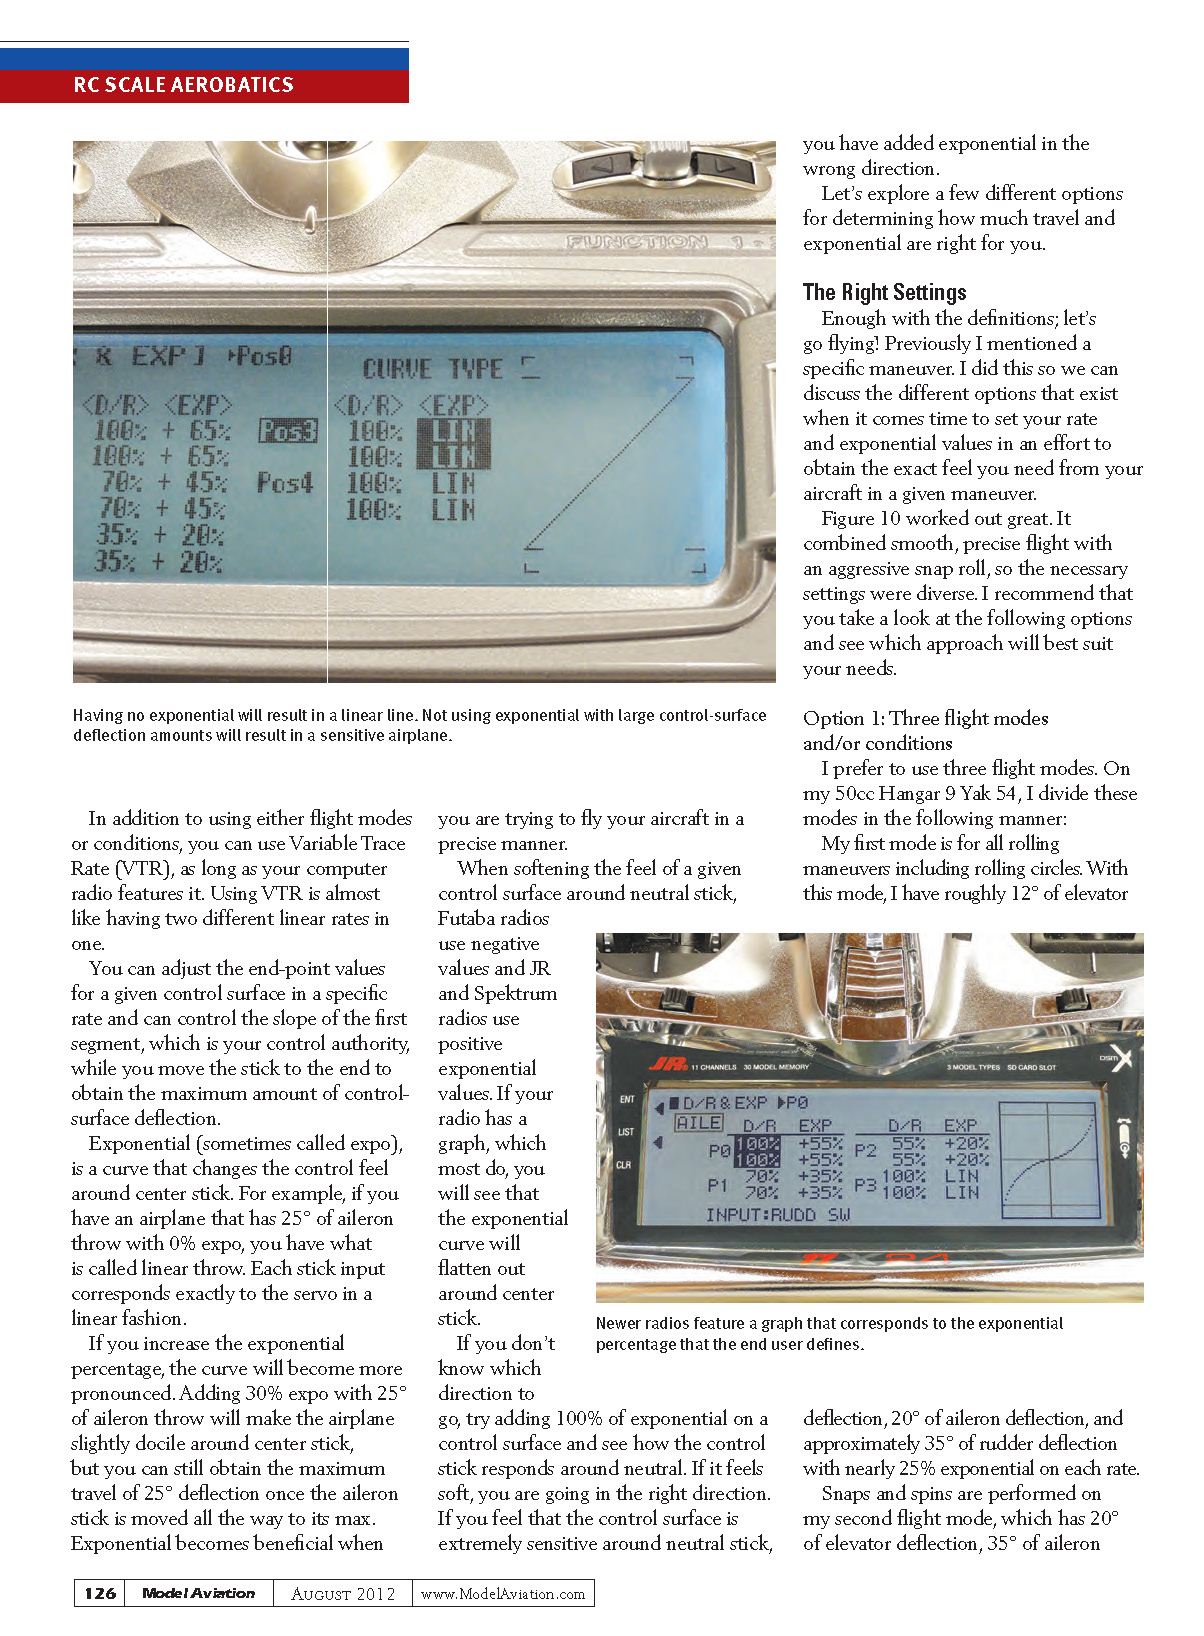
Exponential (sometimes called expo) is a curve that changes the control feel around center stick. For example, if you have an airplane that has 25° of aileron throw with 0% expo, you have what is called linear throw: each stick input corresponds exactly to the servo in a linear fashion. If you increase the exponential percentage, the curve will become more pronounced. Adding 30% expo with 25° of aileron throw will make the airplane slightly docile around center stick, but you can still obtain the maximum travel of 25° deflection once the aileron stick is moved all the way to its max. Exponential becomes beneficial when you are trying to fly your aircraft in a precise manner.
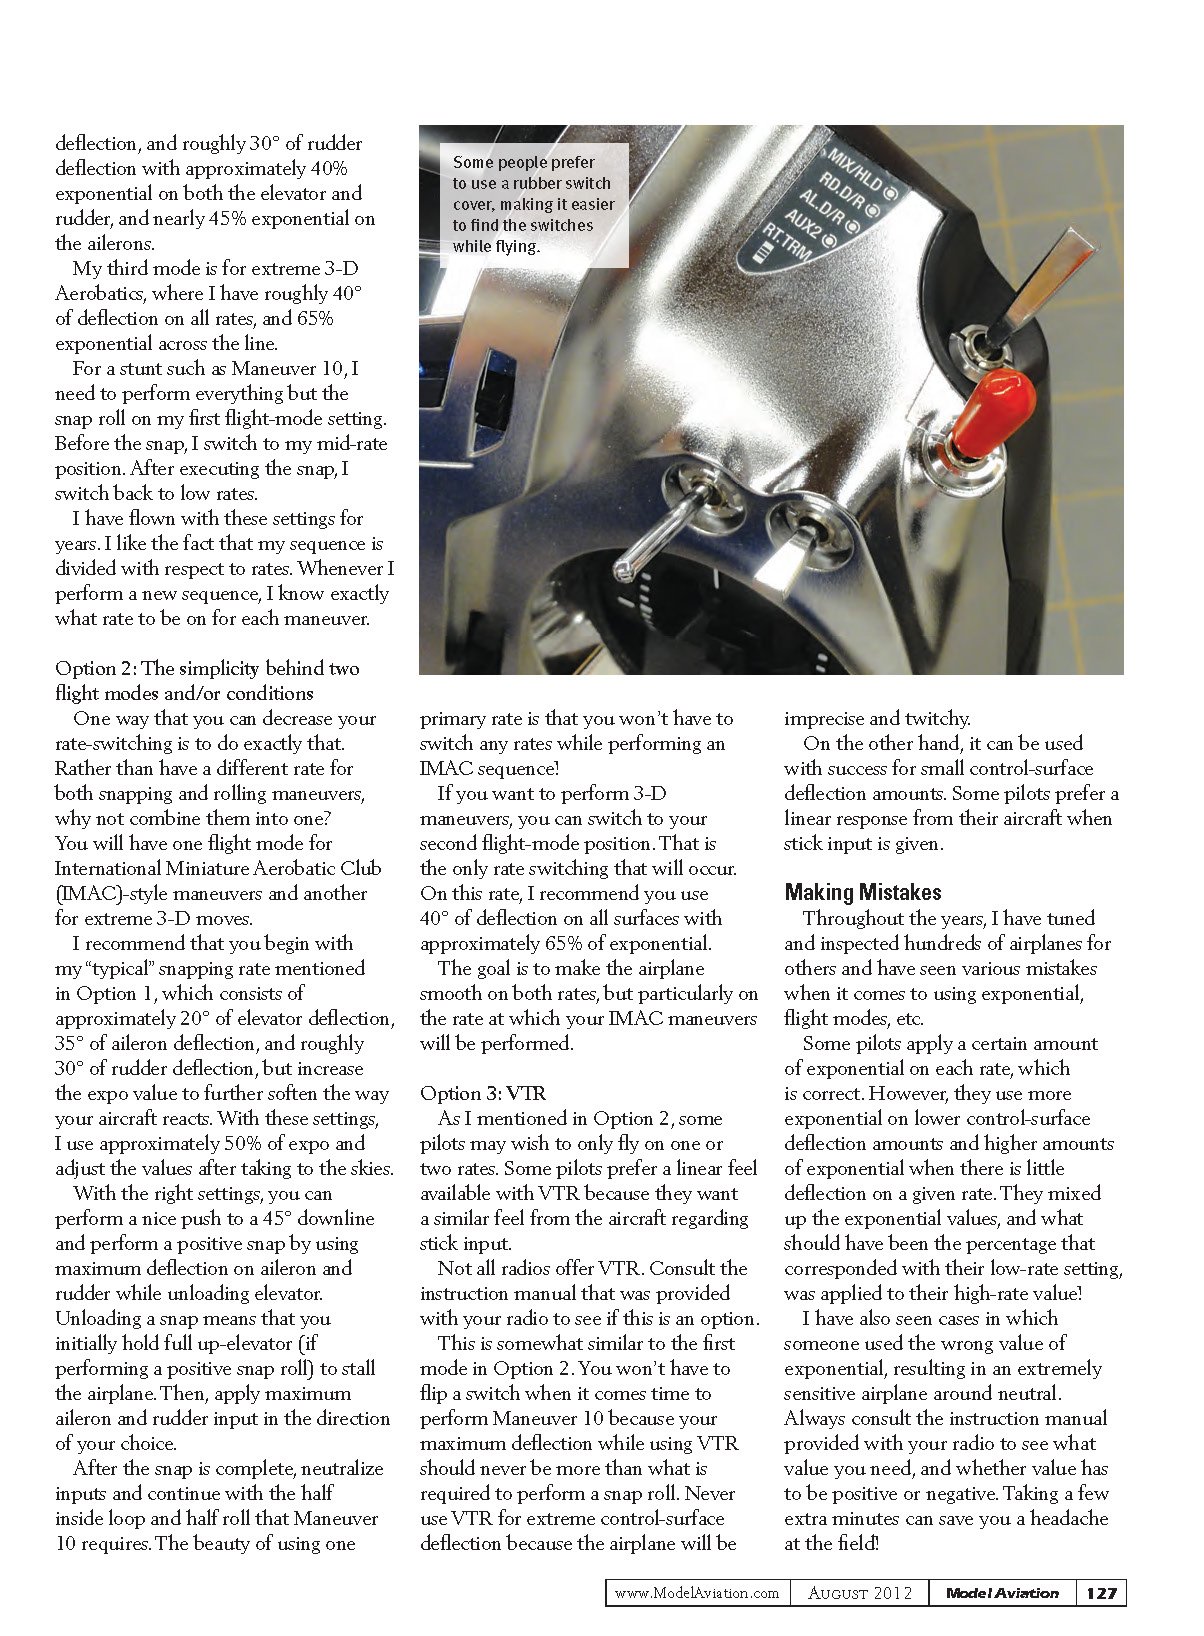
When softening the feel of a given control surface around neutral stick, Futaba radios use negative values and JR and Spektrum radios use positive exponential values. If your radio has a graph, which most do, you will see that the exponential curve flattens out around center stick.
If you don't know which direction to go, try adding 100% exponential on a control surface (on the bench) and see how the control stick responds around neutral. If it feels soft, you are going in the right direction. If the control surface is extremely sensitive around neutral stick, you have applied exponential in the wrong direction.
Let's explore a few different options for determining how much travel and exponential are right for you.
The Right Settings
Enough with the definitions; let's go flying! Previously I mentioned a specific maneuver so we can discuss the different options that exist when it comes time to set your rate and exponential values to obtain the exact feel you need from your aircraft in a given maneuver.
Maneuver 10 worked out great. It combined smooth, precise flight with an aggressive snap roll, so the necessary settings were diverse. I recommend that you take a look at the following options and see which approach will best suit your needs.
Option 1: Three flight modes and/or conditions
I prefer to use three flight modes. On my 50cc Hangar 9 Yak 54, I divide these modes in the following manner:
My first mode is for all rolling maneuvers including rolling circles. With this mode, I have roughly 12° of elevator deflection, 20° of aileron deflection, and approximately 35° of rudder deflection with nearly 25% exponential on each rate.
Snaps and spins are performed on my second flight mode, which has 20° of elevator deflection, 35° of aileron deflection, and roughly 30° of rudder deflection with approximately 40% exponential on both the elevator and rudder, and nearly 45% exponential on the ailerons.
My third mode is for extreme 3-D aerobatics, where I have roughly 40° of deflection on all rates, and 65% exponential across the line.
For a stunt such as Maneuver 10, I need to perform everything but the snap roll on my first flight-mode setting. Just before the snap, I switch to my mid-rate position. After executing the snap, I switch back to low rates.
I have flown with these settings for years. I like the fact that my sequence is divided with respect to rates. Whenever I perform a new sequence, I know exactly what rate to be on for each maneuver.
Option 2: The simplicity behind two flight modes and/or conditions
One way that you can decrease your rate-switching is to do exactly that. Rather than have a different rate for both snapping and rolling maneuvers, combine them into one. You will have one flight mode for IMAC-style maneuvers and another for extreme 3-D moves.
I recommend that you begin with my “typical” snapping rate mentioned in Option 1, which consists of approximately 20° of elevator deflection, 35° of aileron deflection, and roughly 30° of rudder deflection, but increase the expo value to further soften the way your aircraft reacts. With these settings, I use approximately 50% expo and adjust the values after flying.
With the right settings, you can perform a nice push to a 45° downline and perform a positive snap by using maximum deflection on aileron and rudder while unloading elevator. Unloading a snap means that you initially hold full up-elevator (if performing a positive snap or roll) to stall the airplane, then apply maximum aileron and rudder input in the direction of your choice.
After the snap is complete, neutralize inputs and continue with the half inside loop and half roll that Maneuver 10 requires. The beauty of using one primary rate is that you won’t have to switch any rates while performing an IMAC sequence!
If you want to perform 3-D maneuvers, you can switch to your second flight-mode position. That is the only rate switching that will occur. On this rate, I recommend you use 40° of deflection on all surfaces with approximately 65% exponential.
The goal is to make the airplane smooth on both rates, but particularly on the rate at which your IMAC maneuvers will be performed.
Option 3: VTR
Some pilots prefer to fly on one or two rates and like the linear feel available with VTR because it provides a similar response throughout stick travel.
Not all radios offer VTR. Consult the instruction manual that was provided with your radio to see if this is an option.
This approach is similar to the primary mode in Option 2. You won’t have to flip a switch when it comes time to perform Maneuver 10 because your maximum deflection while using VTR should never exceed what is required to perform a snap roll. Do not use VTR for extreme control-surface deflection because the airplane will become imprecise and twitchy.
VTR can be used with success for small control-surface deflection amounts. Some pilots prefer the linear response from their aircraft when stick input is given.
Making Mistakes
Throughout the years, I have tuned and inspected hundreds of airplanes for others and have seen various mistakes when it comes to using exponential, flight modes, etc.
Some pilots apply a certain amount of exponential on each rate, which is correct. However, they sometimes use more exponential on higher control-surface deflection amounts and higher amounts of exponential when there is little deflection on a given rate. In other words, they mixed up the exponential values, and what should have been the percentage that corresponded with their low-rate setting was applied to their high-rate value.
I have also seen cases in which someone used the wrong sign or value of exponential, resulting in an extremely sensitive airplane around neutral. Always consult the instruction manual provided with your radio to see what value you need, and whether the value has to be positive or negative. Taking a few extra minutes can save you a headache at the field!
Another situation that I have encountered is where a pilot utilizes one rate for all types of flying, applying, for example, 35° of control travel for both precision and 3-D maneuvers. How can you expect your airplane to fly smoothly when that amount of travel is being used for everything? It’s not possible.
Final Thoughts
I want to emphasize that all pilots have different preferences, and what may work for one person may not for another. In this column, I dissected a specific maneuver, discussed a few different ways in which a person can perform this figure, and covered a few key areas that must not be overlooked. Even experienced aviators can make mistakes.
It is important to have an airplane properly set up to save time. I like to examine the aircraft and its radio programming before flying. A pilot also must know his or her capabilities, as well as those of the transmitter, to succeed on the flightline.
So many great designs exist that it is rare to find a poor-flying Giant Scale airplane.
Until next time, fly hard!
SOURCES:
- IMAC
- Futaba
(800) 637-7660 www.futaba-rc.com
- Hangar 9 / JR Radios / Spektrum
(800) 338-4639 www.horizonhobby.com
Transcribed from original scans by AI. Minor OCR errors may remain.

