
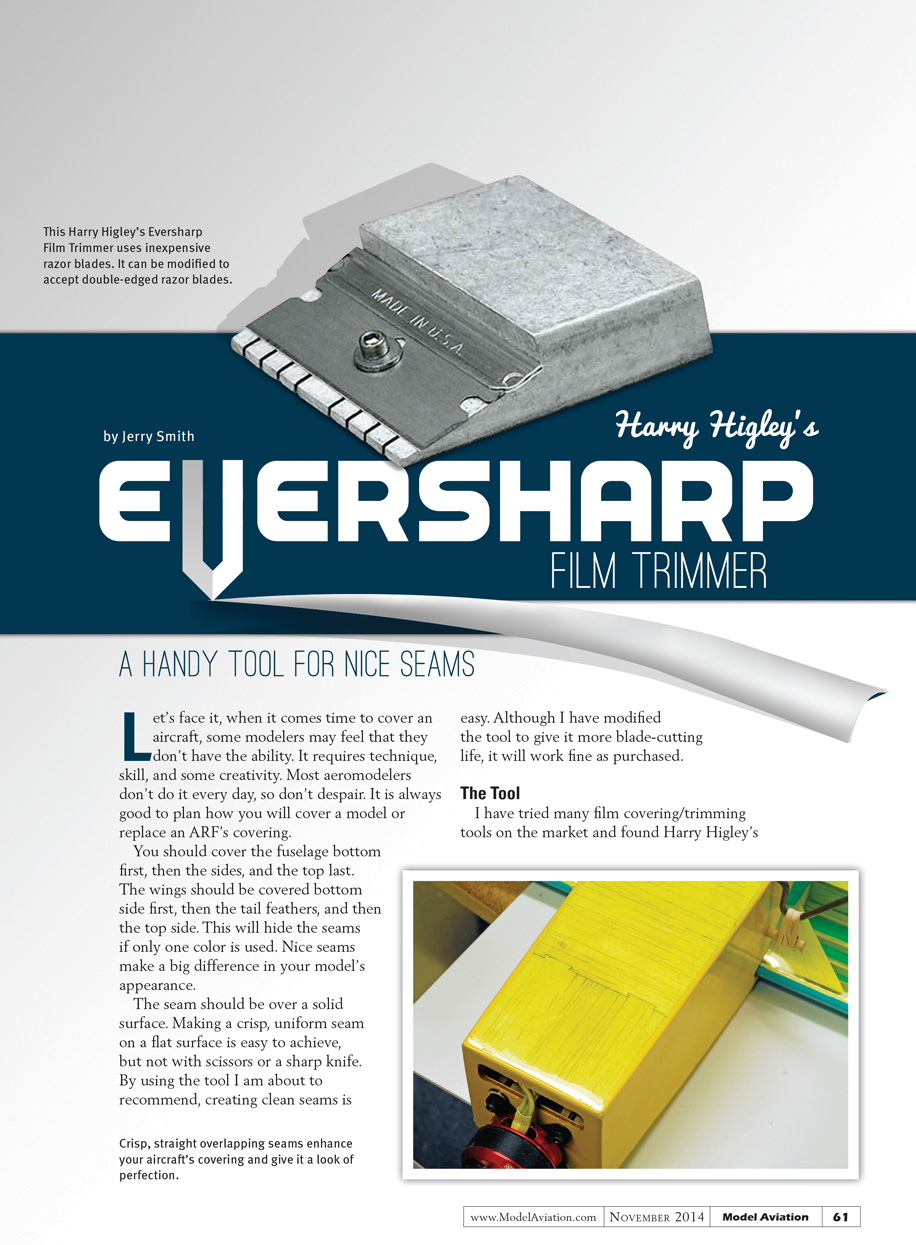
Harry Higley's Eversharp Film Trimmer
A handy tool for nice seams
by Jerry Smith
Let's face it: when it comes time to cover an aircraft, some modelers may feel they don't have the ability. Covering requires technique, skill, and some creativity. Most aeromodelers don't do it every day, so don't despair. It's always good to plan how you will cover a model or replace an ARF's covering.
Cover in this order for best results:
- Fuselage: bottom first, then the sides, and the top last.
- Wings: bottom side first, then the tail feathers, and then the top side.
Doing seams this way will hide them if only one color is used. Nice seams make a big difference in your model's appearance. The seam should be over a solid surface. Making a crisp, uniform seam on a flat surface is easy to achieve — but not with scissors or a sharp knife. Using the tool below, creating clean seams is easy. Although I have modified the tool to give it more blade-cutting life, it will work fine as purchased.
The Tool
I have tried many film covering/trimming tools on the market and found Harry Higley's Eversharp Film Trimmer (also known as Jim's Film Trimmer) to be the most useful. It creates a uniform seam, which is important for adhesion as well as appearance.
Most trimming tools use costly blades that don't last long. The Film Trimmer uses an inexpensive industrial single-edge razor blade. Instead of wearing out in one place, the entire blade gets worn. How does it do this? The four left slots are cut at a different distance from the center than the four right ones. When all eight cutting positions become dull, turn the blade over and its unused segments will align with eight new cutting edges — giving you 16 cutting edges to work with. I think this is clever. All you have to do is keep track of the slots you have used.
The one thing you can't do with it is vary the width of the seam overlap — it's built in and is roughly 1/16 inch. I was disappointed when I first used the trimmer: the recommended single-edge industrial blade is not the sharpest tool in the shed. Many of those blades are coated with a clear rust inhibitor that interferes with cutting; you can remove it with thinner. The blades are mainly used for scraping, but with enough of them you can get the cutting done. This led me to the modification described below.
The Modification
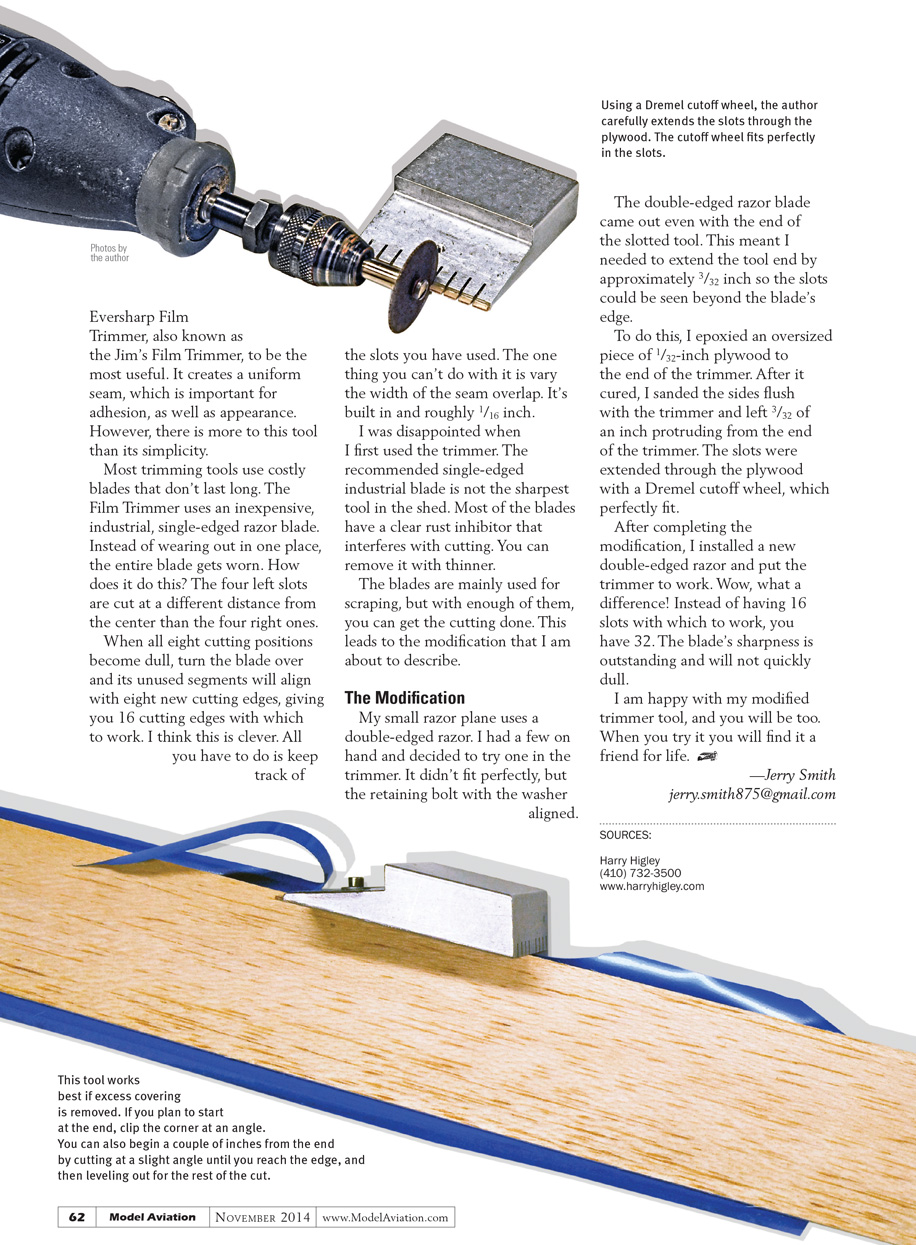
My small razor plane uses a double-edge razor. I had a few on hand and decided to try one in the trimmer. It didn't fit perfectly, but the retaining bolt with the washer lined up. The double-edge razor blade came out even with the end of the slotted tool, so I needed to extend the tool end about 3/32 inch so the slots could be seen beyond the blade's edge.
To do this:
- Epoxy an oversized piece of 1/32-inch plywood to the end of the trimmer.
- After the epoxy cured, sand the sides flush with the trimmer, leaving about 3/32 inch protruding from the end.
- Extend the slots through the plywood with a Dremel cut-off wheel to match the original slots.
- Install a new double-edge razor.
The result was dramatic. Instead of 16 cutting positions, you have 32. The double-edge blade's sharpness is outstanding and will not dull quickly. I'm very happy with my modified trimmer — you will be too. When you try it, you'll find it a friend for life.
— Jerry Smith [email protected]
Sources
Harry Higley (410) 732-3500 www.harryhigley.com
Usage Tips
- This tool works best if excess covering is removed before trimming.
- If you plan to start at the end, clip the corner at an angle.
- You can also begin a couple of inches from the end by cutting at a slight angle until you reach the edge, then level out for the rest of the cut.
Transcribed from original scans by AI. Minor OCR errors may remain.

