
Horizon Hobby Blade Nano QX
I'm new to the hobby. After a couple of years of attending flying events as an observer, I've developed a greater curiosity about becoming a pilot. I'm not a builder and I'm drawn to miniature things, so the Horizon Hobby Blade Nano QX seemed a good place to start.
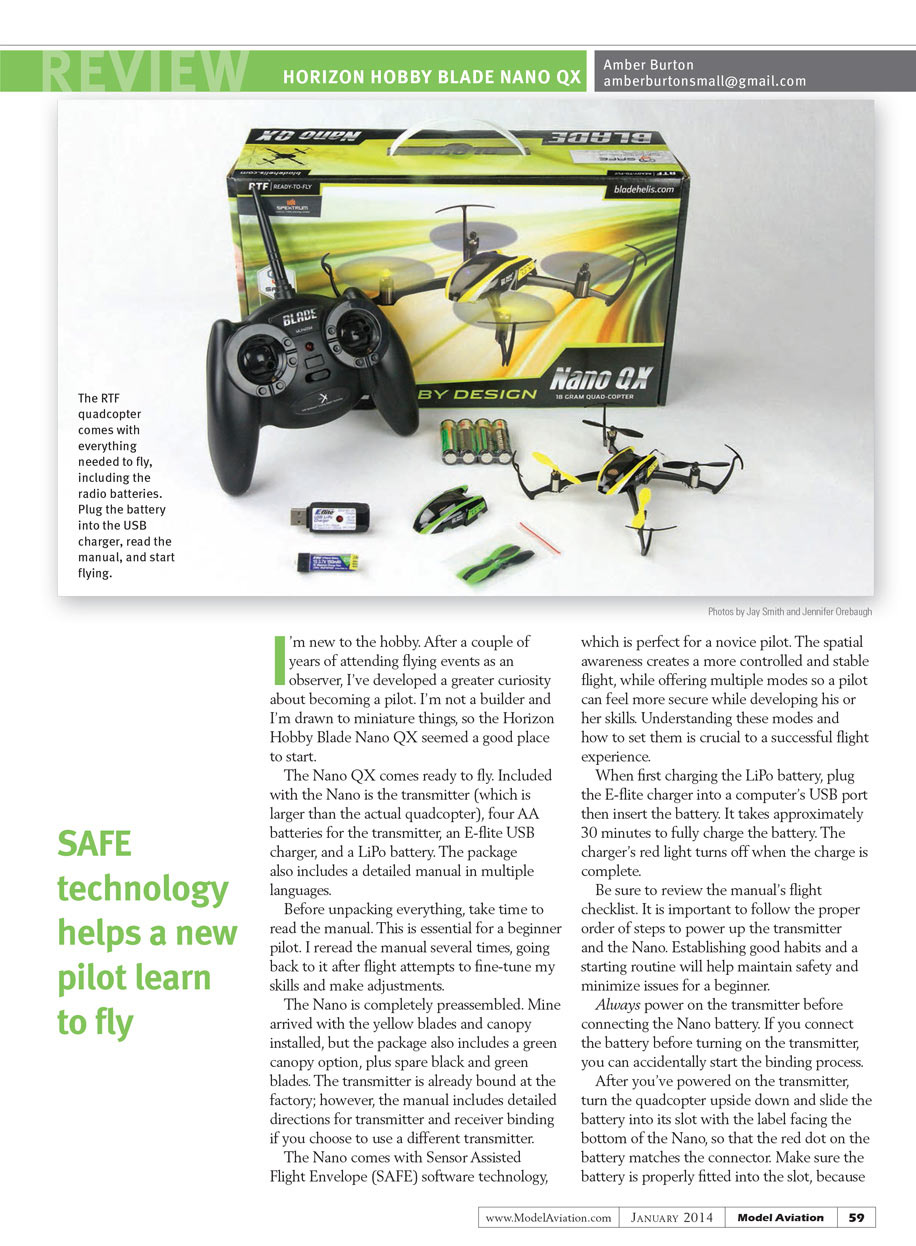
The Nano QX comes ready to fly. Included with the Nano is the transmitter (which is larger than the actual quadcopter), four AA batteries for the transmitter, an E-flite USB charger, and a LiPo battery. The package also includes a detailed manual in multiple languages.
Before unpacking everything, take time to read the manual. This is essential for a beginner pilot. I reread the manual several times, going back to it after flight attempts to fine-tune my skills and make adjustments.
The Nano is completely preassembled. Mine arrived with the yellow blades and canopy installed, but the package also includes a green canopy option, plus spare black and green blades. The transmitter is already bound at the factory; however, the manual includes detailed directions for transmitter and receiver binding if you choose to use a different transmitter.
The Nano comes with Sensor Assisted Flight Envelope (SAFE) software technology, which is perfect for a novice pilot. The spatial awareness creates a more controlled and stable flight, while offering multiple modes so a pilot can feel more secure while developing his or her skills. Understanding these modes and how to set them is crucial to a successful flight experience.
When first charging the LiPo battery, plug the E-flite charger into a computer's USB port then insert the battery. It takes approximately 30 minutes to fully charge the battery. The charger's red light turns off when the charge is complete.
Be sure to review the manual's flight checklist. It is important to follow the proper order of steps to power up the transmitter and the Nano. Establishing good habits and a starting routine will help maintain safety and minimize issues for a beginner.
Always power on the transmitter before connecting the Nano battery. If you connect the battery before turning on the transmitter, you can accidentally start the binding process.
After you've powered on the transmitter, turn the quadcopter upside down and slide the battery into its slot with the label facing the bottom of the Nano, so that the red dot on the battery matches the connector. Make sure the battery is properly fitted into the slot, because the battery's balance can affect trim when flying.
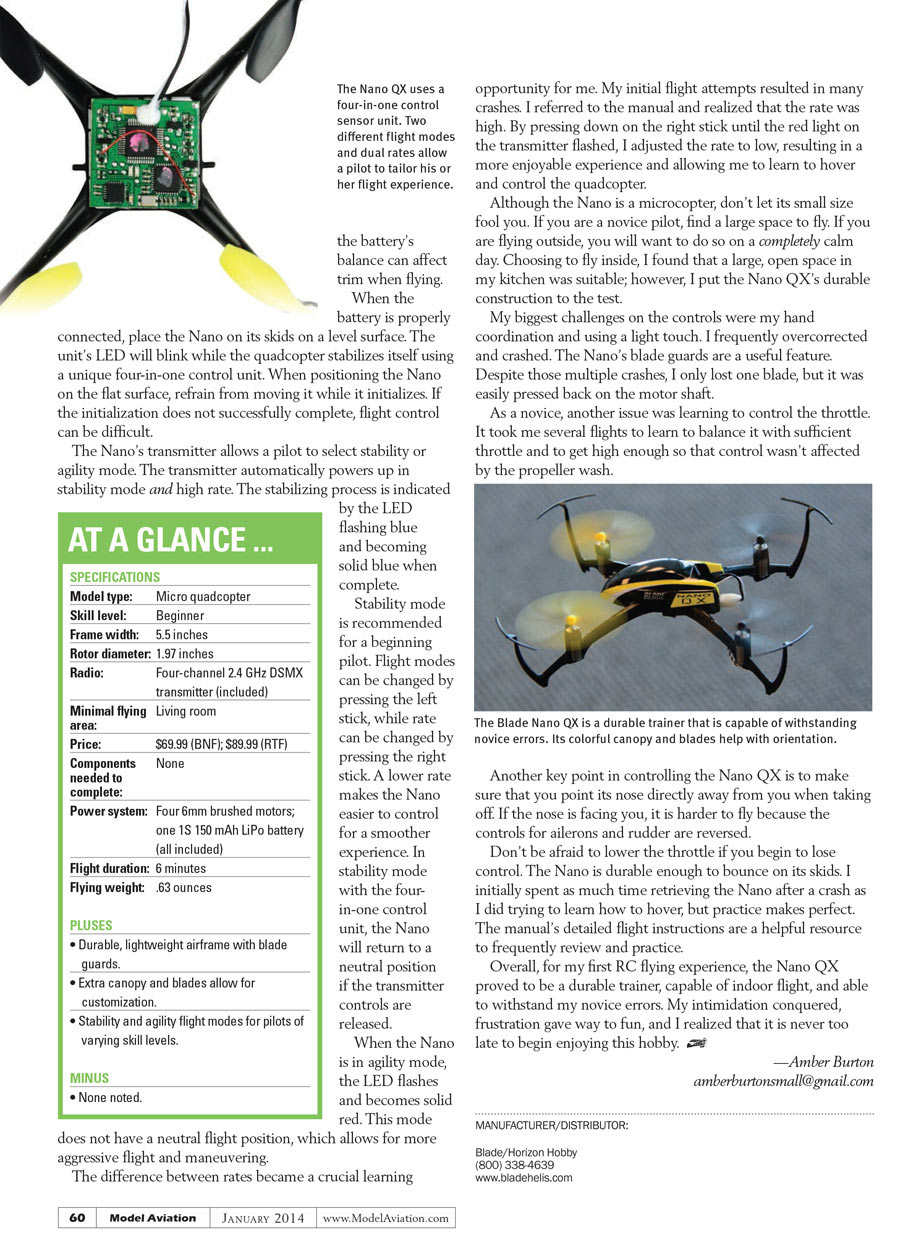
When the battery is properly connected, place the Nano on its skids on a level surface. The unit's LED will blink while the quadcopter stabilizes itself using a unique four-in-one control unit. When positioning the Nano on the flat surface, refrain from moving it while it initializes. If the initialization does not successfully complete, flight control can be difficult.
The Nano's transmitter allows a pilot to select stability or agility mode. The transmitter automatically powers up in stability mode and high rate. The stabilizing process is indicated by the LED flashing blue and becoming solid blue when complete.
Stability mode is recommended for a beginning pilot. Flight modes can be changed by pressing the left stick, while rate can be changed by pressing the right stick. A lower rate makes the Nano easier to control for a smoother experience. In stability mode with the four-in-one control unit, the Nano will return to a neutral position if the transmitter controls are released.
When the Nano is in agility mode, the LED flashes and becomes solid red. This mode does not have a neutral flight position, which allows for more aggressive flight and maneuvering.
The difference between rates became a crucial learning opportunity for me. My initial flight attempts resulted in many crashes. I referred to the manual and realized that the rate was high. By pressing down on the right stick until the red light on the transmitter flashed, I adjusted the rate to low, resulting in a more enjoyable experience and allowing me to learn to hover and control the quadcopter.
Although the Nano is a microcopter, don't let its small size fool you. If you are a novice pilot, find a large space to fly. If you are flying outside, you will want to do so on a completely calm day. Choosing to fly inside, I found that a large, open space in my kitchen was suitable; however, I put the Nano QX's durable construction to the test.
My biggest challenges on the controls were my hand coordination and using a light touch. I frequently overcorrected and crashed. The Nano's blade guards are a useful feature. Despite those multiple crashes, I only lost one blade, but it was easily pressed back on the motor shaft.
As a novice, another issue was learning to control the throttle. It took me several flights to learn to balance it with sufficient throttle and to get high enough so that control wasn't affected by the propeller wash.
Another key point in controlling the Nano QX is to make sure that you point its nose directly away from you when taking off. If the nose is facing you, it is harder to fly because the controls for aileron and rudder are reversed.
Don't be afraid to lower the throttle if you begin to lose control. The Nano is durable enough to bounce on its skids. I initially spent as much time retrieving the Nano after a crash as I did trying to learn how to hover, but practice makes perfect. The manual's detailed flight instructions are a helpful resource to frequently review and practice.
Overall, for my first RC flying experience, the Nano QX proved to be a durable trainer, capable of indoor flight, and able to withstand my novice errors. My intimidation conquered, frustration gave way to fun, and I realized that it is never too late to begin enjoying this hobby.
—Amber Burton [email protected]
AT A GLANCE ...
SPECIFICATIONS
- Model type: Micro quadcopter
- Skill level: Beginner
- Frame width: 5.5 inches
- Rotor diameter: 1.97 inches
- Radio: Four-channel 2.4 GHz DSMX transmitter (included)
- Minimal flying area: Living room
- Price: $69.99 (BNF); $89.99 (RTF)
- Components needed to complete: None
- Power system: Four 6mm brushed motors; one 1S 150 mAh LiPo battery (all included)
- Flight duration: 6 minutes
- Flying weight: 0.63 ounces
PLUSES
- Durable, lightweight airframe with blade guards
- Extra canopy and blades allow for customization
- Stability and agility flight modes for pilots of varying skill levels
MINUS
- None noted
MANUFACTURER/DISTRIBUTOR
- Blade/Horizon Hobby
- (800) 338-4639
- www.bladehelis.com
Transcribed from original scans by AI. Minor OCR errors may remain.

