
First Impressions
Designed by world-class glider pilot Peter Goldsmith, the Mystique is the perfect airplane for Radian Pro owners who want to transition to a higher-performance, built-up airframe.
There are plenty of full-house sailplanes out there but few rival the reasonable price of the Mystique, are combined with E-flite quality, and are backed by Horizon Hobby's world-class support.
If competition is your forte, the Mystique would be a great entry- to mid-level aircraft for F3J (Electric Thermal Duration), in Altitude Limited Electric Soaring (ALES) competition, or in Limited Motor Run (LMR) events.
Kit
The Mystique features built-up wings with solid-wood tail surfaces and a molded fiberglass fuselage. It is clear that the manufacturer focused on attention to detail. The wings use the versatile SD3021 airfoil (modified for the Mystique) for a wide flight envelope.
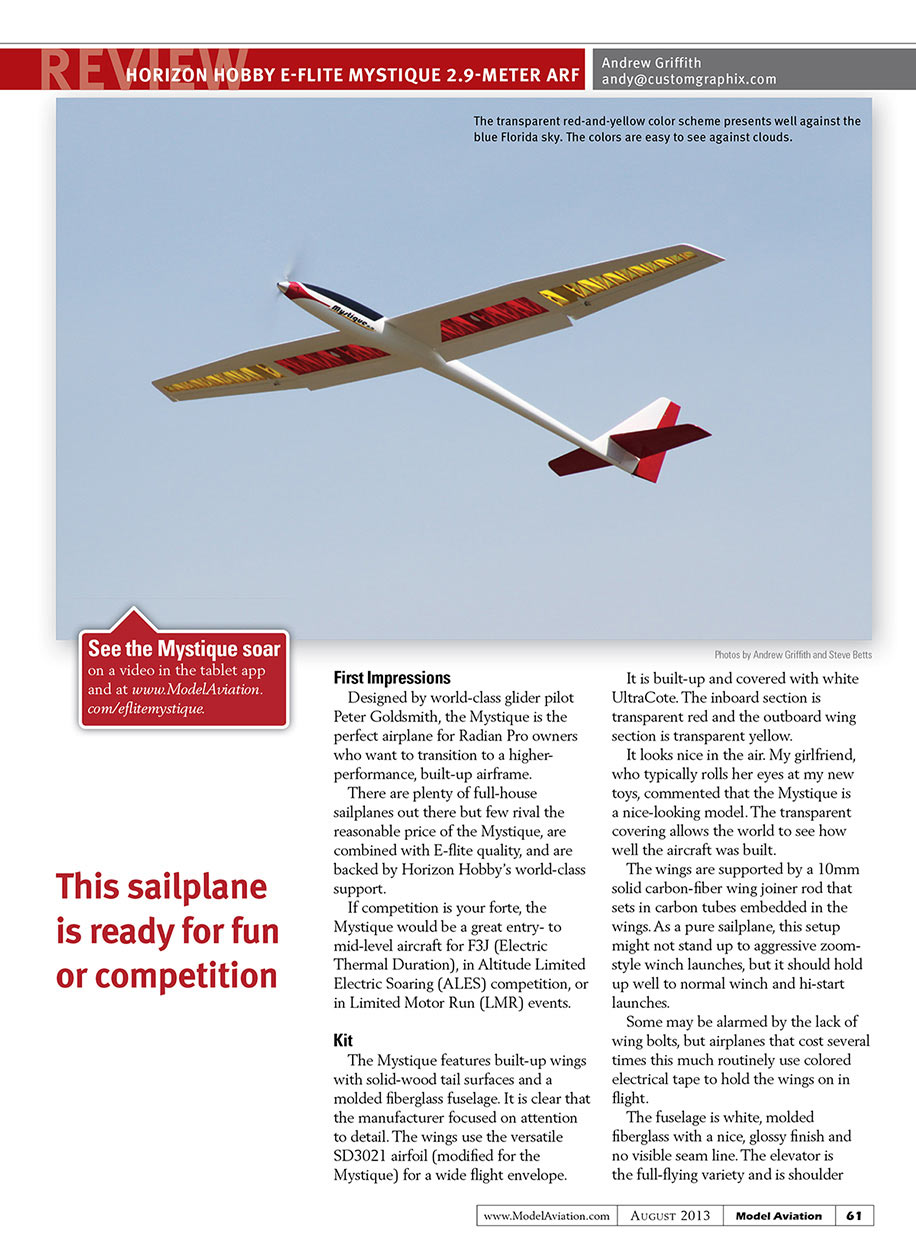
It is built-up and covered with white UltraCote. The inboard section is transparent red and the outboard wing section is transparent yellow.
It looks nice in the air. My girlfriend, who typically rolls her eyes at my new toys, commented that the Mystique is a nice-looking model. The transparent covering allows the world to see how well the aircraft was built.
The wings are supported by a 10mm solid carbon-fiber wing joiner rod that sets in carbon tubes embedded in the wings. As a pure sailplane, this setup might not stand up to aggressive zoom-style winch launches, but it should hold up well to normal winch and hi-start launches.
Some may be alarmed by the lack of wing bolts, but airplanes that cost several times this much routinely use colored electrical tape to hold the wings on in flight.
The fuselage is white, molded fiberglass with a nice, glossy finish and no visible seam line. The elevator is the full-flying variety and is shoulder-mounted to get it away from the dirty air behind the wings. The stabilizer and rudder are built-up and covered in transparent red. The stabilizer can be permanently installed or left removable for transportation.
The vertical fin has a nice recess so the built-up rudder fits with no discernible gap. All of the woodwork in the fuselage and the pushrod guide tubes are installed at the factory, and the canopy snaps into place for easy battery access.
I was anxious to start building the Mystique.
Construction
E-flite kit manuals are typically among the best in the business. Unfortunately, that wasn't the case for the Mystique. There were a few errors and omissions that I'll document.
I used Zap thin and medium CA and Z-Poxy 15- and 30-minute epoxies, available from Frank Tiano Enterprises, to build the Mystique. Please ensure you have adequate ventilation while working with any chemicals.
The first step in constructing the Mystique is preparing the wings. The all-wood, built-up construction appeared to be sturdy, but lightweight, and the flaps and the ailerons are prehinged. The four low-profile, digital wing servos were all that needed to be installed. I thought it would be easy.
I read the entire manual and decided to install all of the control horns with one batch of epoxy. Before mixing any epoxy, make sure you have alcohol and paper towels handy. Any epoxy runs or fingerprints on the white fuselage or wing covering will stand out like a sore thumb.
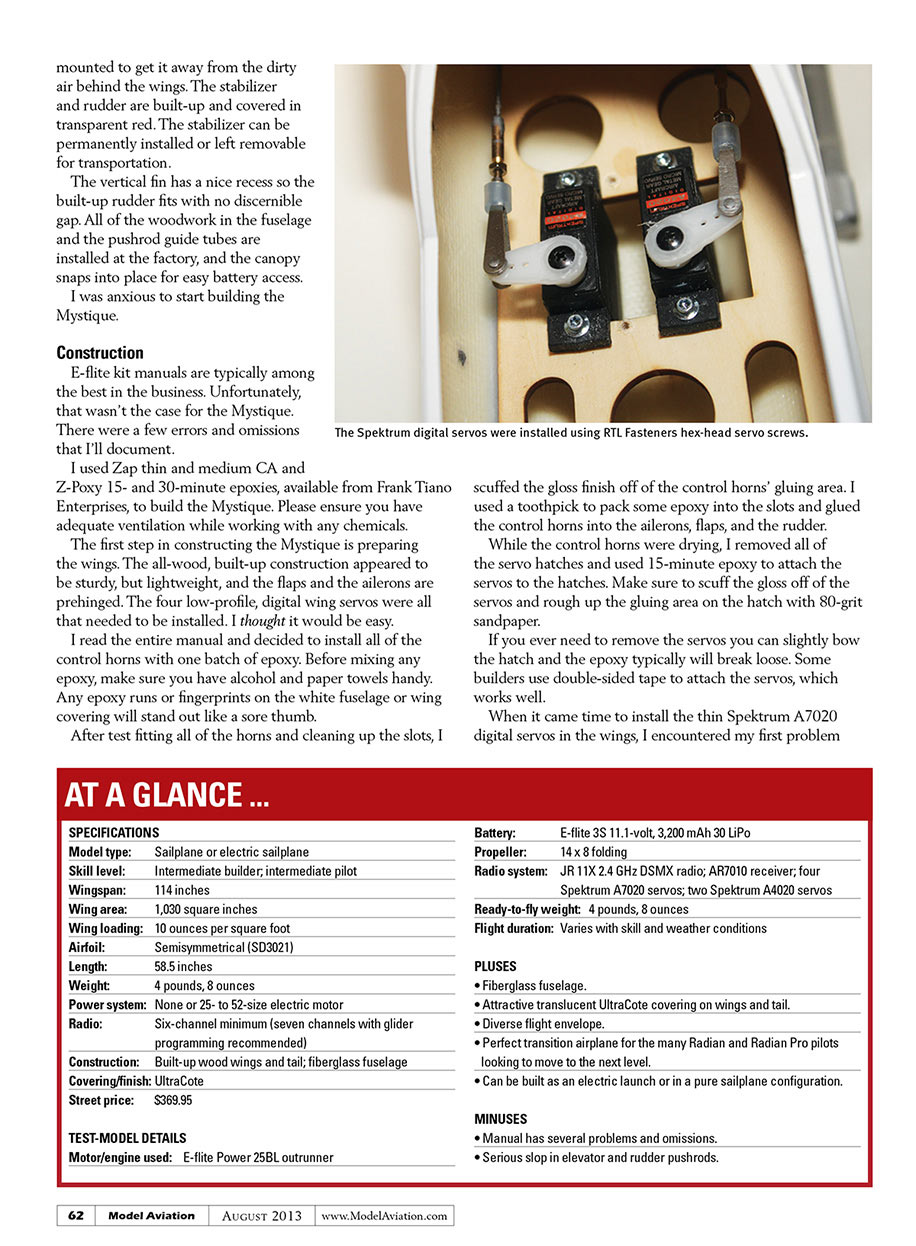
After test fitting all of the horns and cleaning up the slots, I scuffed the gloss finish off of the control horns' gluing area. I used a toothpick to pack some epoxy into the slots and glued the control horns into the ailerons, flaps, and the rudder.
While the control horns were drying, I removed all of the servo hatches and used 15-minute epoxy to attach the servos to the hatches. Make sure to scuff the gloss off of the servos and rough up the gluing area on the hatch with 80-grit sandpaper.
If you ever need to remove the servos you can slightly bow the hatch and the epoxy typically will break loose. Some builders use double-sided tape to attach the servos, which works well.
When it came time to install the thin Spektrum A7020 digital servos in the wings, I encountered my first problem — there wasn't enough clearance between the servo and the aileron horn to allow the supplied 18-inch servo lead to pass through the wing's servo exit slot. The remedy was to shorten the servo lead by about 2 inches and solder on a new connector. Test the aileron throws and make sure you have about 5 to 8 mm of travel each way with the control horn centered.
I could see the reason for mechanical aileron differential, but because the pushrod came in at an angle—combined with the fact that many glider-capable radios have a built-in mix for aileron differential—I decided to install the servos with the servo arm at 90°. This was a good decision and I’ll explain why.
There are pull strings installed in the wings to route the 24-inch aileron extensions through. Even with the strings, the thin airfoil makes this an exercise in patience. The procedure for installing the aileron pushrods in the manual didn’t work. I had to bend them in an elongated Z-pattern to get them installed and working without binding. It took me more than 2½ hours to get the ailerons properly working.
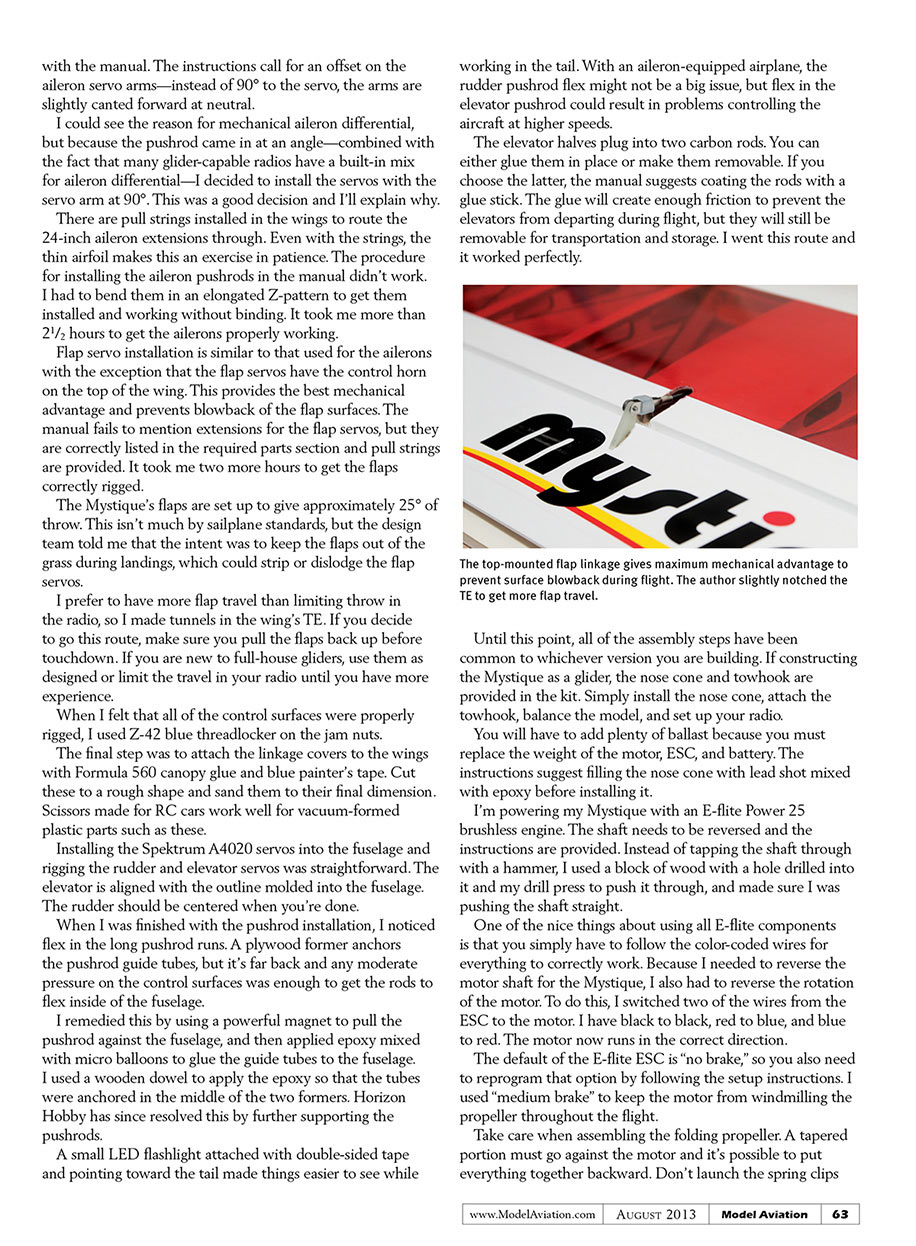
Flap servo installation is similar to that used for the ailerons with the exception that the flap servos have the control horn on the top of the wing. This provides the best mechanical advantage and prevents blowback of the flap surfaces. The manual fails to mention extensions for the flap servos, but they are correctly listed in the required parts section and pull strings are provided. It took me two more hours to get the flaps correctly rigged.
The Mystique’s flaps are set up to give approximately 25° of throw. This isn’t much by sailplane standards, but the design team told me that the intent was to keep the flaps out of the grass during landings, which could strip or dislodge the flap servos.
I prefer to have more flap travel than limiting throw in the radio, so I made tunnels in the wing’s TE. If you decide to go this route, make sure you pull the flaps back up before touchdown. If you are new to full-house gliders, use them as designed or limit the travel in your radio until you have more experience.
When I felt that all of the control surfaces were properly rigged, I used Z-42 blue threadlocker on the jam nuts.
The final step was to attach the linkage covers to the wings with Formula 560 canopy glue and blue painter’s tape. Cut these to a rough shape and sand them to their final dimension. Scissors made for RC cars work well for vacuum-formed plastic parts such as these.
Installing the Spektrum A4020 servos into the fuselage and rigging the rudder and elevator servos was straightforward. The elevator is aligned with the outline molded into the fuselage. The rudder should be centered when you’re done.
When I was finished with the pushrod installation, I noticed flex in the long pushrod runs. A plywood former anchors the pushrod guide tubes, but it’s far back and any moderate pressure on the control surfaces was enough to get the rods to flex inside of the fuselage.
I remedied this by using a powerful magnet to pull the pushrod against the fuselage, and then applied epoxy mixed with micro balloons to glue the guide tubes to the fuselage. I used a wooden dowel to apply the epoxy so that the tubes were anchored in the middle of the two formers. Horizon Hobby has since resolved this by further supporting the pushrods.
A small LED flashlight attached with double-sided tape and pointing toward the tail made things easier to see while working in the tail. With an aileron-equipped airplane, the rudder pushrod flex might not be a big issue, but flex in the elevator pushrod could result in problems controlling the aircraft at higher speeds.
The elevator halves plug into two carbon rods. You can either glue them in place or make them removable. If you choose the latter, the manual suggests coating the rods with a glue stick. The glue will create enough friction to prevent the elevators from departing during flight, but they will still be removable for transportation and storage. I went this route and it worked perfectly.
Until this point, all of the assembly steps have been common to whichever version you are building. If constructing the Mystique as a glider, the nose cone and towhook are provided in the kit. Simply install the nose cone, attach the towhook, balance the model, and set up your radio.
You will have to add plenty of ballast because you must replace the weight of the motor, ESC, and battery. The instructions suggest filling the nose cone with lead shot mixed with epoxy before installing it.
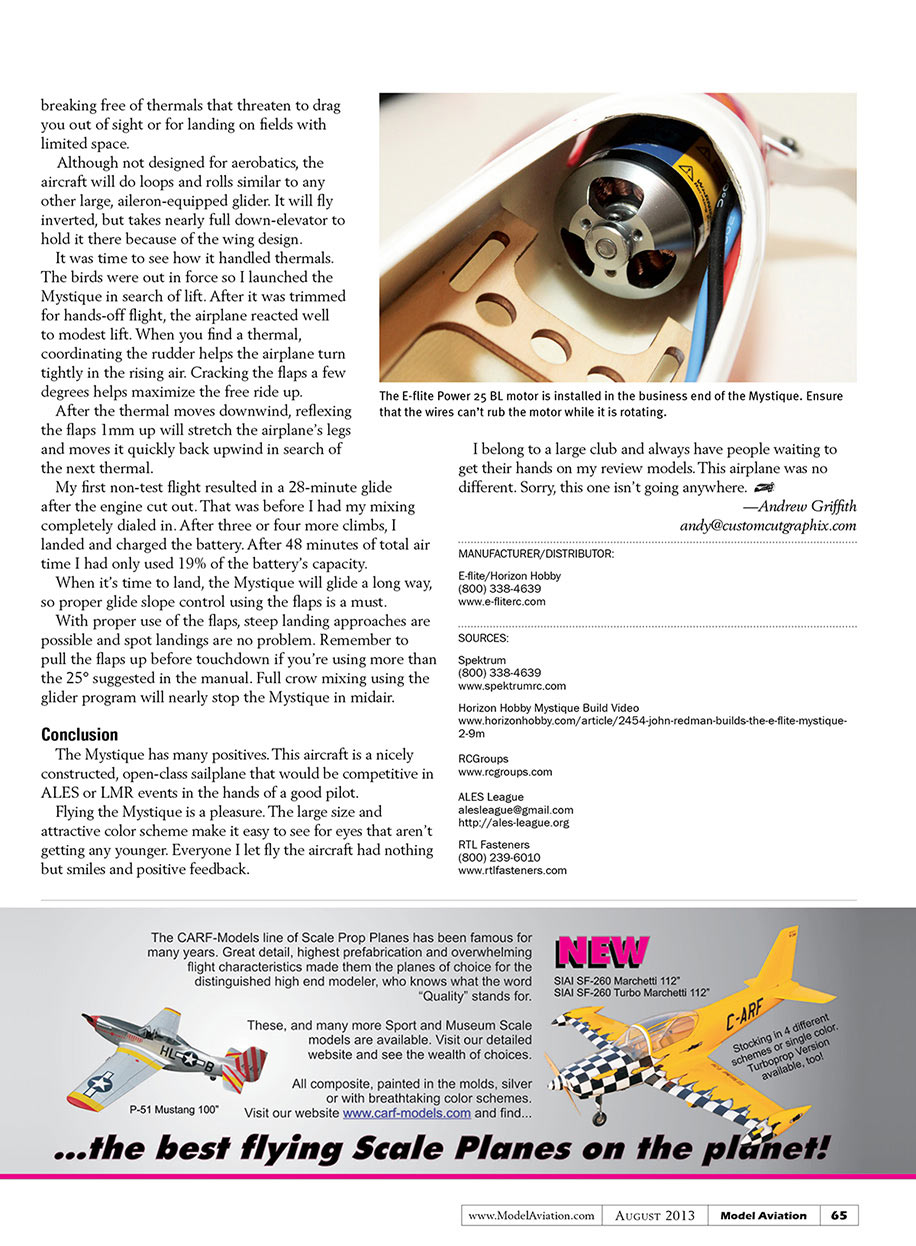
I’m powering my Mystique with an E-flite Power 25 brushless engine. The shaft needs to be reversed and the instructions are provided. Instead of tapping the shaft through with a hammer, I used a block of wood with a hole drilled into it and my drill press to push it through, and made sure I was pushing the shaft straight.
One of the nice things about using all E-flite components is that you simply have to follow the color-coded wires for everything to correctly work. Because I needed to reverse the motor shaft for the Mystique, I also had to reverse the rotation of the motor. To do this, I switched two of the wires from the ESC to the motor. I have black to black, red to blue, and blue to red. The motor now runs in the correct direction.
The default of the E-flite ESC is “no brake,” so you also need to reprogram that option by following the setup instructions. I used “medium brake” to keep the motor from windmilling the propeller throughout the flight.
Take care when assembling the folding propeller. A tapered portion must go against the motor and it’s possible to put everything together backward. Don’t launch the spring clips across the room when snapping them into place. Trust me; they are hard to find!
When using the recommended components, the proper CG was obtained by sliding the battery around. The suggested CG range in the manual is 118-120mm from the wing’s LE, which looks like a lot, but the Horizon Hobby team pilots swear by 120mm, so that is where I started.
I set up two programs on my JR 11X 2.4 GHz DSMX radio.
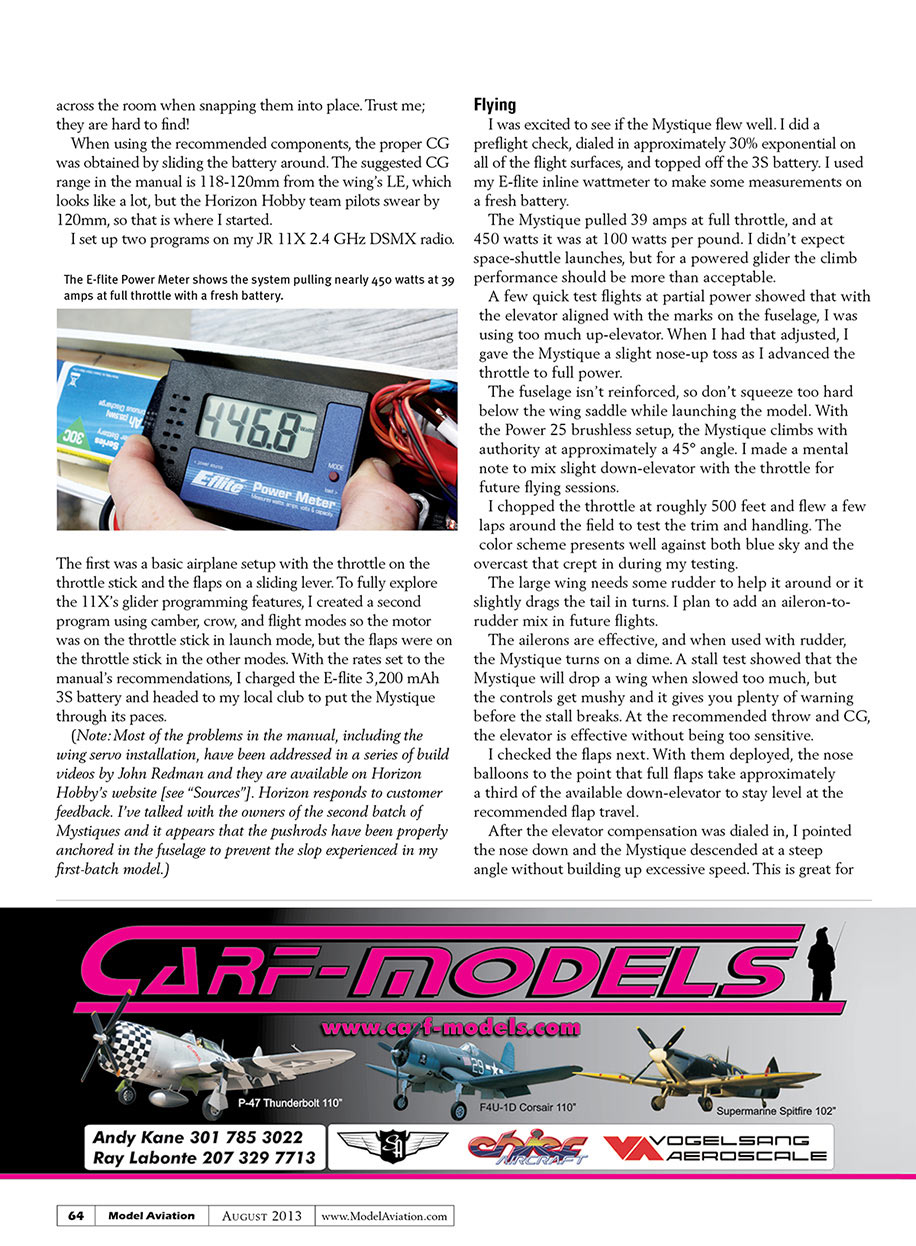
The E-flite Power Meter shows the system pulling nearly 450 watts at 39 amps at full throttle with a fresh battery.
The first was a basic airplane setup with the throttle on the throttle stick and the flaps on a sliding lever. To fully explore the 11X’s glider programming features, I created a second program using camber, crow, and flight modes so the motor was on the throttle stick in launch mode, but the flaps were on the throttle stick in the other modes. With the rates set to the manual’s recommendations, I charged the E-flite 3,200 mAh 3S battery and headed to my local club to put the Mystique through its paces.
(Note: Most of the problems in the manual, including the wing servo installation, have been addressed in a series of build videos by John Redman and they are available on Horizon Hobby’s website [see “Sources”]. Horizon responds to customer feedback. I’ve talked with the owners of the second batch of Mystiques and it appears that the pushrods have been properly anchored in the fuselage to prevent the slop experienced in my first-batch model.)
Flying
I was excited to see if the Mystique flew well. I did a preflight check, dialed in approximately 30% exponential on all of the flight surfaces, and topped off the 3S battery. I used my E-flite inline wattmeter to make some measurements on a fresh battery.
The Mystique pulled 39 amps at full throttle, and at 450 watts it was at 100 watts per pound. I didn’t expect space-shuttle launches, but for a powered glider the climb performance should be more than acceptable.
A few quick test flights at partial power showed that with the elevator aligned with the marks on the fuselage, I was using too much up-elevator. When I had that adjusted, I gave the Mystique a slight nose-up toss as I advanced the throttle to full power.
The fuselage isn’t reinforced, so don’t squeeze too hard below the wing saddle while launching the model. With the Power 25 brushless setup, the Mystique climbs with authority at approximately a 45° angle. I made a mental note to mix slight down-elevator with the throttle for future flying sessions.
I chopped the throttle at roughly 500 feet and flew a few laps around the field to test the trim and handling. The color scheme presents well against both blue sky and the overcast that crept in during my testing.
The large wing needs some rudder to help it around or it slightly drags the tail in turns. I plan to add an aileron-to-rudder mix in future flights.
The ailerons are effective, and when used with rudder, the Mystique turns on a dime. A stall test showed that the Mystique will drop a wing when slowed too much, but the controls get mushy and it gives you plenty of warning before the stall breaks. At the recommended throw and CG, the elevator is effective without being too sensitive.
I checked the flaps next. With them deployed, the nose balloons to the point that full flaps take approximately a third of the available down-elevator to stay level at the recommended flap travel.
After the elevator compensation was dialed in, I pointed the nose down and the Mystique descended at a steep angle without building up excessive speed. This is great for breaking free of thermals that threaten to drag you out of sight or for landing on fields with limited space.
Although not designed for aerobatics, the aircraft will do loops and rolls similar to any other large, aileron-equipped glider. It will fly inverted, but takes nearly full down-elevator to hold it there because of the wing design.
It was time to see how it handled thermals. The birds were out in force so I launched the Mystique in search of lift. After it was trimmed for hands-off flight, the airplane reacted well to modest lift. When you find a thermal, coordinating the rudder helps the airplane turn tightly in the rising air. Cracking the flaps a few degrees helps maximize the free ride up.
After the thermal moves downwind, reflexing the flaps 1mm up will stretch the airplane’s legs and moves it quickly back upwind in search of the next thermal.
My first non-test flight resulted in a 28-minute glide after the engine cut out. That was before I had my mixing completely dialed in. After three or four more climbs, I landed and charged the battery. After 48 minutes of total air time I had only used 19% of the battery’s capacity.
When it’s time to land, the Mystique will glide a long way, so proper glide slope control using the flaps is a must.
With proper use of the flaps, steep landing approaches are possible and spot landings are no problem. Remember to pull the flaps up before touchdown if you’re using more than the 25° suggested in the manual. Full crow mixing using the glider program will nearly stop the Mystique in midair.
Conclusion
The Mystique has many positives. This aircraft is a nicely constructed, open-class sailplane that would be competitive in ALES or LMR events in the hands of a good pilot.
Flying the Mystique is a pleasure. The large size and attractive color scheme make it easy to see for eyes that aren’t getting any younger. Everyone I let fly the aircraft had nothing but smiles and positive feedback.
I belong to a large club and always have people waiting to get their hands on my review models. This airplane was no different. Sorry, this one isn’t going anywhere.
—Andrew Griffith [email protected]
MANUFACTURER/DISTRIBUTOR: E-flite/Horizon Hobby (800) 338-4639 www.e-fliterc.com
SOURCES: Spektrum (800) 338-4639 www.spektrumrc.com
Horizon Hobby Mystique Build Video www.horizonhobby.com/article/2454-john-redman-builds-the-e-flite-mystiqu...
RCGroups www.rcgroups.com
ALES League [email protected] http://ales-league.org
RTL Fasteners (800) 239-6010 www.rtlfasteners.com
Transcribed from original scans by AI. Minor OCR errors may remain.

