

HORIZON HOBBY PARKZONE SPORT CUB BNF WITH AS3X
Andrew Griffith [email protected]
A go-to model for today’s sport pilot
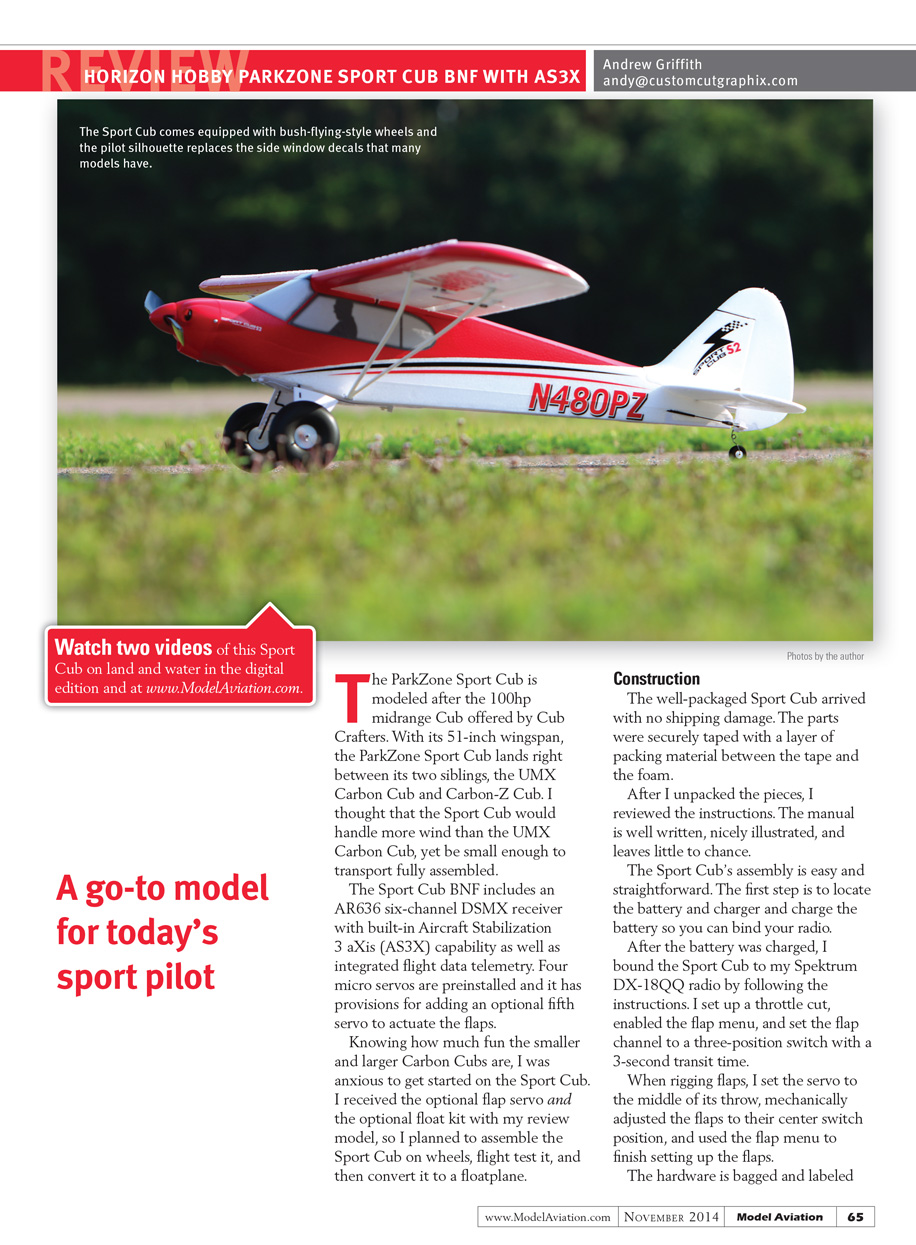
The ParkZone Sport Cub is modeled after the 100 hp midrange Cub offered by Cub Crafters. With its 51-inch wingspan, the ParkZone Sport Cub lands right between its two siblings, the UMX Carbon Cub and Carbon-Z Cub. I thought the Sport Cub would handle more wind than the UMX Carbon Cub, yet be small enough to transport fully assembled.
The Sport Cub BNF includes an AR636 six-channel DSMX receiver with built-in Aircraft Stabilization 3-aXis (AS3X) capability as well as integrated flight data telemetry. Four micro servos are preinstalled and it has provisions for adding an optional fifth servo to actuate the flaps.
Knowing how much fun the smaller and larger Carbon Cubs are, I was anxious to get started on the Sport Cub. I received the optional flap servo and the optional float kit with my review model, so I planned to assemble the Sport Cub on wheels, flight test it, and then convert it to a floatplane.
Construction
The well-packaged Sport Cub arrived with no shipping damage. The parts were securely taped with a layer of packing material between the tape and the foam.
After I unpacked the pieces, I reviewed the instructions. The manual is well written, nicely illustrated, and leaves little to chance.
The Sport Cub’s assembly is easy and straightforward. The first step is to locate the battery and charger and charge the battery so you can bind your radio.
After the battery was charged, I bound the Sport Cub to my Spektrum DX-18 by following the instructions. I set up a throttle cut, enabled the flap menu, and set the flap channel to a three-position switch with a 3-second transit time.
When rigging flaps, I set the servo to the middle of its throw, mechanically adjusted the flaps to their center switch position, and used the flap menu to finish setting up the flaps.
The hardware is bagged and labeled for each step. ParkZone must know my penchant for losing screws because there is an extra of each different screw included in the hardware bags. The floats that fit the Sport Cub were made for the HobbyZone Super Cub and the installation is slightly different, but ParkZone included the float struts and mounting brackets instead of making you purchase a mounting kit as well as the floats. Although the parts are included, there’s no mention in the manual of what the extra struts, screws, and strut brackets are used for, and that is slightly confusing.
The gear installs in only a few moments. The brackets that secure the float strut to the rear hard point have a groove for the wire. The brackets that secure the landing gear, or front float struts, have no groove and are stamped L and R for their respective orientation. The wheels are oversize bush tires and look great on the Sport Cub. I initially thought that they might be too hard, but even landing on a paved runway was no problem.
The top plate attaches with four machine screws that hold the wings in place and cover the seam where the main wings meet. This is an aesthetically pleasing installation.
Assembling the tail is as easy as fitting it into place, installing two bolts, and hooking up a clevis on each side. The clevises include rubber keepers and the hardware bag includes several extras.
The wings have vortex generators that are installed with included double-sided tape that is precut to shape. The narrow portion of the V shape goes toward the leading edge. An odd number of vanes on each strip will leave you with an odd vane on each side; there’s no way to prevent this no matter how you rearrange the strips. The function of the vortex generators is to disrupt the boundary layer of air over the wing, lowering the speed at which the wing stalls.
I installed the flap servo with Foam-Tac contact cement. You can also use double-sided tape or epoxy. Using a hobby knife with a new blade, I carefully freed the flap surfaces. A wedge of foam was removed between the flap and the wing. I cut a strip roughly 1 mm wide between the flap and the wing root.
With the flap switch in the fully retracted position, I adjusted the clevises on the flap servo to ensure the flaps were even with the wing’s trailing edge. Cycle the flaps to make sure they evenly deploy.
I slid the wings together over the supplied wing tube and connected the three servo leads. There’s a nice fairing that covers the seam on the wings. When installed with four machine screws, it holds the wings together and down to the fuselage. Install three screws on each strut and the wings are done.
I programmed my radio as the manual specified and followed the steps to make sure the gyro in the AS3X system was correcting in the proper direction. The last step was to put the Sport Cub on my balancer and set the CG.
The Sport Cub has a large battery compartment that is easily accessed via a hinged hatch that is held in place with a simple catch. Holes along the fuselage centerline allow air flow to cool the components even in my hot Florida weather.
With the supplied 1,300 mAh battery installed, I set the CG at the middle of the recommended range and used a marker to make a tick mark for the forward edge of the battery inside the battery compartment. There’s plenty of room to slide a battery around, and access is excellent.
Aside from waiting for the contact cement to set on the flap servo, the Sport Cub can be fully assembled in roughly 30 minutes.
Float Installation
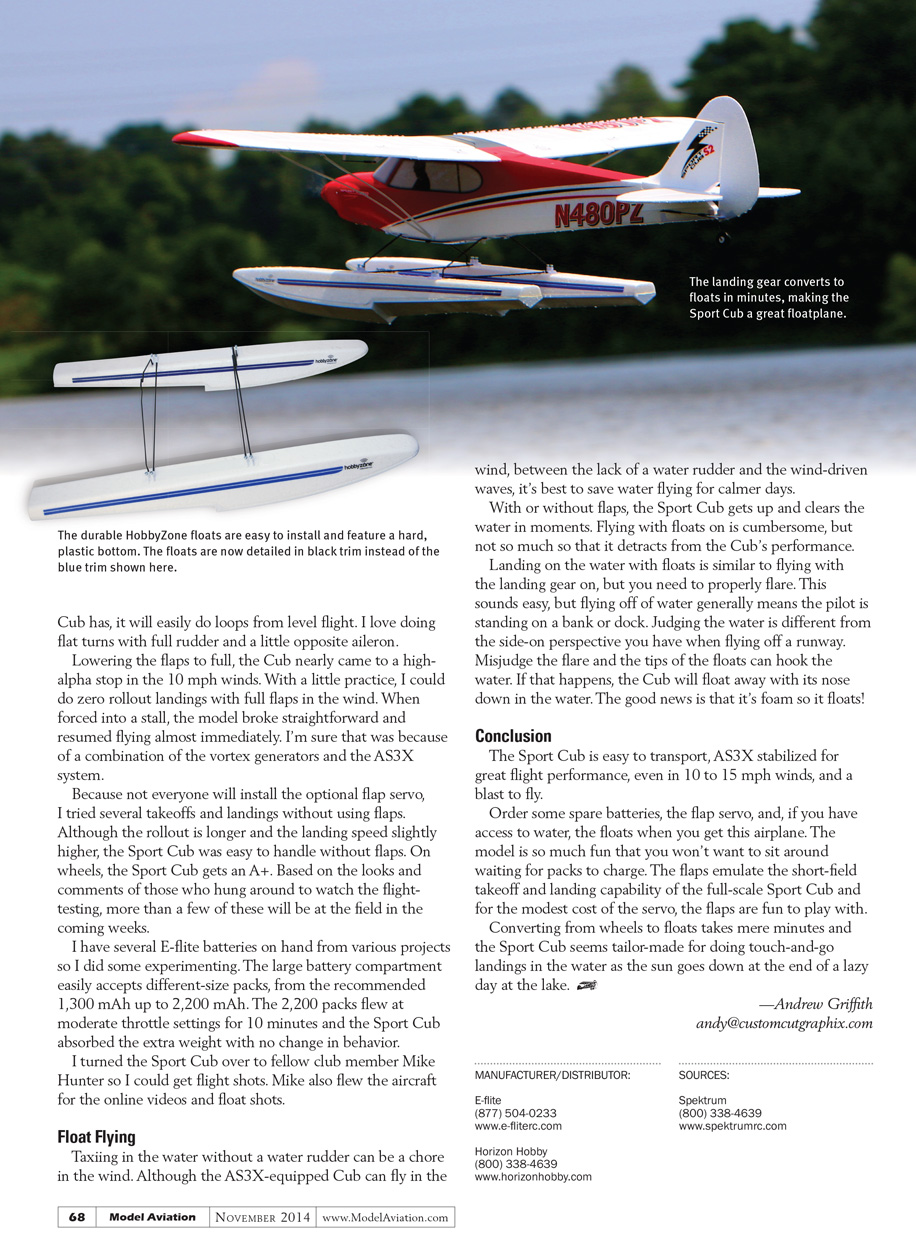
The lightweight optional floats are made from foam and covered on the bottom with hard plastic. There are no provisions for a water rudder, but airplanes of this size generally don’t require one.
Float installation is simple. The float kit comes with crossbraces, struts, and a hardware kit. I used the struts from the Cub kit and the crossbraces from the float set. The rear strut hard point and strut braces in the float kit can be discarded.
Note that the struts and crossbraces all have flat spots ground at each end where the screw seats to lock them in place. The machine-thread screws that come with the float hardware secure the wires onto the floats.
With the struts inserted in one float, I installed four screws so that the crossbraces were tight. The float struts should have a little play, but the screw was tight enough to capture the flat spot. I slid the struts and braces into the other float and installed the remaining screws, tightening the crossbraces and capturing the float struts.
I removed the four screws holding the landing gear brackets, removed the gear, and set it aside. The front float strut is installed where the landing gear wire was and I reinstalled the front strut brackets.
I used the straps that came with the Cub and the self-tapping screws that came with the floats to complete the rear float strut installation at the hard point provided on the Sport Cub. I tightened the screws on the floats, made sure everything was square, and I was ready to get my feet wet!
Flying
The first day out with the Sport Cub was with the landing gear and bush wheels installed. The Sport Cub is big enough to be a larger park flyer, but it transports easily when it is fully assembled. I drive an SUV and the Cub sits in the back with plenty of room to spare.
Nature seemed to know that I had an AS3X-equipped airplane because the wind was blowing at 10-plus mph when I got to the field and it increased as the day went on. The foamies and several of the built-up airplanes that were out early were already packed when I pulled out the Sport Cub. If not for my experience with AS3X, I wouldn’t have thought conditions were conducive for test-flying a new foam model.
With a fresh battery, I headed out for a test flight. The manual indicated 4 to 7 minutes of flight time, so I set the timer to 4 minutes. Despite the breeze, the Sport Cub taxied easily on the paved runway. With the large bush tires, it had no issue taxiing in the mowed grass.
With the Cub facing the wind, I slowly applied power and it came off the ground within a few feet. The model acted as though it needed up-elevator trim, so I brought it around, landed, and adjusted the clevis two turns on the elevator.
With AS3X, it’s best to keep the transmitter trims at neutral to avoid interfering with the gyro operation.
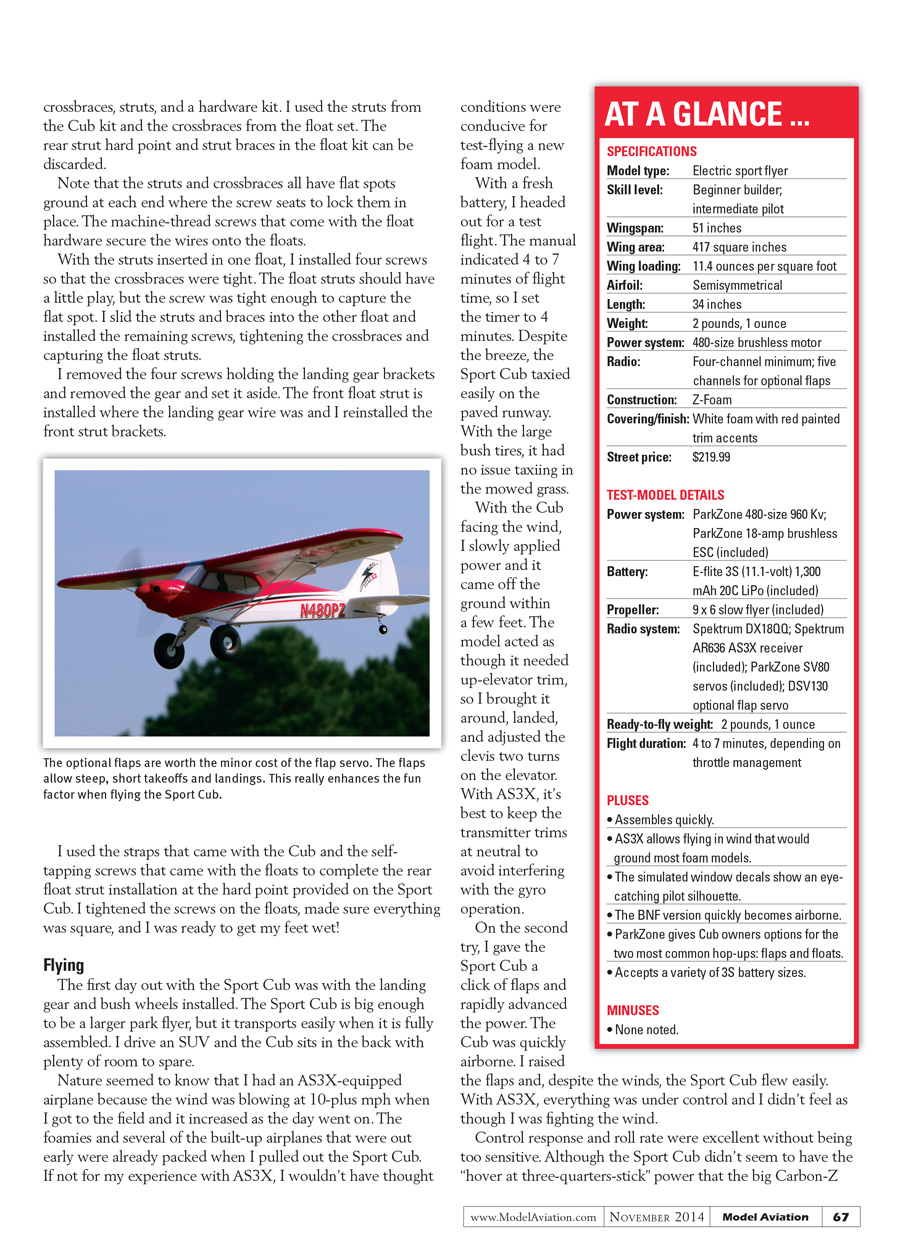
On the second try, I gave the Sport Cub a click of flaps and rapidly advanced the power. The Cub was quickly airborne. I raised the flaps and, despite the winds, the Sport Cub flew easily. With AS3X, everything was under control and I didn’t feel as though I was fighting the wind.
Control response and roll rate were excellent without being too sensitive. Although the Sport Cub didn’t seem to have the “hover at three-quarters-stick” power that the big Carbon-Z Cub has, it will easily do loops from level flight. I love doing flat turns with full rudder and a little opposite aileron.
Lowering the flaps to full, the Cub nearly came to a high-alpha stop in the 10 mph winds. With a little practice, I could do zero-rollout landings with full flaps in the wind. When forced into a stall, the model broke straightforward and resumed flying almost immediately. I’m sure that was because of a combination of the vortex generators and the AS3X system.
Because not everyone will install the optional flap servo, I tried several takeoffs and landings without using flaps. Although the rollout is longer and the landing speed slightly higher, the Sport Cub was easy to handle without flaps. On wheels, the Sport Cub gets an A+. Based on the looks and comments of those who hung around to watch the flight-testing, more than a few of these will be at the field in the coming weeks.
I have several E-flite batteries on hand from various projects so I did some experimenting. The large battery compartment easily accepts different-size packs, from the recommended 1,300 mAh up to 2,200 mAh. The 2,200 mAh packs flew at moderate throttle settings for 10 minutes and the Sport Cub absorbed the extra weight with no change in behavior.
I turned the Sport Cub over to fellow club member Mike Hunter so I could get flight shots. Mike also flew the aircraft for the online videos and float shots.
Float Flying
Taxiing in the water without a water rudder can be a chore in the wind. Although the AS3X-equipped Cub can fly in the wind, between the lack of a water rudder and the wind-driven waves, it’s best to save water flying for calmer days.
With or without flaps, the Sport Cub gets up and clears the water in moments. Flying with floats on is cumbersome, but not so much so that it detracts from the Cub’s performance.
Landing on the water with floats is similar to flying with the landing gear on, but you need to properly flare. This sounds easy, but flying off of water generally means the pilot is standing on a bank or dock. Judging the water is different from the side-on perspective you have when flying off a runway. Misjudge the flare and the tips of the floats can hook the water. If that happens, the Cub will float away with its nose down in the water. The good news is that it’s foam, so it floats!
Conclusion
The Sport Cub is easy to transport, AS3X stabilized for great flight performance even in 10 to 15 mph winds, and a blast to fly.
Order some spare batteries, the flap servo, and, if you have access to water, the floats when you get this airplane. The model is so much fun that you won’t want to sit around waiting for packs to charge. The flaps emulate the short-field takeoff and landing capability of the full-scale Sport Cub and, for the modest cost of the servo, the flaps are fun to play with.
Converting from wheels to floats takes mere minutes and the Sport Cub seems tailor-made for doing touch-and-go landings in the water as the sun goes down at the end of a lazy day at the lake.
—Andrew Griffith [email protected]
MANUFACTURER / DISTRIBUTOR
- E-flite
- Phone: (877) 504-0233
- Website: www.e-flite.com
- Horizon Hobby
- Phone: (800) 338-4639
- Website: www.horizonhobby.com
SOURCES
- Spektrum
- Phone: (800) 338-4639
- Website: www.spektrumrc.com
Transcribed from original scans by AI. Minor OCR errors may remain.

