


Simple Helicopter Maintenance
Tips and Tools
by Andy Panoncillo
The helicopter has become one of the most popular RC interests on the market because of the emergence of numerous affordable and easy-to-build kits. Many kits are designed to be set up in a way that allows beginners to learn and progress with them as advanced flying skills are acquired. These pilots can fly the same helicopter from training gear to 3-D, if they choose, by making minor mechanical adjustments or installing a few upgrades. All the while, they can fly a machine that is safe and reliable—as long as they follow the assembly and maintenance tips below.
Regardless of whether it is a helicopter, airplane, glider, etc., aircraft need attention before you take them out to the field—especially if you’re going to a fun-fly, where many people will be watching you or flying beside you. Good maintenance also protects the investment; some machines out there cost their owners significant amounts of cash.
The modern RC helicopter is much easier to build, set up, and maintain than older versions. This is because they have fewer parts, they self-align during assembly, and they have factory-balanced components, which makes the spinning parts operate more smoothly and causes less overall stress on the airframe.
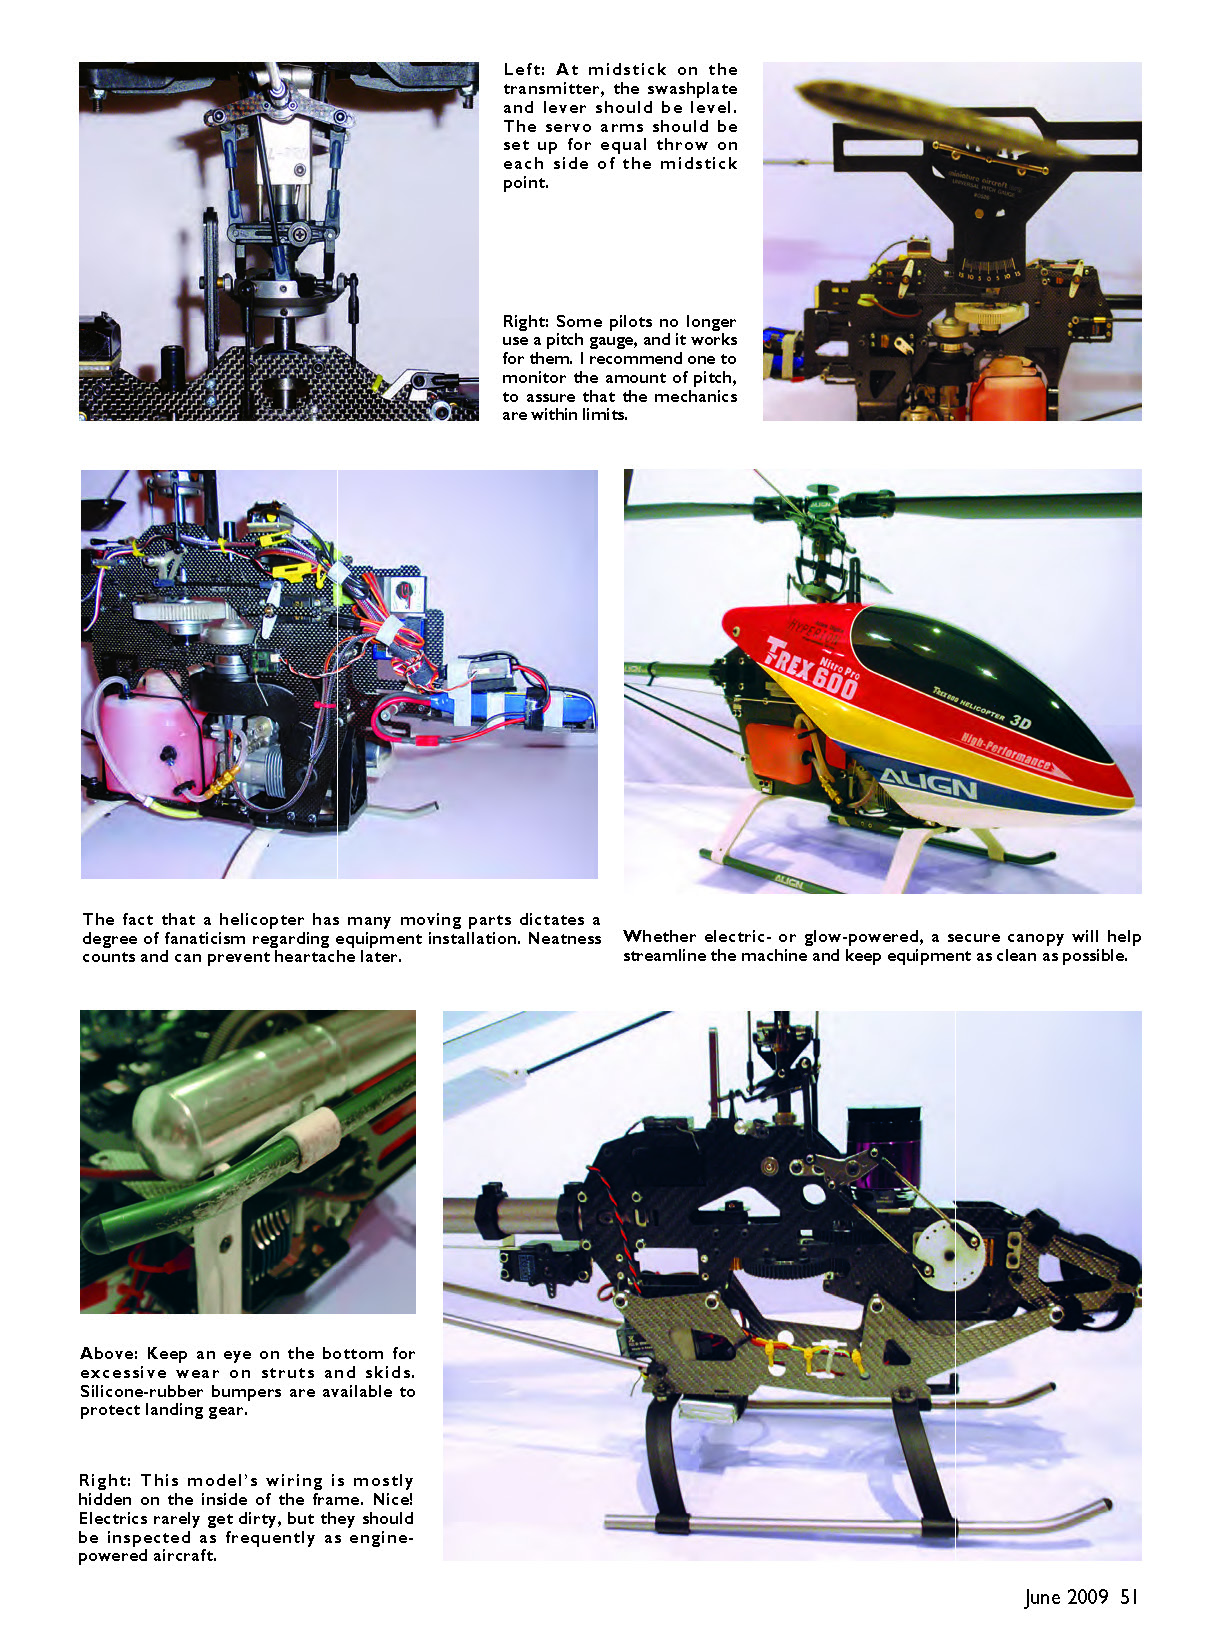
Because a helicopter has many moving parts, neatness and careful equipment installation are important and can prevent heartache later. Whether electric- or glow-powered, a secure canopy will help streamline the machine and keep equipment as clean as possible. Electrics rarely get dirty, but they should be inspected as frequently as engine-powered aircraft.
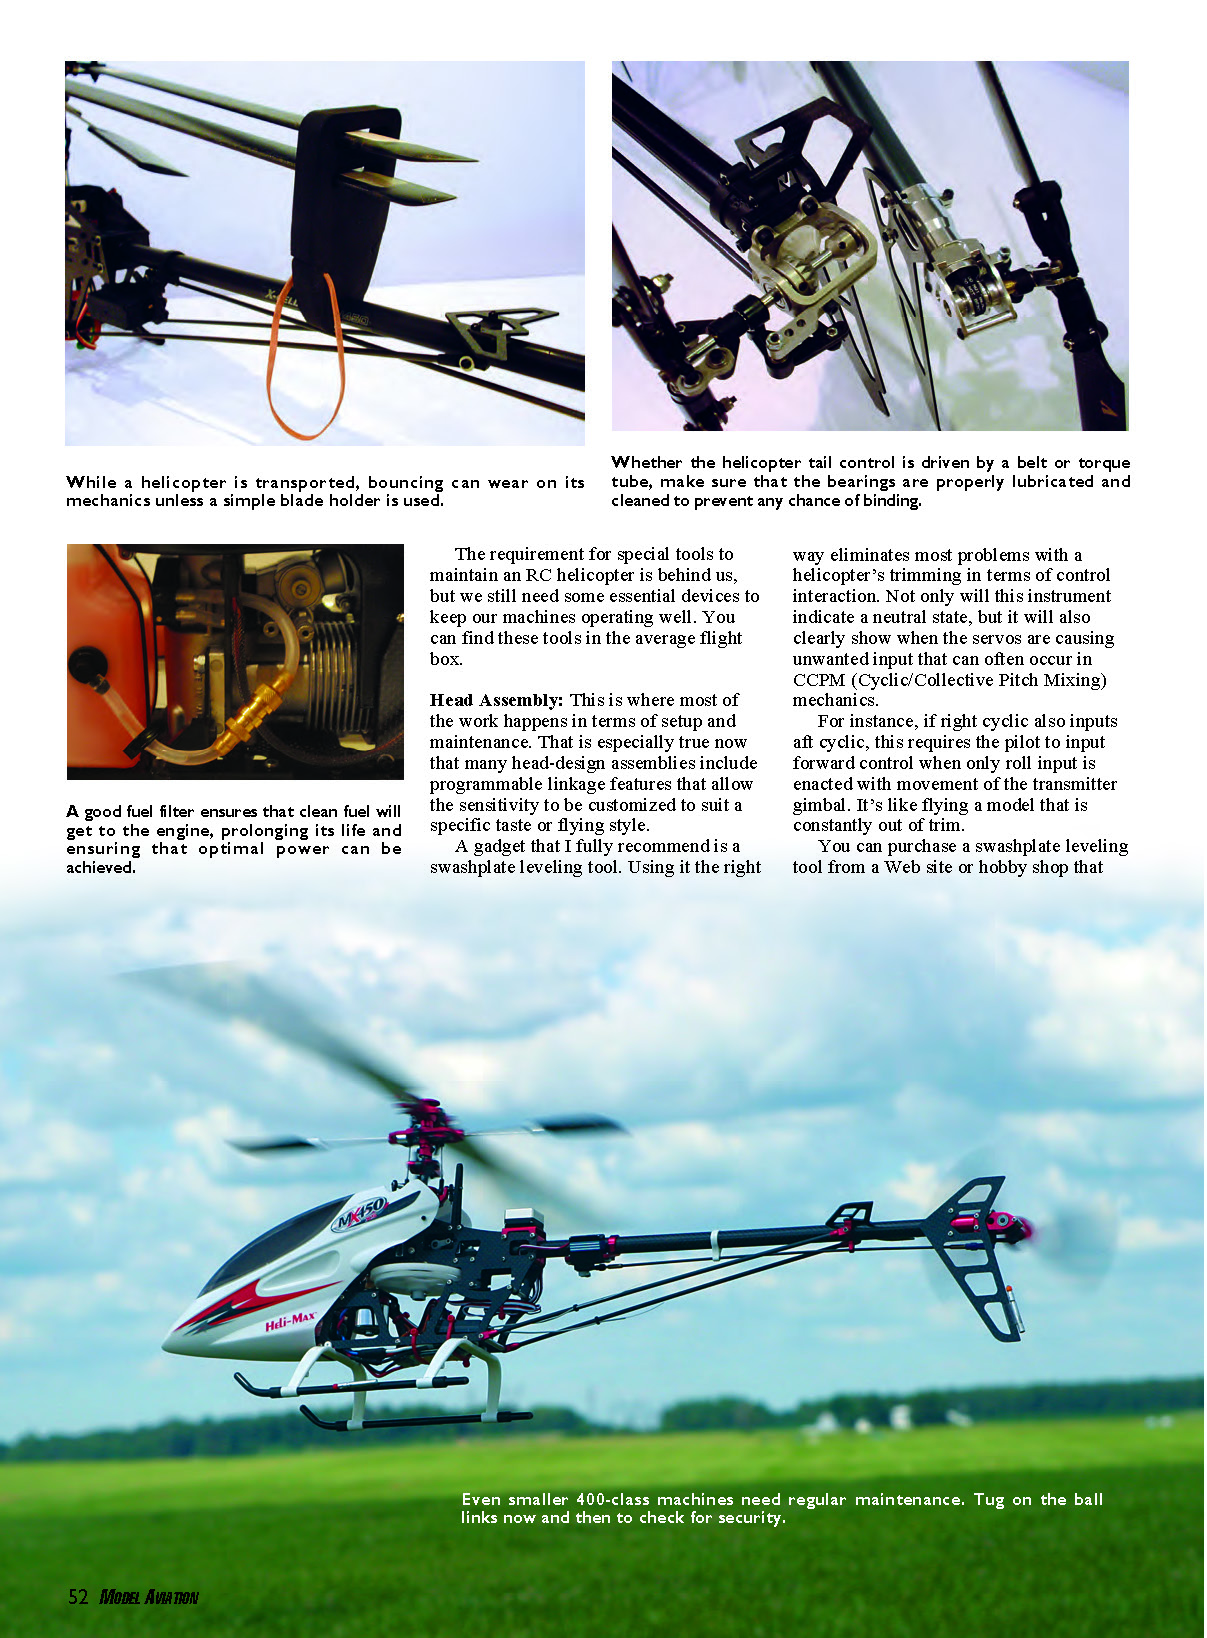
Even smaller 400-class machines need regular maintenance. Tug on the ball links now and then to check for security. While a helicopter is transported, bouncing can wear on its mechanics unless a simple blade holder is used. Whether the helicopter tail control is driven by a belt or torque tube, make sure that the bearings are properly lubricated and cleaned to prevent any chance of failure.
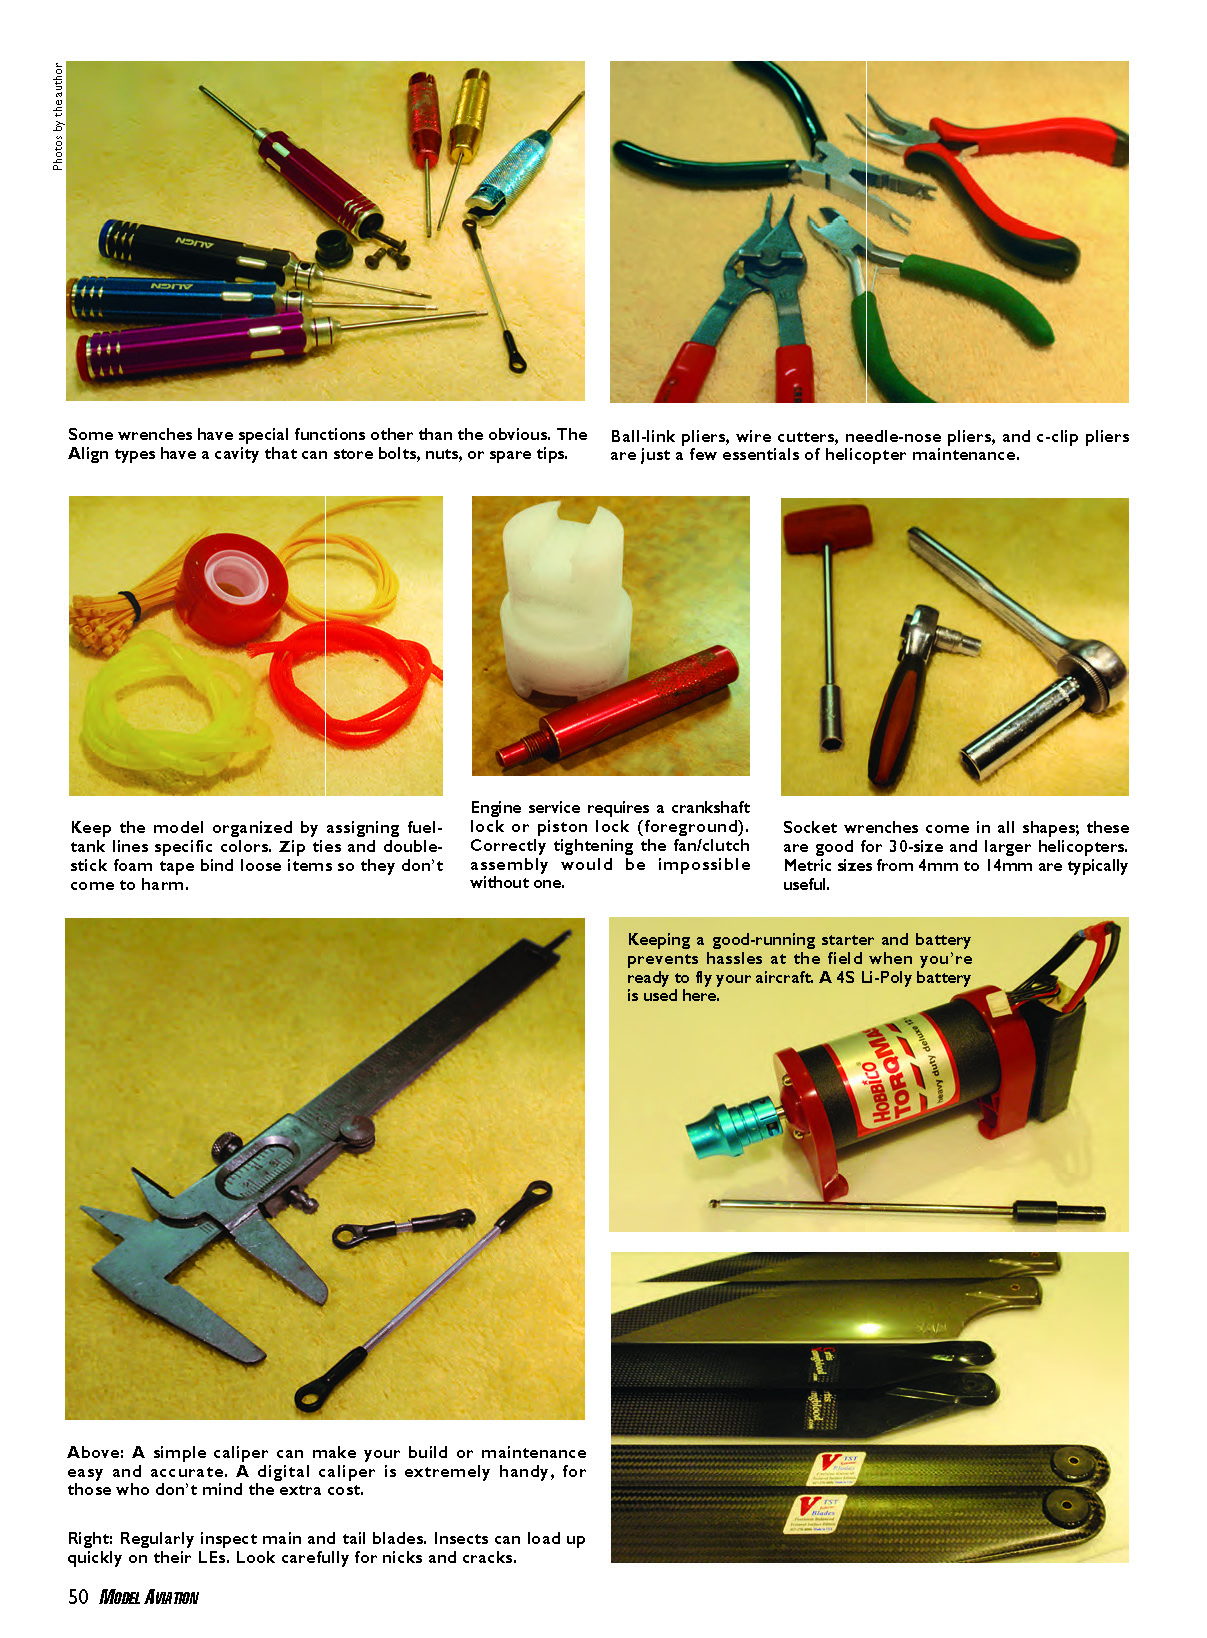
The requirement for special tools to maintain an RC helicopter is largely behind us, but we still need some essential devices to keep our machines operating well. You can find these tools in the average flight box.
- Swashplate leveling tool (for detecting servo interaction and trim issues)
- Ball-link sizing tool
- Pitch gauge
- Mechanical or digital caliper
- Blade holder
- Thread-locking compound
- Epoxy (for mounting lugs/supports)
- Spare ball links and glow plugs
Head Assembly
This is where most of the work happens in terms of setup and maintenance. Many head designs include programmable linkage features that allow sensitivity to be customized to suit a specific flying style.
I fully recommend a swashplate leveling tool. Used correctly, it eliminates most trimming problems related to control interaction. The instrument indicates a neutral state and shows when the servos are causing unwanted input that can occur in CCPM (Cyclic/Collective Pitch Mixing) mechanics. For instance, if right cyclic also inputs aft cyclic, the pilot must input forward control when only roll control is intended—like flying a model that is constantly out of trim.
You can purchase a swashplate leveling tool from a hobby shop or online. The device can be used for the majority of helicopter sizes, from 30 to 90; if you have a 450-size model, use the smallest swashplate leveler. Use the leveling tool on the bench to identify interactions. Adjustments can be made mechanically or with radio mixes. Most interactions can be detected while testing the collective pitch control; watch the bubbles as the swashplate moves up and down. Off-center indications will identify early which servo or linkage needs tweaking. It’s well worth the effort—your machine will fly much closer to perfect on its first hop.
Ball Links
Ball links are the primary connection between the model's mechanics. They should fit securely but move freely. A tight link offers security, but its binding can prevent mechanics from recentering or operating at full potential. A machine with tight links will eventually break in, but it might be difficult to operate until then.
A ball-link sizing tool will condition linkages that are too tight on their ball ends. Use this instrument sparingly; an oversized linkage won't stay attached and will be less precise and more dangerous to operate. Links are inexpensive—buy a pack and have replacements handy in case a preflight reveals a faulty area.
Pitch Gauge
Some pilots avoid using a pitch gauge, either because they are not picky or because they prefer to flight-test and correct issues later. I don't recommend that approach. Regardless of skill level, a pitch gauge offers valuable information to monitor blade pitch. It tells you if design limits are being exceeded and whether the engine can handle the amount of pitch being delivered.
If your helicopter's head mechanics are adjustable, changes to the linkage geometry can be gauged with a pitch gauge. Keep a log of the readings; in the event of a mishap, you can return the helicopter to those settings after a rebuild.
Caliper
A mechanical or digital caliper is invaluable for building, maintenance, and repair. Use it to ensure equal measurements on multiple links and to verify other points on the helicopter that need to be equal on each side. Calipers are ideal for checking dimensions called out in the manual and for removing guesswork.
For example, with the flybar, the rod needs to be centered within the assembly. A caliper makes it easy to compare both sides without straining to see fine ruler lines.
Frame
Most kits self-align during frame assembly. That’s helpful whether you’re experienced and working quickly to get a machine back in the air or new to the hobby. Assemble the frame with the main shaft temporarily installed inside the main bearings. While tightening the bearing-block screws, periodically check that the shaft freely slips up and down. A tight fit indicates misalignment or unevenly tightened mounting screws—both are easy to fix.
Servo location and proper servo-horn alignment are essential. Neutralize both transmitter sticks (throttle at the halfway point) and set servo arms accordingly. Follow the instructions and set the servo arms so they align with the frame/case as directed. Servo-arm length is critical—variations will cause unwanted control mixing.
Most servo arms are positioned 90° relative to the servo case. This setup—often called "The Rule of 90"—helps deliver equal throw on either side and ensures the mechanics can operate correctly.
Engines
Engine technology has improved tremendously: more power, smoother throttle response, better carburetors, and improved cooling. However, care is still necessary. I recommend periodic checks of mounting bolts and screws, as these areas are subjected to stress and vibration with every flight.
Inspect the glow plug regularly. Many pilots don't change a plug until it fails during start-up or, worse, during flight. Replace any plug that is suspect of fault—the average cost is about $5, far less than replacing other parts after a crash.
Helicopter fuel typically has higher oil and nitromethane content to promote better performance and cooling. Engines will run on airplane fuel, but they may not last as long or be as reliable. Spend a few extra dollars on helicopter-specified fuel—you’ll likely save money and trouble later.
Tail and Tailboom
Model helicopters use either carbon-fiber or aluminum tailbooms. Good tailboom supports offer stability and prevent distortion. Make sure your tailboom supports are fastened well. Assemble them with an epoxy such as J.B. Weld to prevent the mounting lugs from separating from the support material.
Include these mounting points in routine preflight checks or after any hard landing. Look for fractures or cracks and ensure tailboom clamps are tightened properly—do not overtighten the mounting bolts. Thoroughly inspect the tail section, since the high speeds involved can create sudden irregularities when a fault occurs. Any suspect vibration can quickly cause drifting or, worse, total failure and a crash.
The introduction of open tail gearbox designs greatly helped maintenance by making gear mesh easier to inspect and adjust. Open gearboxes don't require lubrication, but keep them as clean as possible to prevent excessive wear. Lubricate areas that have slide bearings, such as the tail-rotor pitch-control slider.
Regularly inspect screws and bolts—particularly setscrews. Where metal-to-metal contact is made, treat threads with a thread-locking compound and refresh it whenever a screw is retightened or replaced. It works best on clean, lubricant-free threads.
Keep your helicopter manual handy at all times
Even when disassembly is done with utmost care, reassembly can be confusing. Having a parts-explosion illustration or a manual on hand is a comfort. Incorrectly reassembling an assembly can have disastrous consequences.
Thanks to improvements in materials and helicopter design, we enjoy flying more and worrying less. Modern models can take more flight punishment and hold up better in a mishap. If we do our part in inspecting and maintaining our models, fellow RCers—and especially the public audience—will appreciate how we respect our hobby and sport. That may convince more people to get involved.
Andy Panoncillo [email protected]
Transcribed from original scans by AI. Minor OCR errors may remain.

