
How to Make Cowl Rings: without a lathe
Bill Boss
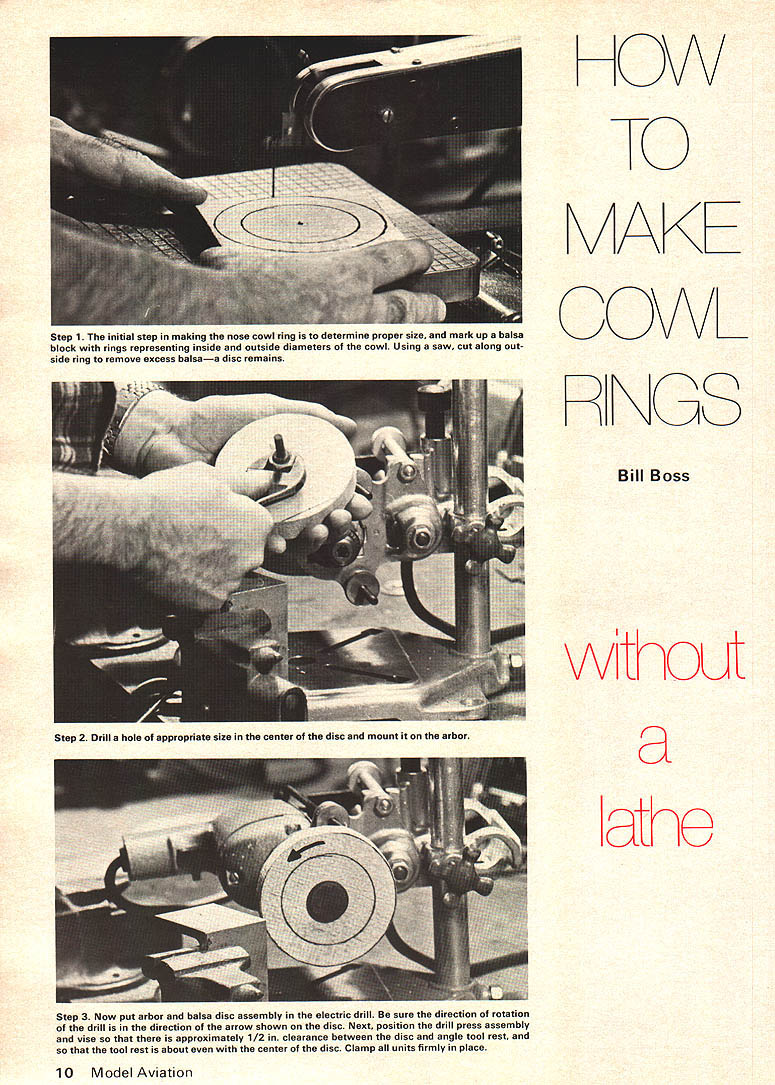
If you have a lathe you are set to use this same turning procedure. If you have no lathe you'll have to scrounge a substitute, perhaps an electric drill — as did the author.
During the course of building a model plane there is always a task that seems to be a little more troublesome than all the rest. I recently came across such a task while constructing a newly designed Carrier plane. The task was that of making a perfectly round and properly-shaped cowl ring from balsa. After a couple of very poor attempts at hand carving and shaping with sandpaper I decided that the only way to solve the problem would be to turn out the ring on a wood lathe. The only thing wrong with this idea is that I had no wood lathe on which to do the wood turning. Well, what could be used as a substitute? Looking around the shop, at the work bench and tool rack, I began to see some possibilities. There was the drill press stand with a high speed (about 2,000 rpm) 1/4-in. electric drill mounted in it, and it is the type from which the drill holding assembly can be removed from its normal vertical position and remounted horizontally. The work bench was equipped with a vise, the tool rack had several sizes of wood chisels, and the miscellaneous box yielded an arbor with a 1/4-in. shank for mounting in the drill chuck. The arbor is the type used for mounting grinding and wire wheels for use in an electric drill. All that was needed was to find something that could be clamped in the vise to serve as a tool rest. The scrap metal box gave up a small length of 2 in. aluminum (or iron) angle stock. Instead of taking you through a lengthy explanation on how the cowl rings are turned out, the accompanying photos and their captions are provided to outline the step-by-step procedures. Before proceeding, please note the following.
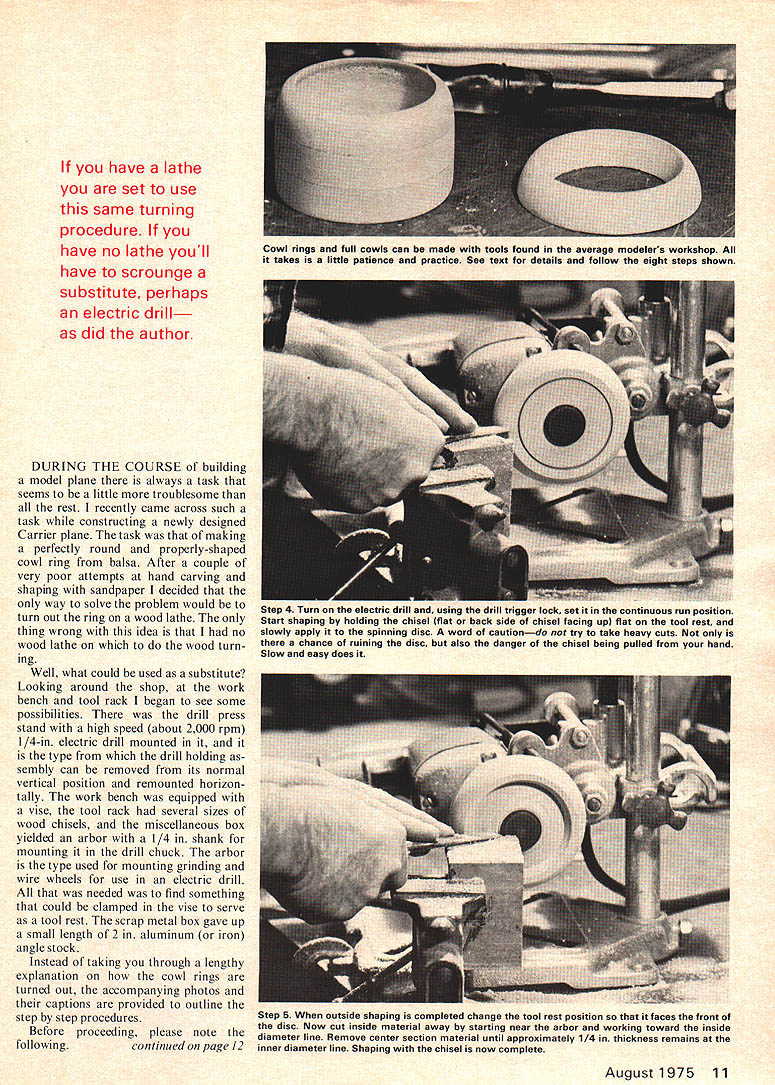
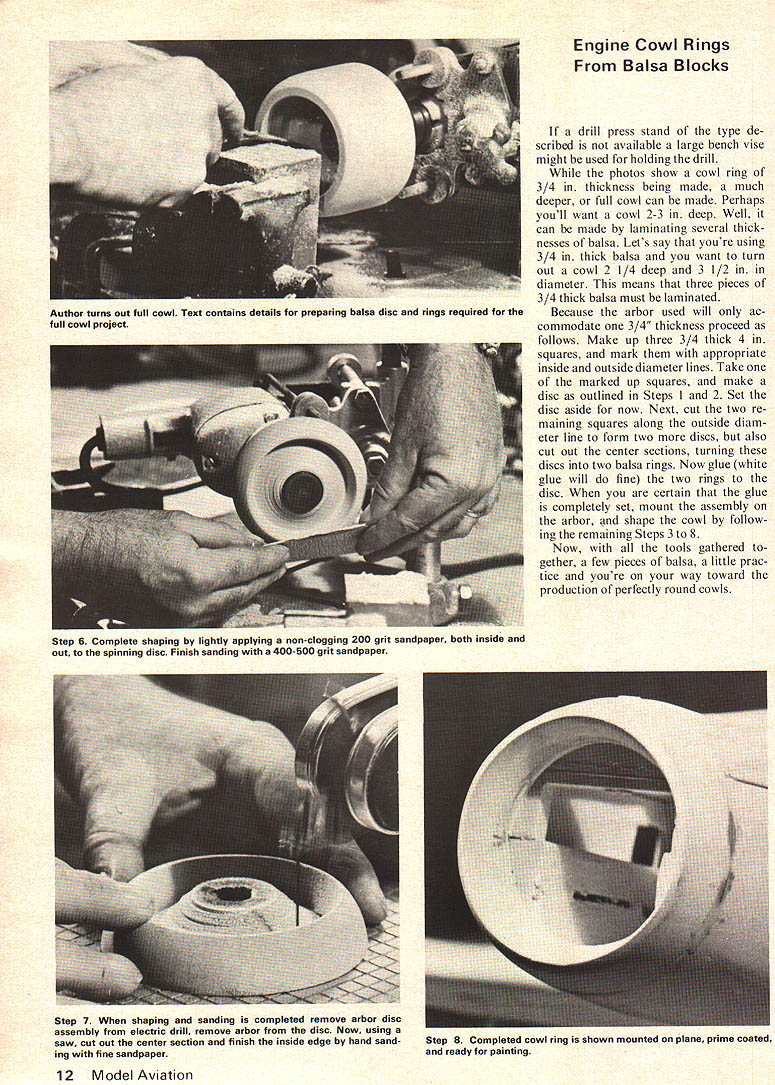
Engine Cowl Rings From Balsa Blocks
If a drill press stand of the type described is not available a large bench vise might be used for holding the drill. While the photos show a cowl ring of 3/4-in. thickness being made, a much deeper, or full cowl can be made. Perhaps you'll want a cowl 2–3 in. deep. Well, it can be made by laminating several thicknesses of balsa. Let's say that you're using 3/4-in. thick balsa and you want to turn out a cowl 2 1/4 in. deep and 3 1/2 in. in diameter. This means that three pieces of 3/4-in. thick balsa must be laminated. Because the arbor used will only accommodate one 3/4-in. thickness, proceed as follows. Make up three 3/4-in.-thick 4 in. squares, and mark them with appropriate inside and outside diameter lines. Take one of the marked-up squares, and make a disc as outlined in Steps 1 and 2. Set the disc aside for now. Next, cut the two remaining squares along the outside diameter line to form two more discs, but also cut out the center sections, turning these discs into two balsa rings. Now glue (white glue will do fine) the two rings to the disc. When you are certain that the glue is completely set, mount the assembly on the arbor, and shape the cowl by following the remaining Steps 3 to 8. Now, with all the tools gathered together, a few pieces of balsa, a little practice and you're on your way toward the production of perfectly round cowls. Before proceeding, please note the following. If a drill press stand of the type described is not available a large bench vise might be used for holding the drill.
While the photos show a cowl ring of 3/4-in. thickness being made, a much deeper, or full cowl can be made. Perhaps you'll want a cowl 2–3 in. deep. Well, it can be made by laminating several thicknesses of balsa. Let's say that you're using 3/4-in. thick balsa and you want to turn out a cowl 2 1/4 in. deep and 3 1/2 in. in diameter. This means that three pieces of 3/4-in. thick balsa must be laminated.
Because the arbor used will only accommodate one 3/4-in. thickness proceed as follows. Make up three 3/4-in.-thick 4 in. squares, and mark them with appropriate inside and outside diameter lines. Take one of the marked-up squares, and make a disc as outlined in Steps 1 and 2. Set the disc aside for now. Next, cut the two remaining squares along the outside diameter line to form two more discs, but also cut out the center sections, turning these discs into two balsa rings. Now glue (white glue will do fine) the two rings to the disc. When you are certain that the glue is completely set, mount the assembly on the arbor, and shape the cowl by following the remaining Steps 3 to 8.
Now, with all the tools gathered together, a few pieces of balsa, a little practice and you're on your way toward the production of perfectly round cowls.
Transcribed from original scans by AI. Minor OCR errors may remain.

