
If It Flies...
Dean Pappas | [email protected]
A new contributor introduces himself and sets the tone for the column
IF IT FLIES, I'm interested in it! It's really that simple, and there is usually something in almost every corner of the aeromodeling universe that grabs my attention. Since I was a youngster I have been active in all disciplines—FF, CL, and RC—even if I wasn't an expert at a lot of it.
Even so, through the years I have learned a bunch about how to make a model airplane fly. But most important I've learned that for every specialty in model airplanedom there has to be somebody out there who knows more about it than I do.
I've made it a point to get to know as many of those people as I can, and if there is a way I can add value to the whole deal, it is by putting all these different bits of aero-savvy together so some useful cross-pollination might take place. I'm going to give you some examples of that, and I promise to take the scenic route while telling the story! This is, after all, my excuse to introduce myself.
Maybe it's corny, but I don't ever remember not being fascinated by things that fly. Fortunately my family lived near enough to the traffic pattern of Teterboro Airport in New Jersey that I was spared the harmful effects of sensory deprivation as a small child.
Ever since I started to learn to fly RC at roughly 7 years old, my biggest focus has been RC Aerobatics, or Pattern. I had the best teachers around—my dad Jim and his buddy Herb—but my addiction to Aerobatics happened because I was also exposed to a small group of excellent fliers at the home club.
These "model-airplane uncles" flew in the Pattern event, and I always knew that was what I wanted to do. After all, the models looked cool, were fast, and at least back then they screamed like banshees. Ah! The sound of high performance.
While I was busy soaking up whatever I could learn from that group, I was also involved in CL Aerobatics, or Stunt. I flew it poorly as a kid, but my building, trimming, and flying skills improved as I gathered friends who flew "real" Stunt.
Sometimes—actually almost all the time—simple exposure to "what it's supposed to look like" is the critical missing element in learning to do something better. This isn't true just in aeromodeling.
One of those Stunt-flying friends I had gathered was Bob Hunt, who was fresh from his win at the Stunt World Championships in 1978. We swapped ideas and tall stories about how to build better airplanes while collaborating at a combined RC and CL air show. Approximately five years later that led to my becoming a writer for Bob, who was the editor at Flying Models magazine.
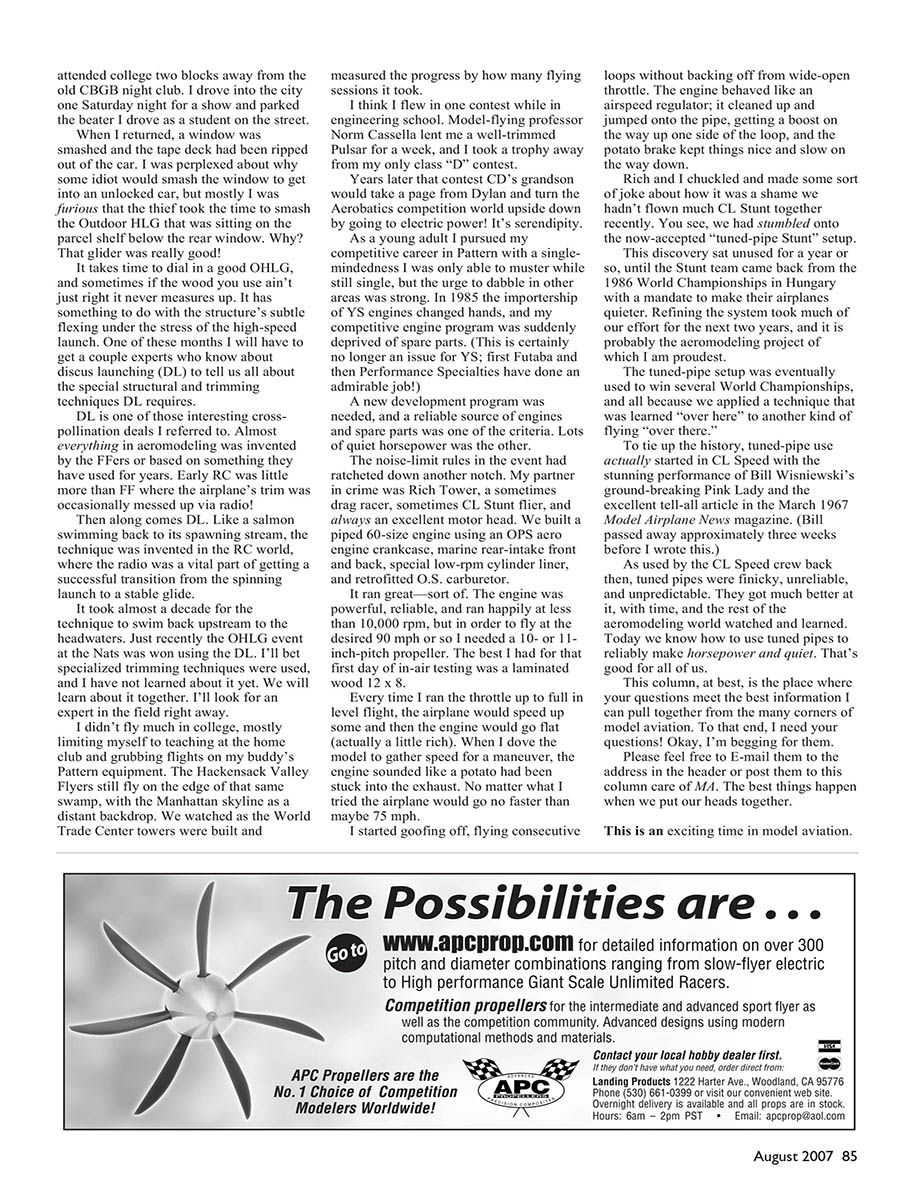
I dabbled in FF throughout it all, learning to trim a decent Hand Launch Glider (HLG) and running my young legs off hoisting Towline Gliders, losing more than a few 1/2As in the process.
I have a silly story to tell you. I drove into the city one Saturday night for a show and parked the beater I drove as a student on the street. When I returned, a window was smashed and the tape deck had been ripped out of the car. I was perplexed about why some idiot would smash the window to get into an unlocked car, but mostly I was furious that the thief took the time to smash the Outdoor HLG that was sitting on the parcel shelf below the rear window. Why? That glider was really good! It takes time to do a good OHLG, and sometimes if the wood you use isn't just right it never measures up. It has something to do with the structure's subtle flexing under the stress of the high-speed launch. One of these months I will have to get a couple experts who know about discus launching (DL) to tell us all about the special structural and trimming techniques DL requires.
DL is one of those interesting cross-pollination deals I referred to. Almost everything in aeromodeling was invented by the FFers or based on something they have used for years. Early RC was little more than FF where the airplane's trim was occasionally messed up via radio!
Then along comes DL. Like a salmon swimming back to its spawning stream, the technique was invented in the RC world, where the radio was a vital part of getting a successful transition from the spinning launch to a stable glide.
It took almost a decade for the technique to swim back upstream to the headwaters. Just recently the OHLG event at the Nats was won using the DL. I'll bet specialized trimming techniques were used, and I have not learned about it yet. We will learn about it together. I'll look for an expert in the field right away.
I didn't fly much in college, mostly limiting myself to teaching at the home club and grubbing flights on my buddy's Pattern equipment. The Hackensack Valley Flyers still fly on the edge of that same swamp, with the Manhattan skyline as a distant backdrop. We watched as the World Trade Center towers were built and measured the progress by how many flying sessions it took.
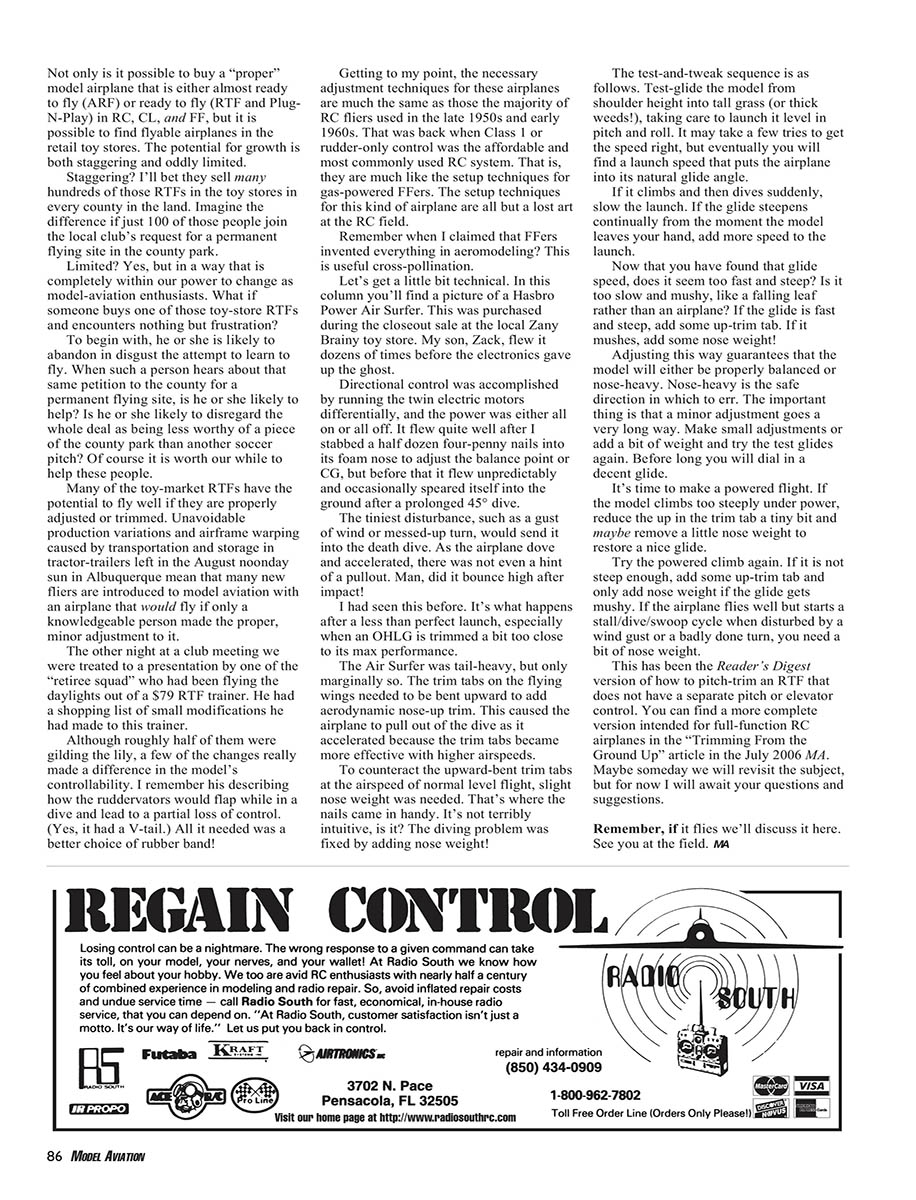
I think I flew in one contest while in engineering school. Model-flying professor Norm Cassella lent me a well-trimmed Pulsar for a week, and I took a trophy away from my only class "D" contest.
Years later that contest CD's grandson would take a page from Dylan and turn the Aerobatics competition world upside down by going to electric power! It's serendipity.
As a young adult I pursued my competitive career in Pattern with a single-mindedness I was only able to muster while still single, but the urge to dabble in other areas was strong. In 1985 the importership of YS engines changed hands, and my competitive engine program was suddenly deprived of spare parts. (This is certainly no longer an issue for YS; first Futaba and then Performance Specialties have done an admirable job!)
A new development program was needed, and a reliable source of engines and spare parts was one of the criteria. Lots of quiet horsepower was the other.
My partner in crime was Rich Tower, a sometimes drag racer, sometimes CL Stunt flier, and always an excellent motor head. We built a potted 60-size engine using an OPS aero engine crankcase, marine rear-intake front and back, a special low-rpm cylinder liner, and a retrofitted O.S. carburetor.
It ran great—sort of. The engine was powerful, reliable, and ran happily at less than 10,000 rpm, but in order to fly at the desired 90 mph or so I needed a 10- or 11-inch-pitch propeller. The best I had for that first day of in-air testing was a laminated wood 12 x 8.
Every time I ran the throttle up to full in level flight, the airplane would bob up some and then the engine would go flat (actually a little rich). When I drove the model to gather speed for a maneuver, the engine sounded like a potato had been stuck into the exhaust. No matter what I tried the airplane would go no faster than maybe 75 mph.
I started goofing off, flying consecutive loops without backing off from wide-open throttle. The engine behaved like an airspeed regulator; it cleaned up and jumped onto the pipe, getting a boost on the way up one side of the loop, and the potato brake kept things nice and slow on the way down.
Rich and I chuckled and made some sort of joke about how it was a shame we hadn't flown much CL Stunt together recently. You see, we had stumbled onto the now-accepted "tuned-pipe Stunt" setup.
This discovery sat unused for a year or so, until the Stunt team came back from the 1986 World Championships in Hungary with a mandate to make their airplanes quieter. Refining the system took much of our effort for the next two years, and it is probably the aeromodeling project of which I am proudest.
The tuned-pipe setup was eventually used to win several World Championships, and all because we applied a technique that was learned "over here" to another kind of flying "over there."
To tie up the history, tuned-pipe use actually started in CL Speed with the stunning performance of Bill Wisniewski's ground-breaking Pink Lady and the excellent tell-all article in the March 1967 Model Airplane News magazine. (Bill passed away approximately three weeks before I wrote this.)
As used by the CL Speed crew back then, tuned pipes were finicky, unreliable, and unpredictable. They got much better at it, with time, and the rest of the aeromodeling world watched and learned. Today we know how to use tuned pipes to reliably make horsepower and quiet. That's good for all of us.
This column, at best, is the place where your questions meet the best information I can pull together from the many corners of model aviation. To that end, I need your questions! Okay, I'm begging for them.
Please feel free to E-mail them to the address in the header or post them to this column care of MA. The best things happen when we put our heads together.
This is an exciting time in model aviation.
Not only is it possible to buy a "proper" model airplane that is either almost ready to fly (ARF) or ready to fly (RTF and Plug-N-Play) in RC, CL, and FF, but it is possible to find flyable airplanes in the retail toy stores. The potential for growth is both staggering and oddly limited.
Staggering? I'll bet they sell many hundreds of those RTFs in the toy stores in every county in the land. Imagine the difference if just 100 of those people join the local club's request for a permanent flying site in the county park.
Limited? Yes, but in a way that is completely within our power to change as model-aviation enthusiasts. What if someone buys one of those toy-store RTFs and encounters nothing but frustration?
To begin with, he or she is likely to abandon in disgust the attempt to learn to fly. When such a person hears about that same petition to the county for a permanent flying site, is he or she likely to help? Is he or she likely to disregard the whole deal as being less worthy of a piece of the county park than another soccer pitch? Of course it is worth our while to help these people.
Many of the toy-market RTFs have the potential to fly well if they are properly adjusted or trimmed. Unavoidable production variations and airframe warping caused by transportation and storage in tractor-trailers left in the August noonday sun in Albuquerque mean that many new fliers are introduced to model aviation with an airplane that would fly if only a knowledgeable person made the proper, minor adjustment to it.
The other night at a club meeting we were treated to a presentation by one of the "retiree squad" who had been flying the daylights out of a $79 RTF trainer. He had a shopping list of small modifications he had made to this trainer.
Although roughly half of them were trivial, a few of the changes really made a difference in the model's controllability. I remember his describing how the ruddervators would flap while in a dive and lead to a partial loss of control. (Yes, it had a V-tail.) All it needed was a better choice of rubber band!
Getting to my point, the necessary adjustment techniques for these airplanes are much the same as those the majority of RC fliers used in the late 1950s and early 1960s. That was back when Class I or rudder-only control was the affordable and most commonly used RC system. That is, they are much like the setup techniques for gas-powered FFers. The setup techniques for this kind of airplane are all but a lost art at the RC field.
Remember when I claimed that FFers invented everything in aeromodeling? This is useful cross-pollination.
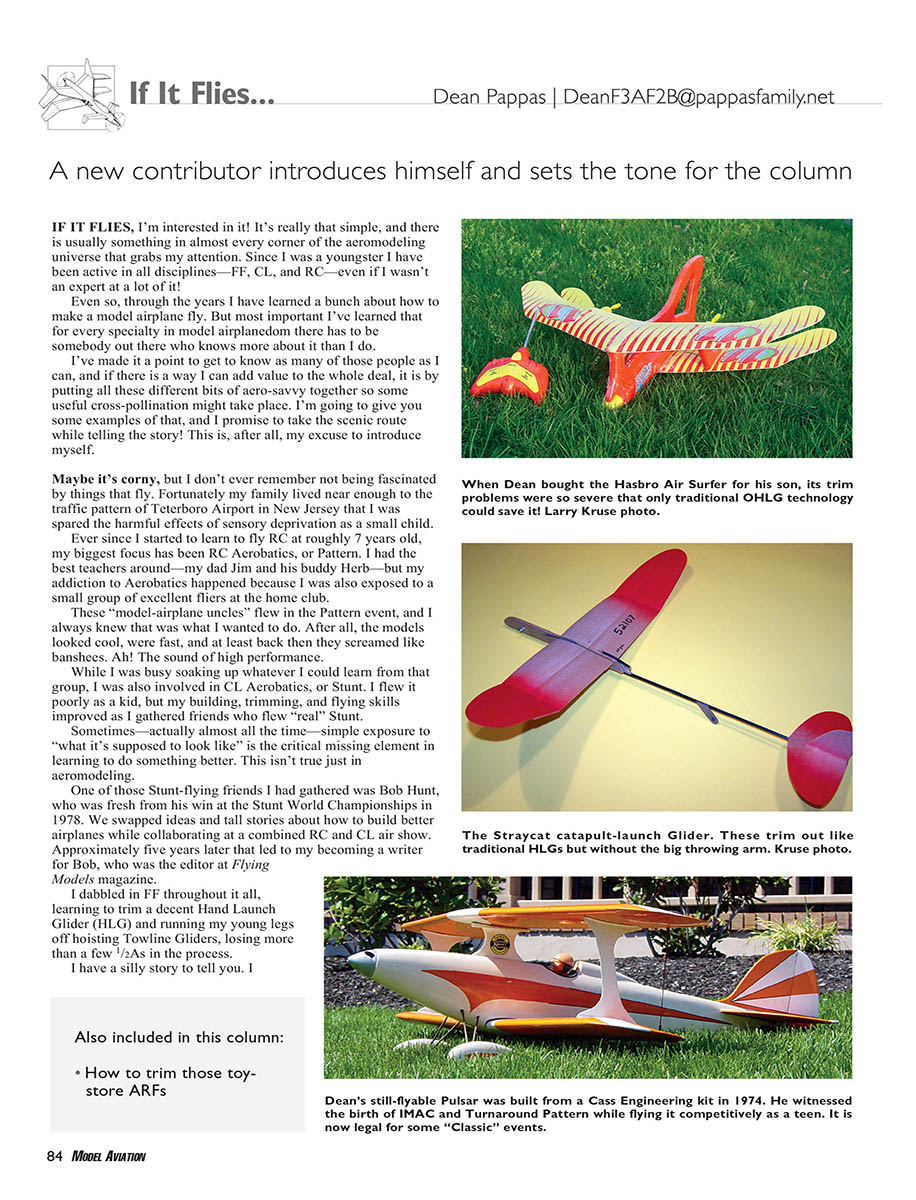
Let's get a little bit technical. In this column you'll find a picture of a Hasbro Power Air Surfer. This was purchased during the closeout sale at the local Zany Brainy toy store. My son, Zack, flew it dozens of times before the electronics gave up the ghost.
Directional control was accomplished by running the twin electric motors differentially, and the power was either all on or all off. It flew quite well after I stabbed a half-dozen four-penny nails into its foam nose to adjust the balance point or CG, but before that it flew unpredictably and occasionally speared itself into the ground after a prolonged 45° dive.
The tiniest disturbance, such as a gust of wind or messed-up trim, would send it into the death dive. As the airplane dove and accelerated, there was not even a hint of a pullout. Man, did it bounce high after impact!
I had seen this before. It's what happens after a less-than-perfect launch, especially when an OHLG is trimmed a bit too close to its max performance.
The Air Surfer was tail-heavy, but only marginally so. The trim tabs on the flying wings needed to be bent upward to add aerodynamic nose-up trim. This caused the airplane to pull out of the dive as it accelerated because the trim tabs became more effective with higher airspeeds.
To counteract the upward-bent trim tabs at the airspeed of normal level flight, slight nose weight was needed. That's where the nails came in handy. It's not terribly intuitive, is it? The diving problem was fixed by adding nose weight!
The rest-and-tweak sequence is as follows:
- Test-glide the model from shoulder height into tall grass (or thick weeds), taking care to launch it level in pitch and roll. It may take a few tries to get the speed right, but eventually you will find a launch speed that puts the airplane into its natural glide angle.
- If it climbs and then dives suddenly, slow the launch. If the glide steepens continually from the moment the model leaves your hand, add more speed to the launch.
- Now that you have found that glide speed, evaluate the glide: does it seem too fast and steep? Is it too slow and mushy, like a falling leaf rather than an airplane?
- If the glide is fast and steep, add some up-trim tab. If it mushes, add some nose weight.
- Make small adjustments and repeat test glides. Adjusting this way guarantees that the model will be either properly balanced or nose-heavy; nose-heavy is the safe direction to err.
It's time to make a powered flight. If the model climbs too steeply under power, reduce the up in the trim tab a tiny bit and maybe remove a little nose weight to restore a nice glide.
Try the powered climb again. If it is not steep enough, add some up-trim tab and only add nose weight if the glide gets mushy. If the airplane flies well but starts a stall/dive/slowpoke cycle when disturbed by a wind gust or a badly done turn, you need a bit of nose weight.
This has been the Reader's Digest version of how to pitch-trim an RTF that does not have a separate pitch or elevator control. You can find a more complete version intended for full-function RC airplanes in the "Trimming From the Ground Up" article in the July 2006 MA. Maybe someday we will revisit the subject, but for now I will await your questions and suggestions.
Also included in this column:
- How to trim those toy-store ARFs
Remember, if it flies we'll discuss it here. See you at the field. MA
Transcribed from original scans by AI. Minor OCR errors may remain.

