
Installing a One-Piece Bolt-on Wing
by Bob Noll
Mounting a wing can be frustrating, but this easy-to-follow pictorial will help you get it attached to the fuselage accurately and securely.
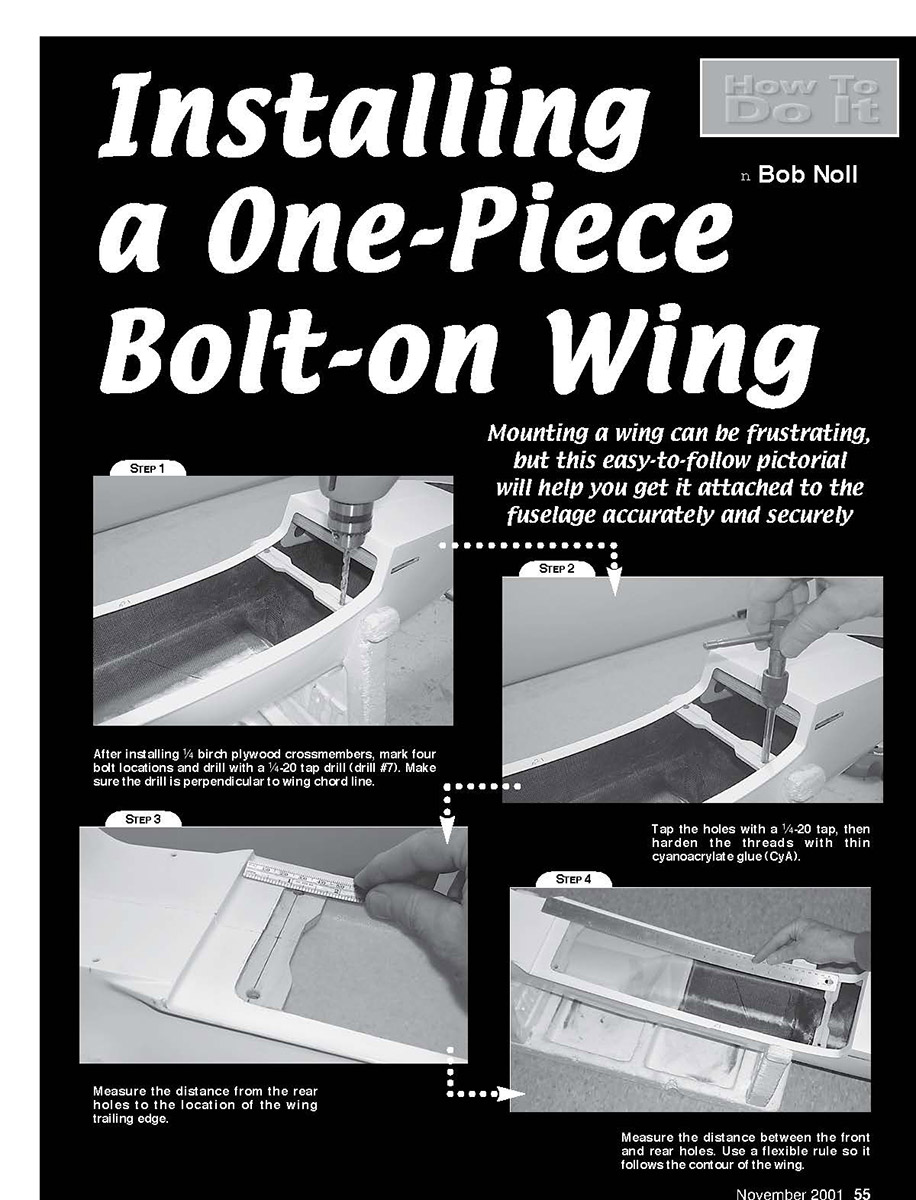
Step 1
After installing 1/4 birch plywood crossmembers, mark four bolt locations and drill with a 1/4-20 tap drill (drill #7). Make sure the drill is perpendicular to wing chord line.
Step 2
Tap the holes with a 1/4-20 tap, then harden the threads with thin cyanoacrylate glue (CyA).
Step 3
Measure the distance from the rear holes to the location of the wing trailing edge.
Step 4
Measure the distance between the front and rear holes. Use a flexible rule so it follows the contour of the wing.
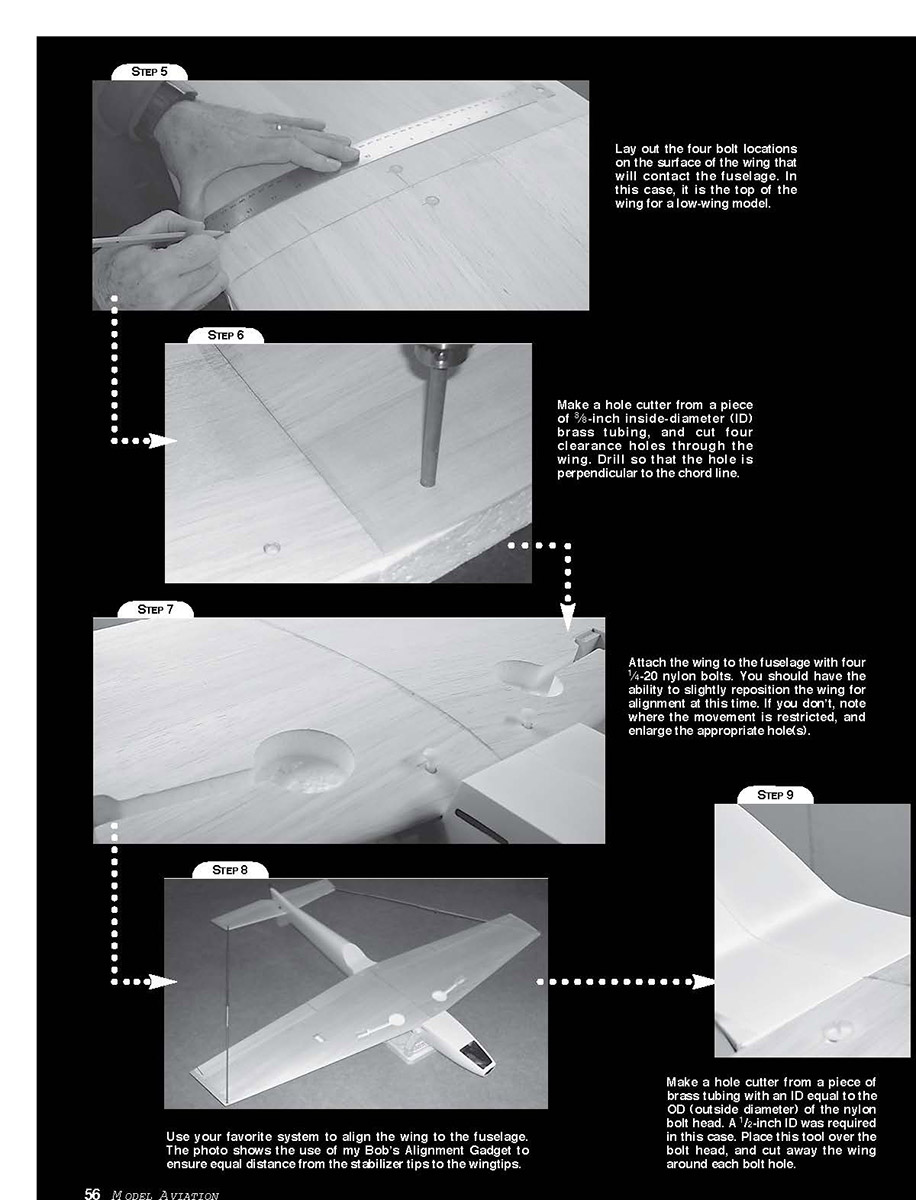
Step 5
Lay out the four bolt locations on the surface of the wing that will contact the fuselage. In this case, it is the top of the wing for a low-wing model.
Step 6
Make a hole cutter from a piece of 5/8-inch inside-diameter (ID) brass tubing, and cut four clearance holes through the wing. Drill so that the hole is perpendicular to the chord line.
Step 7
Attach the wing to the fuselage with four 1/4-20 nylon bolts. You should have the ability to slightly reposition the wing for alignment at this time. If you don't, note where the movement is restricted, and enlarge the appropriate hole(s).
Step 8
Use your favorite system to align the wing to the fuselage. The photo shows the use of my Bob's Alignment Gadget to ensure equal distance from the stabilizer tips to the wingtips.
Step 9
Make a hole cutter from a piece of brass tubing with an ID equal to the OD (outside diameter) of the nylon bolt head. A 1/2-inch ID was required in this case. Place this tool over the bolt head, and cut away the wing around each bolt hole.
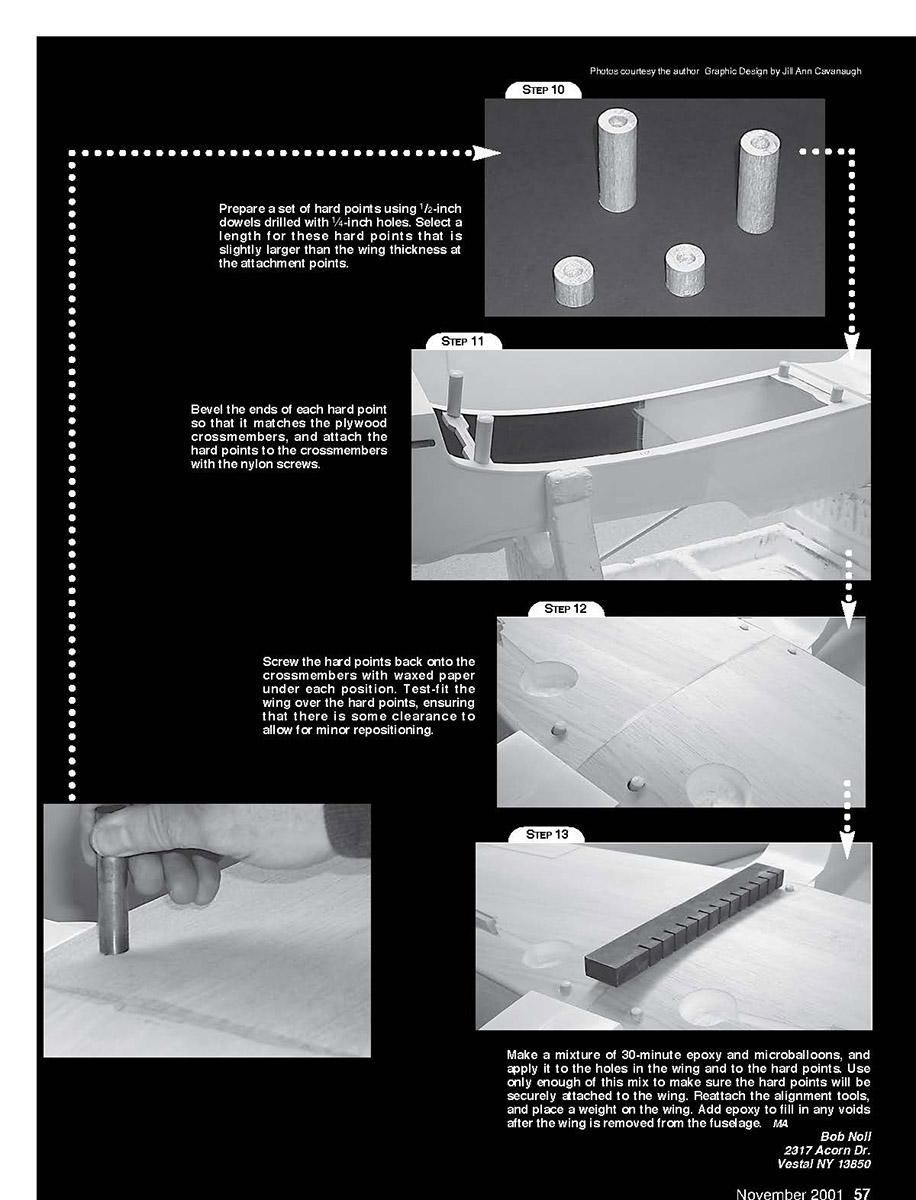
Step 10
Prepare a set of hard points using 1/2-inch dowels drilled with 1/4-inch holes. Select a length for these hard points that is slightly larger than the wing thickness at the attachment points.
Step 11
Bevel the ends of each hard point so that it matches the plywood crossmembers, and attach the hard points to the crossmembers with the nylon screws.
Step 12
Screw the hard points back onto the crossmembers with waxed paper under each position. Test-fit the wing over the hard points, ensuring that there is some clearance to allow for minor repositioning.
Step 13
Make a mixture of 30-minute epoxy and microballoons, and apply it to the holes in the wing and to the hard points. Use only enough of this mix to make sure the hard points will be securely attached to the wing. Reattach the alignment tools, and place a weight on the wing. Add epoxy to fill in any voids after the wing is removed from the fuselage.
Bob Noll 2317 Acorn Dr. Vestal NY 13850
Transcribed from original scans by AI. Minor OCR errors may remain.

