
It's all in the details ARUP S2
by Timothy Dawson
Research and plans
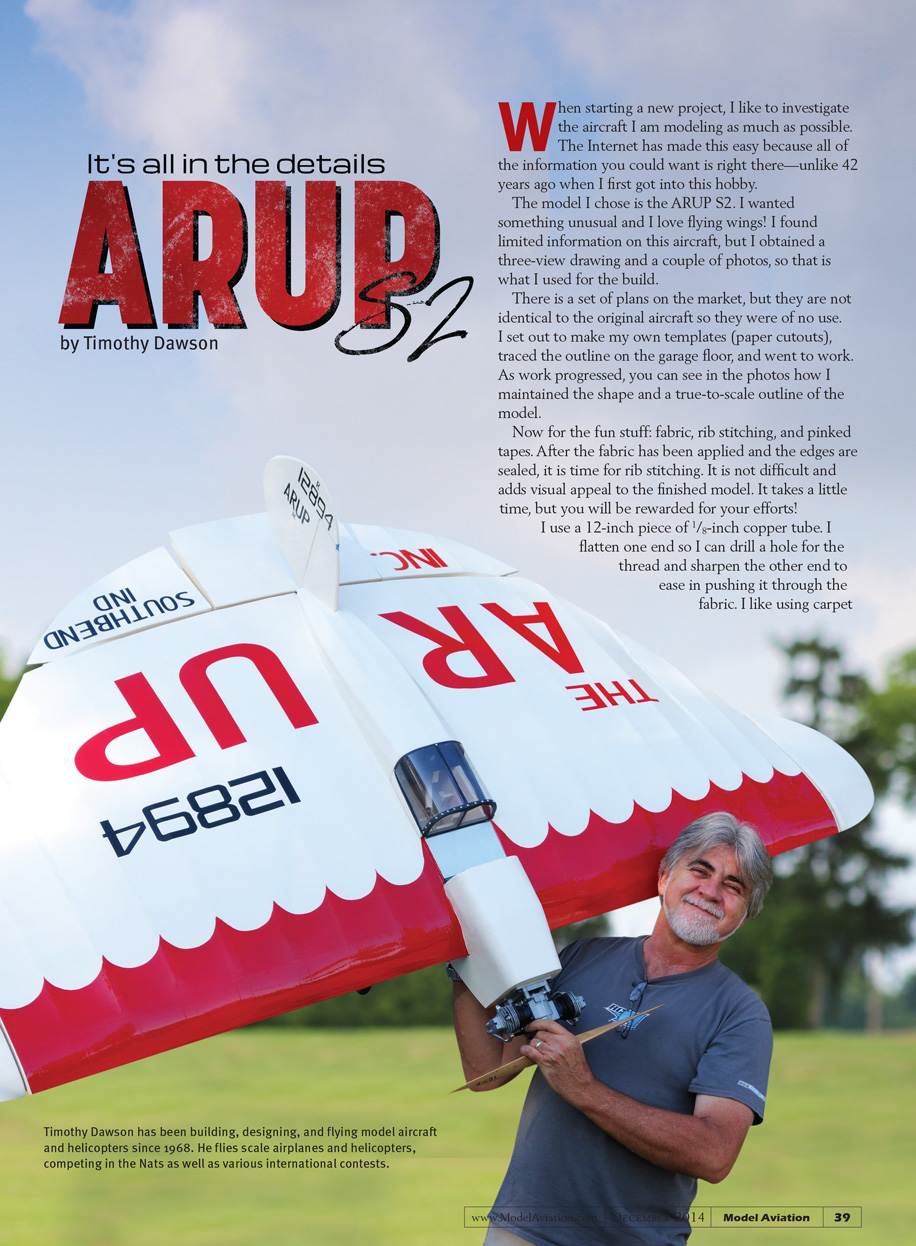
When starting a new project, I like to investigate the aircraft I am modeling as much as possible. The Internet has made this easy because all of the information you could want is right there—unlike 42 years ago when I first got into this hobby.
The model I chose is the ARUP S2. I wanted something unusual and I love flying wings. I found limited information on this aircraft, but I obtained a three-view drawing and a couple of photos, so that is what I used for the build.
There is a set of plans on the market, but they are not identical to the original aircraft so they were of no use. I set out to make my own templates (paper cutouts), traced the outline on the garage floor, and went to work. As work progressed, you can see in the photos how I maintained the shape and a true-to-scale outline of the model.
Fabric, rib stitching, and pinked tape
Now for the fun stuff: fabric, rib stitching, and pinked tapes. After the fabric has been applied and the edges are sealed, it is time for rib stitching. It is not difficult and adds visual appeal to the finished model. It takes a little time, but you will be rewarded for your efforts.
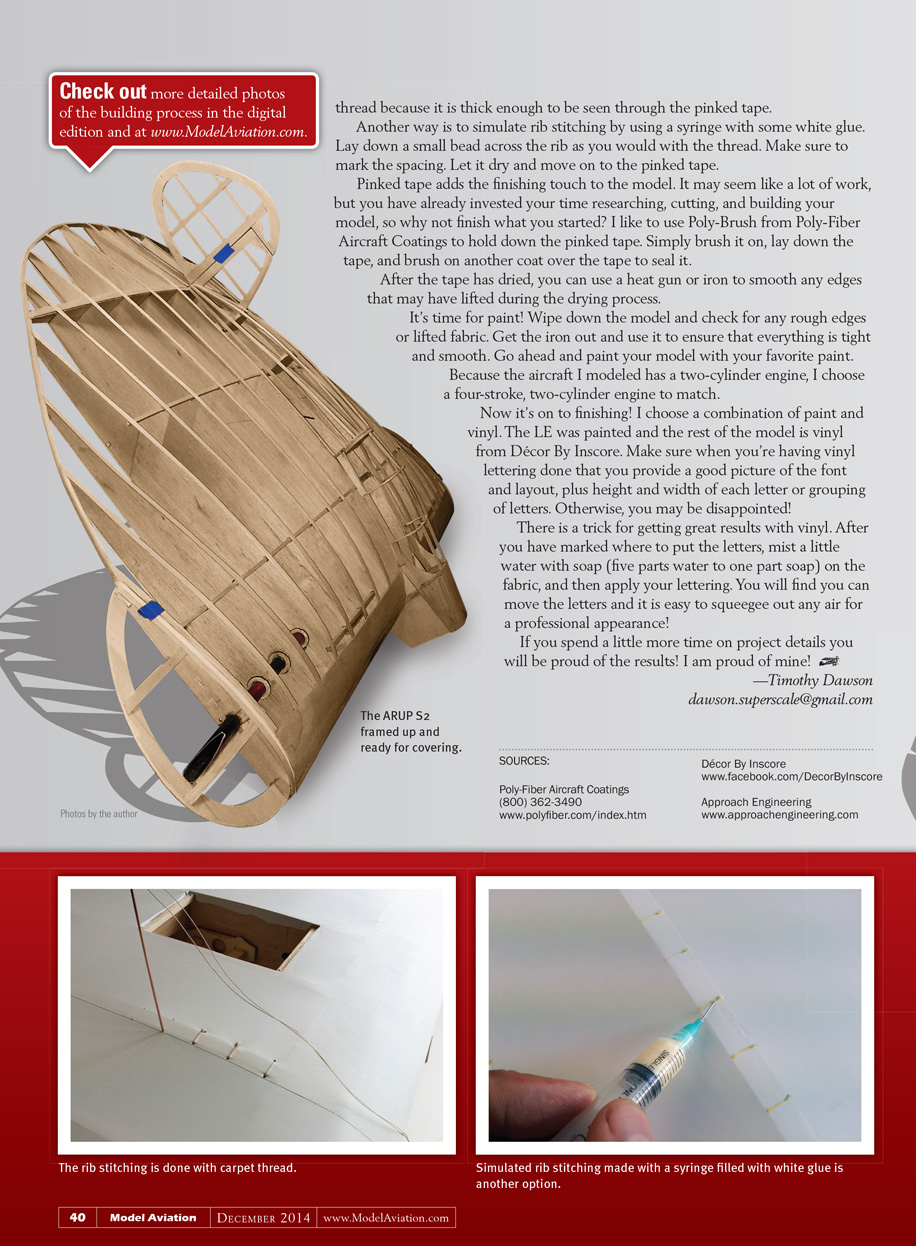
I use a 12-inch piece of 1/8-inch copper tube. I flatten one end so I can drill a hole for the thread and sharpen the other end to ease in pushing it through the fabric. I like using carpet thread because it is thick enough to be seen through the pinked tape.
Another way is to simulate rib stitching by using a syringe with some white glue. Lay down a small bead across the rib as you would with the thread. Make sure to mark the spacing. Let it dry and move on to the pinked tape.
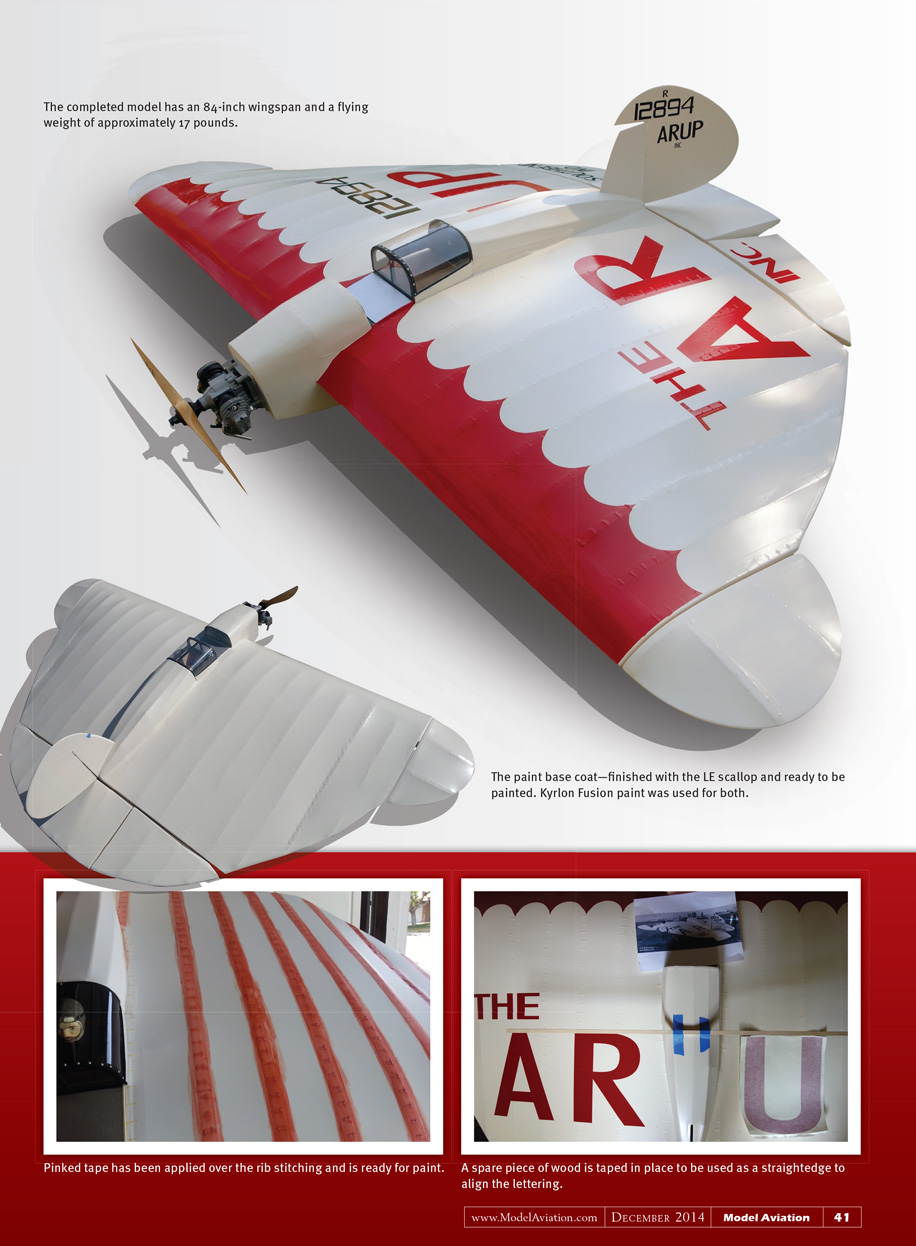
Pinked tape adds the finishing touch to the model. It may seem like a lot of work, but you have already invested your time researching, cutting, and building your model, so why not finish what you started? I like to use Poly-Brush from Poly-Fiber Aircraft Coatings to hold down the pinked tape. Simply brush it on, lay down the tape, and brush on another coat over the tape to seal it.
After the tape has dried, you can use a heat gun or iron to smooth any edges that may have lifted during the drying process.
Painting
It's time for paint. Wipe down the model and check for any rough edges or lifted fabric. Get the iron out and use it to ensure that everything is tight and smooth. Then paint your model with your favorite paint.
Engine choice
Because the aircraft I modeled has a two-cylinder engine, I chose a four-stroke, two-cylinder engine to match.
Finishing and vinyl lettering
Now it's on to finishing. I chose a combination of paint and vinyl. The leading edge (LE) was painted and the rest of the model is vinyl from Décor By Inscore. Make sure when you're having vinyl lettering done that you provide a good picture of the font and layout, plus height and width of each letter or grouping of letters. Otherwise, you may be disappointed.
There is a trick for getting great results with vinyl. After you have marked where to put the letters, mist a little water with soap (five parts water to one part soap) on the fabric, and then apply your lettering. You will find you can move the letters and it is easy to squeegee out any air for a professional appearance.
Final thoughts
If you spend a little more time on project details you will be proud of the results. I am proud of mine!
—Timothy Dawson [email protected]
SOURCES:
- Poly-Fiber Aircraft Coatings, (800) 362-3490, www.polyfiber.com/index.htm
- Décor By Inscore, www.facebook.com/DecorByInscore
- Approach Engineering, www.approachengineering.com
No additional primary article text on this page — the page contains only photographs and their captions.
Transcribed from original scans by AI. Minor OCR errors may remain.

