

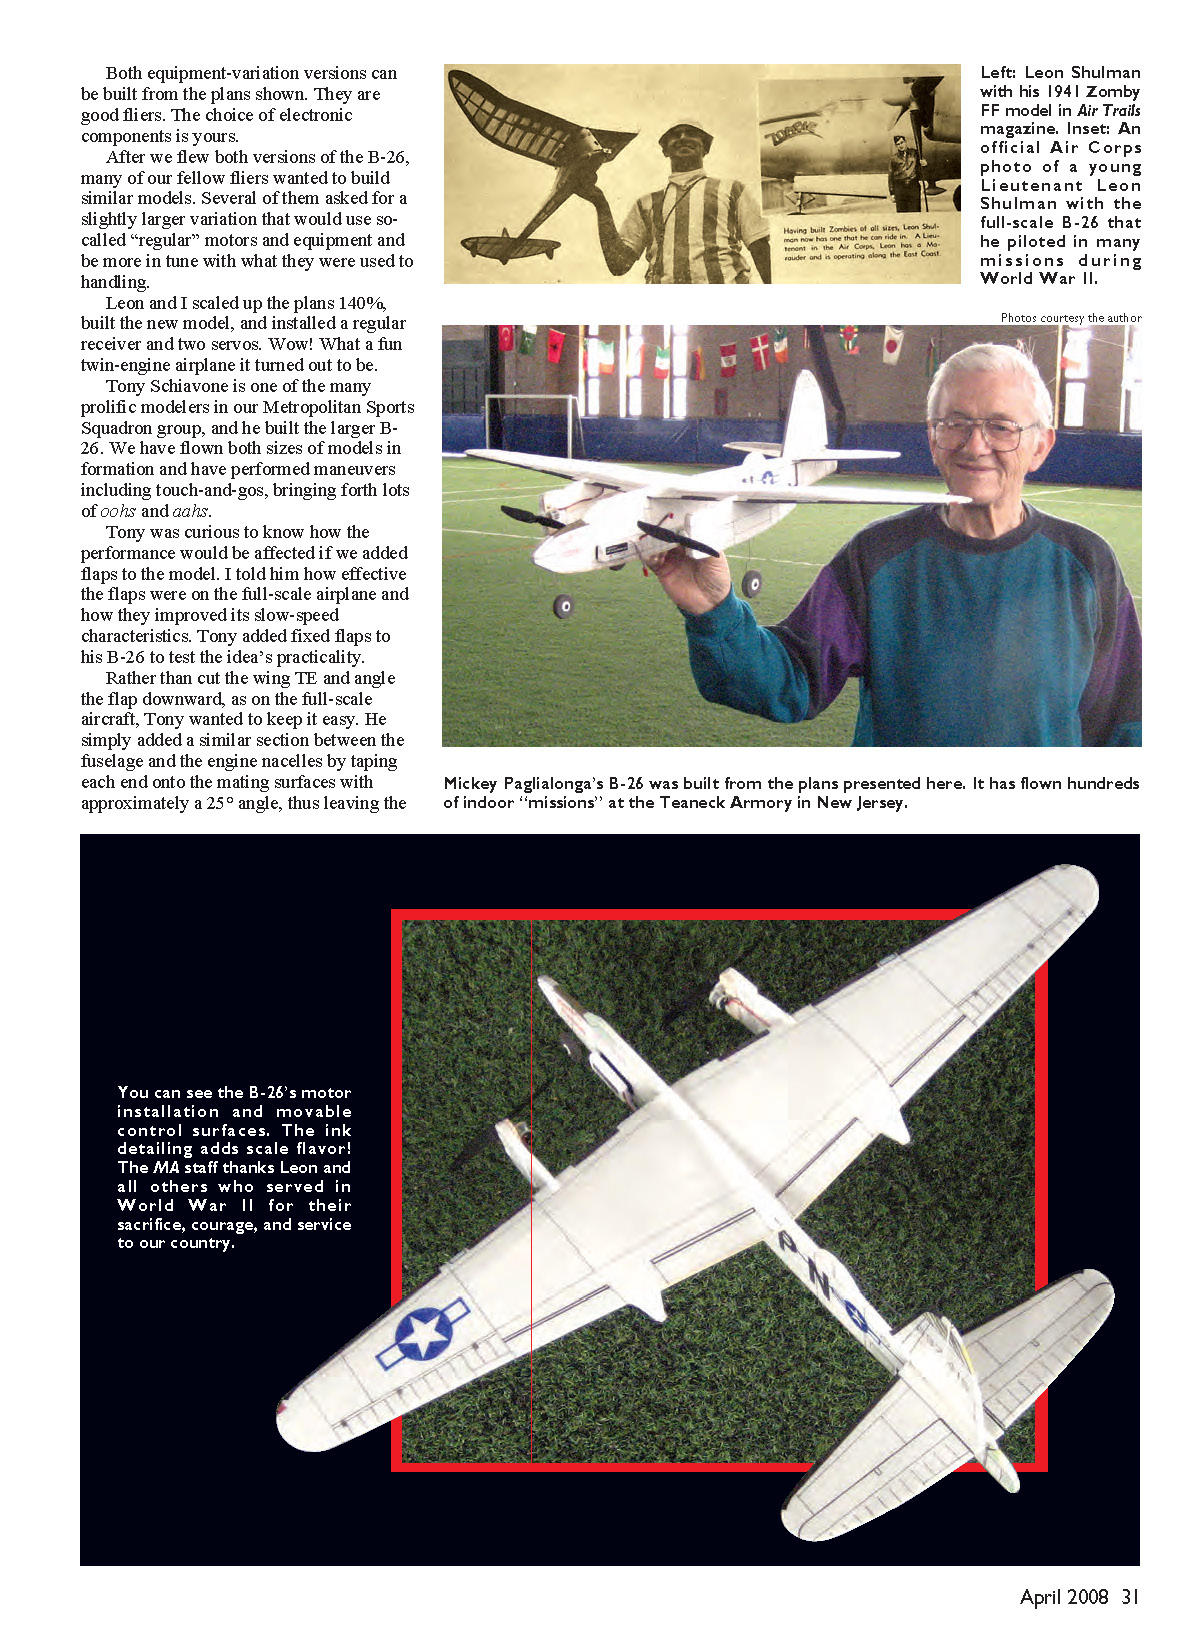


Leon’s B-26 MARAUDER
Fast-forward to recent times. Leon and I were given an Air Hogs foam RC biplane that had seen better days. The choice was to repair the model or scrap it and use the electronics in a new design. Since Leon and I are flying buddies and had worked together on models, the answer became obvious: we would design and build a B-26—the bomber Leon flew in World War II.
We wanted a profile model in keeping with our Keep It Structurally Simple (KISS) guidelines. It was intended primarily for indoor flying, but we would also fly it outdoors during calm weather. We constructed the B-26 from Depron foam board and reused the electronics from the tired Air Hogs biplane. The construction was kept uncomplicated so the model could be built quickly and flown realistically.
With experience from our earlier KISS designs, the B-26 turned out to be an easy project. After completing and test-flying the model, we were amazed by the performance produced by the combination of construction and equipment. We then built a second “first class” model using newer micro components: a small receiver and two actuators (one for the rudder and one for the elevator).
Both equipment variants can be built from the plans provided. They are good fliers; the choice of electronic components is up to you.
After we flew both versions, many fellow fliers wanted similar models. Several asked for a slightly larger variation using “regular” motors and equipment. We scaled up the plans 140%, built the new model, and installed a regular receiver and two servos. What a fun twin-engine airplane it turned out to be.
Tony Schiavone, a prolific modeler in our Metropolitan Sports Squadron group, built the larger B-26. We have flown both sizes in formation and performed maneuvers, including touch-and-goes, drawing lots of oohs and aahs.
Tony was curious how performance would be affected by adding flaps. Rather than cut the wing trailing edge and hinge a flap as on the full-scale airplane, Tony added a simple fixed-flap section between the fuselage and the engine nacelles. He taped each end to the mating surfaces at approximately a 25° angle. It worked fine, and the modified version does fly slightly slower—another practical option for this versatile design.
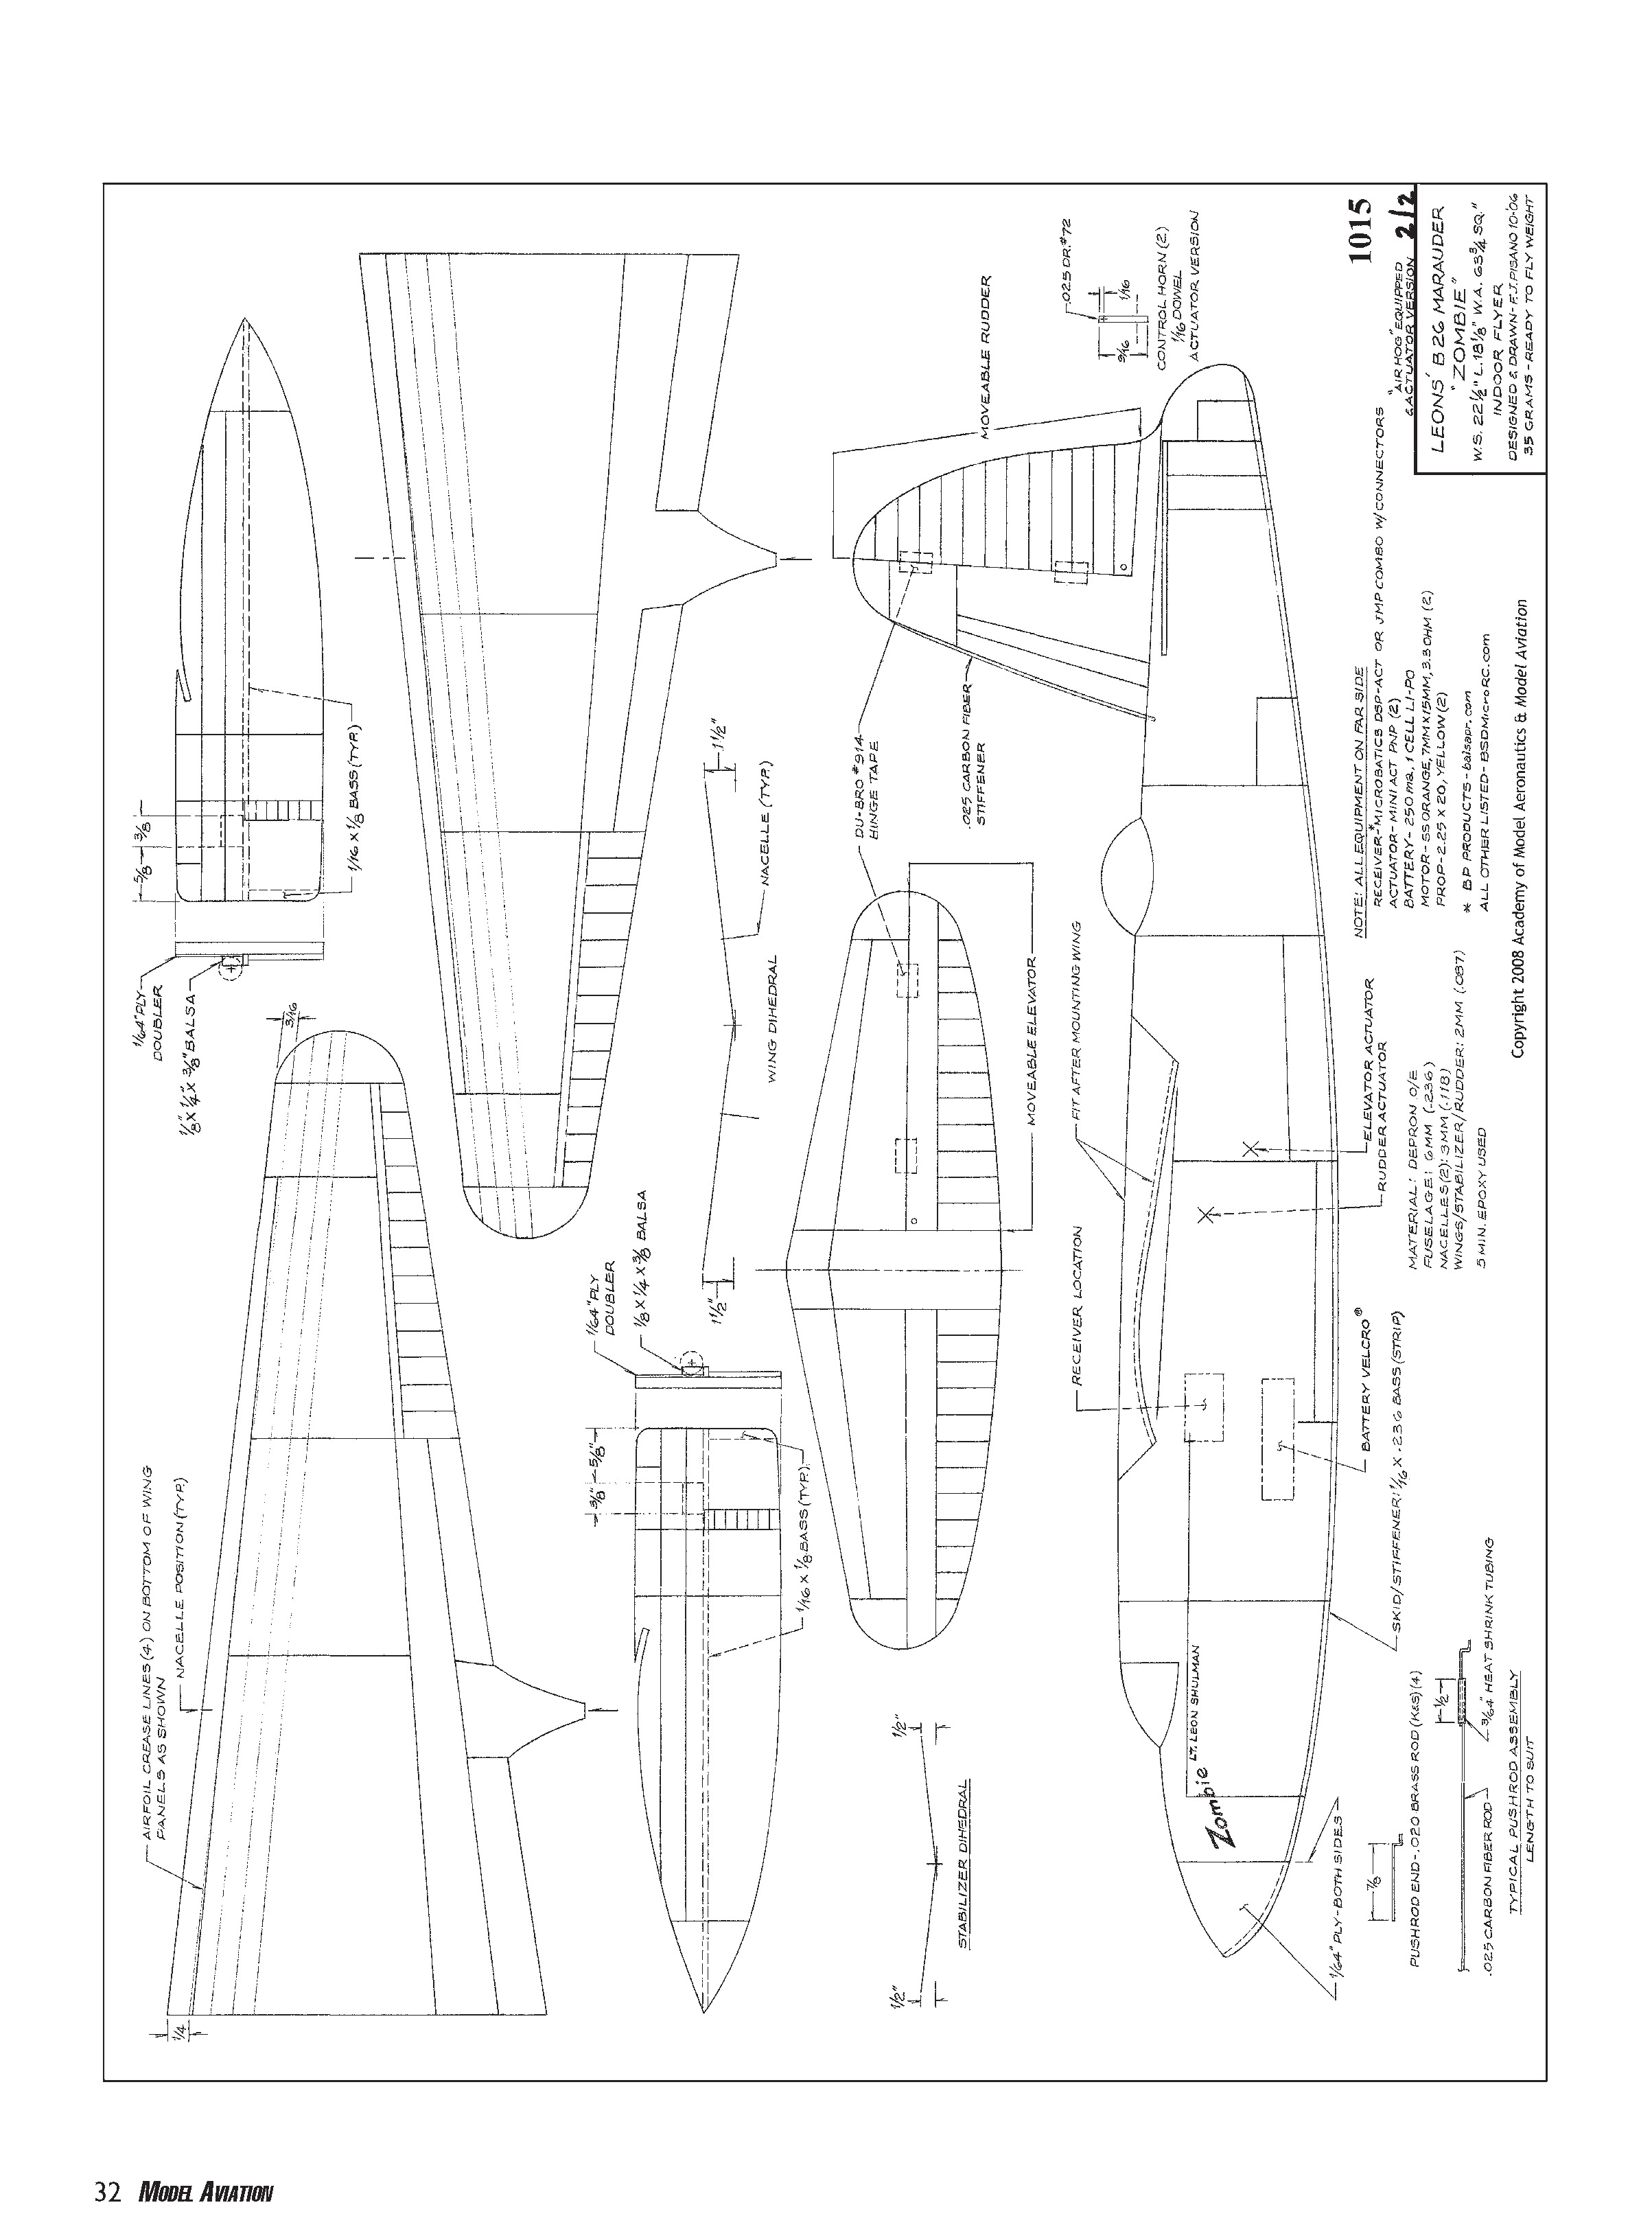
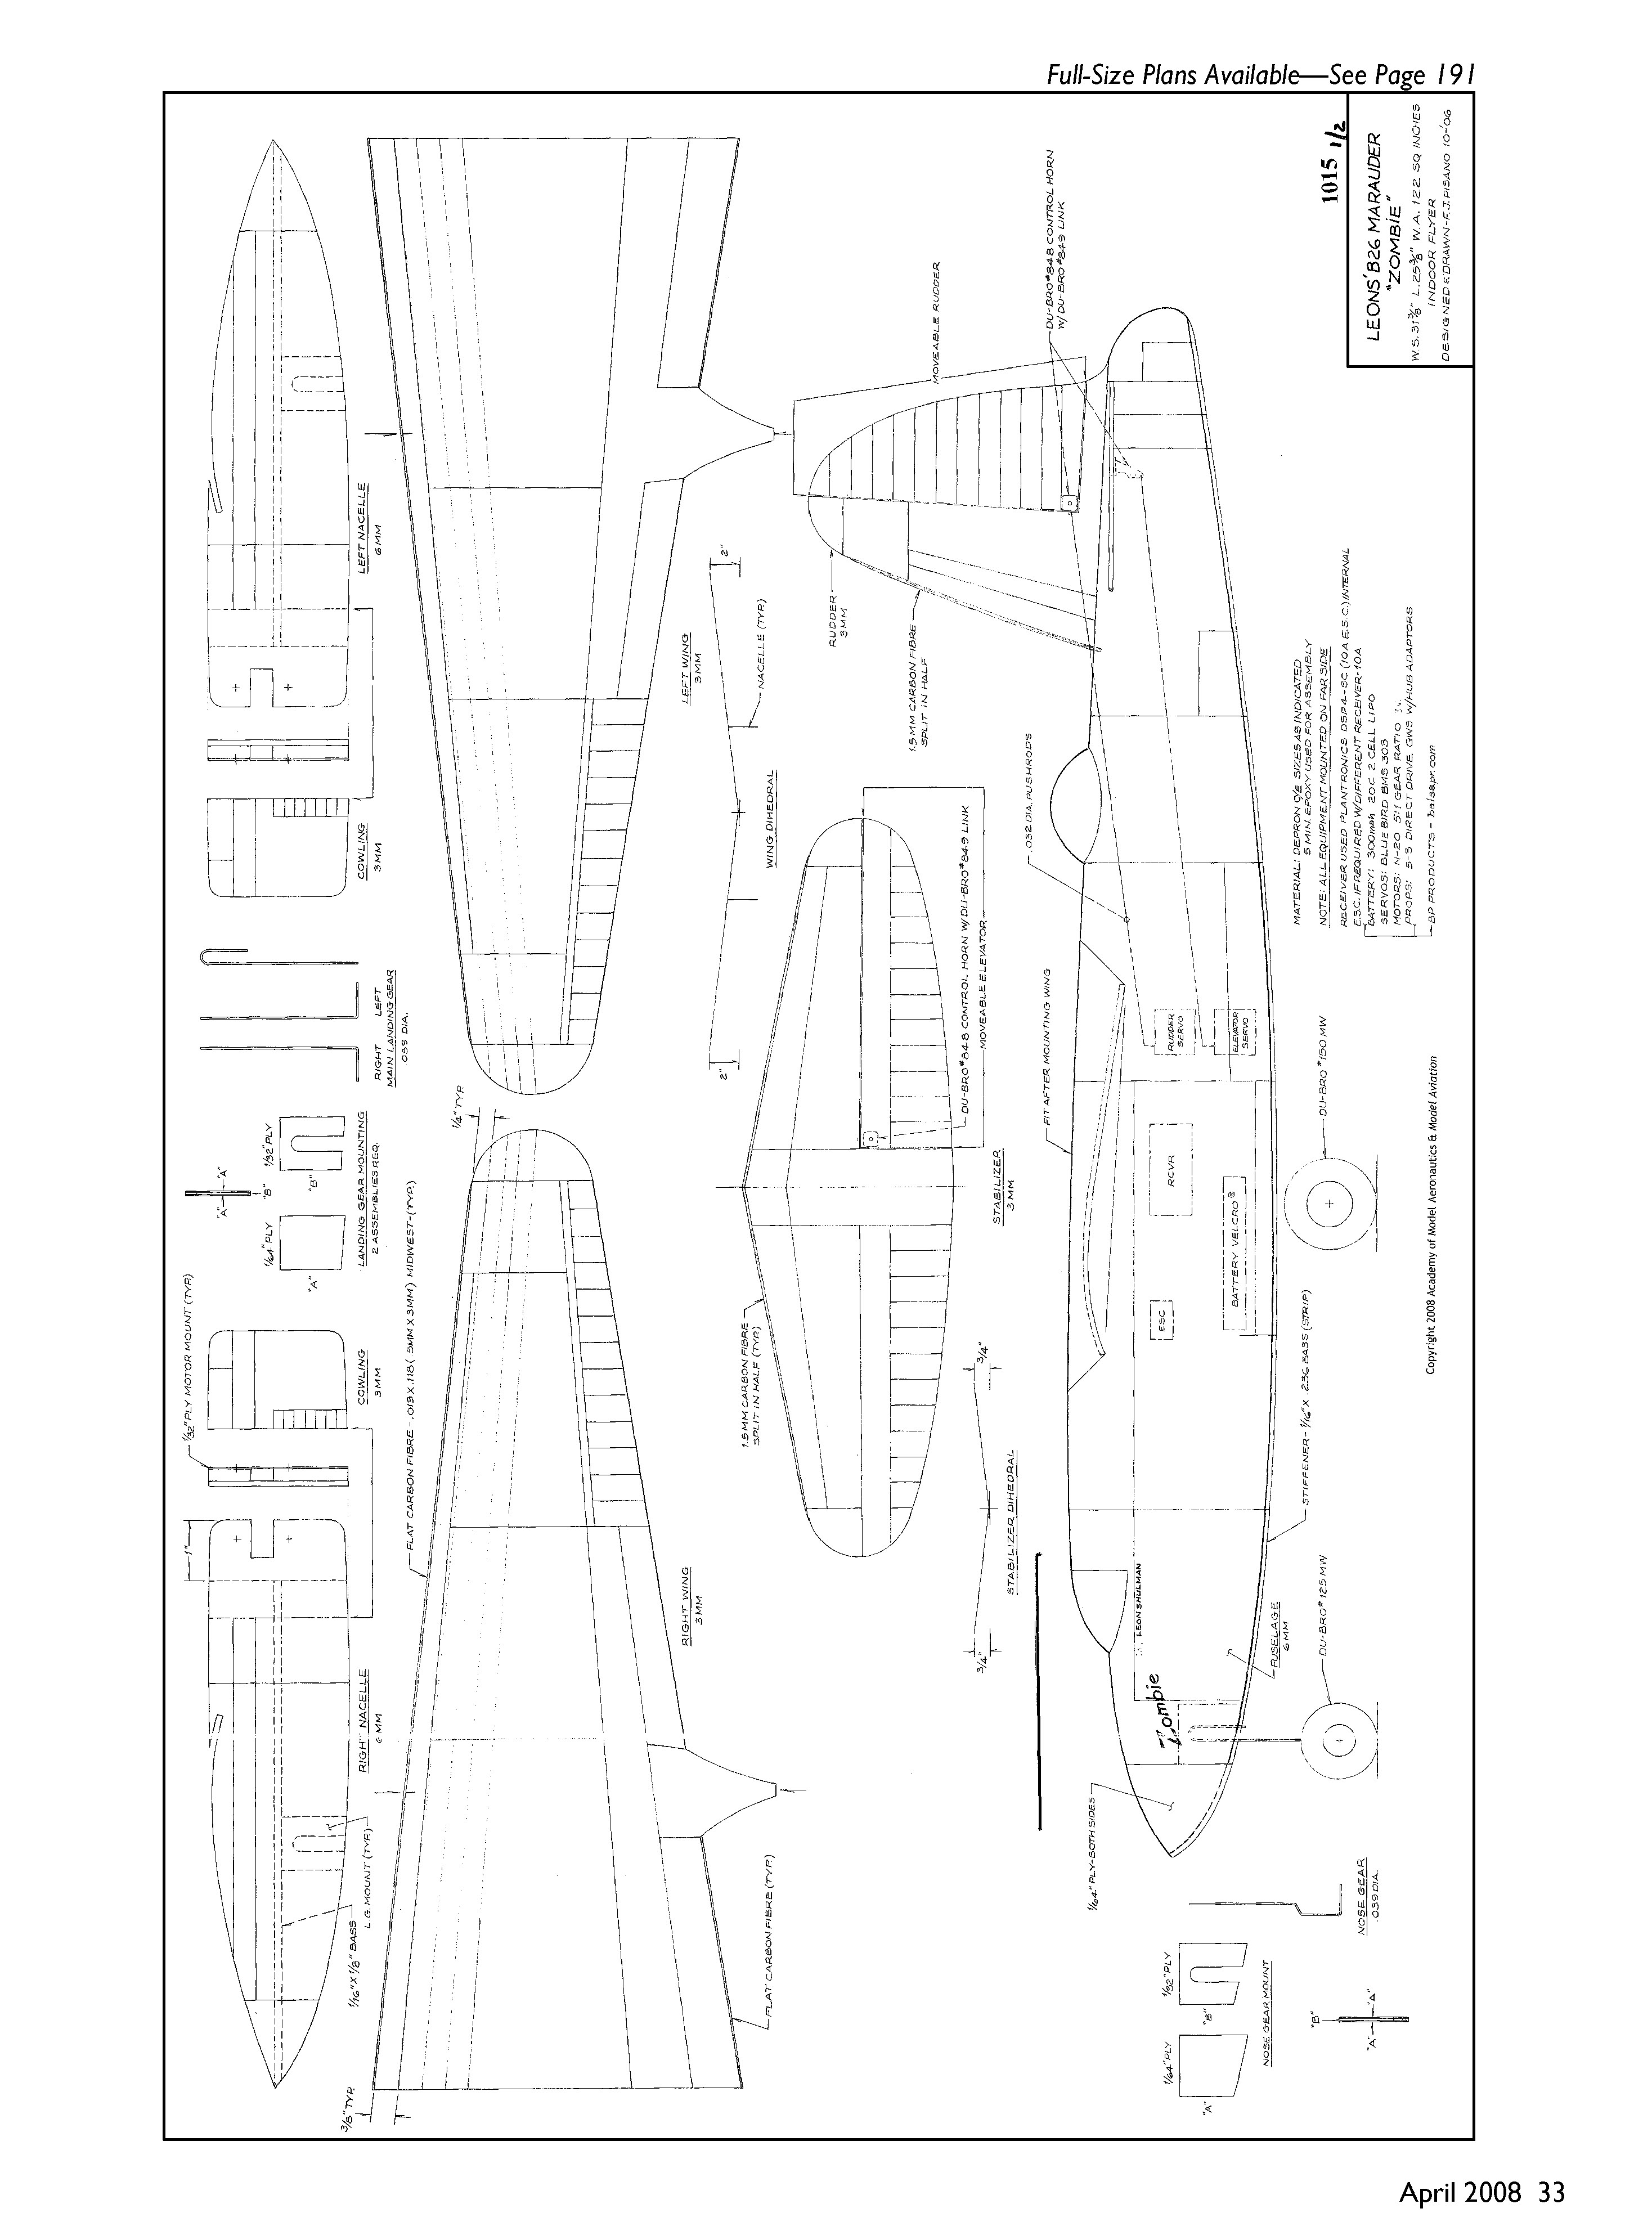
Leon and I are including plans for both sizes of the B-26. Each set provides details about structure and equipment. Your usual tools should be sufficient since the model is essentially an assembly project. The larger version is made from 3mm and 6mm Depron, along with other materials noted on the plans.
Smaller (actuator) B-26
- Type: Semiscale, twin-motor, indoor/outdoor
- Pilot skill: Beginner to expert
- Wingspan: 22 inches
- Wing area: 63 square inches
- Length: 18 inches
- Weight: 35 grams (1.2 ounces); 1.5 ounces with battery
- Wing loading: 0.29 ounce/square foot
- Motors: Bob Selman orange pager; Bob Selman small magnetic actuators
- Propellers: Selman 2¼-inch yellow
- Radio: Microbatics with ESC
- Batteries: One-cell, 250 mAh Li-Poly — weight 7 grams (0.25 ounce)
- Construction: Depron — body 6mm; wing/tail 2mm; nacelles 3mm
Larger (servo) B-26
- Type: Semiscale, twin-motor, indoor/outdoor
- Pilot skill: Beginner to expert
- Wingspan: 31.5 inches
- Wing area: 120 square inches
- Length: 25.5 inches
- Weight: 96 grams (3.4 ounces); 3.9 ounces with battery
- Wing loading: 0.21 ounce/square foot
- Motors: Hobby Electronics #F832 — 5:1 gear ratio, 3 volts
- Servos: Bluebird 303 servos
- Propellers: GWS Direct Drive, 5.3 inches with shaft adapters
- Radio: Plantronics DSP4-SC with ESC
- Batteries: Two-cell, 250 mAh Li-Poly — weight 14 grams (0.5 ounce)
- Construction: Depron — body and nacelles 6mm; wing 3mm; tail surfaces 2mm
Construction
- Cut all required parts from Depron foam board as the plans indicate.
- Glue the skid strip to the bottom of the fuselage using five-minute epoxy. To make the skid follow the nose curve, cut several kerfs along its length on the top of the strip. Hold the strip in place with short pieces of masking tape until the epoxy sets. Add the 1/64" plywood nose-turret pieces to each side of the fuselage.
- If you want scale markings, apply them now—before assembling parts. Use a Sharpie Fine Point marking pen for panel lines and Tamiya flat-black acrylic paint for the nose, windshield, turret, and rear turret. These details add scale appeal.
- Crease the wing panels as indicated to obtain the airfoil shape. Sand the center wing edges to provide the indicated dihedral.
- The stabilizer need not be cut in half; you can fold it against a straightedge at the centerline to achieve the slight dihedral shown. If building the first-class (combat-ready) version, cut the rudder and elevator moving parts free at this time.
- Hinges:
- For the smaller variation use 1/4" x 3/8" strips of Du-Bro Electric Flyer Hinge Tape (product 916). You will need two hinges for the rudder and two for the elevator.
- For the larger B-26 use the Du-Bro hinge tape in the normal manner: run it the entire length of the movable surface on one side only.
- Insert the stabilizer into its slot in the fuselage and glue it in place with five-minute epoxy.
- Adhere the wings at the correct dihedral angle using five-minute epoxy. When the epoxy has cured, glue the wing in position and ensure proper alignment on the fuselage.
- Fit the top wing filler piece back in place and glue it after the wing is secure. Glue the nacelles to the wing panels using the alignment marks, and add the stiffeners.
- Position the receiver as shown on the plans using double-stick tape. Place the battery using a hook-and-loop fastener. Make a small hole under the wing and above the receiver to pass the motor wires through the fuselage.
Notes:
- The larger version uses 3mm and 6mm Depron for strength where needed; follow the plans for material callouts.
- This is primarily an assembly project—typical hobby tools and adhesives are sufficient.
- The plans include alignment marks and equipment placement for both equipment-variation versions. Choose the electronic components that suit your skill level and flying preferences.
Transcribed from original scans by AI. Minor OCR errors may remain.

