
MAXFORD USA AIRCO DH.2
Fitz Walker [email protected]
Geoffrey de Havilland’s unusual fighter becomes an ARF
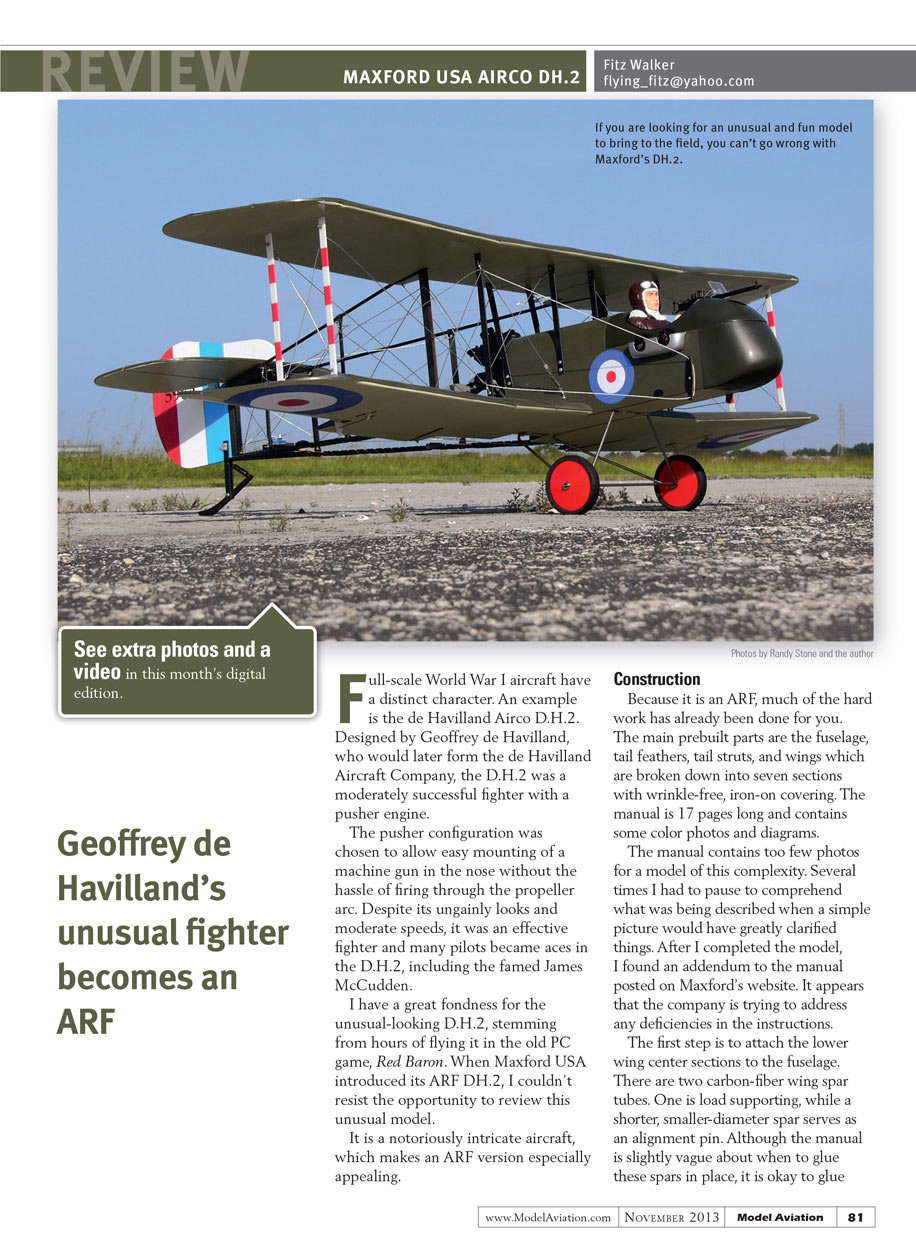
Full-scale World War I aircraft have a distinct character. An example is the de Havilland Airco D.H.2. Designed by Geoffrey de Havilland, who would later form the de Havilland Aircraft Company, the D.H.2 was a moderately successful fighter with a pusher engine.
The pusher configuration was chosen to allow easy mounting of a machine gun in the nose without the hassle of firing through the propeller arc. Despite its ungainly looks and moderate speeds, it was an effective fighter and many pilots became aces in the D.H.2, including the famed James McCudden.
I have a great fondness for the unusual-looking D.H.2, stemming from hours of flying it in the old PC game, Red Baron. When Maxford USA introduced its ARF D.H.2, I couldn’t resist the opportunity to review this unusual model.
It is a notoriously intricate aircraft, which makes an ARF version especially appealing.
Construction
Because it is an ARF, much of the hard work has already been done for you. The main prebuilt parts are the fuselage, tail feathers, tail struts, and wings which are broken down into seven sections with wrinkle-free, iron-on covering. The manual is 17 pages long and contains some color photos and diagrams.
The manual contains too few photos for a model of this complexity. Several times I had to pause to comprehend what was being described when a simple picture would have greatly clarified things. After I completed the model, I found an addendum to the manual posted on Maxford’s website. It appears that the company is trying to address any deficiencies in the instructions.
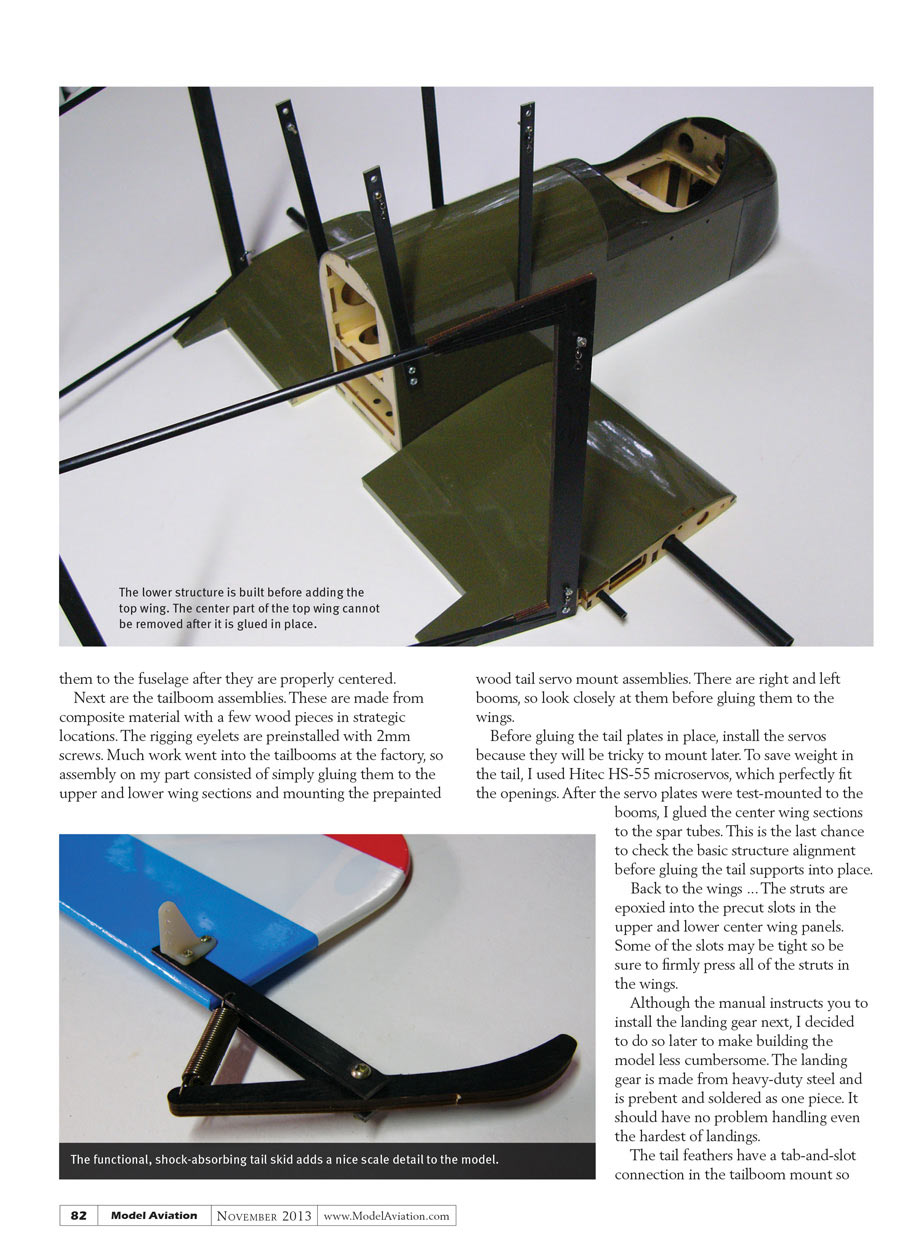
The first step is to attach the lower wing center sections to the fuselage. There are two carbon-fiber wing spar tubes. One is load supporting, while a shorter, smaller-diameter spar serves as an alignment pin. Although the manual is slightly vague about when to glue these spars in place, it is okay to glue them to the fuselage after they are properly centered.
Next are the tailboom assemblies. These are made from composite material with a few wood pieces in strategic locations. The rigging eyelets are preinstalled with 2mm screws. Much work went into the tailbooms at the factory, so assembly on my part consisted of simply gluing them to the upper and lower wing sections and mounting the prepainted wood tail servo mount assemblies. There are right and left booms, so look closely at them before gluing them to the wings.
Before gluing the tail plates in place, install the servos because they will be tricky to mount later. To save weight in the tail, I used Hitec HS-55 microservos, which perfectly fit the openings. After the servo plates were test-mounted to the booms, I glued the center wing sections to the spar tubes. This is the last chance to check the basic structure alignment before gluing the tail supports into place.
Back to the wings ... The struts are epoxied into the precut slots in the upper and lower center wing panels. Some of the slots may be tight so be sure to firmly press all of the struts in the wings.
Although the manual instructs you to install the landing gear next, I decided to do so later to make building the model less cumbersome. The landing gear is made from heavy-duty steel and is prebent and soldered as one piece. It should have no problem handling even the hardest of landings.
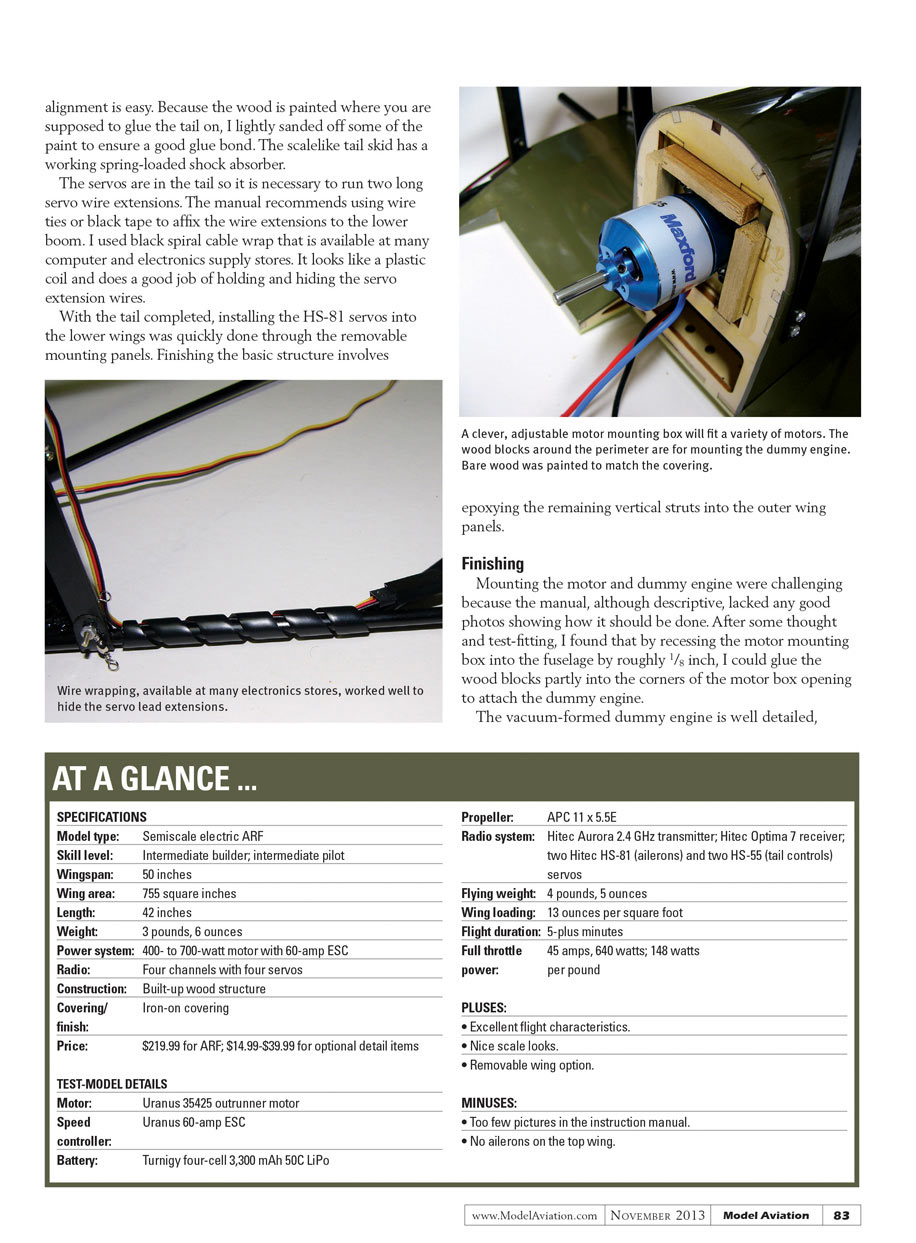
The tail feathers have a tab-and-slot connection in the tailboom mount so alignment is easy. Because the wood is painted where you are supposed to glue the tail on, I lightly sanded off some of the paint to ensure a good glue bond. The scalelike tail skid has a working spring-loaded shock absorber.
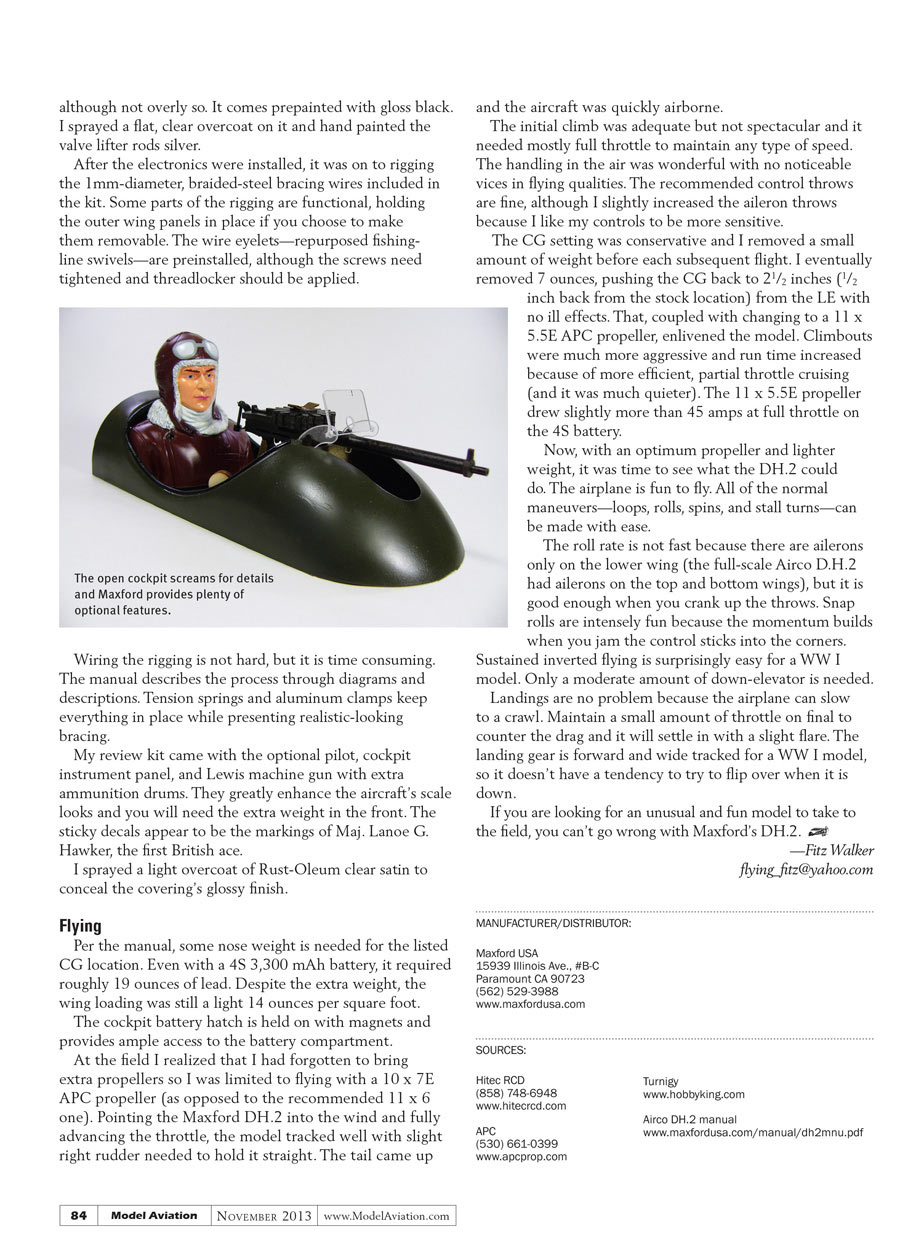
The servos are in the tail so it is necessary to run two long servo wire extensions. The manual recommends using wire ties or black tape to affix the wire extensions to the lower boom. I used black spiral cable wrap that is available at many computer and electronics supply stores. It looks like a plastic coil and does a good job of holding and hiding the servo extension wires.
With the tail completed, installing the HS-81 servos into the lower wings was quickly done through the removable mounting panels. Finishing the basic structure involves epoxying the remaining vertical struts into the outer wing panels.
Finishing
Mounting the motor and dummy engine were challenging because the manual, although descriptive, lacked any good photos showing how it should be done. After some thought and test-fitting, I found that by recessing the motor mounting box into the fuselage by roughly 1/8 inch, I could glue the wood blocks partly into the corners of the motor box opening to attach the dummy engine.
The vacuum-formed dummy engine is well detailed, and the aircraft was quickly airborne.
The initial climb was adequate but not spectacular and it needed mostly full throttle to maintain any type of speed. The handling in the air was wonderful with no noticeable vices in flying qualities. The recommended control throws are fine, although I slightly increased the aileron throws because I like my controls to be more sensitive.
The CG setting was conservative and I removed a small amount of weight before each subsequent flight. I eventually removed 7 ounces, pushing the CG back to 2 1/2 inches (1/2 inch back from the stock location) from the LE with no ill effects. That, coupled with changing to a 11 x 5.5E APC propeller, enlivened the model. Climbouts were much more aggressive and run time increased because of more efficient, partial throttle cruising (and it was much quieter). The 11 x 5.5E propeller drew slightly more than 45 amps at full throttle on the 4S battery.
Now, with an optimum propeller and lighter weight, it was time to see what the DH.2 could do. The airplane is fun to fly. All of the normal maneuvers—loops, rolls, spins, and stall turns—can be made with ease.
The roll rate is not fast because there are ailerons only on the lower wing (the full-scale Airco D.H.2 had ailerons on the top and bottom wings), but it is good enough when you crank up the throws. Snap rolls are intensely fun because the momentum builds when you jam the control sticks into the corners.
Sustained inverted flying is surprisingly easy for a WW I model. Only a moderate amount of down-elevator is needed. Landings are no problem because the airplane can slow to a crawl. Maintain a small amount of throttle on final to counter the drag and it will settle in with a slight flare. The landing gear is forward and wide tracked for a WW I model, so it doesn’t have a tendency to try to flip over when it is down.
If you are looking for an unusual and fun model to take to the field, you can’t go wrong with Maxford’s DH.2.
—Fitz Walker [email protected]
MANUFACTURER/DISTRIBUTOR:
Maxford USA 15393 Illinois Ave., #B-C Paramount CA 90723 (562) 529-3988 www.maxfordusa.com
SOURCES:
Hitec RCD (858) 748-6948 www.hitecrcd.com
APC (530) 661-0399 www.apcprop.com
Turnigy www.hobbyking.com
Airco D.H.2 manual www.maxfordusa.com/manual/dh2mu.pdf
Maxford USA Airco DH.2
Fitz Walker
Transcribed from original scans by AI. Minor OCR errors may remain.

