
Micro-Flying
Route 4, Box 369, Farmville VA 23901; E-mail: [email protected]
HELLO MICRO LOVERS! This has been a rich period for new products and goodies.
Before I get into a product discussion, the National Indoor Remote-Controlled Aircraft Council (NIRAC) Championships will be held October 7-9, 2005, at the Oakland Yard Athletics dome, and I will be the CD. Along with the competition events, there will be ample open flying.
The events include AMA 627, Indoor Electric Duration (limit three cells); RC Sport Scale; RC Fun Scale; Pylon Racing; Old Timer Climb and Glide; and Indoor RC Towline Glider. A catered banquet is planned for Saturday evening at the site.
More details can be found at www.nirac.org. Come out and help make this the best meet yet!
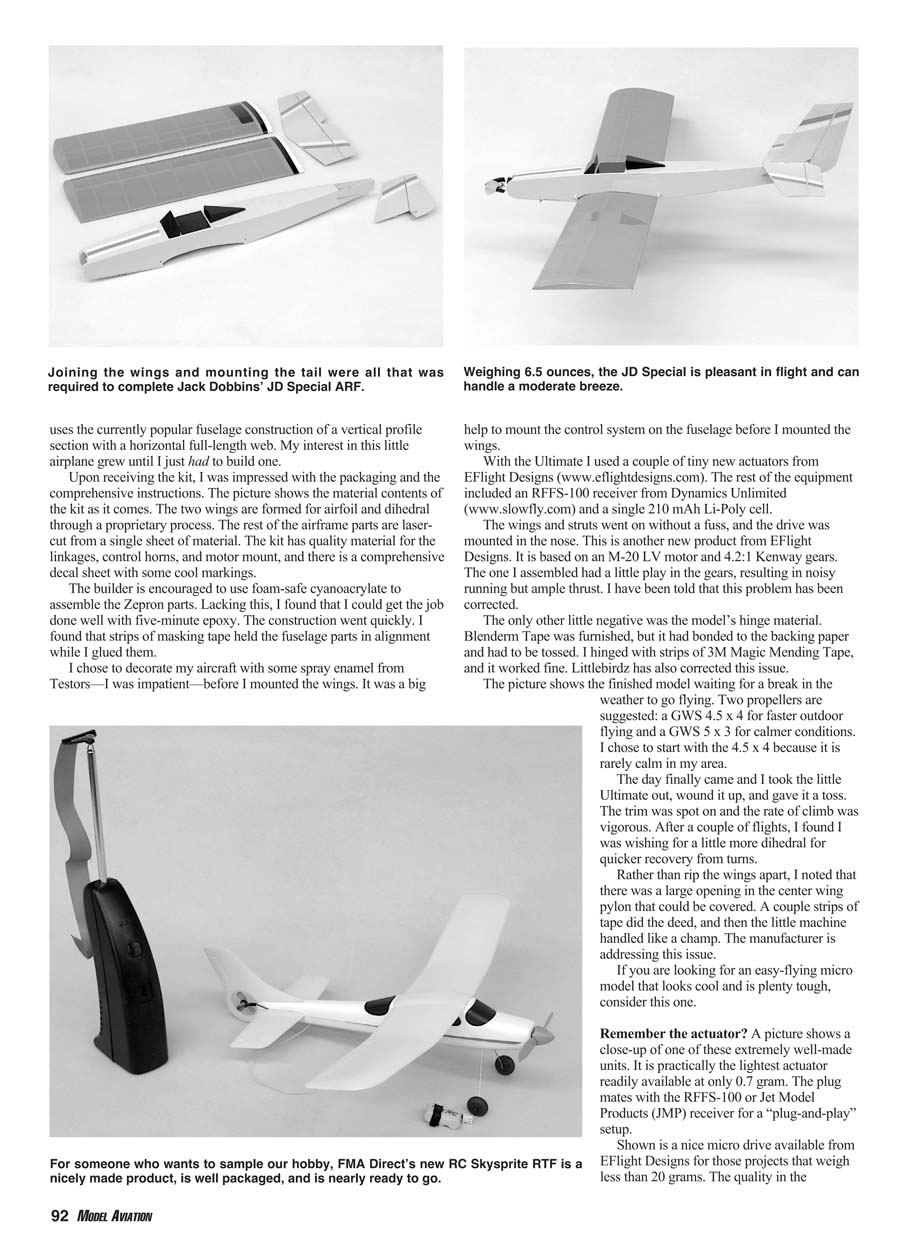
There are some fresh players on the new-products scene. I learned about a micro kit—the Micro Indoor Ultimate Bipe—from Littlebirdz (www.littlebirdz.com). The company is setting up to develop a laser-cut line of micro kits. With a 12.75-inch wingspan and a weight of 24-26 grams, this model is definitely micro.
The little Ultimate is constructed from laser-cut Zepron foam and uses the currently popular fuselage construction of a vertical profile section with a horizontal full-length web. My interest in this little airplane grew until I just had to build one.
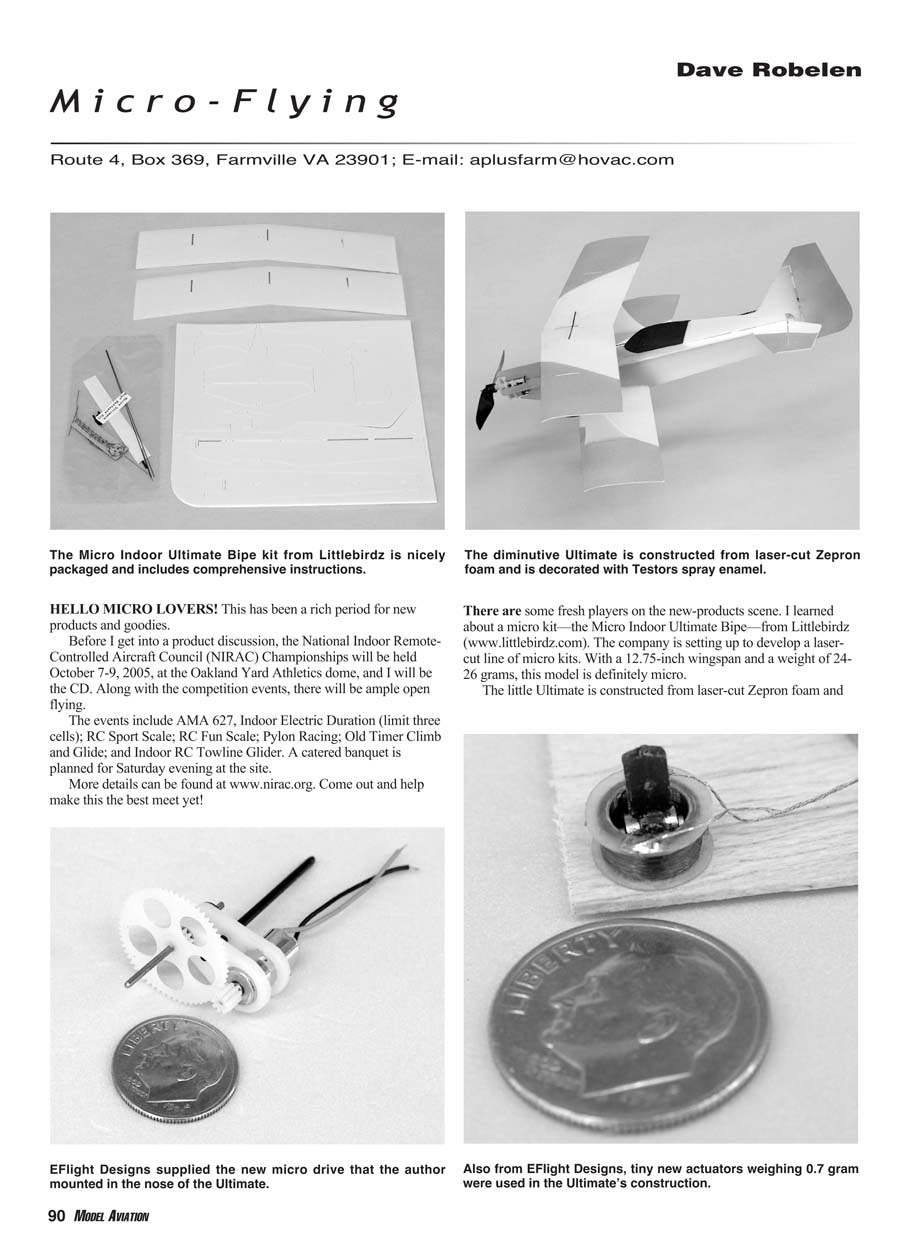
Upon receiving the kit, I was impressed with the packaging and the comprehensive instructions. The picture shows the material contents of the kit as it comes. The two wings are formed for airfoil and dihedral through a proprietary process. The rest of the airframe parts are laser-cut from a single sheet of material. The kit has quality material for the linkages, control horns, and motor mount, and there is a comprehensive decal sheet with some cool markings.
The builder is encouraged to use foam-safe cyanoacrylate to assemble the Zepron parts. Lacking this, I found that I could get the job done well with five-minute epoxy. The construction went quickly. I found that strips of masking tape held the fuselage parts in alignment while I glued them.
I chose to decorate my aircraft with some spray enamel from Testors—I was impatient—before I mounted the wings. It was a big help to mount the control system on the fuselage before I mounted the wings.
With the Ultimate I used a couple of tiny new actuators from EFlight Designs (www.eflightdesigns.com). The rest of the equipment included an RFFS-100 receiver from Dynamically Unlimited (www.slowfly.com) and a single 210 mAh Li-Poly Unilited cell.
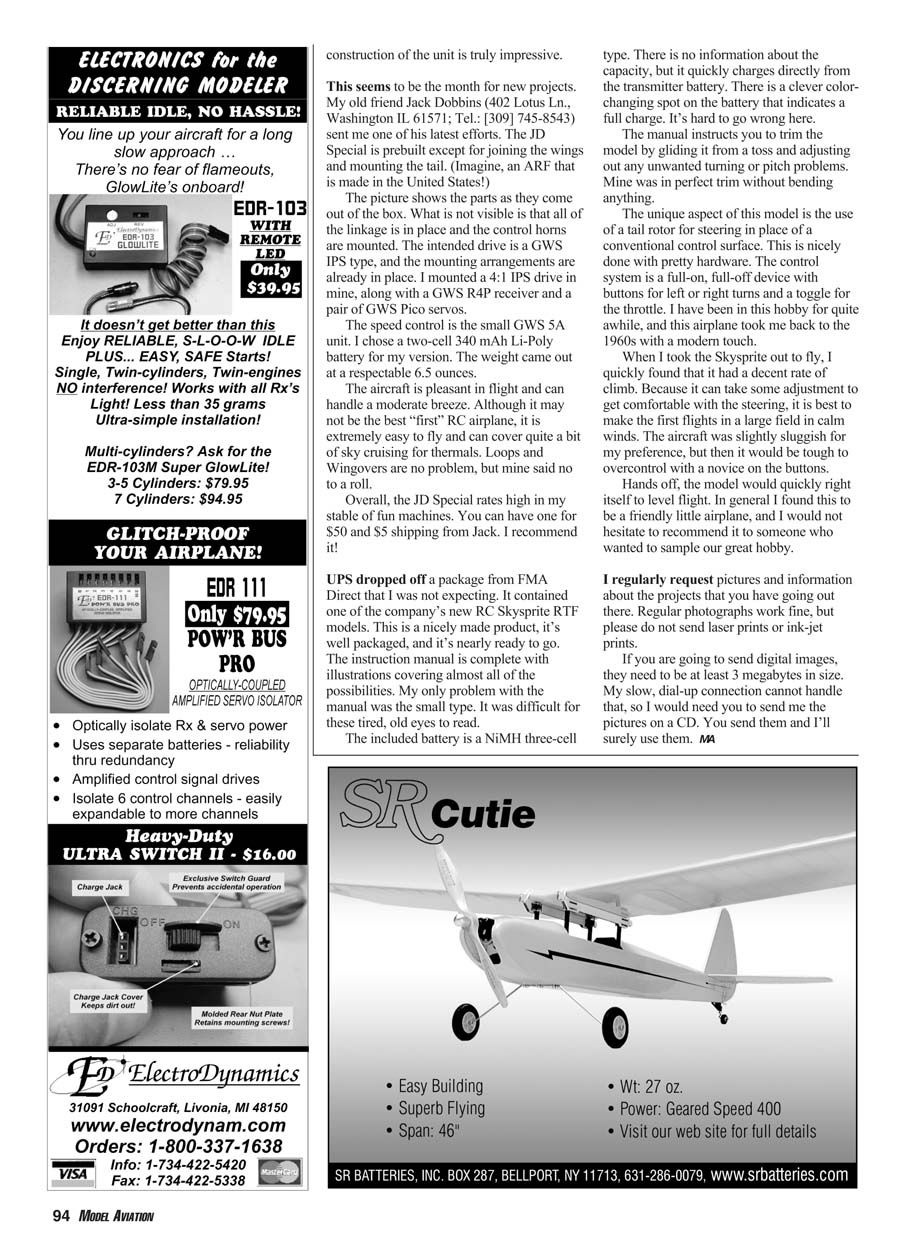
The wings and struts went on without a fuss, and the drive was mounted in the nose. This is another new product from EFlight Designs. It is based on an M-20 LV motor and 4.2:1 Keway gears. The one I assembled had a little play in the gears, resulting in noisy running but ample thrust. I have been told that this problem has been corrected.
The only other little negative was the model’s hinge material. Blenderm Tape was furnished, but it had bonded to the backing paper and had to be tossed. I hinged with strips of 3M Magic Mending Tape, and it worked fine. Littlebirdz has also corrected this issue.
The picture shows the finished model waiting for a break in the weather to go flying. Two propellers are suggested: a GWS 4.5 x 4 for faster outdoor flying and a GWS 5 x 3 for calmer conditions. I chose to start with the 4.5 x 4 because it is rarely calm in my area.
The day finally came and I took the little Ultimate out, wound it up, and gave it a toss. The trim was spot on and the rate of climb was vigorous. After a couple of flights, I found I was wishing for a little more dihedral for quicker recovery from turns.
Rather than rip the wings apart, I noted that there was a large opening in the center wing pylon that could be covered. A couple strips of tape did the deed, and then the little machine handled like a champ. The manufacturer is addressing this issue.
If you are looking for an easy-flying micro model that looks cool and is plenty tough, consider this one.
Remember the actuator? A picture shows a close-up of one of these extremely well-made units. It is practically the lightest actuator readily available at only 0.7 gram. The plug mates with the RFFS-100 or Jet Model Products (JMP) receiver for a “plug-and-play” setup.
Shown is a nice micro drive available from EFlight Designs for those projects that weigh less than 20 grams. The quality in the construction of the unit is truly impressive.
This seems to be the month for new projects. My old friend Jack Dobbins (402 Lotus Ln., Washington IL 61571; Tel.: [309] 745-8543) sent me one of his latest efforts. The JD Special is prebuilt except for joining the wings and mounting the tail. (Imagine, an ARF that is made in the United States!)
The picture shows the parts as they come out of the box. What is not visible is that all of the linkage is in place and the control horns are mounted. The intended drive is a GWS IPS type, and the mounting arrangements are already in place. I mounted a 4:1 IPS drive in mine, along with a GWS R4P receiver and a pair of GWS Pico servos.
The speed control is the small GWS 5A unit. I chose a two-cell 340 mAh Li-Poly battery for my version. The weight came out at a respectable 6.5 ounces.
The aircraft is pleasant in flight and can handle a moderate breeze. Although it may not be the best “first” RC airplane, it is extremely easy to fly and can cover quite a bit of sky cruising for thermals. Loops and wingovers are no problem, but mine said no to a roll.
Overall, the JD Special rates high in my stable of fun machines. You can have one for $50 and $5 shipping from Jack. I recommend it!
UPS dropped off a package from FMA Direct that I was not expecting. It contained one of the company’s new RC Skysprite RTF models. This is a nicely made product, it’s well packaged, and it’s nearly ready to go. The instruction manual is complete with illustrations covering almost all of the possibilities. My only problem with the manual was the small type. It was difficult for these tired, old eyes to read.
The included battery is a NiMH three-cell type. There is no information about the capacity, but it quickly charges directly from the transmitter battery. There is a clever color-changing spot on the battery that indicates a full charge. It’s hard to go wrong here.
The manual instructs you to trim the model by gliding it from a toss and adjusting out any unwanted turning or pitch problems. Mine was in perfect trim without bending anything.
The unique aspect of this model is the use of a tail rotor for steering in place of a conventional control surface. This is nicely done with pretty hardware. The control system is a full-on, full-off device with buttons for left or right turns and a toggle for the throttle. I have been in this hobby for quite awhile, and this airplane took me back to the 1960s with a modern touch.
When I took the Skysprite out to fly, I quickly found that it had a decent rate of climb. Because it can take some adjustment to get comfortable with the steering, it is best to make the first flights in a large field in calm winds. The aircraft was slightly sluggish for my preference, but then it would be tough to overcontrol with a novice on the buttons.
Hands off, the model would quickly right itself to level flight. In general I found this to be a friendly little airplane, and I would not hesitate to recommend it to someone who wanted to sample our great hobby.
I regularly request pictures and information about the projects that you have going out there. Regular photographs work fine, but please do not send laser prints or ink-jet prints.
If you are going to send digital images, they need to be at least 3 megabytes in size. My slow, dial-up connection cannot handle that, so I would need you to send me the pictures on a CD. You send them and I’ll surely use them. MA
Transcribed from original scans by AI. Minor OCR errors may remain.

