
Micro-Flying
Route 4, Box 369, Farmville VA 23901; E-mail: [email protected]
HELLO MICRO FANS, and greetings from Central Virginia.
Spring has almost sprung in my area, and I have actually gotten some decent flying days. Of course, being retired from a 7–4 job does improve the situation when it comes to grabbing the moment.
This column will probably make it out before the big meet in Waterford, Michigan (May 31–June 1), so I will look forward to seeing some of you there. The Toledo show is just a few weeks away as I write this, and I am looking forward to the show itself and the flying session Saturday night at the Bowling Green State University field house. Travel safely and get plenty of rest if you are coming; I was wiped after last year’s session.
I have only made it to one indoor flying session in recent months, and that was at the National Building Museum in Washington, DC. If you are within a reasonable distance of this great site, I highly recommend that you come to the sessions. The DC Maxecuters club organizes the flying, and it does a superb job. The web site address to keep up with this activity is www.his.com/~tschmitt/comingattractions.html. There is plenty of other great stuff on this web site.
At the event there was a slightly enlarged Punkin II of my design that Jay Stargel of Woodbine, Maryland, built. There were two of these models in identical colors, but I missed the other builder’s name. Both models were splendid fliers and well suited to this facility.
A good starter model: DJ Aerotech Lockheed Electra profile
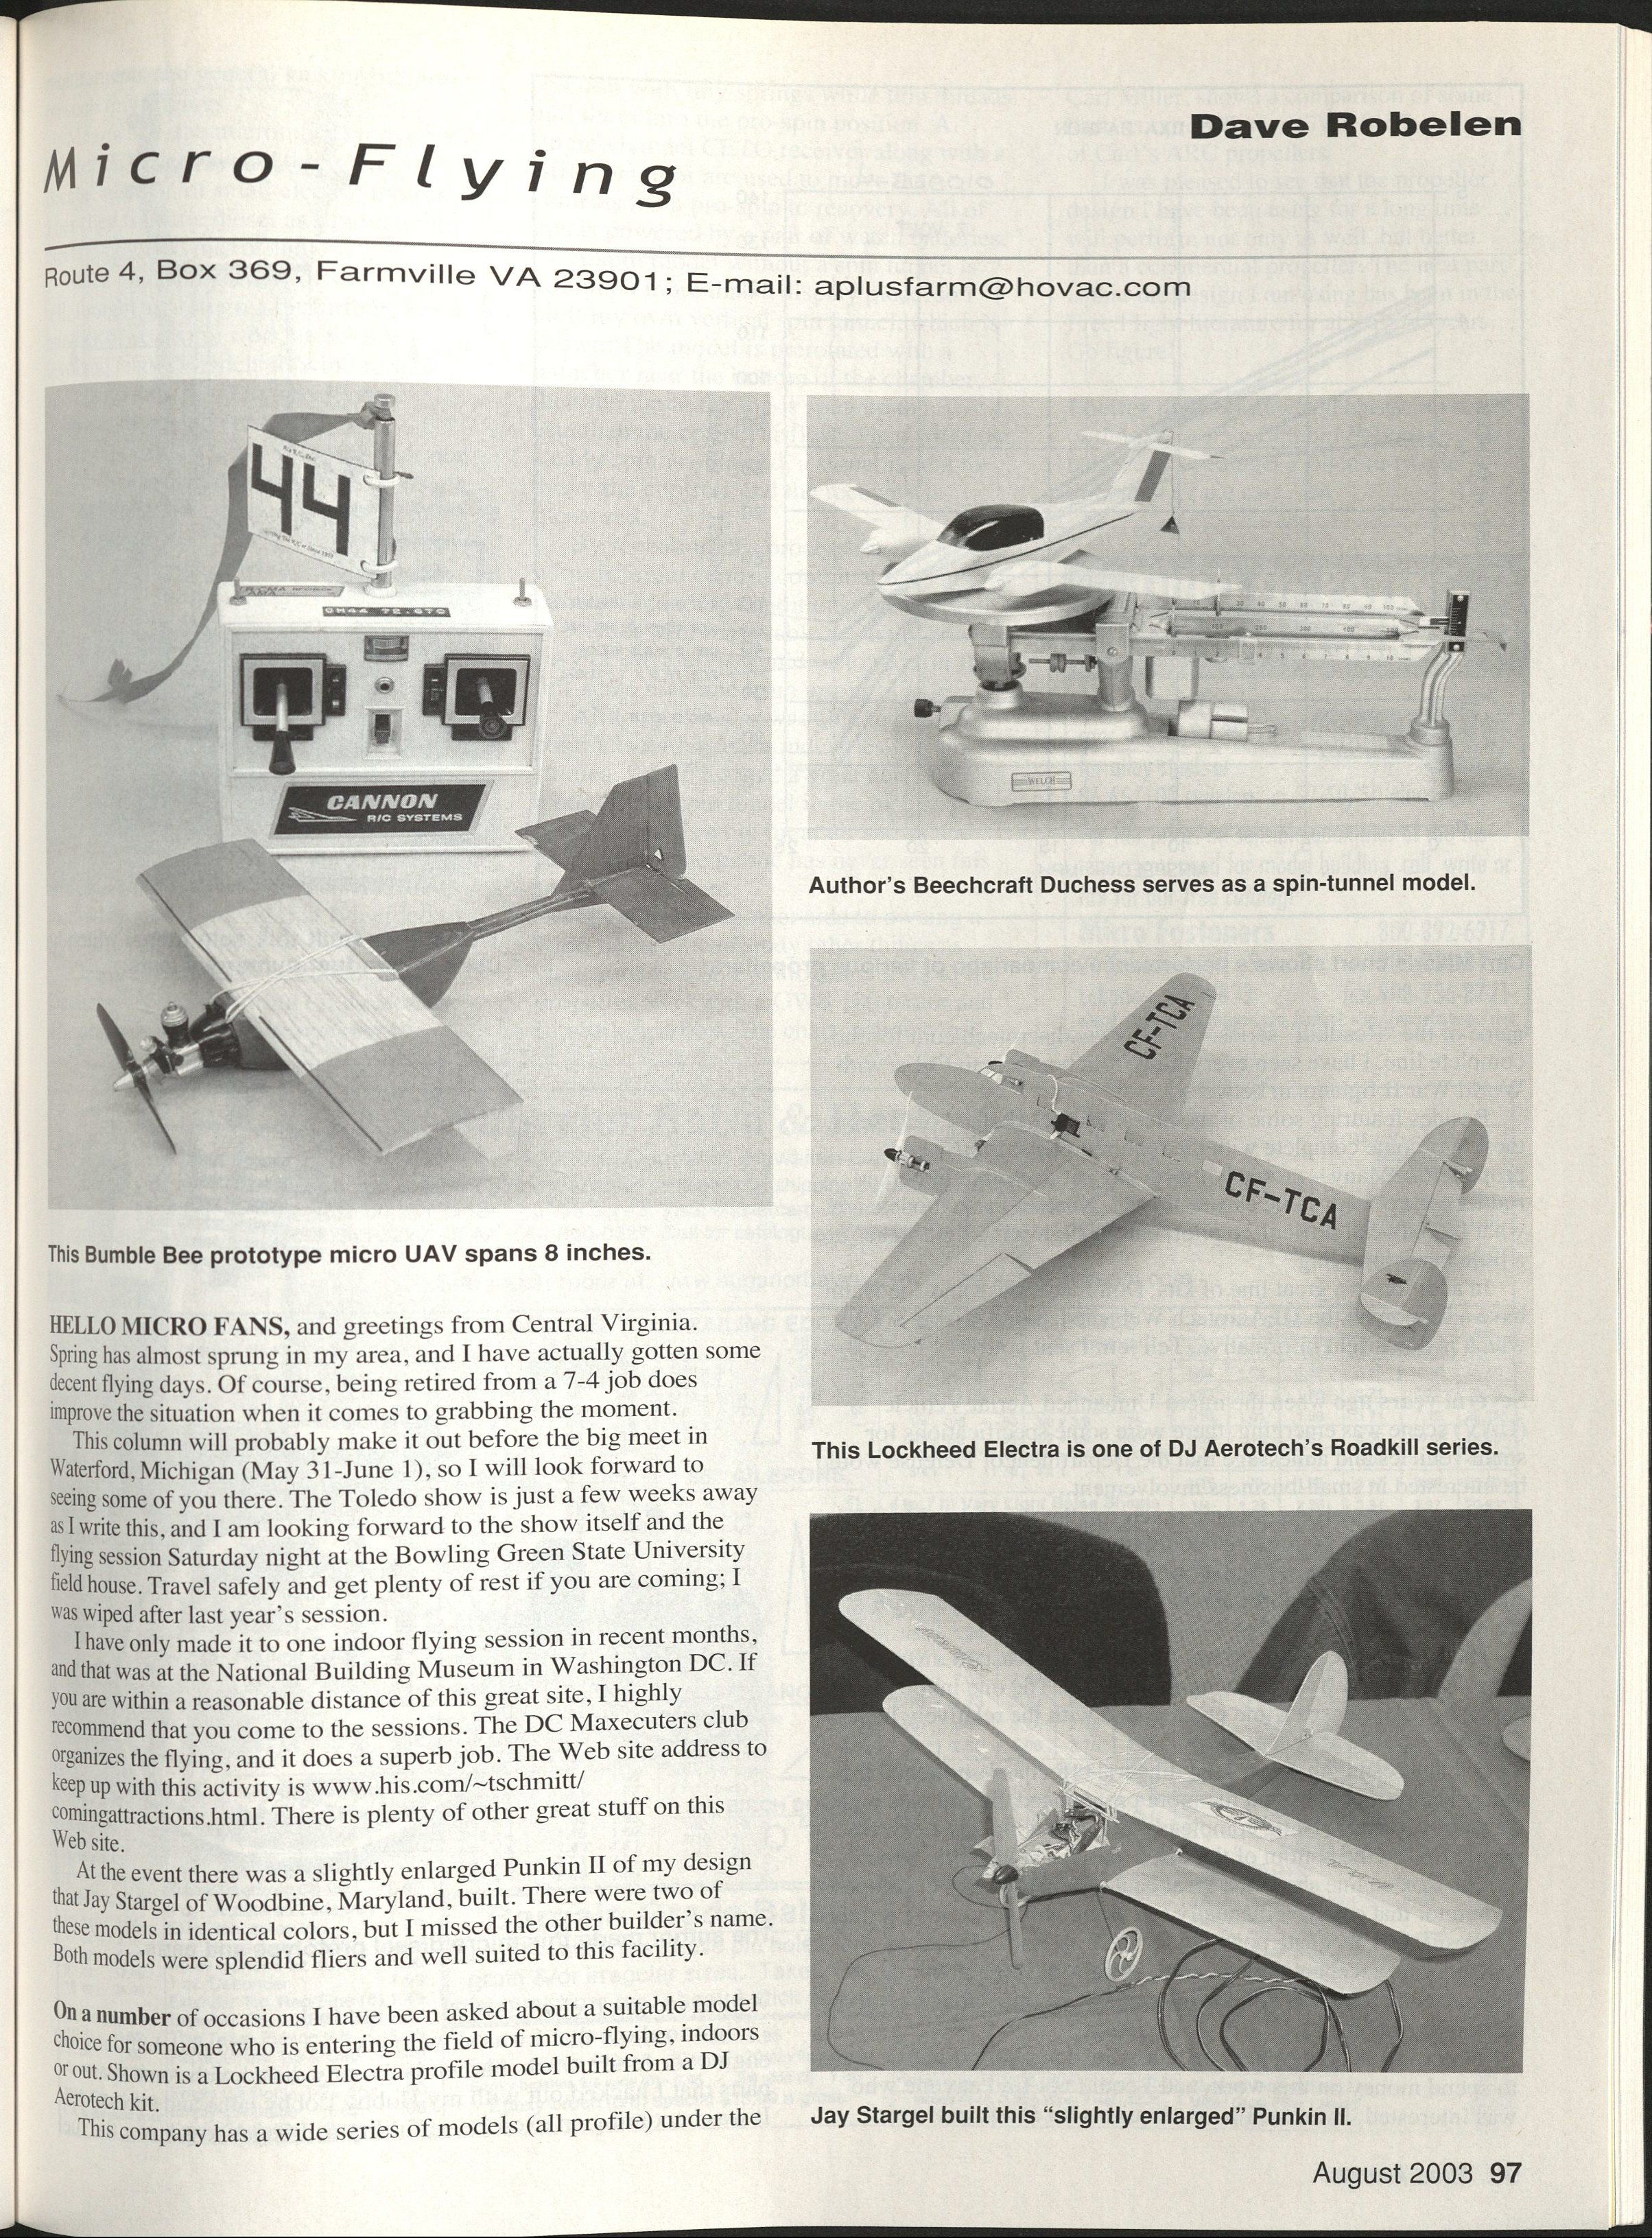
On a number of occasions I have been asked about a suitable model choice for someone who is entering the field of micro-flying, indoors or out. Shown is a Lockheed Electra profile model built from a DJ Aerotech kit.
This company has a wide series of models (all profile) under the name of the “Roadkill” series. Check www.djaerotech.com for the complete line. I have seen everything from bombers to Cubs, with World War II fighters in between. Besides featuring some of the nicest laser-cut balsa I have seen, these kits come complete with the required power unit(s) and propeller(s). Many—probably most—are set up with aileron and rudder control with some clever linkage. None of these models are what I would call difficult to pilot, but the high-wing lightplanes are a little more forgiving.
In addition to a great line of kits, Don Stackhouse and Joe Hahn have a section on the DJ Aerotech web site labeled “Ask J & D,” which is downright informative. Tell ’em I sent you.
Micro-UAV beginnings and the Bumble Bee
Several years ago, when the micro-Unmanned Aerial Vehicle (UAV) scene was emerging, there were some specifications for small vehicles and a message that the Department of Defense would be interested in small-business involvement. Since the models don’t come much smaller than what I build, I took an interest in seeing what could be done with the commercial equipment of the times.
I had a Canon microsystem that was way ahead of its time in features and several Cox .010 engines with which to work. The Bumble Bee has flown with at least 10 different wings to look at airfoil and wingspan effects. The one in the picture has an 8‑inch wingspan, and even loaded with the relatively heavy Canon gear, it was decent to fly. One interesting thing was the dihedral effect as I shortened the wing. The shorter the span, the more pronounced the roll was with the rudder. Besides being completely flat, this wing has a pair of plastic fins on the bottom of the tips to further reduce this effect.
The Cox engine showed a great deal of potential as I developed a carburetor that could be manually set, along with modified porting. The result was adequate power to fly the relatively high wing loading and excellent fuel economy. Flights lasting 10 minutes became commonplace with the little model with just the tank on the back of the engine.
No group of government officials was knocking my door down to spend money on this work, and I could not find anyone who was interested. Even so, I learned quite a bit about micro air vehicles along the way, so all was not lost.
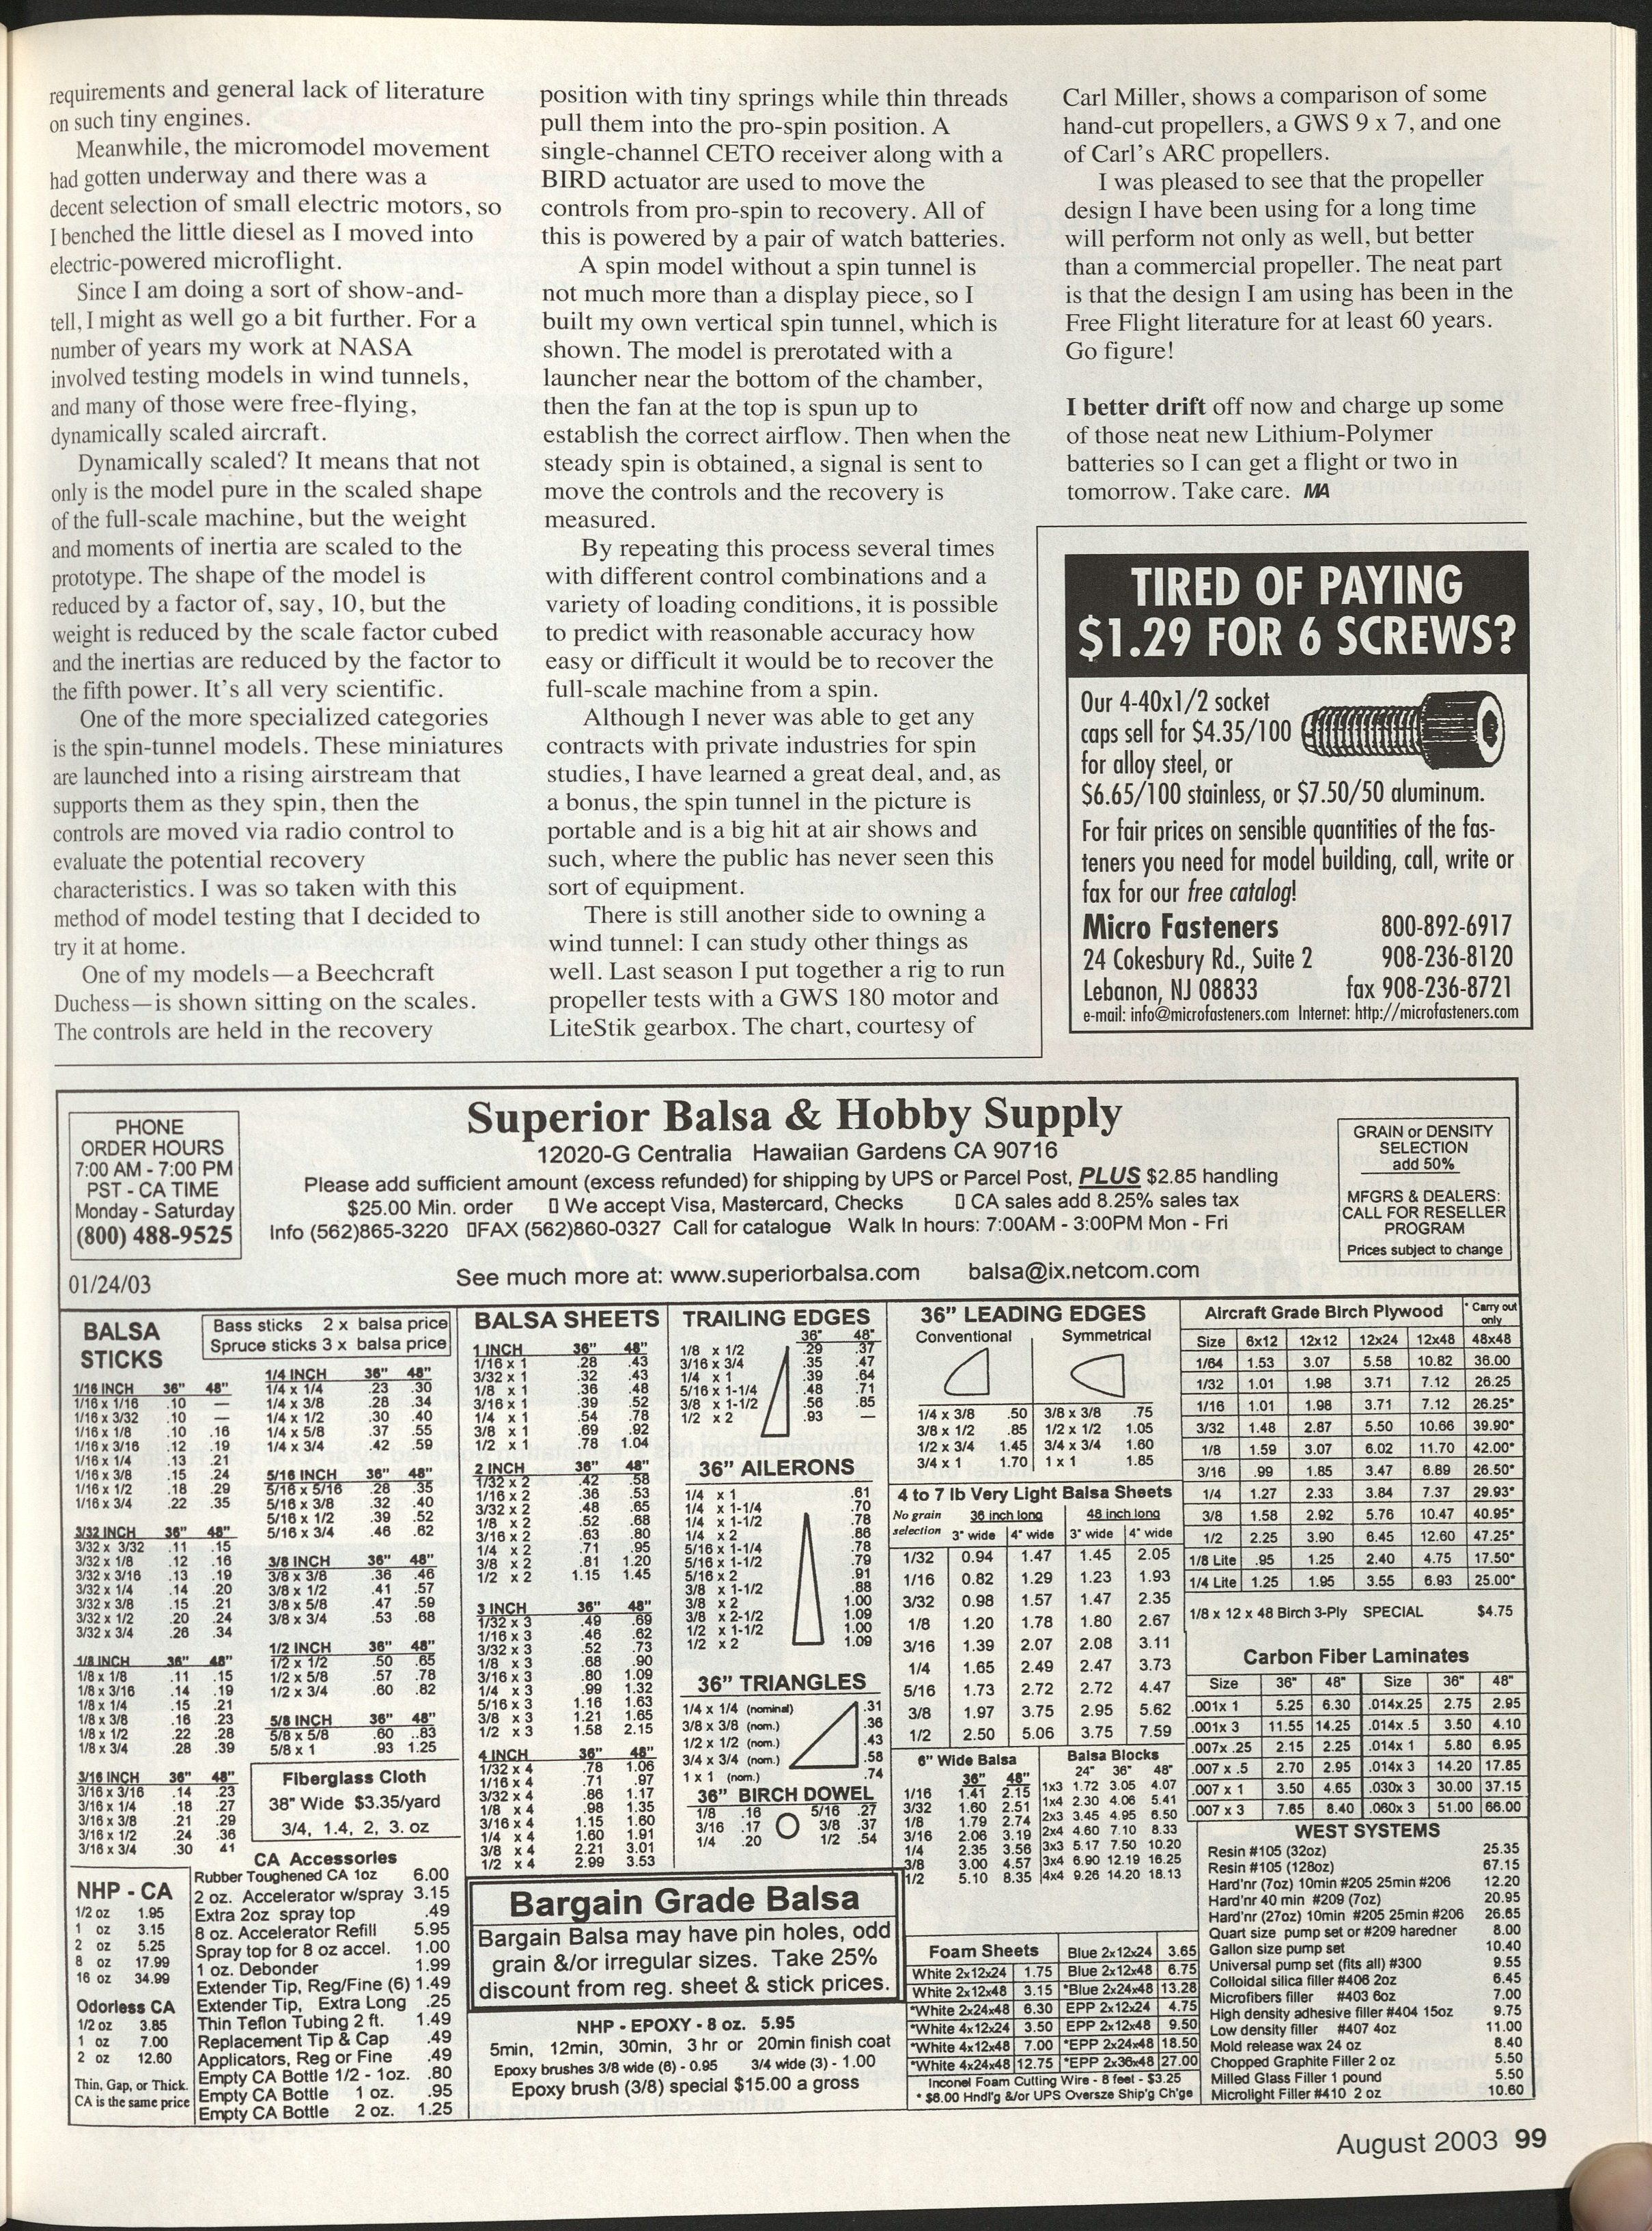
Small diesel attempt and move to electric
Just to show that I was slow to give up, I decided to build a small engine for future work. Shown is the tiny diesel with some spare parts that I hacked out with my Hobby Lobby lathe and accessories. It was becoming an exercise in futility as I began to go over the fuel requirements and the general lack of literature on such tiny engines.
Meanwhile, the micromodel movement had gotten underway and there was a decent selection of small electric motors, so I benched the little diesel as I moved into electric-powered microflight.
Wind tunnels, dynamic scaling, and spin testing
Since I am doing a sort of show-and-tell, I might as well go a bit further. For a number of years my work at NASA involved testing models in wind tunnels, and many of those were free-flying, dynamically scaled aircraft.
Dynamically scaled? It means that not only is the model pure in the scaled shape of the full-scale machine, but the weight and moments of inertia are scaled to the prototype. The shape of the model is reduced by a factor of, say, 10, but the weight is reduced by the scale factor cubed and the inertias are reduced by the factor to the fifth power. It’s all very scientific.
One of the more specialized categories is the spin-tunnel model. These miniatures are launched into a rising airstream that supports them as they spin; then the controls are moved via radio control to evaluate the potential recovery characteristics. I was so taken with this method of model testing that I decided to try it at home.
One of my models—a Beechcraft Duchess—is shown sitting on the scales. The controls are held in the recovery position with tiny springs while thin threads pull them into the pro-spin position. A single-channel CETO receiver along with a BIRD actuator are used to move the controls from pro-spin to recovery. All of this is powered by a pair of watch batteries.
A spin model without a spin tunnel is not much more than a display piece, so I built my own vertical spin tunnel. The model is prerotated with a launcher near the bottom of the chamber, then the fan at the top is spun up to establish the correct airflow. When the steady spin is obtained, a signal is sent to move the controls and the recovery is measured.
By repeating this process several times with different control combinations and a variety of loading conditions, it is possible to predict with reasonable accuracy how easy or difficult it would be to recover the full-scale machine from a spin.
Although I never was able to get any contracts with private industry for spin studies, I have learned a great deal, and, as a bonus, the spin tunnel in the picture is portable and is a big hit at air shows and such, where the public has never seen this sort of equipment.
Propeller testing
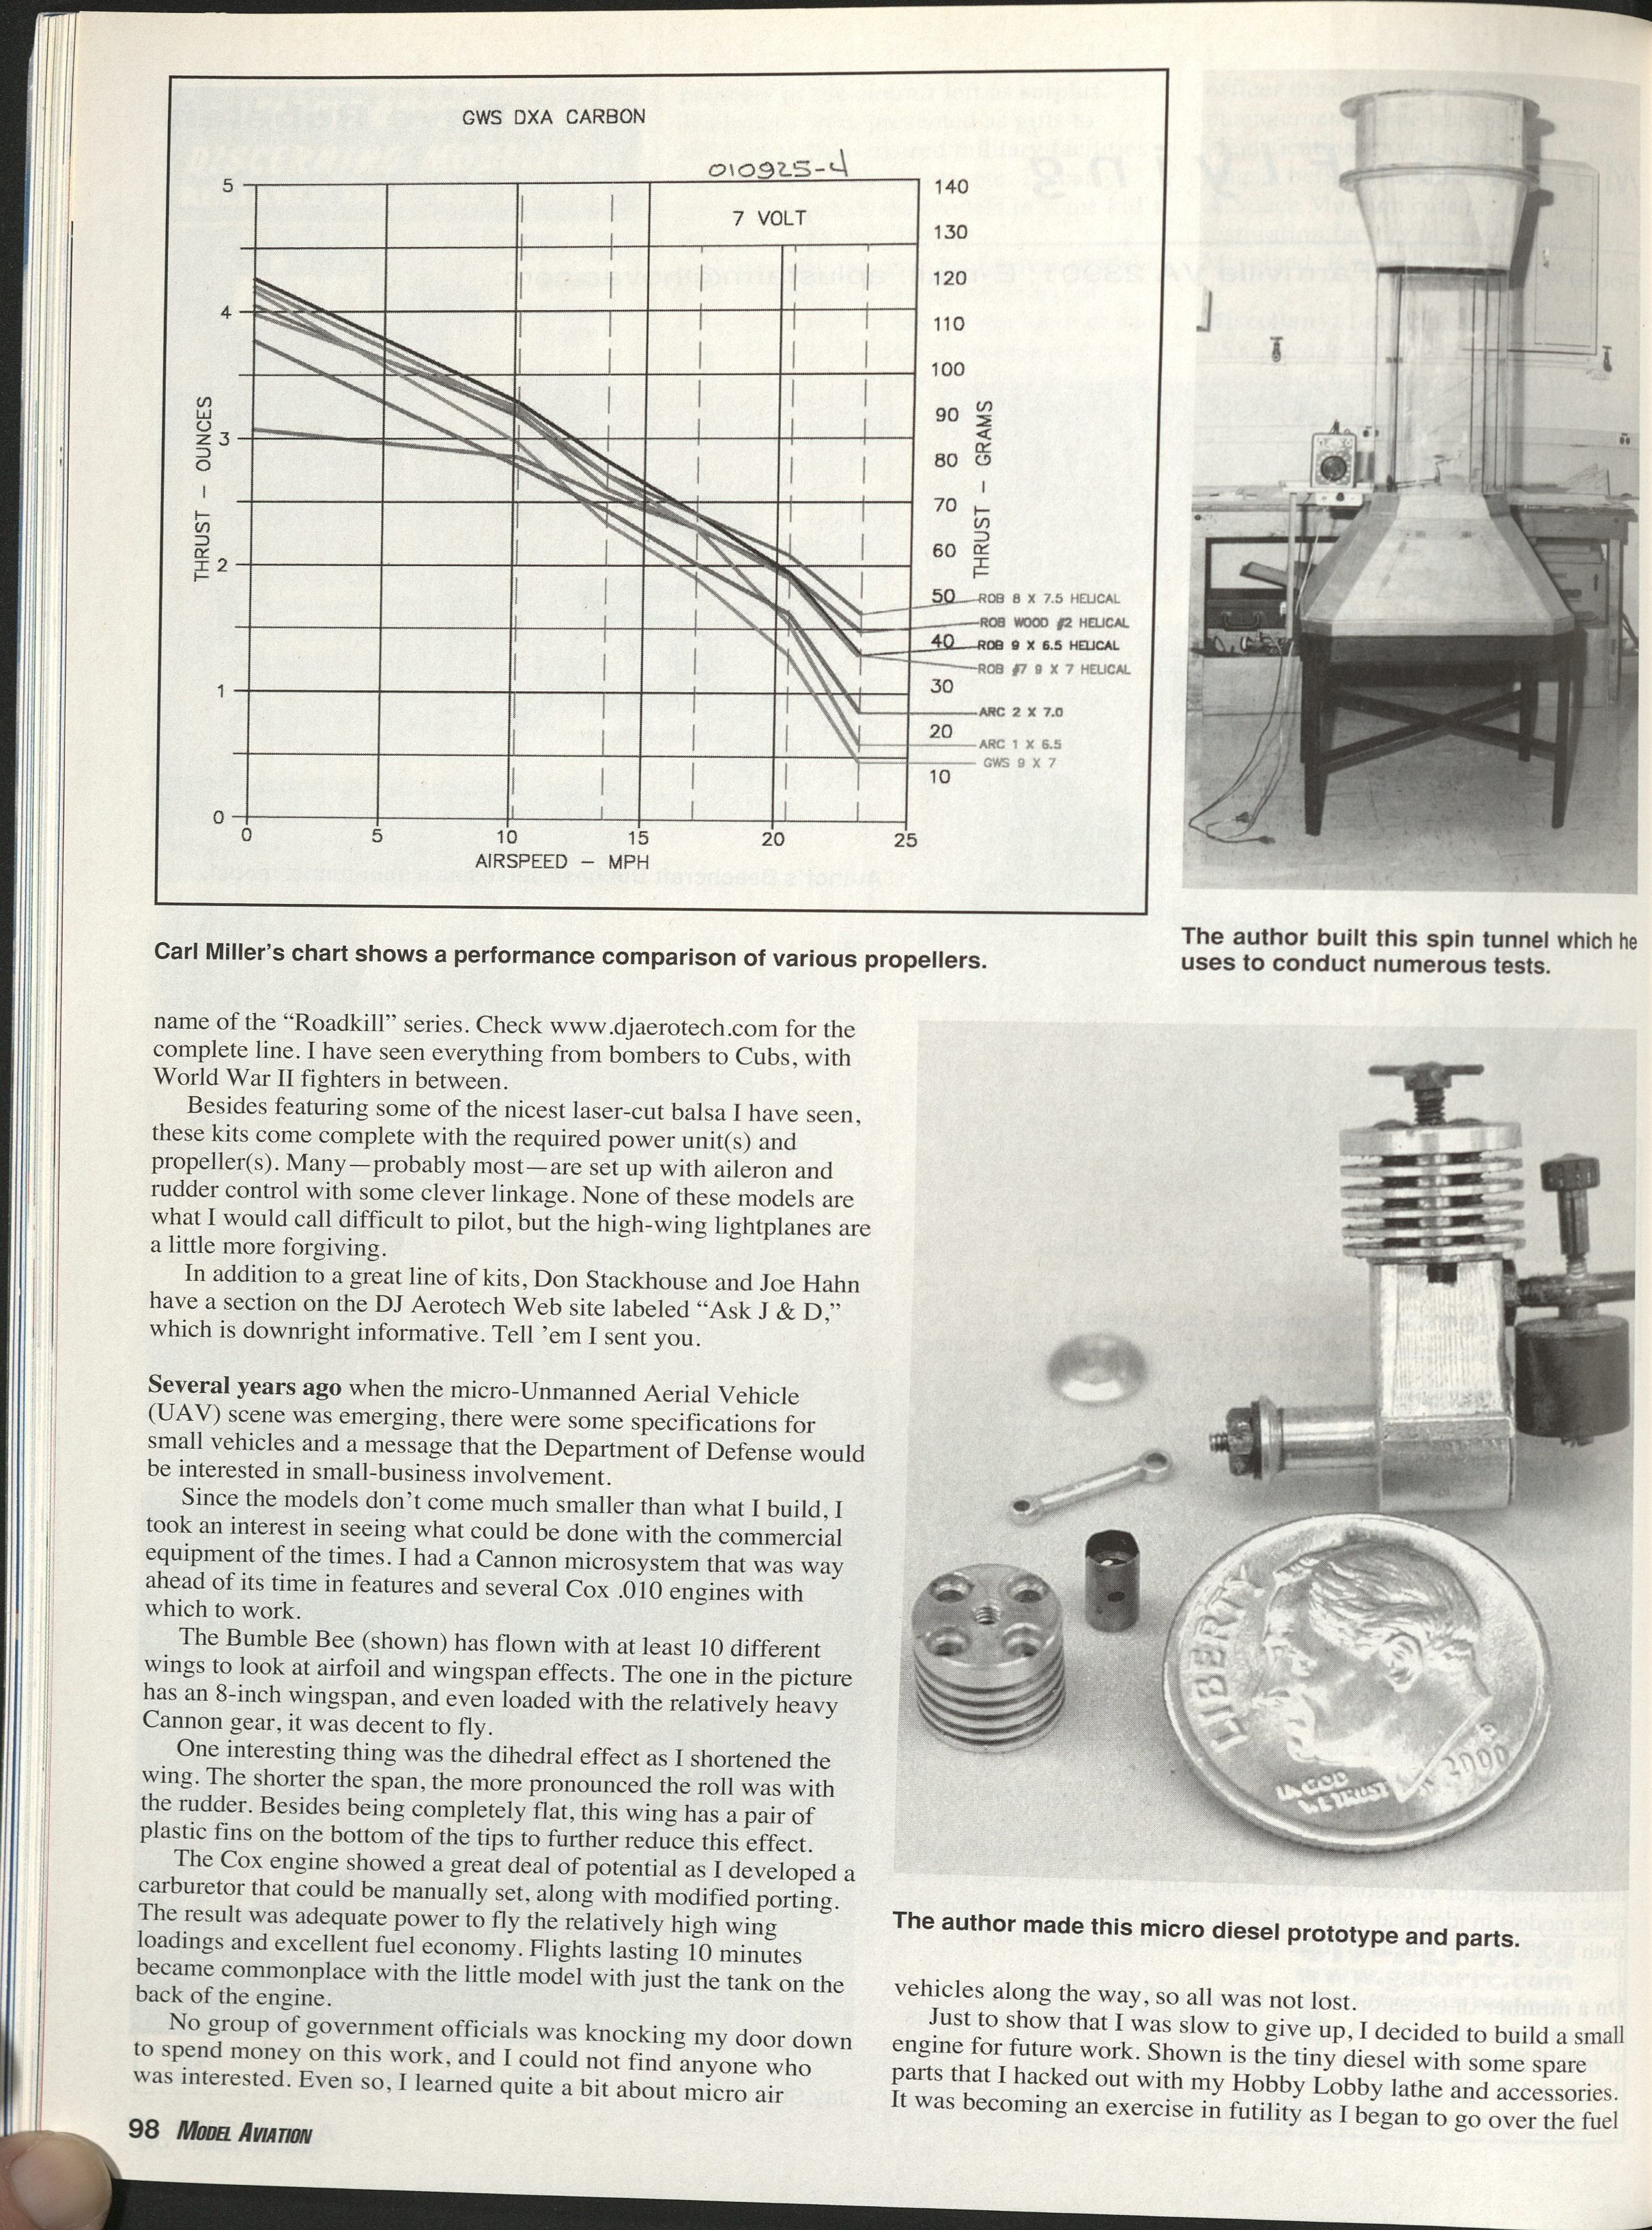
There is still another side to owning a wind tunnel: I can study other things as well. Last season I put together a rig to run propeller tests with a GWS 180 motor and LiteStik gearbox. The chart, courtesy of Carl Miller, shows a comparison of some hand-cut propellers, a GWS 9 x 7, and one of Carl’s ARC propellers.
I was pleased to see that the propeller design I have been using for a long time will perform not only as well, but better than a commercial propeller. The neat part is that the design I am using has been in the Free Flight literature for at least 60 years. Go figure!
I better drift off now and charge up some of those neat new Lithium-Polymer batteries so I can get a flight or two in tomorrow. Take care.
MA
Transcribed from original scans by AI. Minor OCR errors may remain.

