
Micro-Flying
Dave Robelen
Route 4, Box 369, Farmville VA 23901 E-mail: [email protected]
GREETINGS micro-model enthusiasts! I have a mixed bag this month. I will review a neat model that I found at the 2004 Toledo Show, present a custom glider by a Williamsburg, Virginia, modeler, and have a look at one of my latest micro projects.
Review: Megatech 1903 Wright Flyer (RTF)
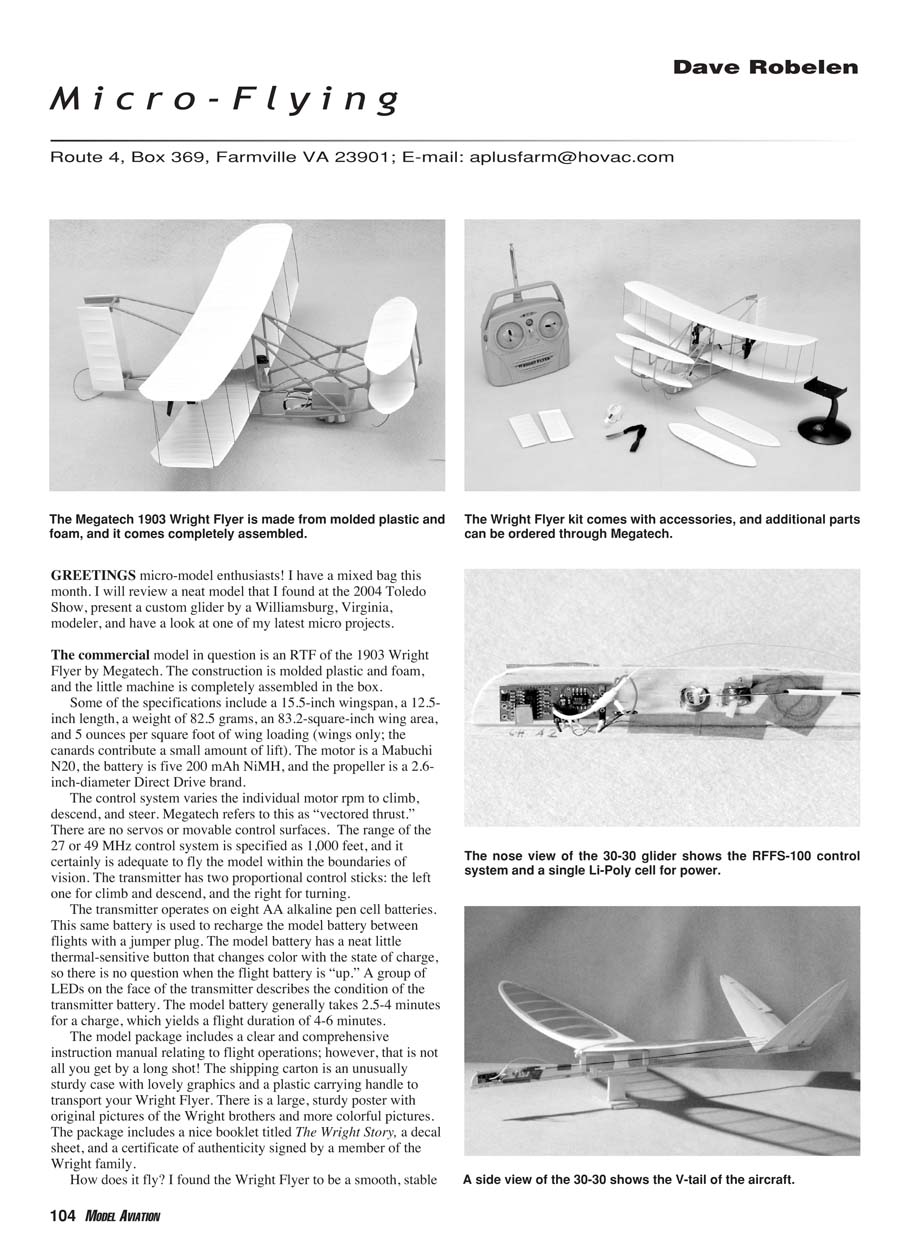
The commercial model in question is an RTF of the 1903 Wright Flyer by Megatech. Construction is molded plastic and foam, and the little machine is completely assembled in the box.
Specifications:
- Wingspan: 15.5 inches
- Length: 12.5 inches
- Weight: 82.5 grams
- Wing area: 83.2 square inches
- Wing loading: 5 ounces per square foot (wings only; the canards contribute a small amount of lift)
- Motor: Mabuchi N20
- Battery: five 200 mAh NiMH cells
- Propeller: 2.6-inch-diameter Direct Drive
Control and radio:
- The control system varies the individual motor rpm to climb, descend, and steer (Megatech calls this "vectored thrust").
- No servos or movable control surfaces.
- Range of the 27 or 49 MHz control system is specified as 1,000 feet — adequate to fly within visual boundaries.
- Transmitter has two proportional sticks: left for climb/descend, right for turning.
- Transmitter uses eight AA alkaline pen cells. The same battery pack is used to recharge the model battery between flights via a jumper plug.
- The model battery has a thermal-sensitive button that changes color with state of charge; transmitter has LEDs to show its battery condition.
- Charge time: generally 2.5–4 minutes, yielding flight durations of 4–6 minutes.
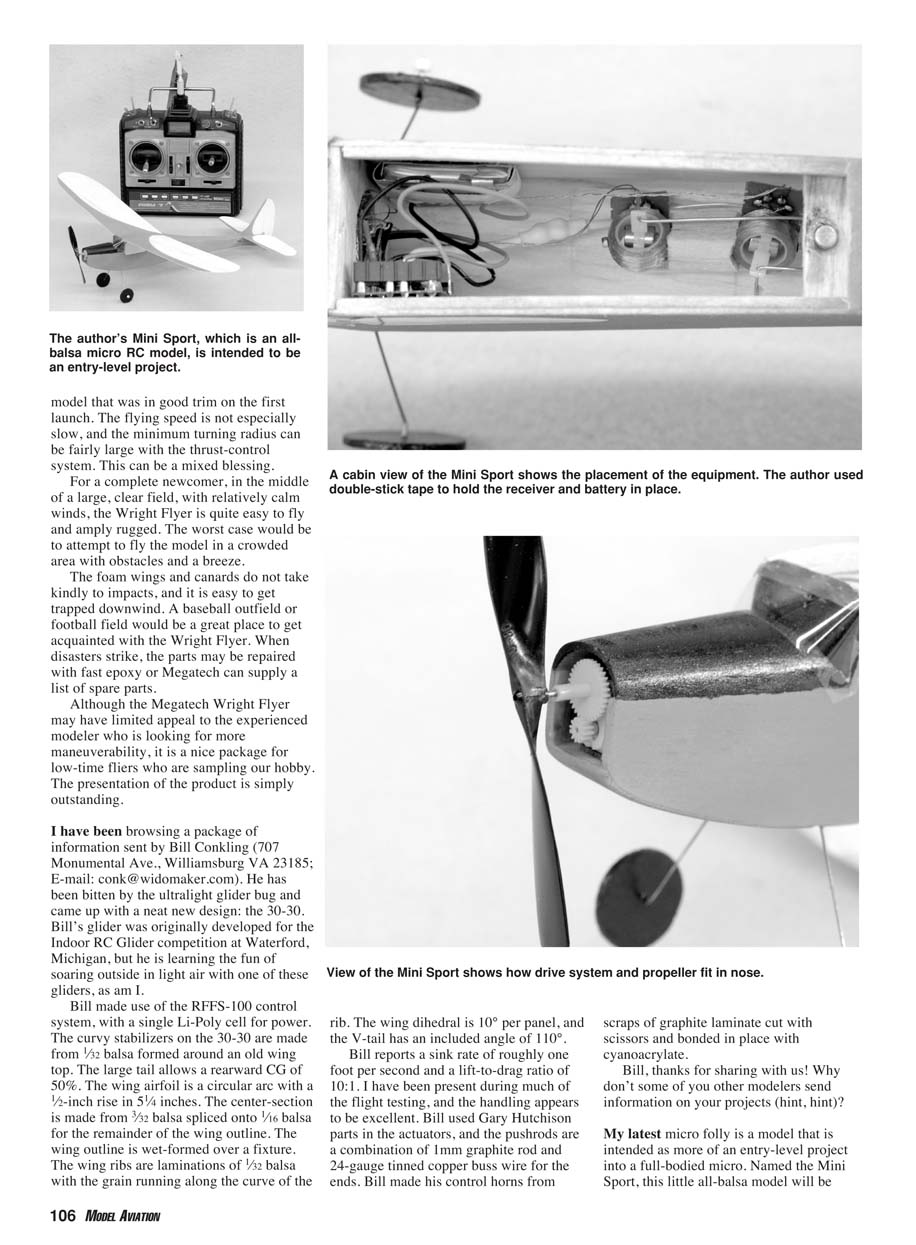
Package contents and extras:
- Clear, comprehensive instruction manual for flight operations.
- Unusually sturdy shipping carton with nice graphics and a plastic carrying handle.
- Large poster with original pictures of the Wright brothers and additional color pictures.
- Booklet titled The Wright Story, a decal sheet, and a certificate of authenticity signed by a member of the Wright family.
Flight impressions:
- Smooth, stable; in good trim on the first launch.
- Flying speed not especially slow; minimum turning radius can be fairly large with the thrust-control system.
- Excellent for complete newcomers in a large, calm field; amply rugged.
- Not suitable for crowded areas or breezy conditions — foam wings and canards are fragile and it's easy to get trapped downwind.
- Recommended flying area: baseball outfield or football field to get acquainted.
- Repairs: parts may be fixed with fast epoxy, and Megatech can supply spare parts.
- Overall: limited appeal for experienced modelers seeking high maneuverability, but a great package for low-time fliers sampling the hobby. Presentation is outstanding.
Spotlight: Bill Conkling’s Ultralight Glider — the 30-30
I have been browsing a package of information sent by Bill Conkling (707 Monumental Ave., Williamsburg VA 23185; E-mail: [email protected]). He has been bitten by the ultralight glider bug and came up with a neat new design: the 30-30. Bill originally developed the glider for the Indoor RC Glider competition at Waterford, Michigan, but he and I are enjoying soaring it outside in light air.
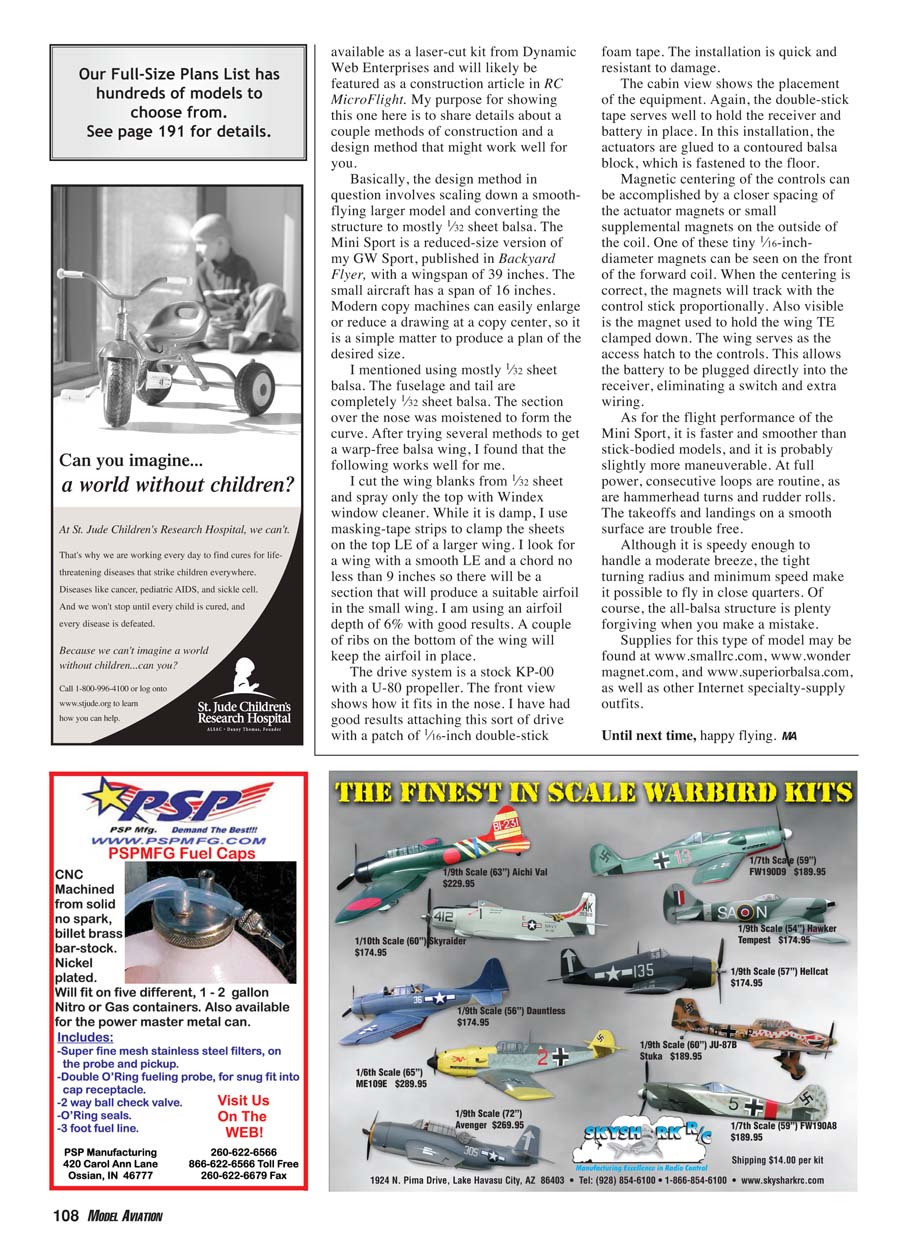
Construction and components:
- Control system: RFFS-100 with a single Li-Poly cell for power.
- Stabilizers: curvy stabilizers made from 1/32" balsa formed around an old wing tube.
- Tail: large tail permitting a rearward CG of 50%.
- Wing airfoil: circular arc with a 1/2-inch rise in 5 1/4 inches (approximately).
- Center-section: made from 3/32" balsa spliced onto 1/16" balsa for the remainder of the wing outline; wing outline wet-formed over a fixture.
- Ribs: laminations of 1/32" balsa with the grain running along the curve.
- Dihedral: 10° per panel.
- V-tail: included angle of 110°.
Performance and hardware:
- Reported sink rate: roughly 1 foot per second.
- Lift-to-drag ratio: about 10:1.
- Handling: excellent during flight testing.
- Actuators: Gary Hutchison parts used.
- Pushrods: combination of 1 mm graphite rod with 24-gauge tinned copper buss wire for the ends.
- Control horns: made from scraps of graphite laminate, cut with scissors and bonded in place with cyanoacrylate.
Bill, thanks for sharing! Why don't some of you other modelers send information on your projects (hint, hint)?
Project: Mini Sport (my latest micro)
My latest micro folly is intended as an entry-level project into a full-bodied micro. Named the Mini Sport, this all-balsa model will be available as a laser-cut kit from Dynamic Web Enterprises and will likely be featured as a construction article in RC MicroFlight. I’m sharing details about a couple of construction methods and a design approach that might work well for you.
Design method:
- Scale down a smooth-flying larger model and convert the structure to mostly 1/32" sheet balsa.
- The Mini Sport is a reduced-size version of my GW Sport (published in Backyard Flyer) which had a 39-inch wingspan; the Mini Sport has a 16-inch span.
- Modern copy machines can easily enlarge or reduce drawings at a copy center, so producing a plan to the desired size is simple.
Construction notes:
- Use mostly 1/32" sheet balsa: fuselage and tail are completely 1/32".
- Nose section: moistened to form the curve.
- Wing construction method that gave warp-free results:
- Cut wing blanks from 1/32" sheet and spray only the top with Windex window cleaner.
- While damp, use masking-tape strips to clamp the sheets on the top LE of a larger wing.
- Look for a larger wing with a smooth LE and a chord no less than 9 inches so there will be a section that produces a suitable airfoil in the small wing.
- I use an airfoil depth of 6% with good results. A couple of ribs on the bottom will keep the airfoil shape in place.
Power and installation:
- Drive system: stock KP-00 with a U-80 propeller.
- Mounting: attach the drive with a patch of 1/16" double-stick foam tape — quick and resistant to damage.
- Cabin installation: double-stick tape holds the receiver and battery in place; actuators glued to a contoured balsa block fastened to the floor.
Controls and access:
- Magnetic centering of controls: accomplished by closer spacing of actuator magnets or small supplemental magnets on the outside of the coil. One tiny 1/16"-diameter magnet can be used on the front of the forward coil.
- When centering is correct, the magnets will track with the control stick proportionally.
- A magnet can also hold the wing trailing edge clamped down; the wing serves as the access hatch to the controls. This allows plugging the battery directly into the receiver, eliminating a switch and extra wiring.
Flight performance:
- Faster and smoother than stick-bodied models; slightly more maneuverable.
- At full power, consecutive loops are routine, as are hammerhead turns and rudder rolls.
- Takeoffs and landings on a smooth surface are trouble-free.
- Tight turning radius and low minimum speed make it possible to fly in close quarters.
- All-balsa structure is forgiving when mistakes are made.
Supplies:
- Sources for parts and materials include:
- www.smallrc.com
- www.wondermagnet.com
- www.superiorbalsa.com
- other Internet specialty-supply outfits
Until next time, happy flying. MA
Transcribed from original scans by AI. Minor OCR errors may remain.

