
Eye-catching Christen Eagle takes flight
Joe Malinchak | [email protected]
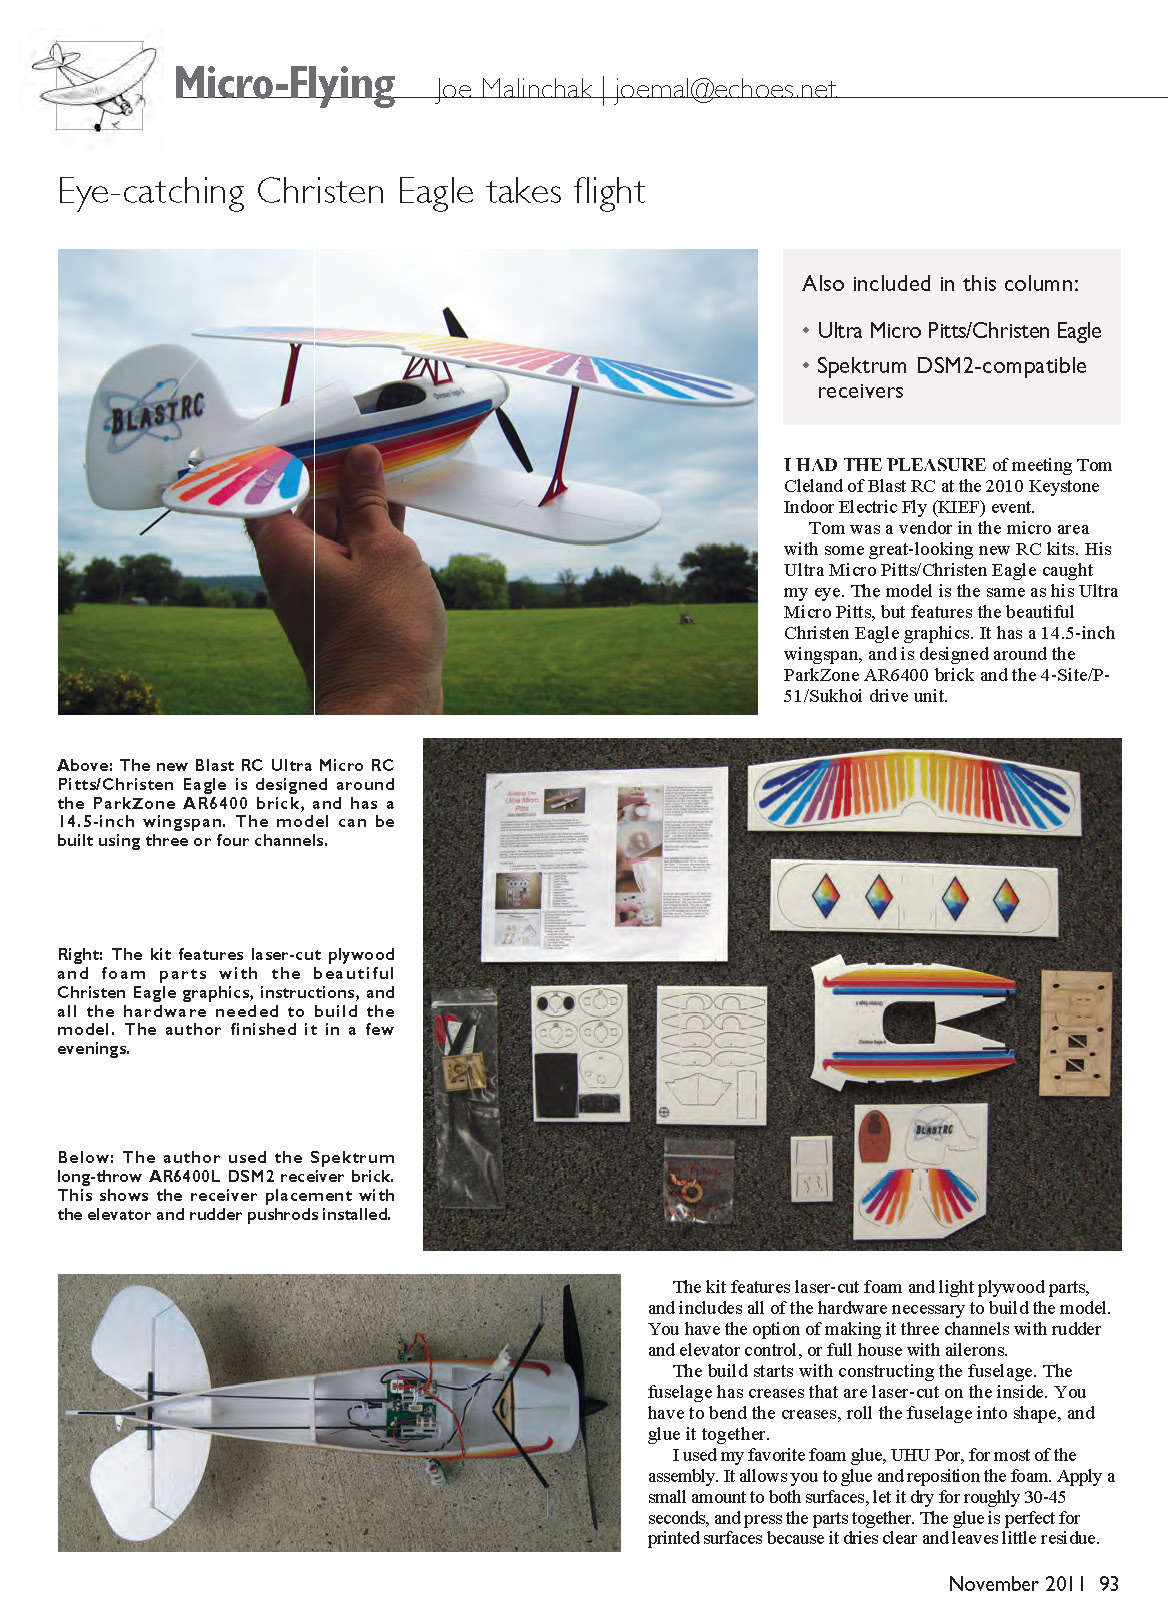
I had the pleasure of meeting Tom Cleland of Blast RC at the 2010 Keystone Indoor Electric Fly (KIEF) event. Tom was a vendor in the micro area with some great-looking new RC kits. His Ultra Micro Pitts/Christen Eagle caught my eye. The model is the same as his Ultra Micro Pitts but features the beautiful Christen Eagle graphics. It has a 14.5-inch wingspan and is designed around the ParkZone AR6400 brick and the 4-Site/P-51/Sukhoi drive unit.
The kit features laser-cut foam and light plywood parts and includes all of the hardware necessary to build the model. You have the option of making it three-channel with rudder and elevator control, or full-house with ailerons.
The build starts with constructing the fuselage. The fuselage has creases that are laser-cut on the inside. You bend the creases, roll the fuselage into shape, and glue it together.
I used my favorite foam glue, UHU Por, for most of the assembly. It allows you to glue and reposition the foam: apply a small amount to both surfaces, let it dry for roughly 30–45 seconds, and press the parts together. The glue is perfect for printed surfaces because it dries clear and leaves little residue.
Once the bulkhead is installed in the fuselage, the pre-bent metal wheel axles can be glued into the holes of the carbon-gear struts with CA after they are properly aligned. The foam wheel pants are a nice touch. I assembled mine with UHU Por glue and sanded them to shape. I colored the wood wheels with a black permanent marker and added the wheel pants and strut covers during final assembly.
I followed the instruction manual for the construction of the elevator and rudder and used small pieces of Blenderm tape for the hinges. I test-fit the elevator and rudder assembly in the fuselage, then glued it in place. UHU Por is good here because you can reposition the tail parts as needed.
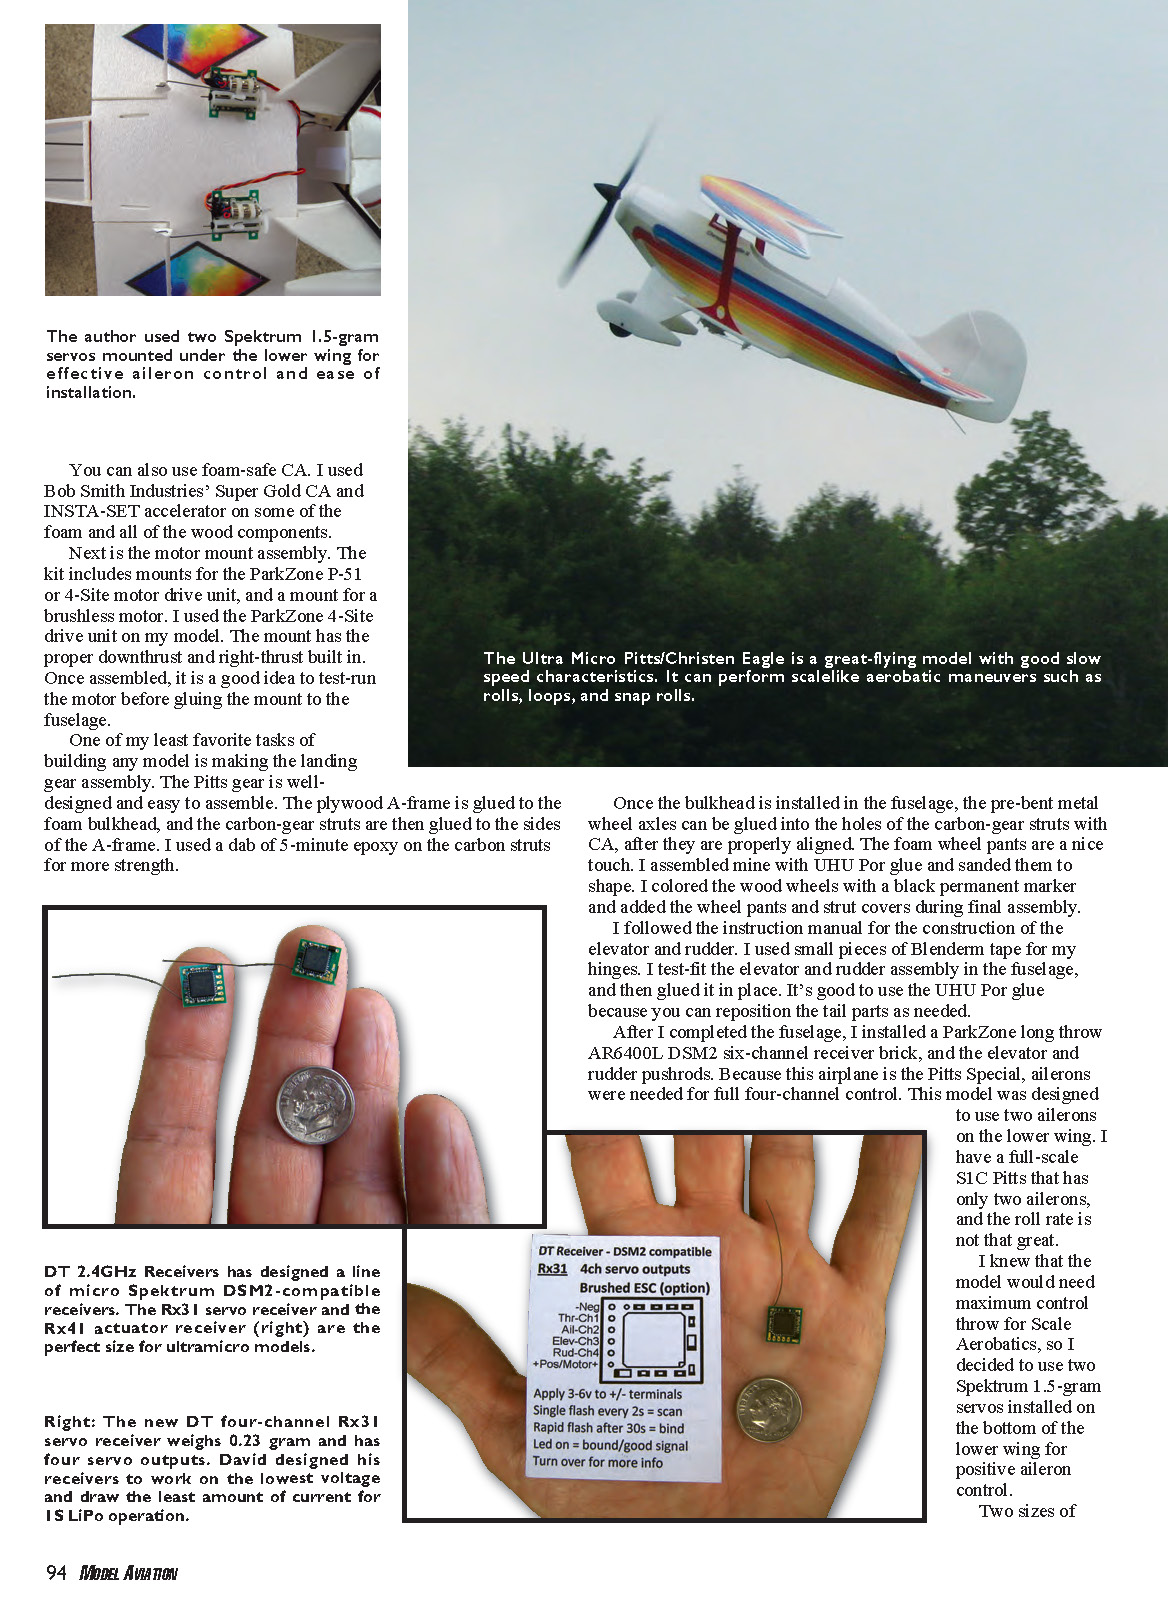
After completing the fuselage, I installed a ParkZone long-throw AR6400L DSM2 six-channel receiver brick and the elevator and rudder pushrods. Because this airplane is the Pitts Special, ailerons were needed for full four-channel control. This model was designed to use two ailerons on the lower wing. I have a full-scale S1C Pitts that has only two ailerons and the roll rate is not that great, so I knew the model would need maximum control throw for scale aerobatics. I decided to use two Spektrum 1.5-gram servos installed on the bottom of the lower wing for positive aileron control. Two sizes of servos are available.
You can also use foam-safe CA. I used Bob Smith Industries' Super Gold CA and INSTA-SET accelerator on some of the foam and all of the wood components.
Next is the motor-mount assembly. The kit includes mounts for the ParkZone P-51 or 4-Site motor drive unit and a mount for a brushless motor. I used the ParkZone 4-Site drive unit on my model. The mount has the proper downthrust and right-thrust built in. Once assembled, it is a good idea to test-run the motor before gluing the mount to the fuselage.
One of my least favorite tasks when building any model is making the landing-gear assembly. The Pitts gear is well-designed and easy to assemble. The plywood A-frame is glued to the foam bulkhead, and the carbon-gear struts are then glued to the sides of the A-frame. I used a dab of 5-minute epoxy on the carbon struts for more strength. The shorter ones are used for the three-channel version and the longer ones for the aileron version. I colored the two longer wing struts with a red permanent marker and glued them to the top wing with UHU Por. I then colored the N-struts with the red marker and glued them to the fuselage. Finally, I glued the top wing onto the lower wing and made sure it was properly aligned.
Flight Test
The completed model weighed 32 grams without the battery. I balanced the model with a Thunder Power 160 mAh 25C cell installed (the Thunder Power 160 mAh cell gives the 4-Site motor a little more kick than the standard 150 mAh cell). The CG should be just behind the lower wing's leading edge.
I took a few photos and headed out for a test. The model flew great right from the start. I only had to add a little aileron trim before exploring the airplane's flight envelope. The model flies in a scale-like manner. Rolls, loops, and snap rolls were no problem.
I slowed it down to test its slow-speed characteristics and found I could slow the model without any bad stalling habits. Overall, the Ultra Micro Pitts/Christen Eagle was easy to build and, yes, a blast to fly! See the Blast RC website listed under "Sources" for more information.
DT 2.4 GHz Receivers: David Theunissen
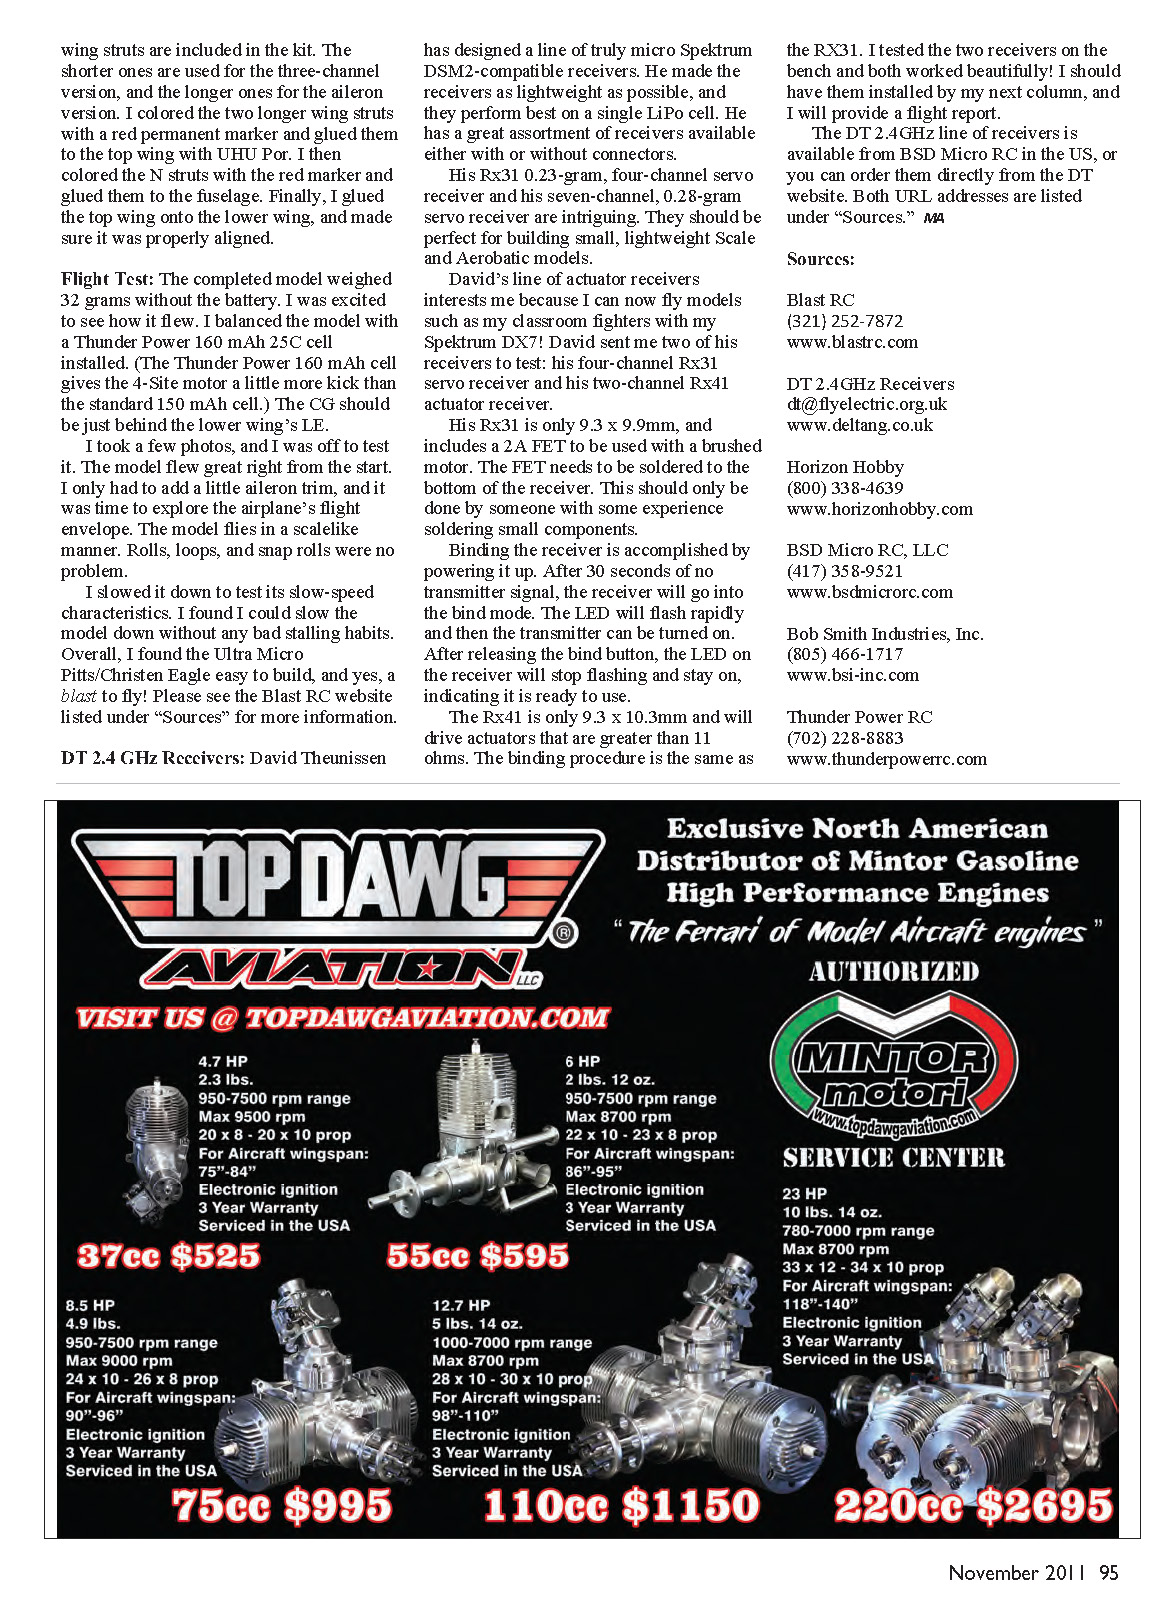
David Theunissen has designed a line of truly micro Spektrum DSM2-compatible receivers. He made the receivers as lightweight as possible, and they perform best on a single LiPo cell. He offers a great assortment of receivers available either with or without connectors.
His Rx31 0.23-gram four-channel servo receiver and his seven-channel 0.28-gram servo receiver are intriguing; they should be perfect for building small, lightweight scale and aerobatic models.
David's line of actuator receivers interests me because I can now fly models such as my classroom fighters with my Spektrum DX7! David sent me two of his receivers to test: his four-channel Rx31 servo receiver and his two-channel Rx41 actuator receiver.
The Rx31 is only 9.3 x 9.9 mm and includes a 2A FET to be used with a brushed motor. The FET needs to be soldered to the bottom of the receiver; this should only be done by someone with experience soldering small components.
Binding the receiver is accomplished by powering it up. After 30 seconds of no transmitter signal, the receiver will go into bind mode. The LED will flash rapidly and then the transmitter can be turned on. After releasing the bind button, the LED on the receiver will stop flashing and stay on, indicating it is ready to use.
The Rx41 is only 9.3 x 10.3 mm and will drive actuators that are greater than 11 ohms. The binding procedure is the same as for the Rx31. I tested the two receivers on the bench and both worked beautifully. I should have them installed by my next column and will provide a flight report.
The DT 2.4 GHz line of receivers is available from BSD Micro RC in the US, or you can order them directly from the DT website. Both URL addresses are listed under "Sources." JM
Sources
- Blast RC
(321) 252-7872 www.blastrc.com
- DT 2.4GHz Receivers
[email protected] www.deltang.co.uk
- Horizon Hobby
(800) 338-4639 www.horizonhobby.com
- BSD Micro RC, LLC
(417) 358-9521 www.bsdmicrorc.com
- Bob Smith Industries, Inc.
(805) 466-1717 www.bsi-inc.com
- Thunder Power RC
(702) 228-8883 www.thunderpowerrc.com
Transcribed from original scans by AI. Minor OCR errors may remain.

